SonicWall TZ300 Out of the Box
Description
This article explains how to set up a TZ300 SonicWall appliance for the first time. Setting up a new TZ300 SonicWall involves the following steps:
- Check the package contents
- Power on the appliance
- Connect the interfaces
- Run the setup wizard
- Register the product
- Get the latest firmware
Resolution
The SonicWall TZ300 package includes the following.
- SonicWall TZ300
- One Ethernet Cable
- One Power Adapter
- One Power Cord

 NOTE: The included power cord is approved for use only in specific countries and regions. Before using a power cord, verify that it is rated and approved for use in your location.
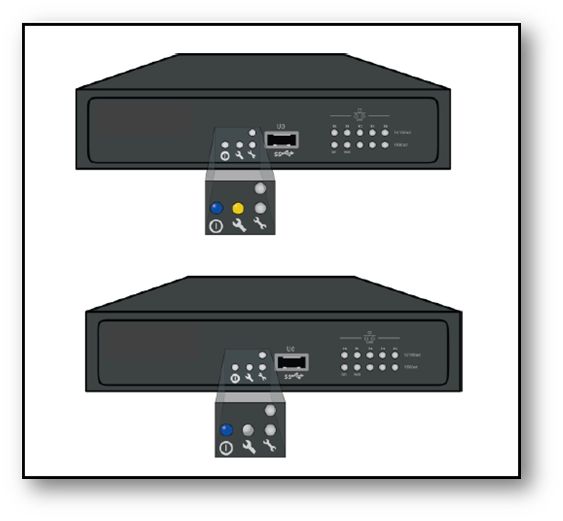
Front and Back Views of the SonicWall TZ300

SonicWall TZ300 Port Descriptions

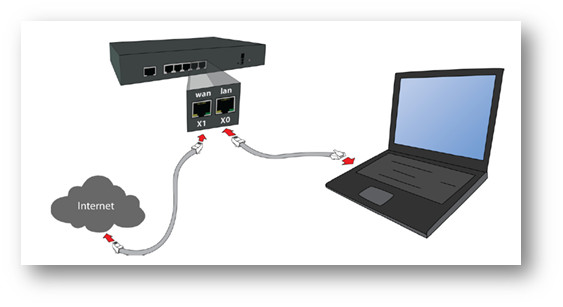
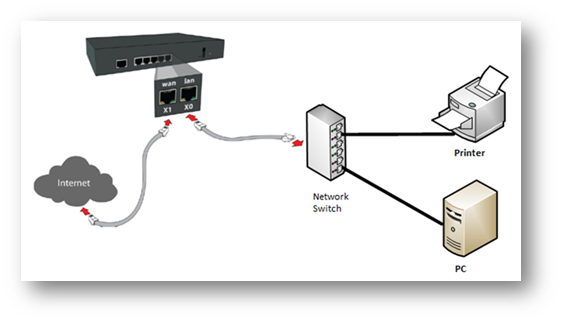
Cabling the SonicWall TZ300 as a Network Gateway

- Locate the SonicWall ports X0 and X1, port X0 is also label as LAN and port X1 is also label as WAN.
- Connect your Internet access device such as a cable or DSL modem to SonicWall WAN (X1 port).
- Connect SonicWall LAN (X0 port) to your laptop or PC or to a Network Switch that to which your network devices such as PCs, game consoles, Smart TVs, etc are connected.
- Other ports such as X2, X3 can be assign to other networks.
SonicWall cabling scenarios
Cabling scenario 1
- Cable a PC directly to the SonicWall LAN port.
- Cable a DSL or Cable modem to the WAN port for Internet access.
Cabling scenario 2
- Cable a Network Switch directly to the SonicWall LAN port.
- Connect PCs, Printers, Games Consoles, Smart TVs, and other network devices to the Network Switch.
- Cable a DSL or Cable modem to the WAN port for Internet access.
SonicWall TZ300 Power On
- Appliance powers on and the orange LED blinks during the boot sequence. This process may take up to 2 minutes.
Access the SonicWall Admin User Interface
- Connect a PC to the SonicWall LAN (X0) interface or a network switch connected to the LAN interface. You will automatically receive an IP address from the SonicWall appliance.
- Open a browser to https://192.168.168.168 for access to the SonicWall.
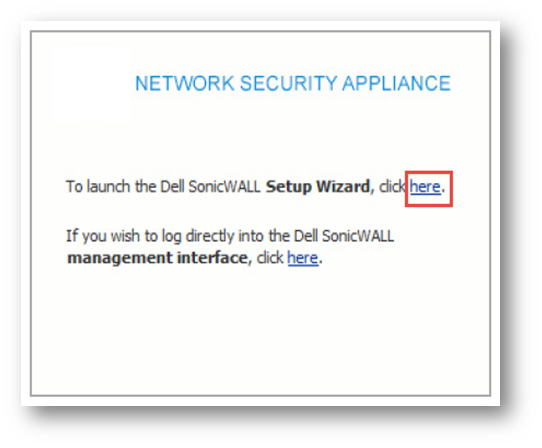
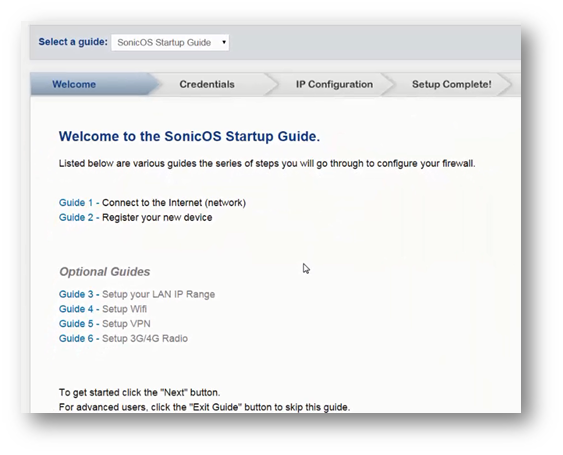
SonicWall TZ300 setup wizard walk through
- For the first time access as the Admin user, you will be offered a choice to use a Setup Wizard or go directly to the SonicWall management interface.
- At the Setup Wizard Launch Page, click Setup Wizard link here.
At the Setup Wizard Welcome Page
- Click Next.
At the Admin Credentials page
The Admin default login credentials are
- Username: admin
- Password: password
NOTE: If your wish to change the password for the Admin user, you can do this here. This is recommended to keep the Admin user secure.
- Click Next.

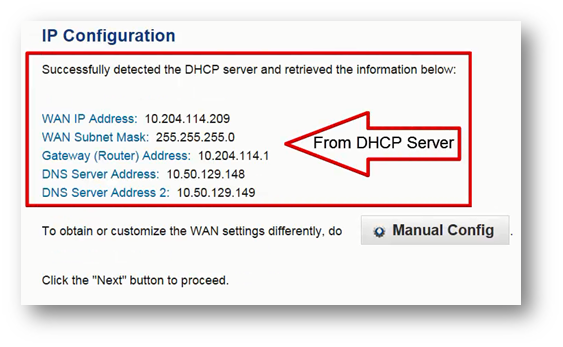
IP Configuration page
- The WAN Interface will detect for a DHCP server to retrieve its IP configurations.
- If no DHCP server is detected or if you wish to enter static IP parameters then click Manual Config.
- The DHCP method is preferred, use the Manual Configuration method only if needed.
- Click Next.
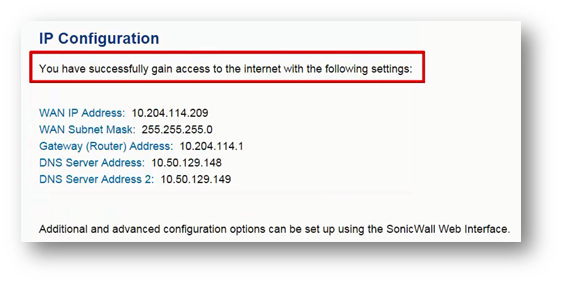
IP Configuration success page
- The IP configuration for the WAN Interface is complete and the Setup Wizard is done.
- Click Done.
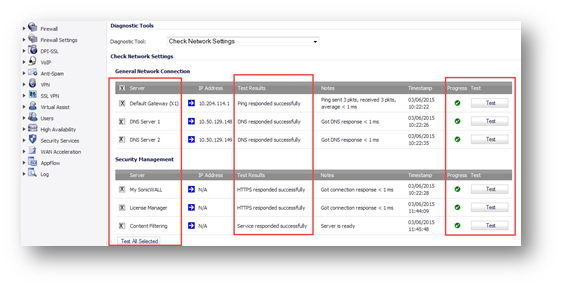
Test Internet Connectivity
- Check for Internet connectivity after the Setup Wizard has initialized the SonicWall.
- On the SonicWall management interface, navigate to System | Diagnostics, scroll down to Diagnostic Tools and select Check Network Settings.
- Under Check Network Settings | General Network Connections, select the appropriate check boxes and Test buttons. You should get successful test responses, but if you get errors the most common cause is a misconfigured cable connection.
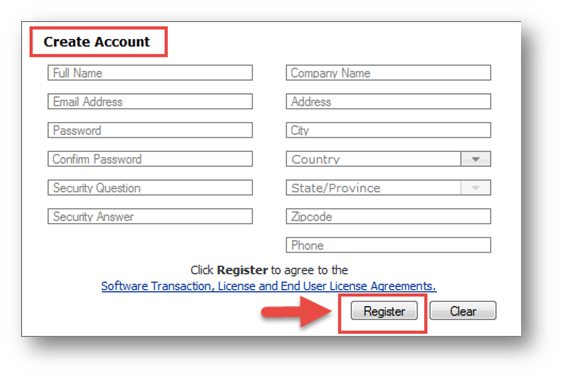
Register your SonicWall
- To Register, click Register.

- To register your SonicWall from the License Management page, enter your MySonicWall username, password and click Submit.
- MySonicWallCreate account Create Account Register.

- Fill in the Create Account popup and click Register to create a MySonicWall account.
See also: