Unable to access remote computer by host name over site to site VPN
Description
If you are able to access the remote computer over the site to site VPN by IP address and can't access the same computer by host name, it means your DNS server is not able to resolve the domain name and/or host name of the remote computer. And you have to use the correct DNS server address in your network interface settings.
First of all make sure the DNS server address configured on your network interface is able to resolve the host name you are trying to access.
- Go to command prompt and type in nslookup then Hostname and press enter. And check if it is giving you the correct IP address of the remote computer.
 NOTE: IP address and still you are not able to access the host name, then please call the technical support to troubleshoot the issue.

- If it is giving you an error, telling the DNS server can't find the host and non-existent domain, then you have to check the DNS server settings of your network interface.

Check if the DNS Server address on the network interface is configured manually or is configured to get the DNS address automatically.
- If the DNS IP address is configured manually and you are using your private DNS server address which is not aware of the remote computer host name and domain name, then you have to add the remote computer's domain name and host name details into your private DNS server or you have to use the remote site DNS server address.
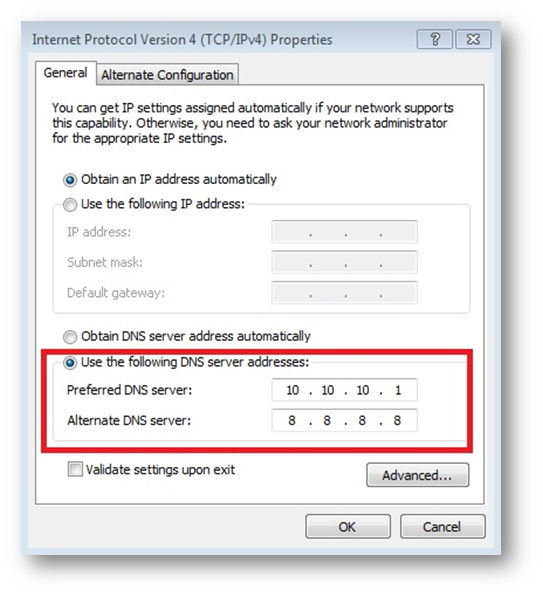
- If the DNS server address is configured manually and it is a public DNS server, then change the primary DNS server to the DNS server address which can resolve the host name being accessed.
If the network interface is configured to obtain the DNS server address automatically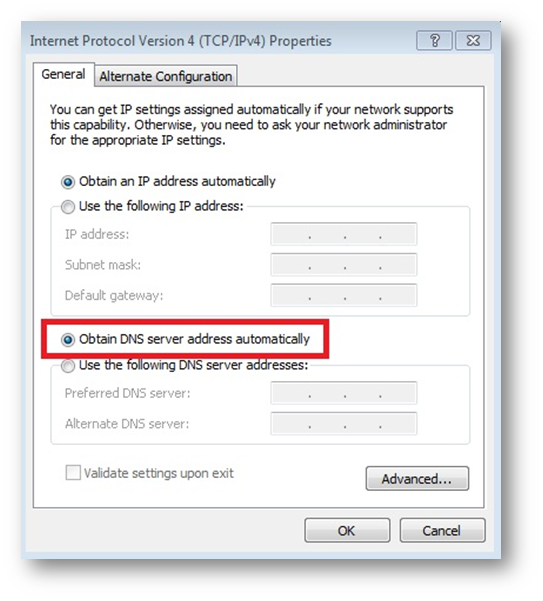
- If you have a DHCP server other than SonicWall, then make sure it is providing the right DNS server address and domain name to the client computers.
- If SonicWall is the DHCP server, then you have to change the DNS server settings of the DHCP scope.
Resolution for SonicOS 7.X
This release includes significant user interface changes and many new features that are different from the SonicOS 6.5 and earlier firmware. The below resolution is for customers using SonicOS 7.X firmware.
Change the DNS server address on SonicWall's DHCP scope.
- Login into SonicWall GUI.
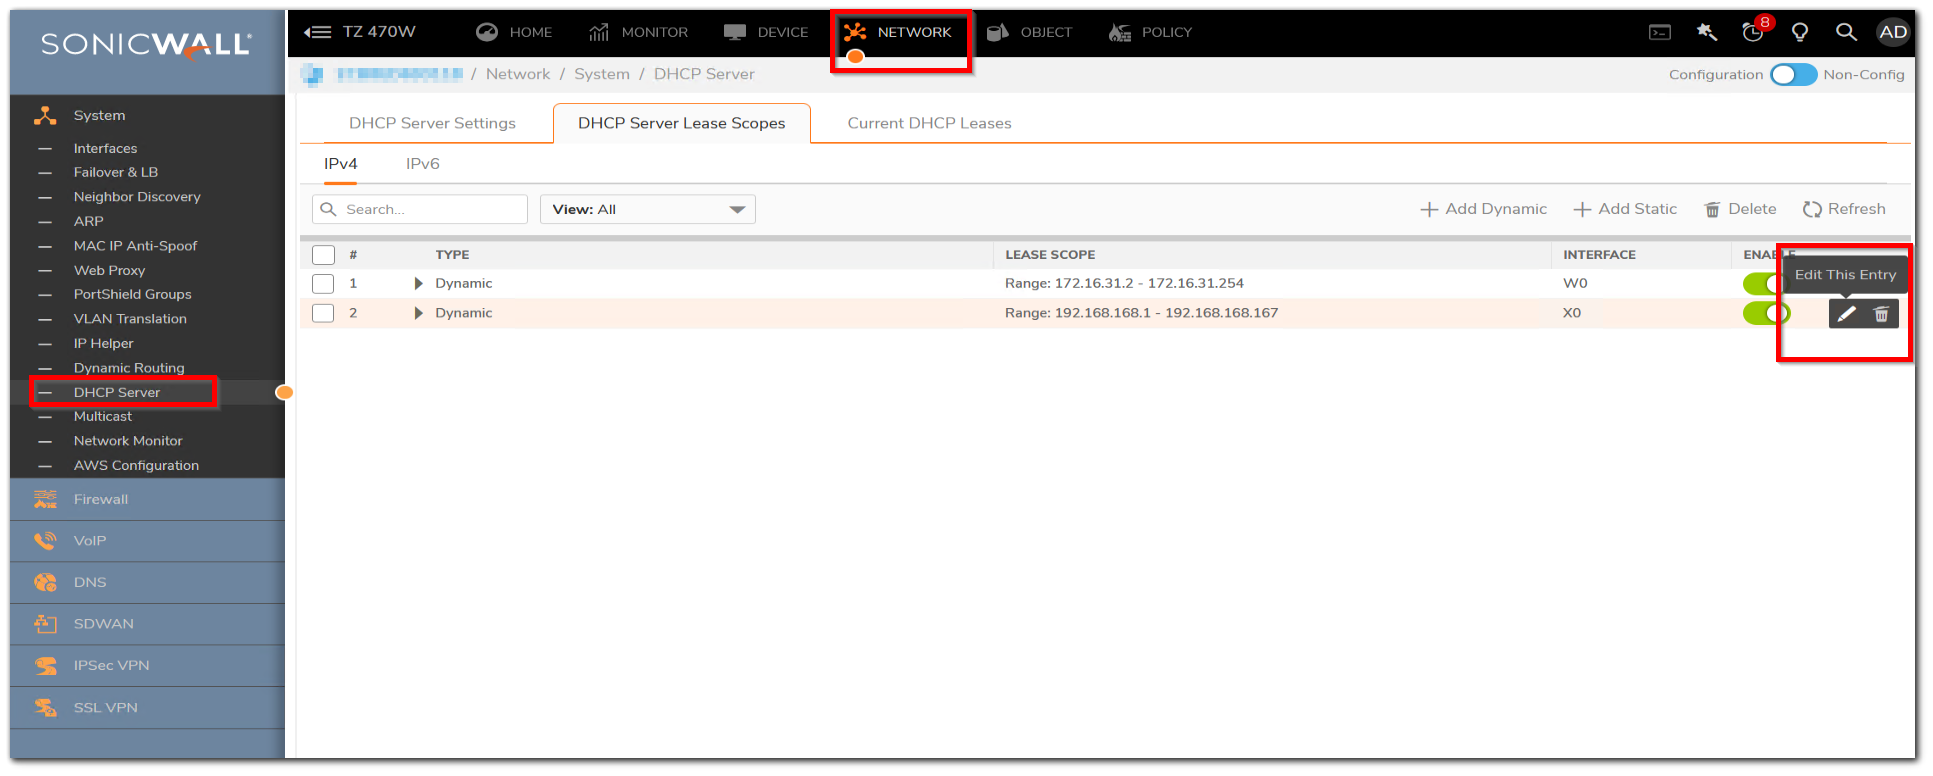
- Click Network in the top navigation menu.
- Click on DHCP Server, click on the configure / edit button of the correct DHCP scope and click DNS/WINS tab.
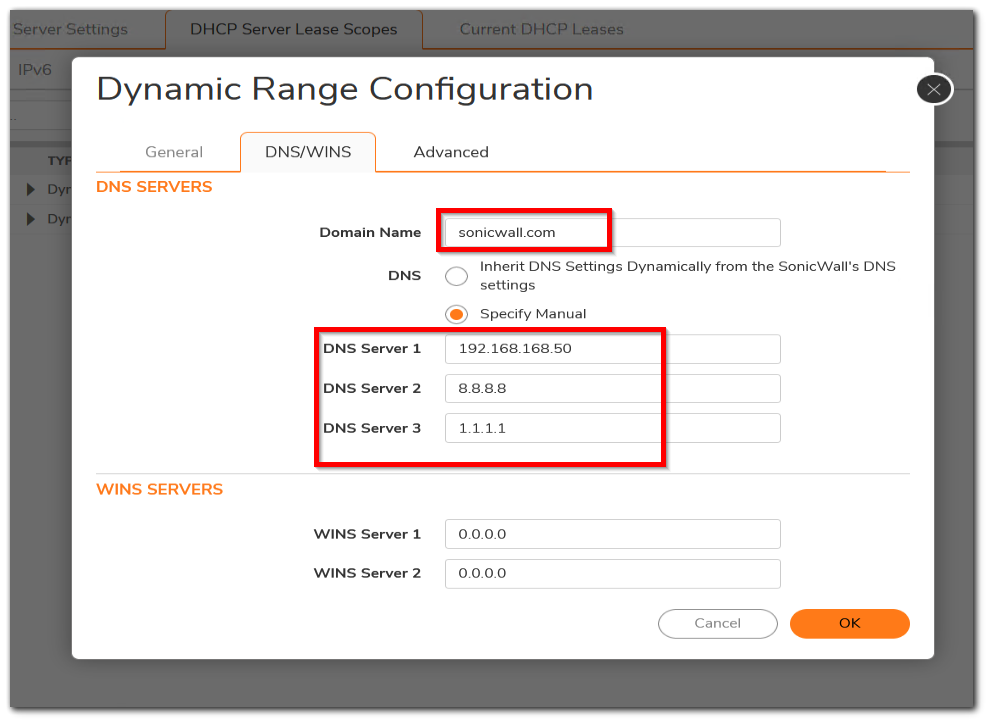
- In the Domain Name field, type in the domain of the computer you are trying to access.
- Click Specify Manually radio button and specify the DNS server-1 IP address as the DNS server, which can resolve the host name (It can be your remote site DNS server IP or your local DNS server IP).
- Now release and renew the IP address on your computer and then try to resolve the Hostname using nslookup. Now It should resolve the host name to the correct IP address. If still it is not working please call the technical support.
 NOTE: If you are trying to access the shared drive or folders of the remote computer, make sure "Windows Networking (NetBIOS) Broadcast" is enabled under Advanced tab in VPN Policy
Resolution for SonicOS 6.5
This release includes significant user interface changes and many new features that are different from the SonicOS 6.2 and earlier firmware. The below resolution is for customers using SonicOS 6.5 firmware.
Change the DNS server address on SonicWall's DHCP scope.
- Login into SonicWall GUI.
- Click Manage in the top navigation menu.
- Click on DHCP Server, click on the configure button of the correct DHCP scope and click DNS/WINS tab.
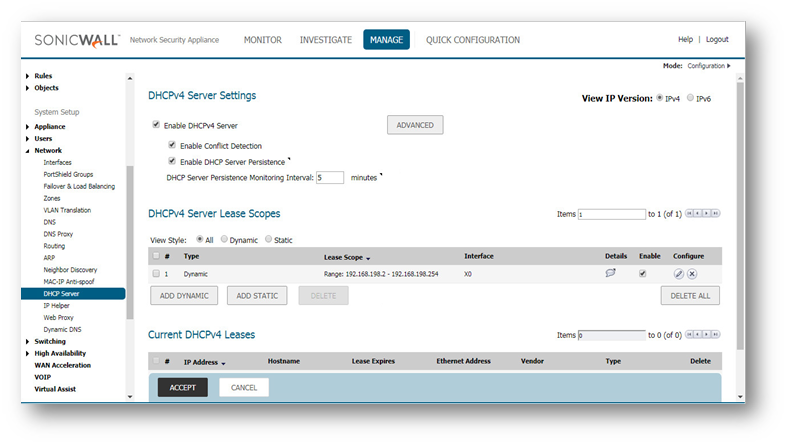
- In the Domain Name field, type in the domain of the computer you are trying to access.
- Click Specify Manually radio button and specify the DNS server-1 IP address as the DNS server, which can resolve the host name (It can be your remote site DNS server IP or your local DNS server IP).
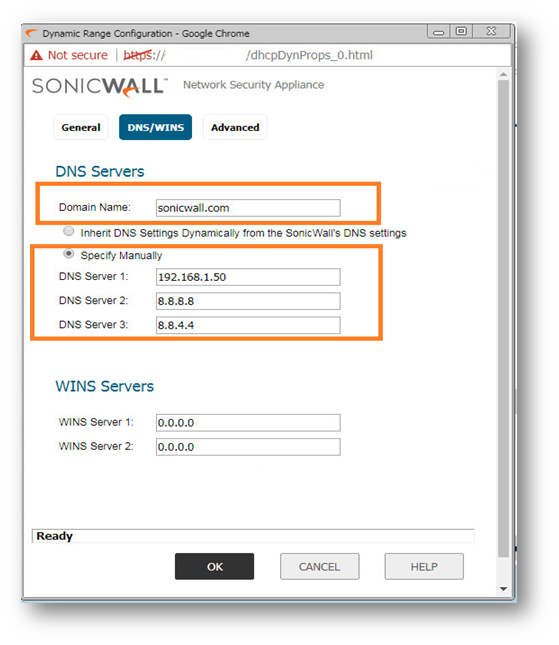
- Now release and renew the IP address on your computer and then try to resolve the hostname using nslookup. Now It should resolve the host name to the correct IP address. If still it is not working please call the technical support.
 NOTE: If you are trying to access the shared drive or folders of the remote computer, make sure "Windows Networking (NetBIOS) Broadcast" is enabled under Advanced tab in VPN Policy