SonicWall SonicPoint N2: Out of Box Setup
Description
Resolution
SonicWall SonicPoint N2
Out of Box Setup
SonicWall SonicPoint N2 Out of Box Setup Video
Topics Covered:
- Out of the Box
- Port and LED Descriptions
- Power over Ethernet (POE) Injector/Switch Overview
- Cabling the SonicPoint
- Firewall: SonicOS Firmware Requirements
- Configure the Network Interface
- Configure the WLAN zone
Out of the Box:
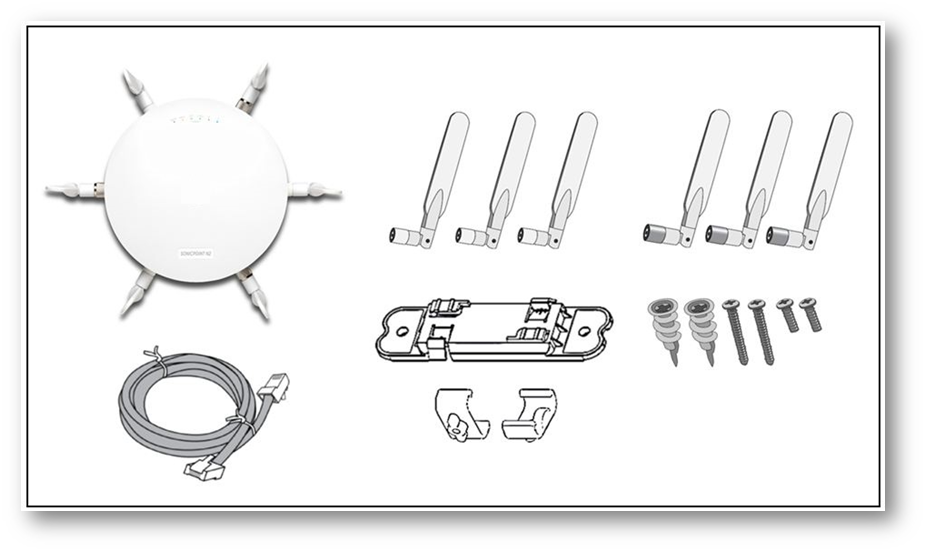
The SonicWall SonicPoint N2 package includes the following:
- SonicPoint N2
- Cat5 Ethernet Cable
- Ceiling Brackets
- Anchor/Screw Kit

Status LEDs:
There is a status LED for lan2, lan1, 5G, 2.4G.
There is also an LED for the tool icon and a power LED all the way to the right that indicates the device booting up and having power.
Power over Ethernet (POE) Injector:
The power over ethernet injector is capable of providing 25 watts of power.The port on the left is your "Data and Power out Port".
- This is the Port that you will connect to your SonicPoint LAN1/POE Port
The port on the right is your "Data in Port".
- This is the Port that you can connect to your SonicWall WLAN X2 port.
Note: In most cases customers will use this this power over ethernet injector to power their device. However, you can also use a POE capable network switch port as long as it is 802.3at compliant and capable of providing 25 watts of power.
Cabling the SonicPoint:
Start by locating the SonicPoint LAN1/POE port. Connect the LAN1 port to the supplied POE Injector port on the left labeled "DATA & POWER OUT".
Now, locate the SonicWall WLAN X2 port and connect it to the POE Injector port on the right labeled "DATA IN".
Note: This is the standard way for connecting your SonicPoint to your SonicWall device. However, as mentioned previously, A POE capable network switch can be used as an alternative for the POE Injector that is supplied with your devices as long as it is 802.3at compliant.
Firmware Requirements:
To effectively manage your sonicpoint you will need to use a correct SonicOS version.
- The SonicOS 5.91 or higher will work.
- And the SonicOS 6.2.2 or higher will also work.
- SonicPoints must be in the configured in WLAN zone. When SonicPoints are in the WLAN zone they are auto detected and deployed.
- Also, The SonicOS auto updates the SonicPoint firmware when needed.
Configure SonicWall Interfaces for Wireless Access:
 Allow Interface Trust"
Select the checkboxes to enable security services on this zone. Minimally, you would enable:
- Gateway Anti- Virus, IPS, and Anti-Spyware.
If your wireless clients are all running SonicWall Client Anti-Virus, select
- Enable Client AV Enforcement Service.
On the Guest Services tab:
- Optionally configure guest Internet access.
- For information about Guest Services, see the SonicOS Administrator's Guide.
On the Wireless tab:
- Select Only allow traffic generated by a SonicPoint/SonicPointN to allow only traffic from SonicPoints to enter the WLAN zone interfaces, providing maximum security.


