NDR: Virtual Sensor Deployment (AWS)
Description
 CAUTION: The examples below are intended to be serve as general guidelines. Your platform or software version may differ, resulting in variations in images, screens, options, or other elements.
- This guide is intended to serve as an example only. Users must modify applicable details, such as IP addresses, subnets, and device names, to align with their specific environment.
- Exercise caution when making changes to your firewall or environment, as unplanned modifications can result in downtime, depending on the complexity of the configuration and infrastructure.
- Your experience may vary if you are using a different software version or a product from another brand or manufacturer. Please note that you are solely responsible for the configuration and management of your devices.
1. Preparing
You must have:
- One IP address with access to a default gateway
- A Stellar Cyber license that can be applied to the sensor
To prepare for the installation:
- Open firewall ports for log ingestion.
- Open firewall ports for Network Traffic, Sandbox, and IDS features, as necessary.
- Reply to your NDR integration ticket for access to the AMI. You must provide:
- AWS account name
- AWS account number
- AWS region for the sensor
2. Launching the AMI
To configure and launch the AMI:
- Use our example as a guideline, as you might be using a different software version.
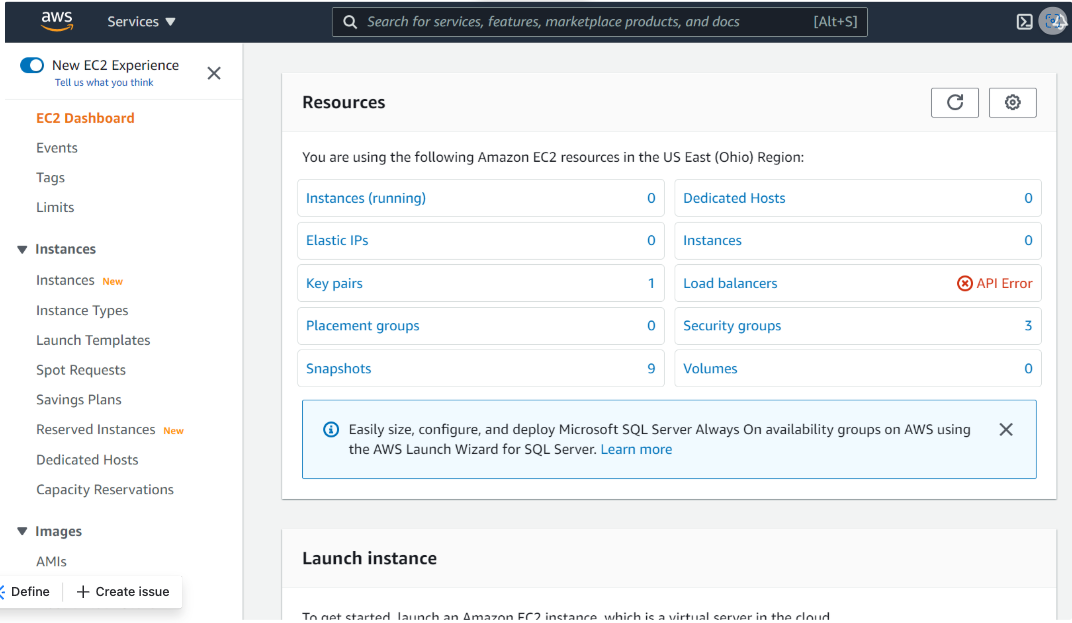
- Log in to your EC2 Dashboard.
- Click on AMIs, under Images.

- A list of existing AMIs appears.
- If you don't see any products, click the drop-down next to the search bar and choose Private images.

- If you still don't see any products, make sure your region setting is correct.
- And if you still don't see any products, contact technical support.
AMI Names for Stellar Cyber Images
- For reference, the AMI names for the Stellar Cyber AMIs are as follows:
- Modular Sensor – ModularSensor-5-x-y
- In all cases, the x-y refers to the minor version numbers of the sensor software (for example, ModularSensor-5-1-2).
- Click the check-box to the left of the AMI. The Launch button activates and the details appear.
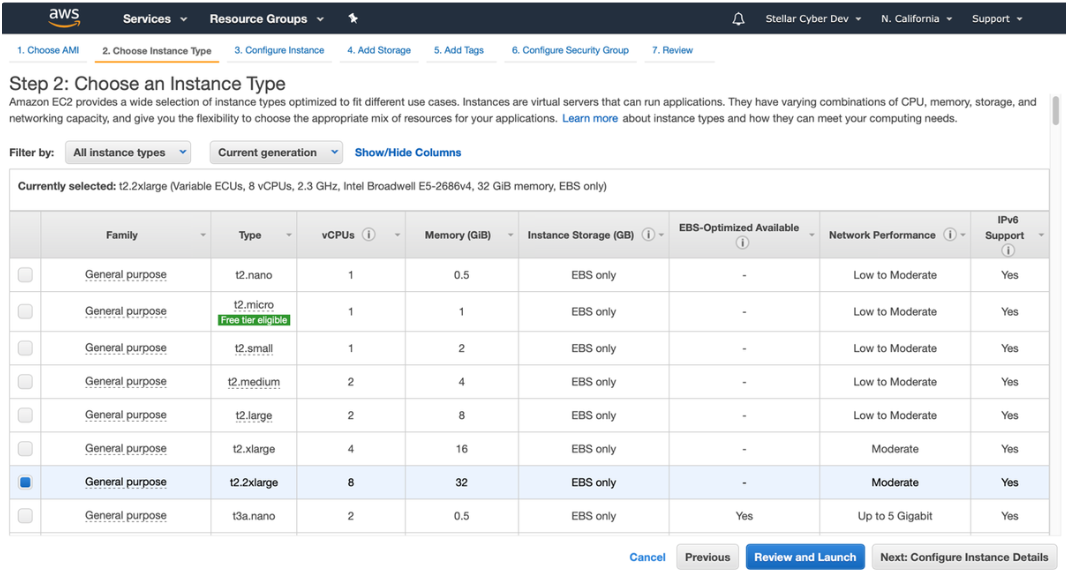
- Click Launch. The Choose an Instance Type page appears.
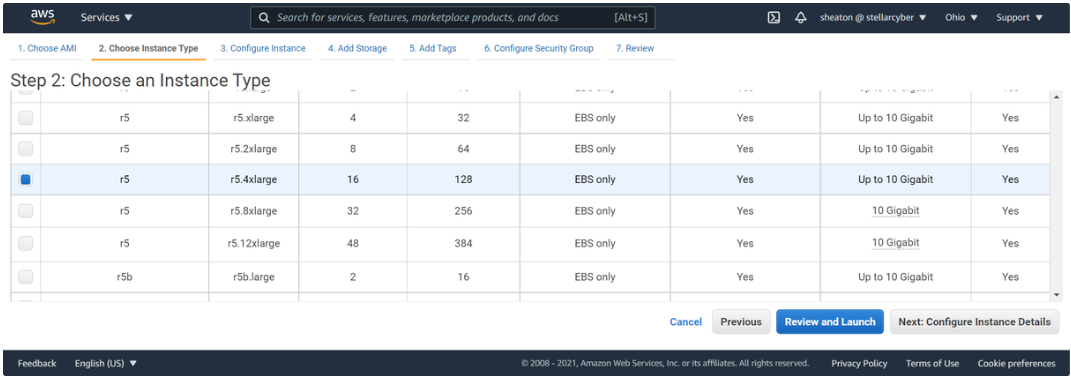
- Choose a t2.2xlarge or higher type. Smaller instance types are not supported.
- Click Next: Configure Instance Details. The Configure Instance Details page appears.
- We recommend keeping the default settings.
- Click Next: Add Storage. The Add Storage page appears.
- We recommend keeping the default settings.
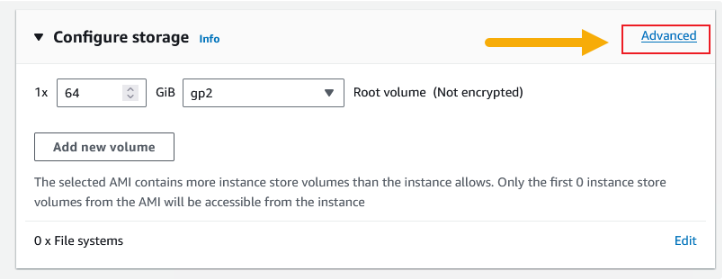
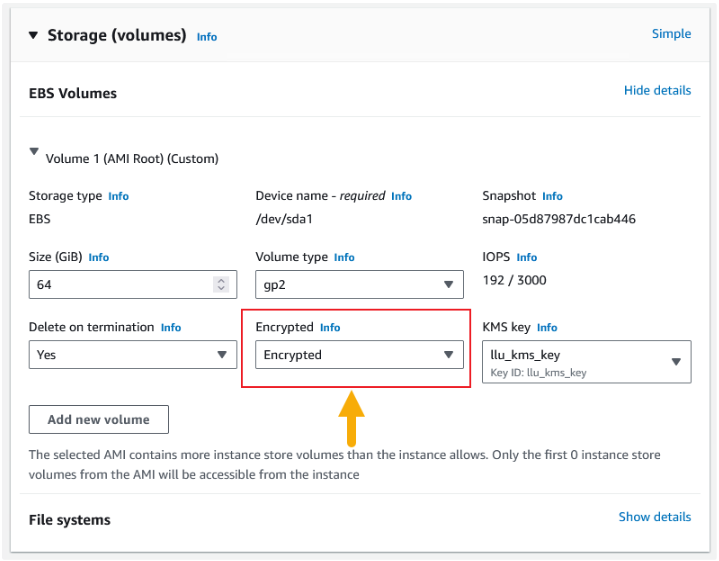
- As an option, you can encrypt your storage volume as follows:
- Click the Advanced button in the Configure Storage panel.
- Set the Encrypted dropdown in the EBS Volumes settings to Encrypted.
- You can also convert an existing sensor's unencrypted storage volume to use encryption.
- Click Next: Add Tags. The Add Tags page appears.
- Stellar Cyber does not use tags.
- Click Next: Configure Security Group. The Configure Security Group page appears.

- You can ignore the warning at the bottom of the page.
- Security groups define which local ports and remote hosts can reach the sensor. AWS enables SSH by default.
- Enter the Security group name.
- Click Add Rule. A new row appears. Configure inbound rules to allow your sensor to communicate with the DP.
- If you already added rules on a prior installation, you can choose Select an existing security group to see a list of the existing groups.
- Click Review and Launch. Make changes if necessary.
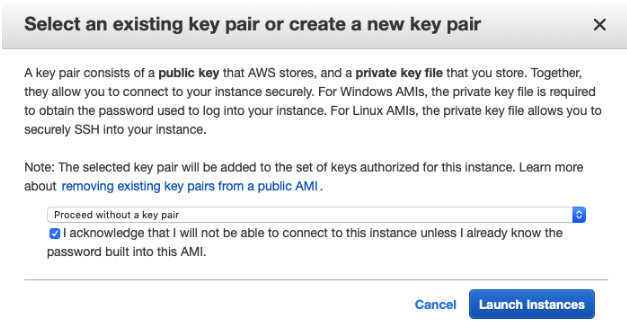
- Click Launch. The Select an existing key pair screen appears. Stellar Cyber is configured with a user name and password, so does not need a key pair.
- Choose Proceed without a key pair.
- Click the check-box to acknowledge.
- Click Launch Instance.
- You can launch the image but you cannot copy it. This means that the VM must be deployed in the AWS region where the image was authorized.
- The VM is now running in the AWS cloud.
3. Connecting the Sensor to the Stellar Cyber Platform
To connect the sensor to the Stellar Cyber Platform:
- Log in to your new sensor. The default username/password is aella/changeme. You are immediately prompted to change the password.
- Change the password.
- After you change the password, your session closes automatically. When you log back in with your new credentials, the prompt changes to DataSensor>.
- Set the host name. The host name is displayed in Stellar Cyber and should be unique for each sensor:
- set hostname <new hostname>
- Assign the tenant
- The Tenant ID was provided in the ticket.
- set tenant_id <Tenant ID from Stellar Cyber>
- Use the set cm command to specify the hostname to reach the management interface of the Data Processor.
- When specifying a hostname, the system attempts to verify the hostname with the DNS server. If the DNS server is not reachable, the system reports the error and lets you either proceed with the configured hostname or quit.
- <Applicable CM URL from below>
- NOAM Console: cm-solutionsgrantedinc.stellarcyber.cloud
- EMEA Console: cm-emea-snwl.stellarcyber.cloud
- Verify with the show cm command. You should see the IP address of the DP listed as the CM Controller and the Status should be Established.
- Log out with the quit command.
4. Sensor Authorization
Once complete, please reply to your engineer’s email with the following information so we can confirm that we are seeing the sensor and authorize it.
Sensor Details
- Sensor Hostname
- Sensor IP Address
Related Articles
not finding your answers?
