NDR: Virtual Sensor Deployment (VMware)
Description
 CAUTION: The examples below are intended to be serve as general guidelines. Your platform or software version may differ, resulting in variations in images, screens, options, or other elements.
- This guide is intended to serve as an example only. Users must modify applicable details, such as IP addresses, subnets, and device names, to align with their specific environment.
- Exercise caution when making changes to your firewall or environment, as unplanned modifications can result in downtime, depending on the complexity of the configuration and infrastructure.
- Your experience may vary if you are using a different software version or a product from another brand or manufacturer. Please note that you are solely responsible for the configuration and management of your devices.
1. Site Preparation
You will need:
- One IP address with access to a default gateway
- Open firewall ports for log ingestion
- Open firewall ports for Network Traffic, Sandbox, and IDS features, as necessary
Downloading Images
You can download the images for modular sensors using the link below.
- Download the modular sensor image from the following URL: aella-modular-ds-5.4.0.ova
Supported ESXi Versions
Sensor installation is supported on the following ESXi versions:
- 8.0
- 7.0
- 6.7
2. Installation Steps
- Select the option to deploy a new OVF template wizard and use the Local file option, as shown below.

- The Stellar Cyber distribution provides an OVA file, which is a format that includes the requested OVF file as a component.
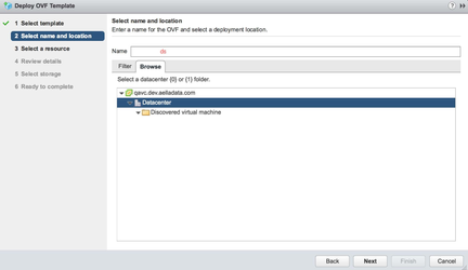
- On the next screen provide the VM a name and select the appropriate data center where it will be deployed, as shown below:
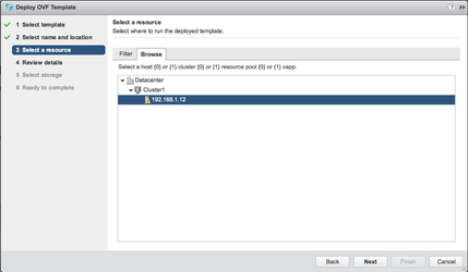
- Within the data center, there may be more than one resource that can run the VM. Select the one which hosts the mirror port. A simple configuration is shown in the following image:
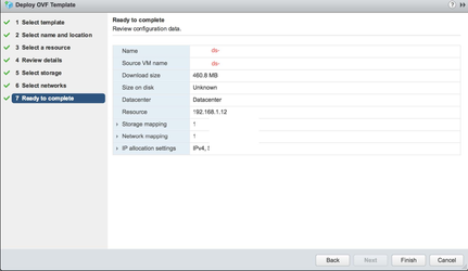
- Once the selections are made, the summary page appears as follows. If the settings are correct, click the Finish button shown in the following image:
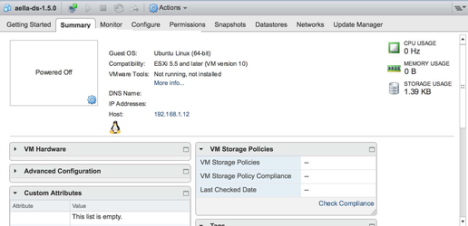
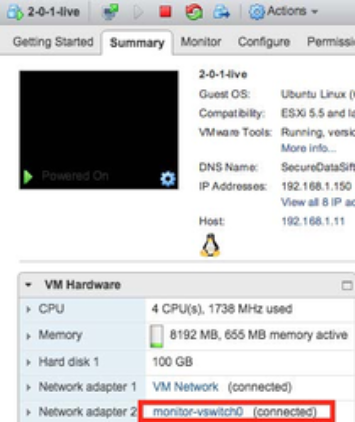
- The VM is loaded into the hypervisor management and can then be seen in the vCenter summary page. An example of this is shown in the following image:
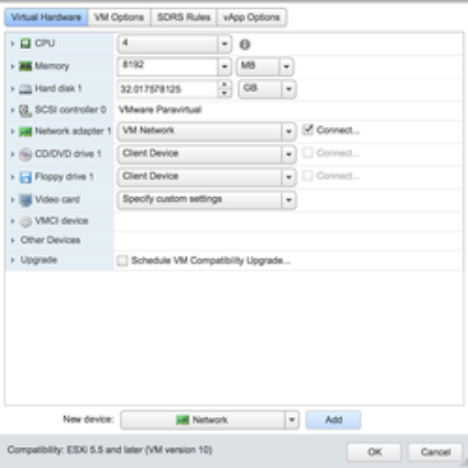
- Expand the Virtual Hardware sub-page. The Management channel used by the sensor is implemented over "Network Adapter 1" which needs to be connected. Select it as shown in the following image:
- At this point the Sensor is installed and can be started. An example of this is shown in the following image:
3. Connecting the Sensor to the Stellar Cyber Platform
To connect the sensor to the Stellar Cyber Platform:
- Log in to your new sensor. The default username/password is aella/changeme. You are immediately prompted to change the password.
- Change the password.
- After you change the password, your session closes automatically. When you log back in with your new credentials, the prompt changes to DataSensor>.
- Set the host name. The host name is displayed in Stellar Cyber and should be unique for each sensor:
- set hostname <new hostname>
- Set IP parameters for the management port. The commands are as follows (Substitute your own IP parameters for those shown in bold).
- set interface management ip 192.168.14.100/255.255.255.0
- set interface management gateway 192.168.14.1
- set interface management dns 8.8.8.8
- Verify the IP settings with the show interface command.
- Assign the tenant
- The Tenant ID was provided in the ticket.
- set tenant_id <Tenant ID from Stellar Cyber>
- Use the set cm command to specify the hostname to reach the management interface of the Data Processor.
- When specifying a hostname, the system attempts to verify the hostname with the DNS server. If the DNS server is not reachable, the system reports the error and lets you either proceed with the configured hostname or quit.
- <Applicable CM URL from below>
- NOAM Console: cm-solutionsgrantedinc.stellarcyber.cloud
- EMEA Console: cm-emea-snwl.stellarcyber.cloud
- Verify with the show cm command. You should see the IP address of the DP listed as the CM Controller and the Status should be Established.
- Log out with the quit command.
4. Sensor Authorization
Once complete, please reply to your engineer’s email with the following information so we can confirm that we are seeing the sensor and authorize it.
Sensor Details
- Sensor Hostname
- Sensor IP Address
Related Articles
not finding your answers?