L2TP VPN Configuration
Description
This article details how to setup an L2TP Server connection on the SonicWall. While SonicOS offers several Software VPN solutions such as Global VPN Client (GVC) and NetExtender/Mobile Connect these are not suitable for all environments. Some devices may be legacy and only support L2TP, GVC is also only supported for Windows OS, and NetExtender/Mobile Connect are Licensed solutions.
While L2TP Connections are possible to the SonicWall it should be noted that this is a legacy protocol and not recommended as a long term of best practice solution for VPN connectivity.
Resolution for SonicOS 7.X
This release includes significant user interface changes and many new features that are different from the SonicOS 6.5 and earlier firmware. The below resolution is for customers using SonicOS 7.X firmware.
- Login to the SonicWall management GUI and navigate to Network | IPSec VPN | Rules and Settings.
- Select Configure for the WAN GroupVPN feature.
- On the General Tab ensure that IKE using Preshared Secret is selected and set a Shared Secret.

- On the Proposals tab set the DH Group, Encryption, Authentication, and Life Time as you see fit, although the default options are suitable for most deployments.
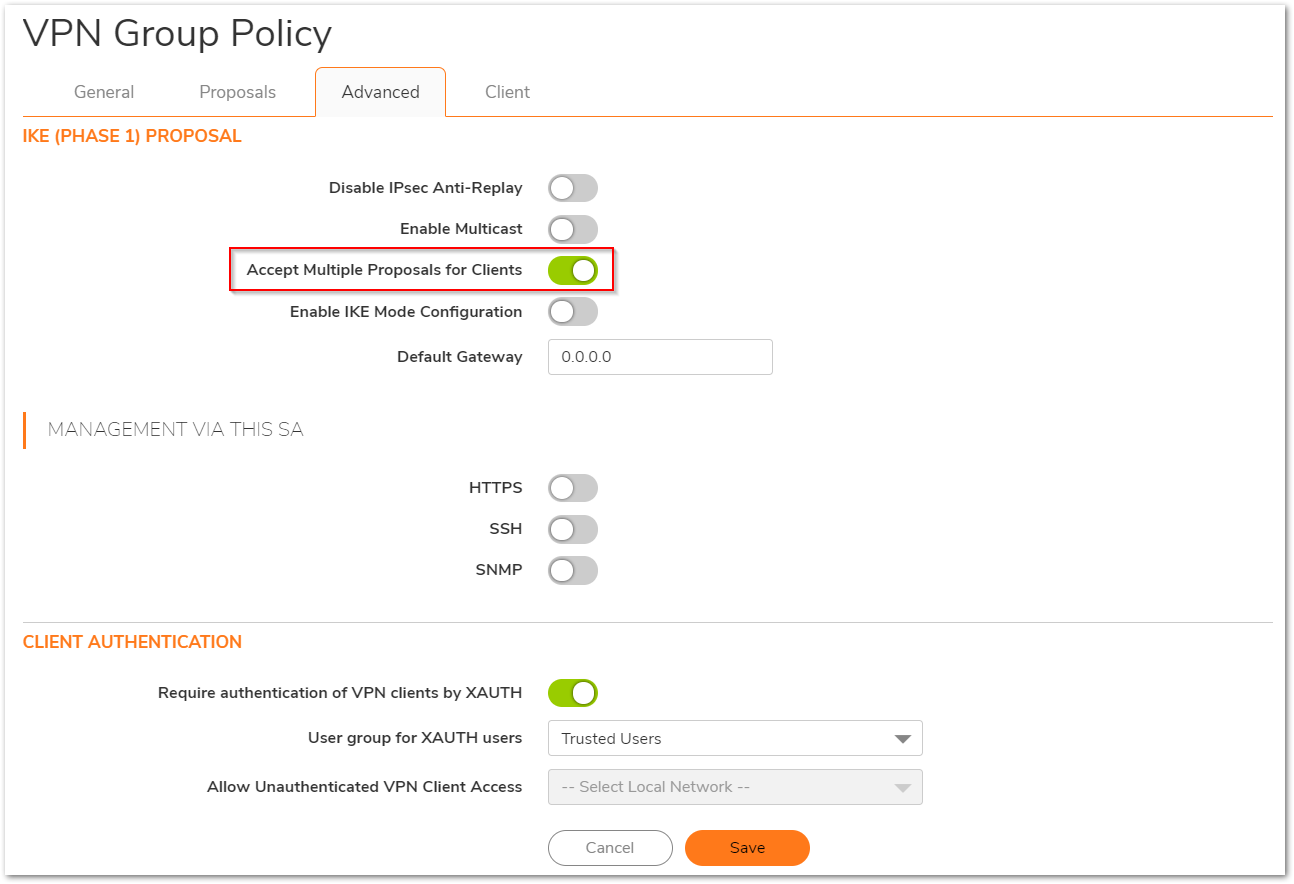
- On the Advanced tab Enable the option for Accept Multiple Proposals for Clients.
- Review the options on the Client tab, the default values are suitable for most deployments.
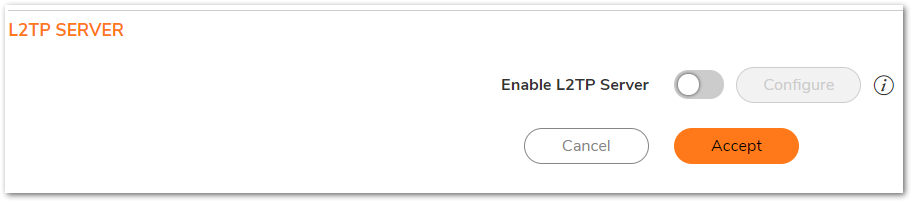
- Navigate to Network Network | IPSec VPN | L2TP Server and ensure that Enable L2TP Server is checked.
- Click Configure and on the pop-up window examine the L2TP Server tab. Here you may set DNS/WINS information as necessary and adjust the Keep Alive Time.

- On the L2TP Users tab you need to set an IP Pool, this is the available addresses that L2TP Users can draw from when connecting. You may also set User Group for the L2TP clients.
 CAUTION: Setting to small of an IP Pool will result in IP Exhaustion, make sure to use a suitably large pool of addresses.
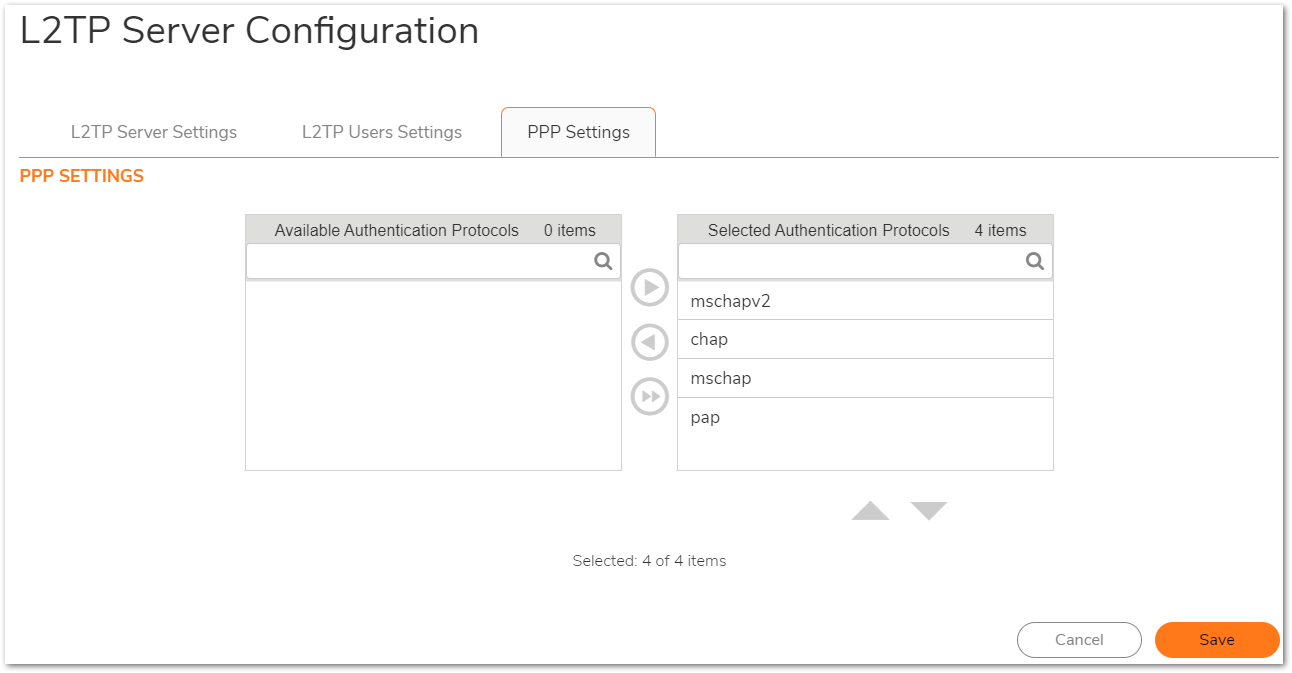
- Finally on the PPP tab you may choose the order of authentication protocol. The default order is suitable for most deployments.
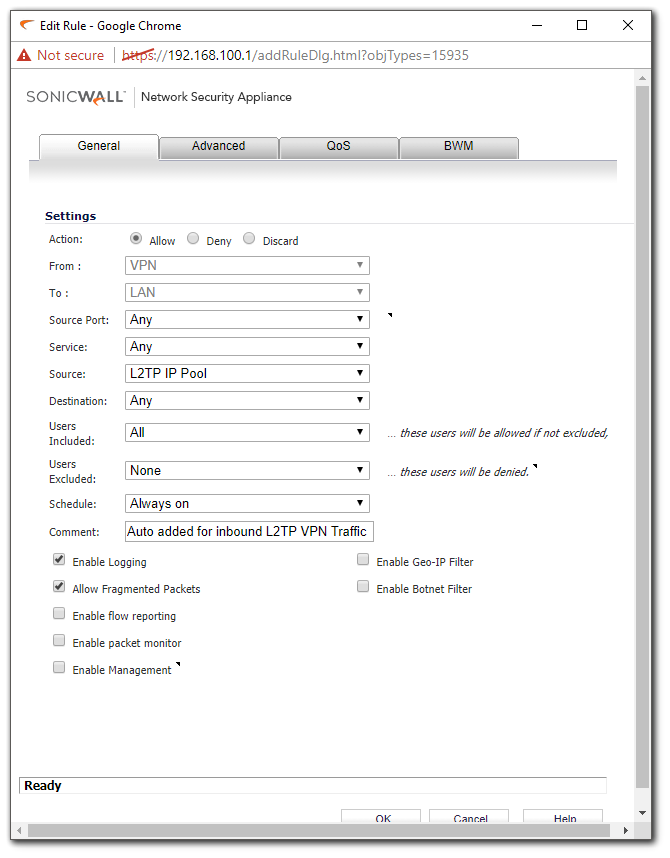
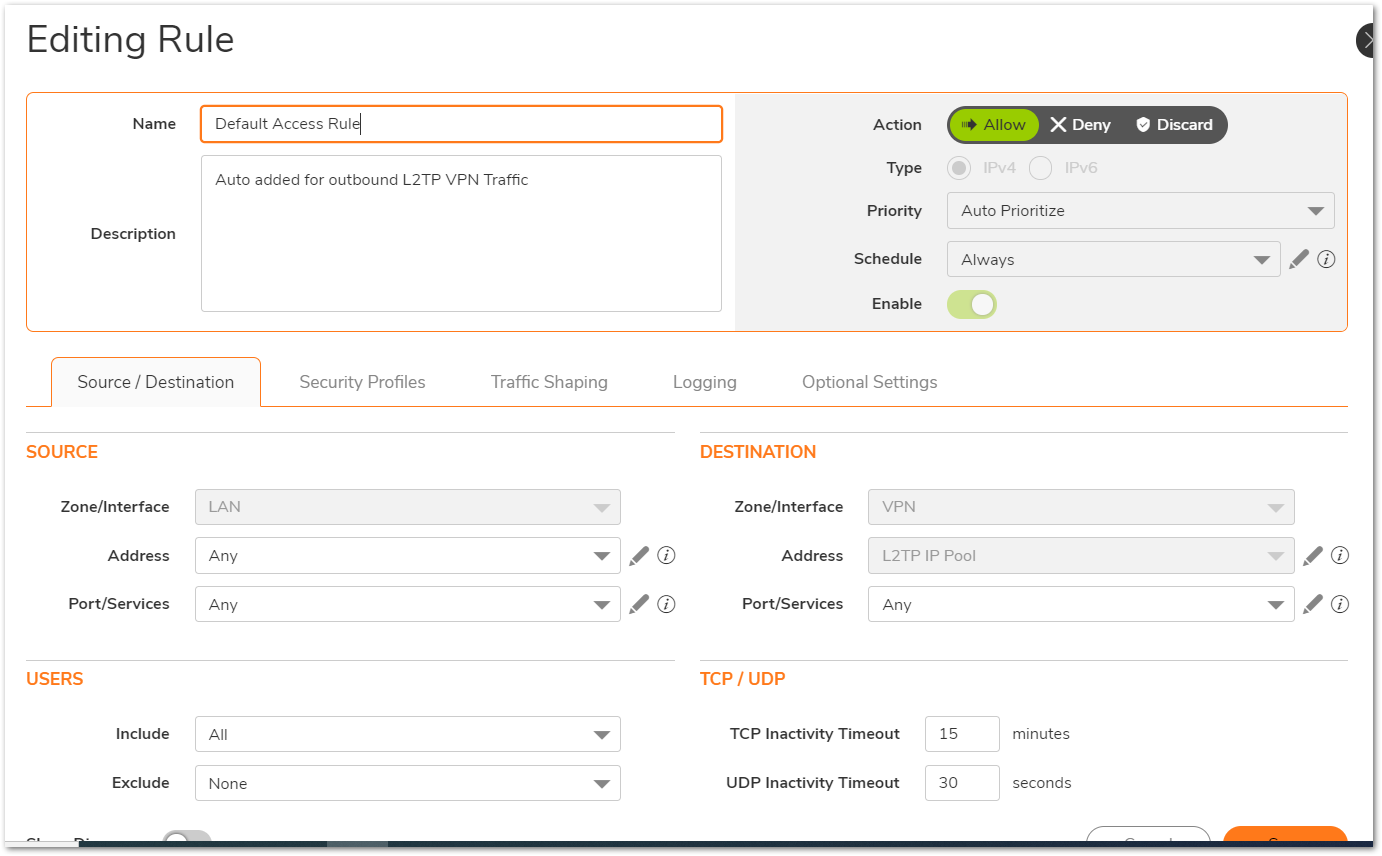
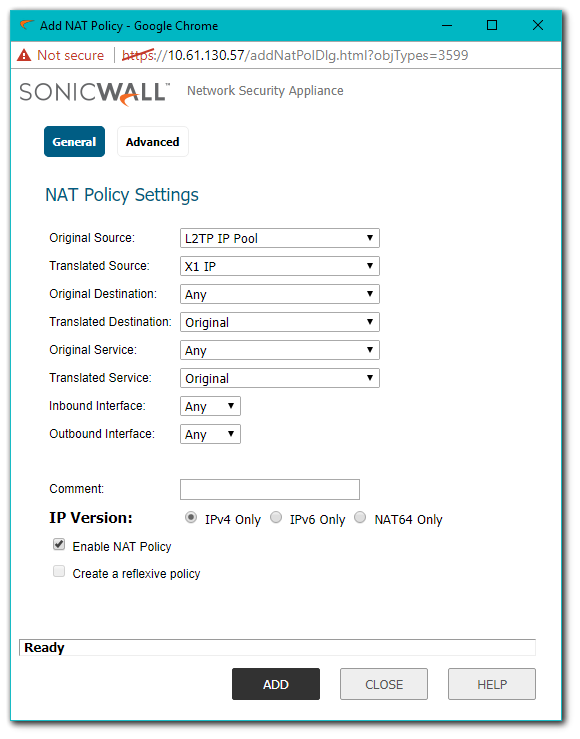
- Once the above steps are complete the SonicWall will auto-create NAT Policies and Firewall Access Rules for the L2TP IP Pool.

Resolution for SonicOS 6.5
This release includes significant user interface changes and many new features that are different from the SonicOS 6.2 and earlier firmware. The below resolution is for customers using SonicOS 6.5 firmware.
- Login to the SonicWall management GUI and navigate to Manage | VPN | Base Settings.
- Select Configure for the WAN GroupVPN feature.
- On the General Tab ensure that IKE using Preshared Secret is selected and set a Shared Secret.

- On the Proposals tab set the DH Group, Encryption, Authentication, and Life Time as you see fit, although the default options are suitable for most deployments.
- On the Advanced tab Enable the option for Accept Multiple Proposals for Clients.

- Review the options on the Client tab, the default values are suitable for most deployments.
- Navigate to Manage | VPN | L2TP Server and ensure that Enabled L2TP Server is checked.

- Click Configure and on the pop-up window examine the L2TP Server tab. Here you may set DNS/WINS information as necessary and adjust the Keep Alive Time.

- On the L2TP Users tab you need to set an IP Pool, this is the available addresses that L2TP Users can draw from when connecting. You may also set User Group for the L2TP clients. CAUTION: Setting to small of an IP Pool will result in IP Exhaustion, make sure to use a suitably large pool of addresses.

- Finally on the PPP tab you may choose the order of authentication protocol. The default order is suitable for most deployments.

- Once the above steps are complete the SonicWall will auto-create NAT Policies and Firewall Access Rules for the L2TP IP Pool.

Resolution for SonicOS 6.2 and Below
The below resolution is for customers using SonicOS 6.2 and earlier firmware. For firewalls that are generation 6 and newer we suggest to upgrade to the latest general release of SonicOS 6.5 firmware.
- Login to the SonicWall management GUI and navigate to VPN | Settings.
- Click Configure for the WAN GroupVPN feature.
- On the General tab ensure that IKE using Preshared Secret is selected and set a Shared Secret.

- On the Proposals tab set the DH Group, Encryption, Authentication, and Life Time as you see fit, although the default options are suitable for most deployments.
- On the Advanced tab Enable the option for Accept Multiple Proposals for Clients.

- Review the options on the Client Tab, the default values are suitable for most deployments.
- Navigate to VPN | L2TP Server and ensure that Enabled L2TP Server is checked.

- Click Configure and on the pop-up window examine the L2TP Server Tab. Here you may set DNS/WINS information as necessary and adjust the Keep Alive Time.

- On the L2TP Users Tab you need to set an IP Pool, this is the available Addresses that L2TP Users can draw from when connecting. You may also set User Group for the L2TP clients. CAUTION: Setting to small of an IP Pool will result in IP Exhaustion, make sure to use a suitably large pool of addresses.

- Finally on the PPP Tab you may choose the order of authentication protocol. The default order is suitable for most deployments.

- Once the above steps are complete the SonicWall will auto-create NAT Policies and Firewall Access Rules for the L2TP IP Pool.