How to set Radius server (NPS) when using WPA-EAP, WPA2-EAP or WPA2-AUTO-EAP
Description
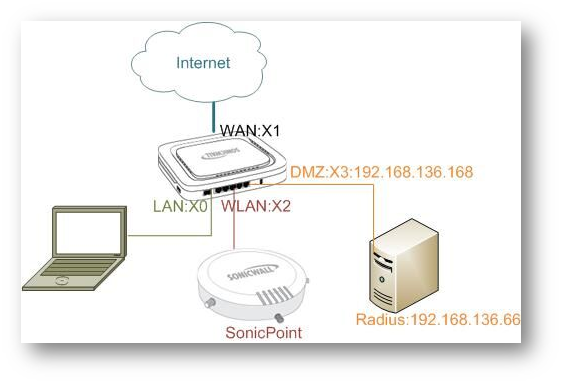
Extensible Authentication Protocol (EAP) is available when using WPA, WPA2 or WPA2-Auto. This solution utilizes an external 802.1x/EAP-capable RADIUS server for key generation. An EAP-compliant RADIUS server provides 802.1X authentication. A RADIUS server must be configured to support this authentication and all communications with the SonicWall. This article shows you how to configuring this RADIUS server when using WPA-EAP, WPA2-EAP or WPA2-Auto-EAP as authentication type.
Radius Server: Network Policy and Access Server from Windows 2008.
Radius Client: SonicWall Firewall
Radius default ports for authentication: 1812.
Resolution
1. Set up and configure Radius server.
2. Configure authentication type on the firewall.
3. Configure Radius Server on the SonicPoint.
4. Add NAT Policy and Access Rule on the firewall.
Step 1: Set up and configure Radius server.
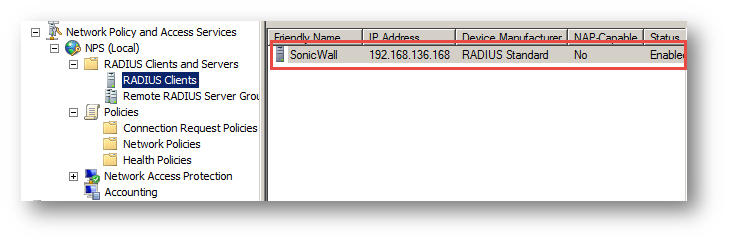
NPS (Network Policy and Access Server from Windows 2008, previously known as the Internet Authentication Service (IAS) ) has been installed on Windows 2008 server 192.168.136.66. Using Radius for authentication, you should configure Radius Client and associated Network Policy on the server.
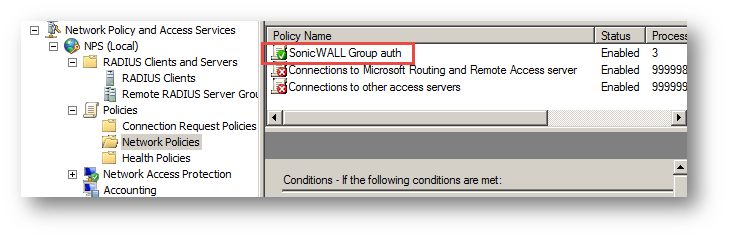
The following screenshots show the already configured client and policy on the Radius server.
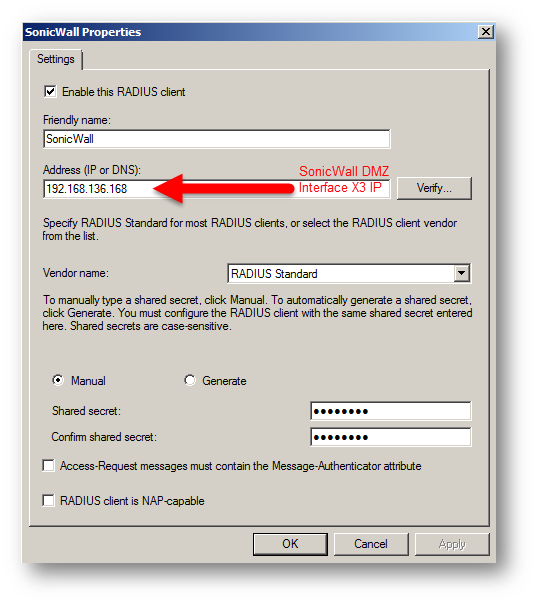
a) Radius Client
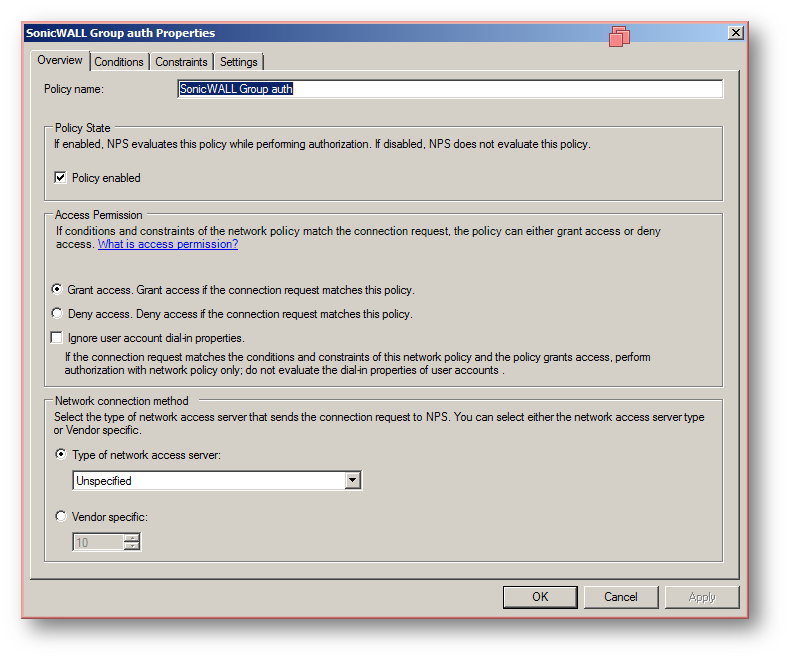
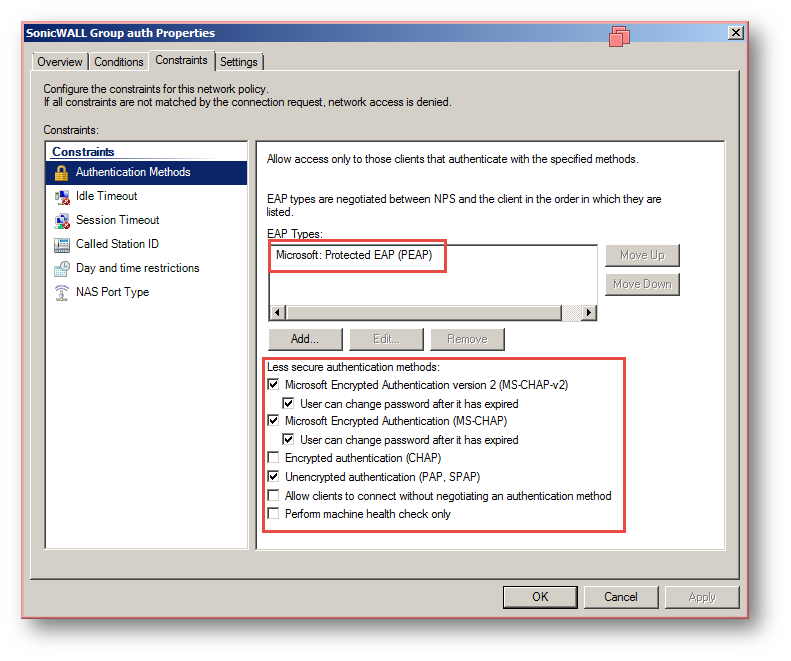
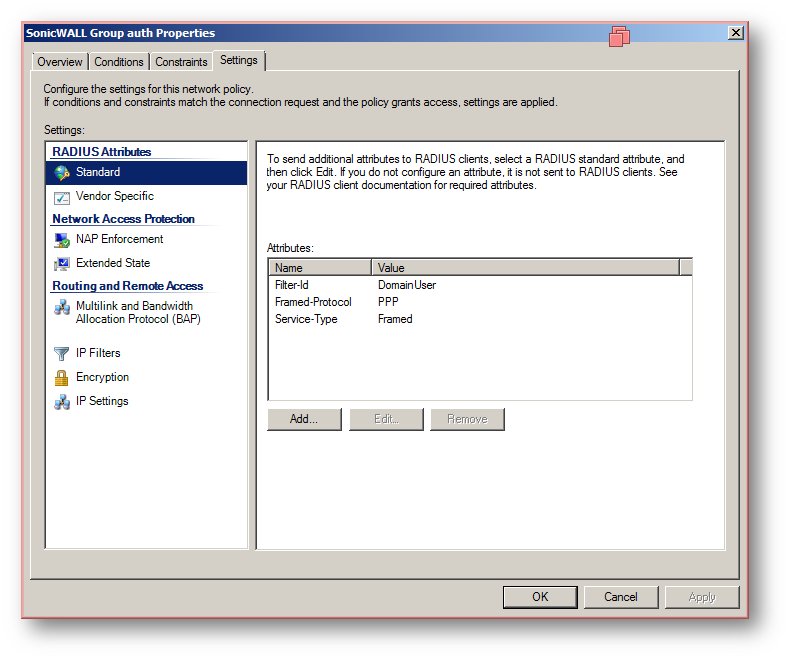
b) Network Policy

Step 2. Configure authentication type on the firewall
Open the GUI or your SonicWall. Go to Manage | SonicPoints | Base Settings page | Click edit button of your SonicPoint at SonicPoint AC/N Objects section | Click tab Radio Basic | Select WPA-EAP, WPA2 -EAP or WPA2-AUTO-EAP. A Radius Server Settings will be displayed.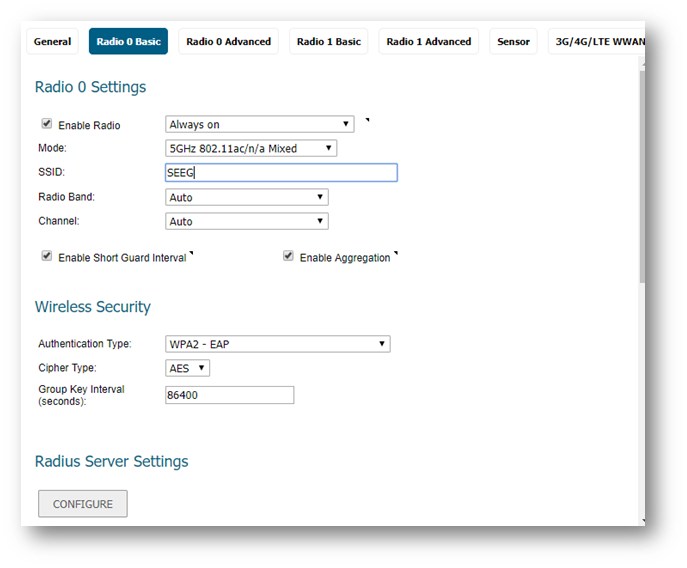
Step 3. Configure Radius Server on the SonicPoint
Click Configure button at Radius Server Settings area Input Radius Server IP and Secret (the default port is 1812). Click button OK.
After clicking OK, the Radius configuration is done, but at the moment a window will pop up, which informs you to add necessary NAT policy and/or change firewall access rule.
Step 4. Add NAT Policy and Access Rule on the firewall
Go to Rules | NAT Policies, Add a NAT Policy:
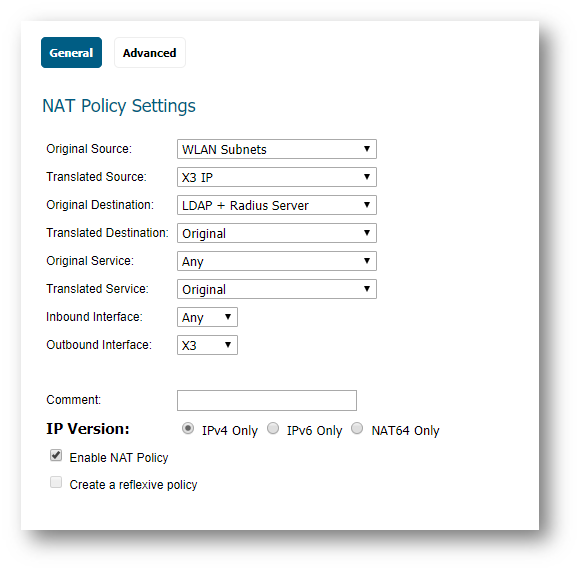
X3 IP:192.168.136.168
LDAP + Radius Server:192.168.136.66
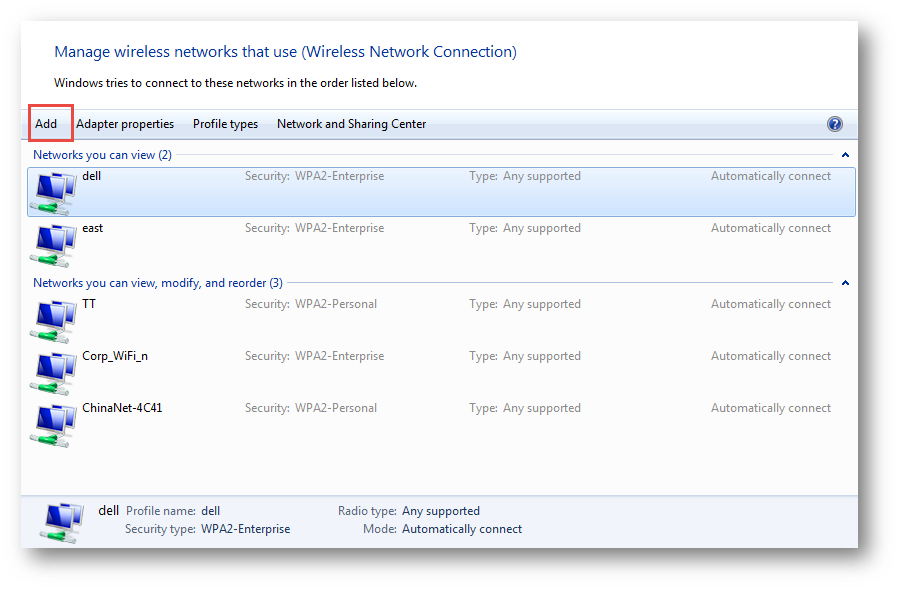
How to test:
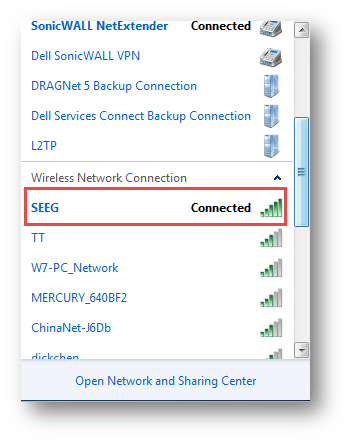
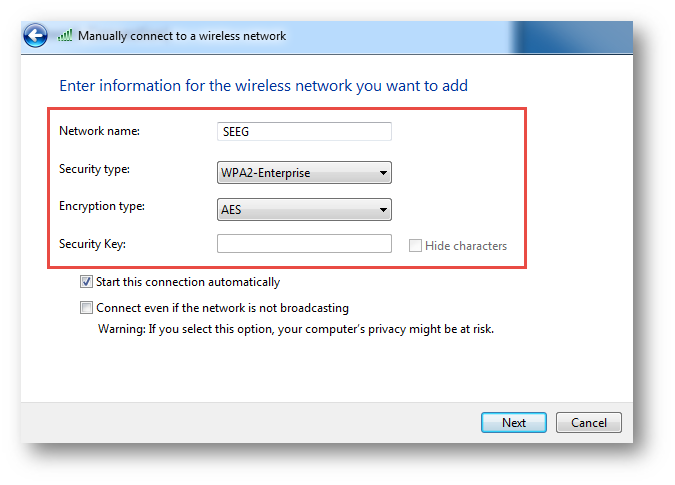
1. From the laptop, go to Control Panel | Network and Sharing Center | Manage Wireless Networks | Add.
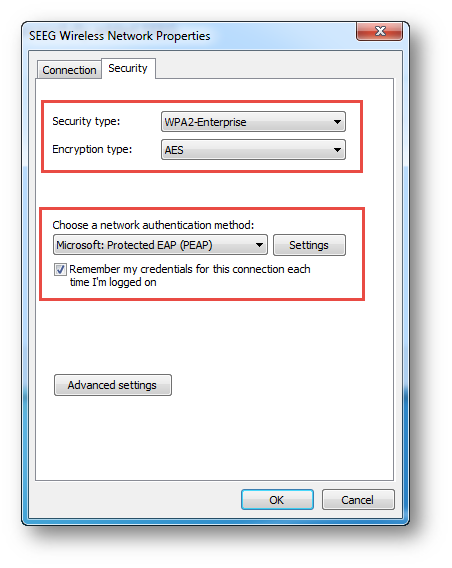
2. Input SSID: SEEG; Security type: WPA2-Enterprise; Encryption type: AES.
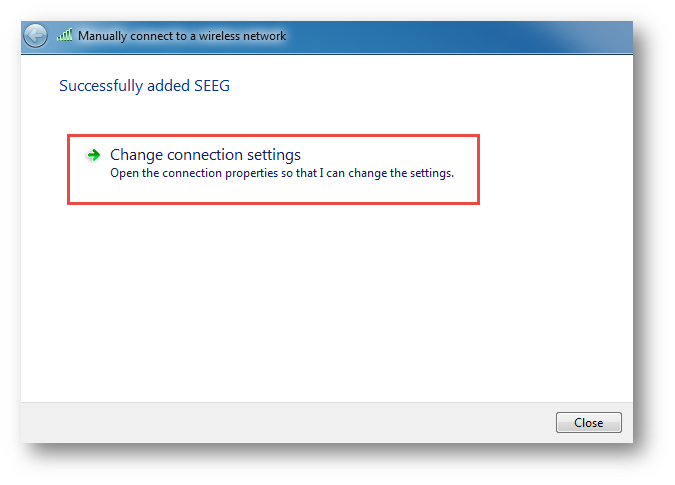
3. Click Change connection settings | Security tab | Settings.
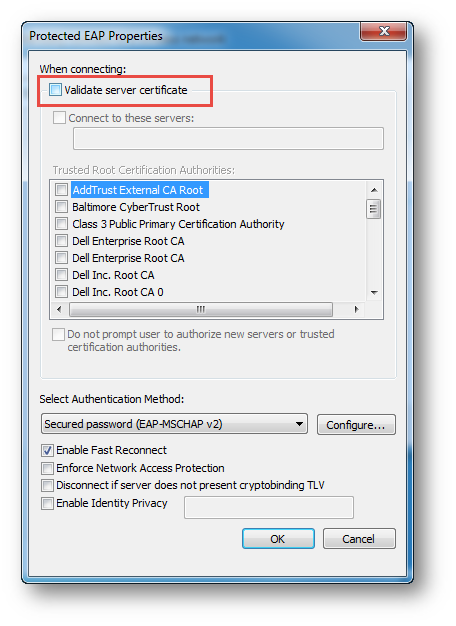
4. Uncheck the option Validate server certificate | Click OK.
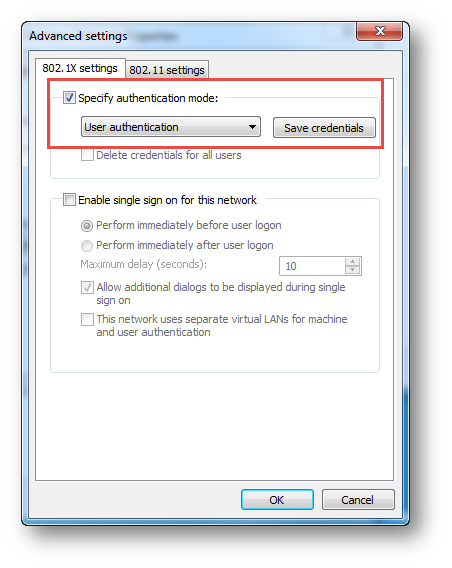
5. Select Advanced settings in the Security tab | Select User authentication and set the user name and password.
6. Connect to SEEG network.