How To Reserve IP Address For A Device Through DHCP Server IP Reservation in Sonicwall
Description
DHCP IP reservation lets you assign a specific IP address to a specific device or whenever the device connects to the network. Most devices uses DHCP wherein, the server provides the IP address dynamically. However, there may be situations when you need to ensure the same IP is assigned to the device to work.
For example, if current range is 192.168.1.10 to 192.168.1.254 and your reserved IP is 192.168.1.100, then split the DHCP scope in same subnet. ie., 192.168.1.10 to 192.168.1.99 and 192.168.1.101 to 192.168.1.254.
Resolution for SonicOS 7.X
This release includes significant user interface changes and many new features that are different from the SonicOS 6.5 and earlier firmware. The below resolution is for customers using SonicOS 7.X firmware.
- Login to the SonicWall ,Click NETWORK.
- Navigate to the SYSTEM | DHCP Server page.
- Make sure Enable DHCP Server is checked.
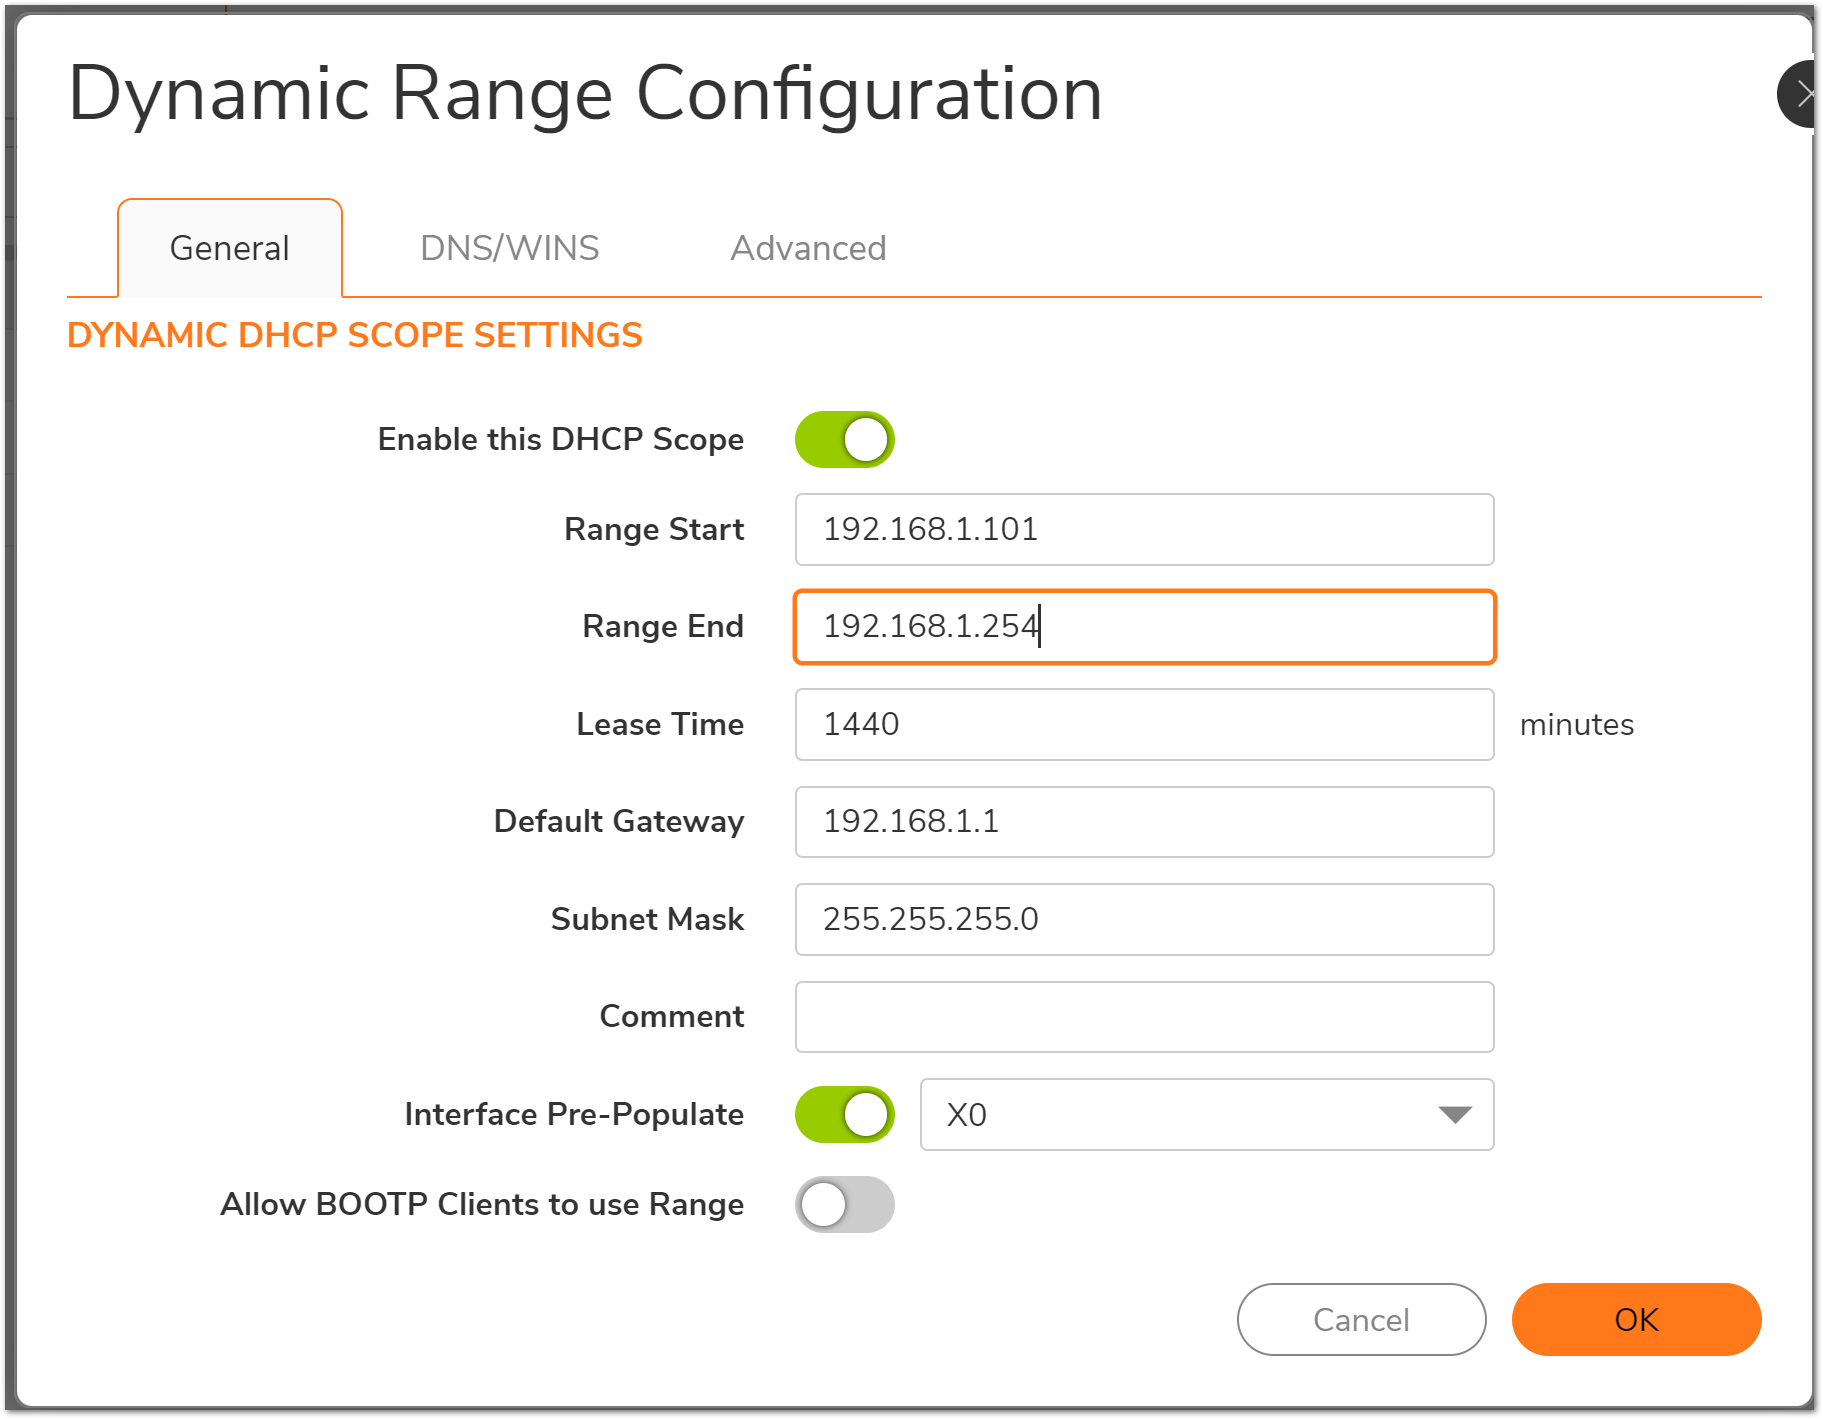
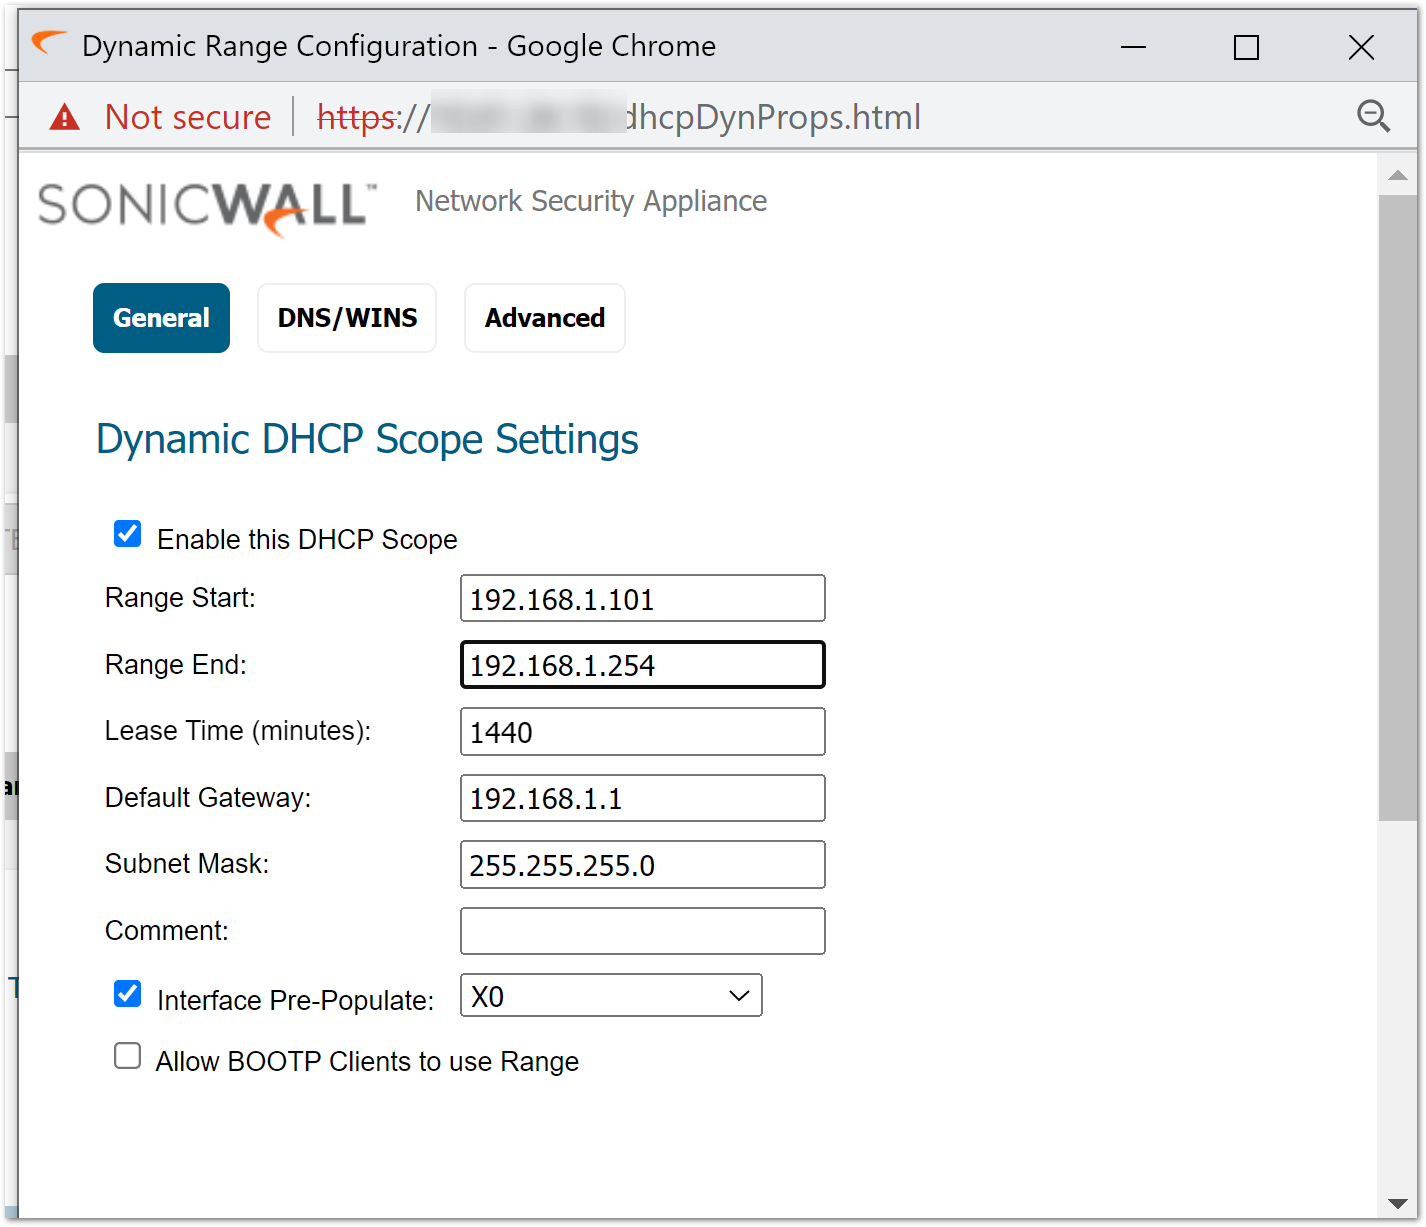
- Click ADD Dynamic button to bring up the Dynamic DHCP Configuration window.
As prompted, You will need to create two DHCP scopes ie., 192.168.1.10 to 192.168.1.99 and 192.168.1.101 to 192.168.1.254
Click OK.
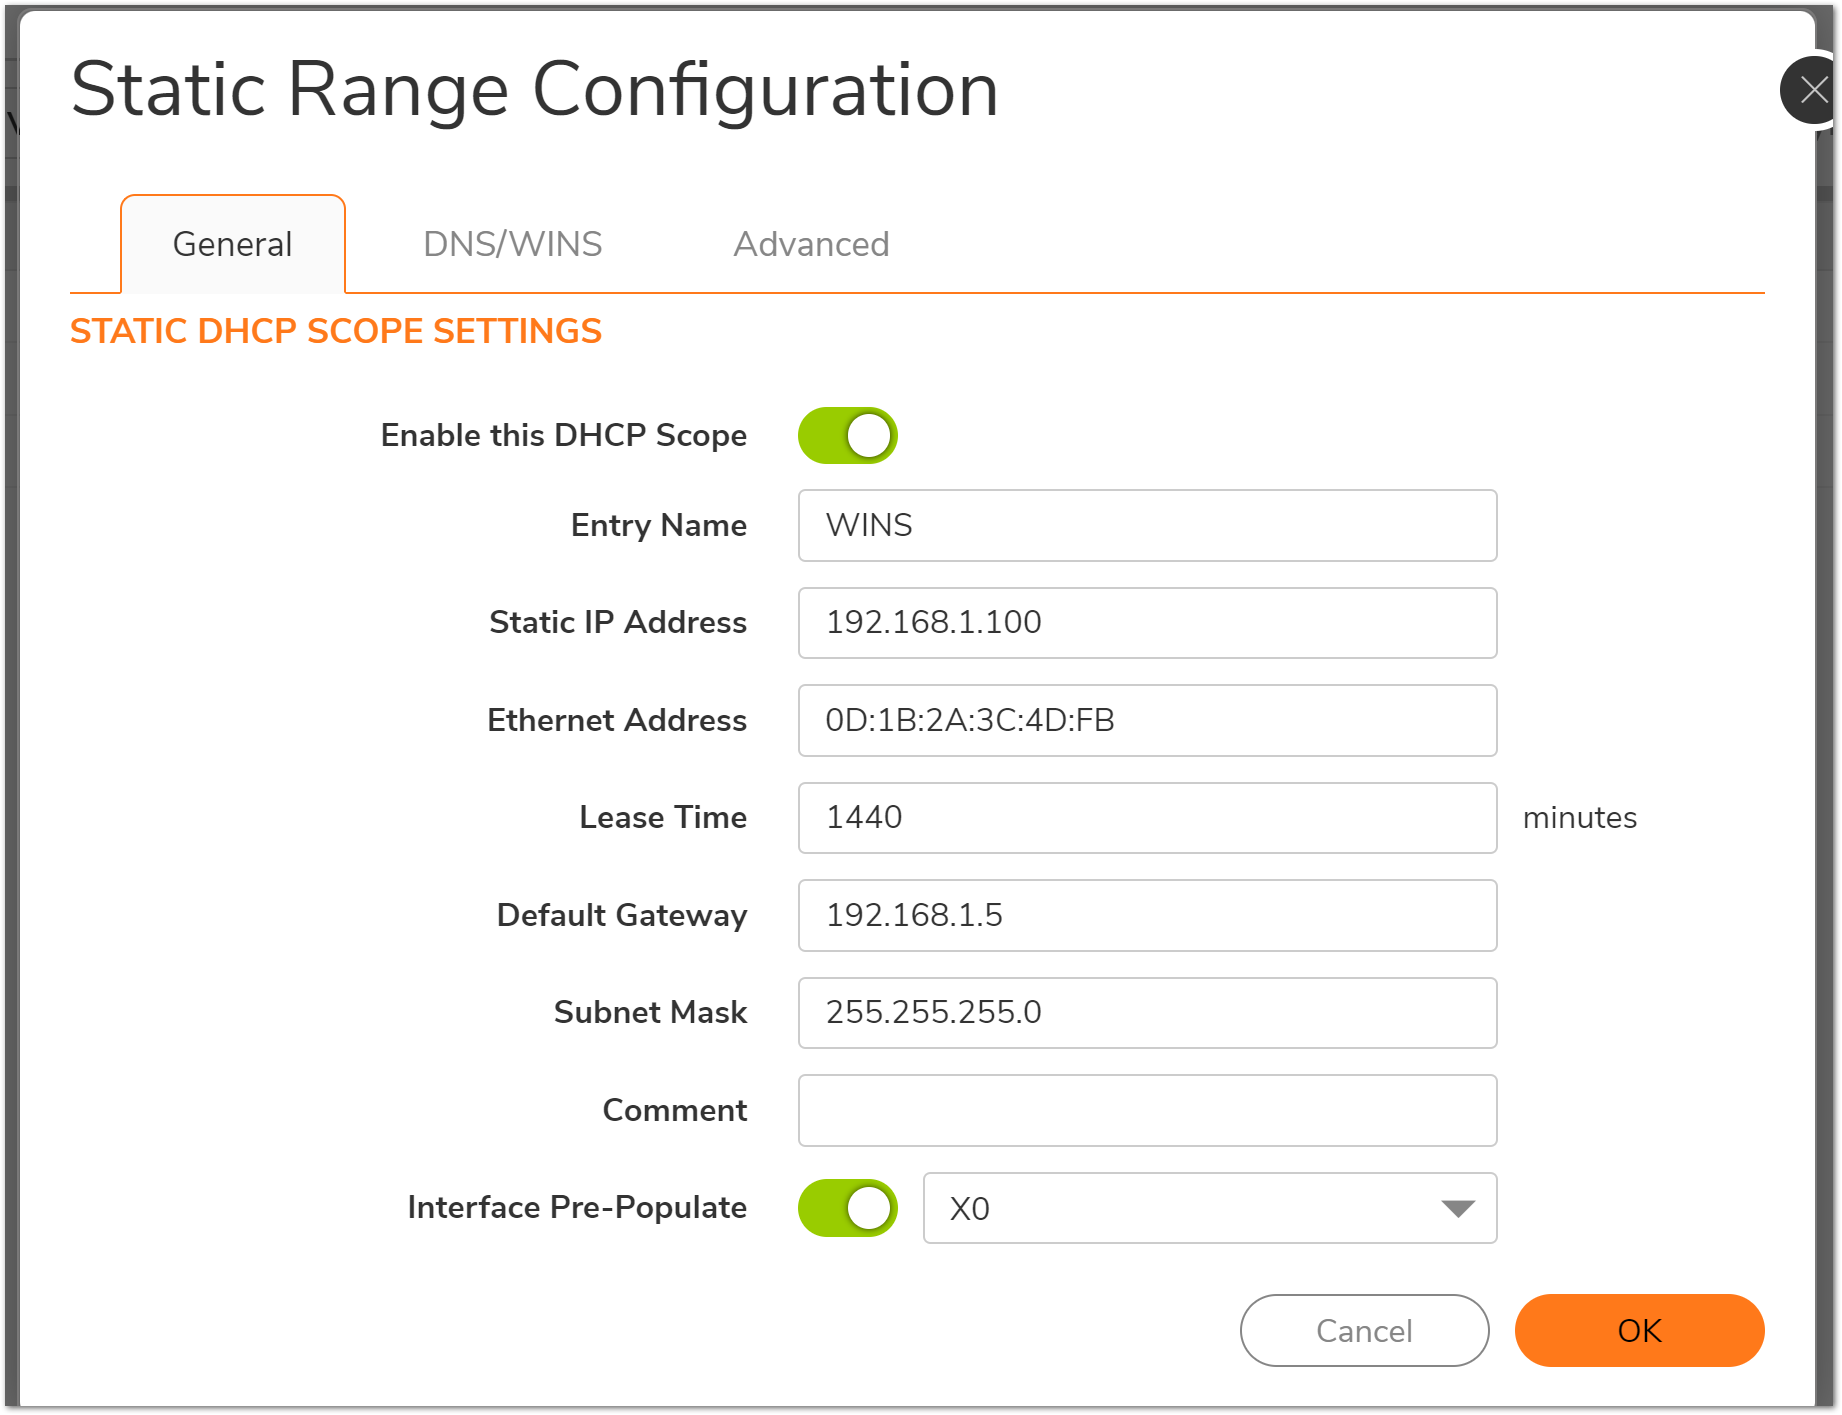
- Click Add Static button to bring up the Static DHCP Configuration window. As prompted, enter a name for this mapping, the computer's assigned IP address 192.168.1.100, the corresponding MAC address, etc. Click OK.
Resolution for SonicOS 6.5
This release includes significant user interface changes and many new features that are different from the SonicOS 6.2 and earlier firmware. The below resolution is for customers using SonicOS 6.5 firmware.
- Login to the SonicWall ,click MANAGE.
- Navigate to the Network | DHCP Server page.
- Make sure Enable DHCP Server is checked.
- Click ADD Dynamic button to bring up the Dynamic DHCP Configuration window.
As prompted, You will need to create two DHCP scopes ie., 192.168.1.10 to 192.168.1.99 and 192.168.1.101 to 192.168.1.254
Click OK.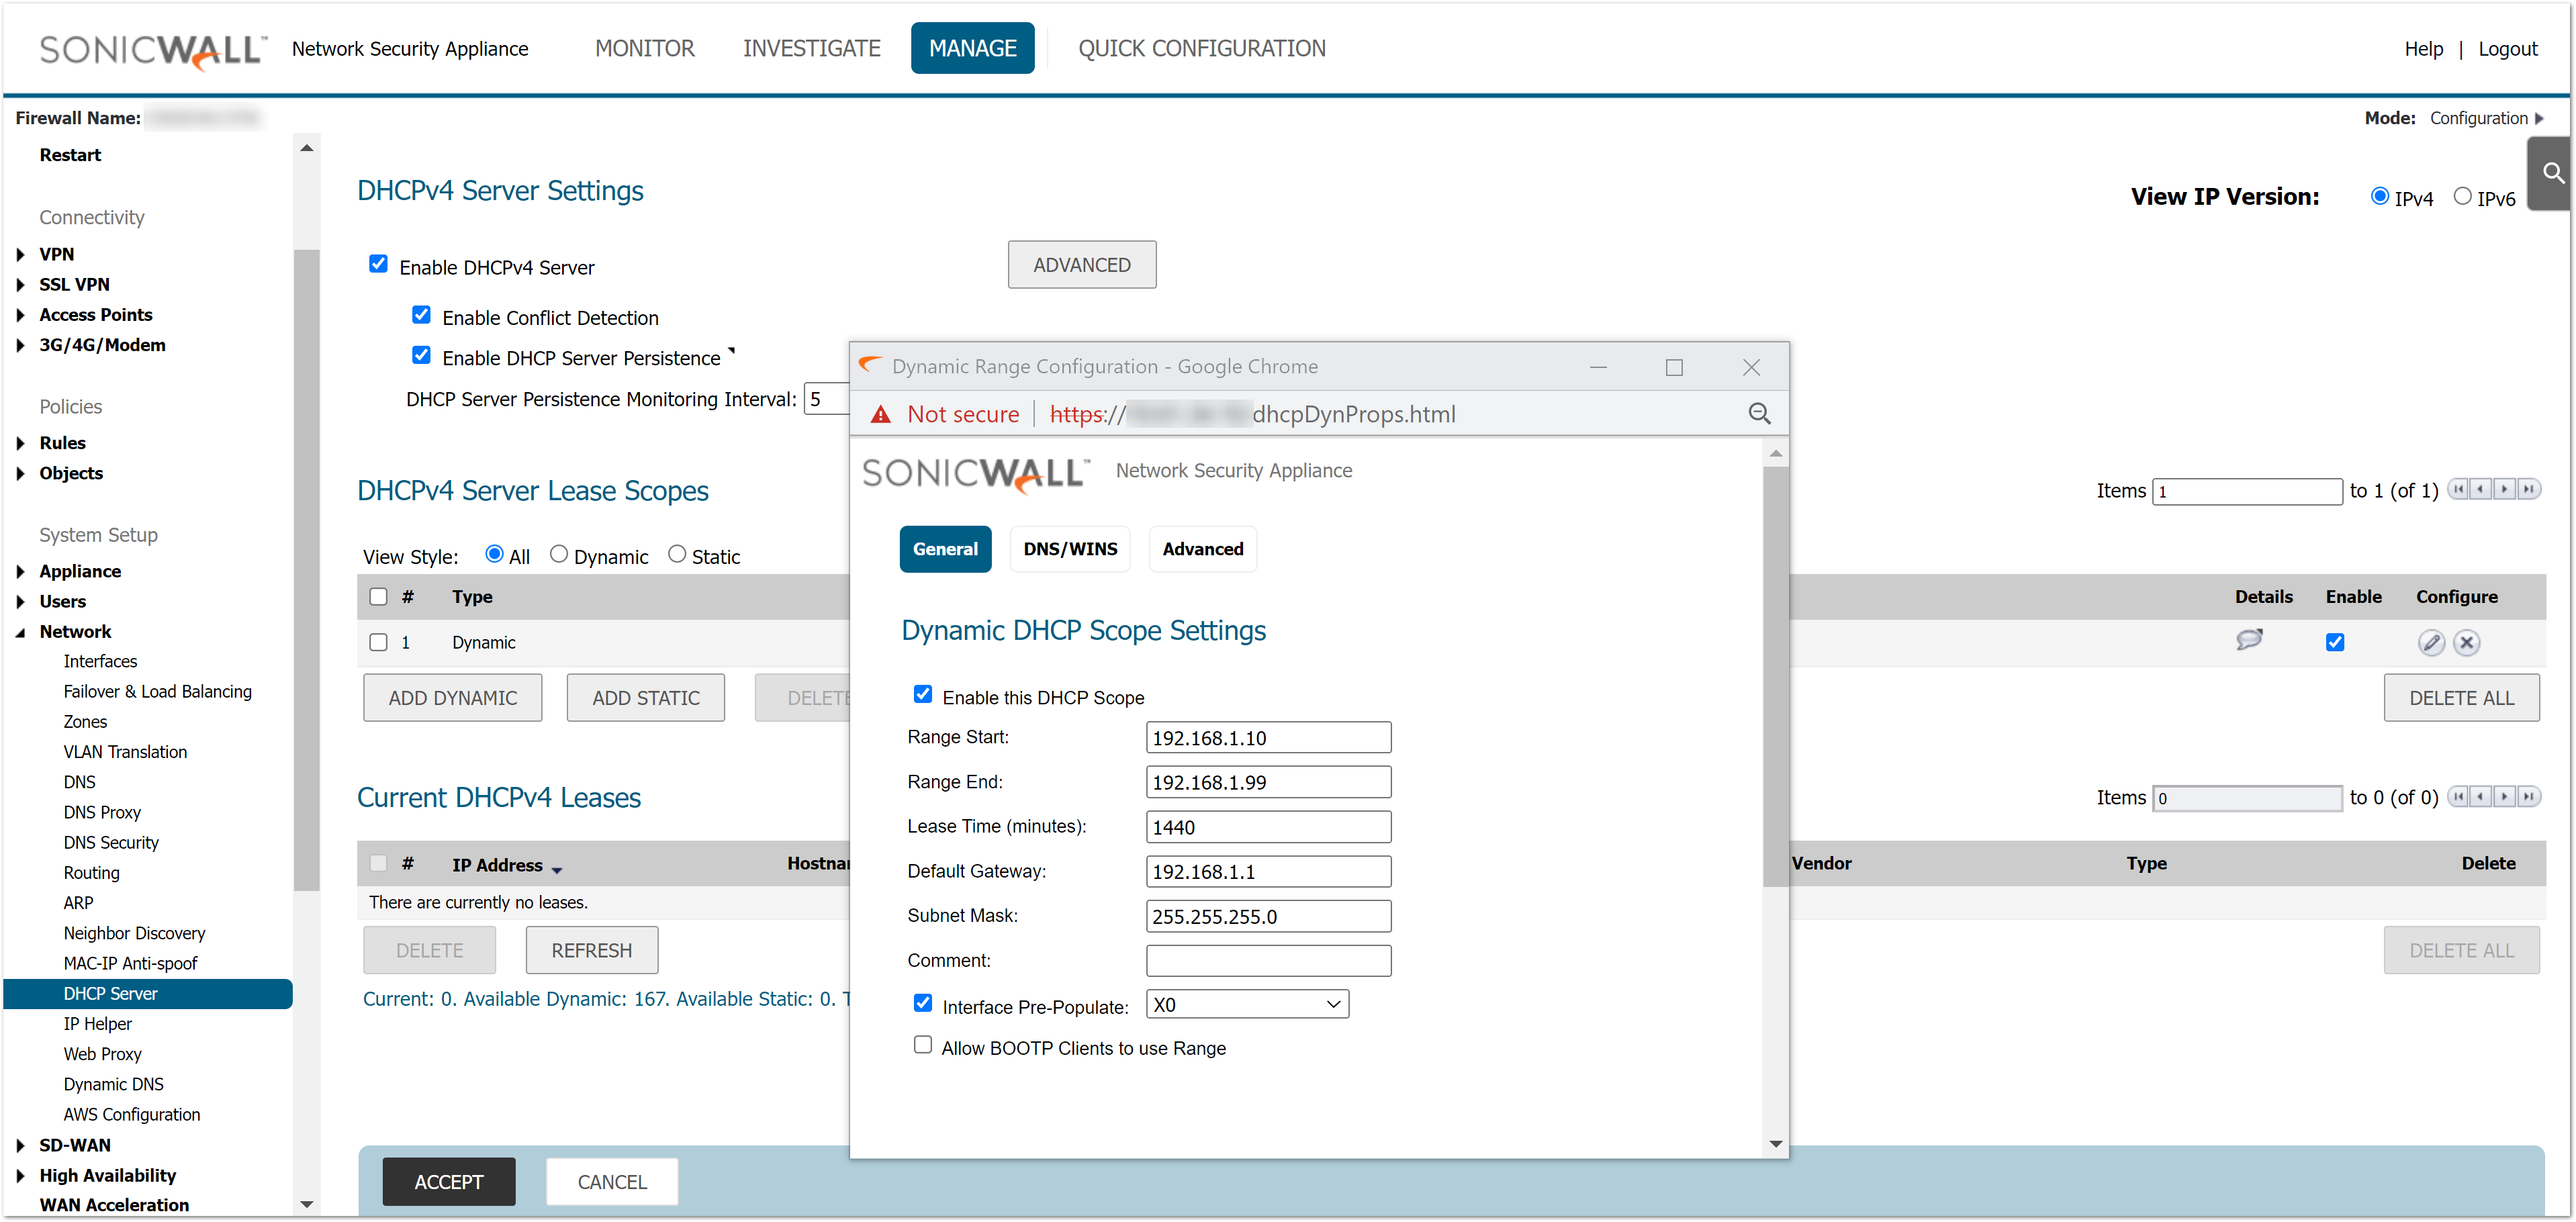
- Click Add Static button to bring up the Static DHCP Configuration window.
As prompted, enter a name for this mapping, the computer's assigned IP address 192.168.1.100, the corresponding MAC address, etc.
Click OK.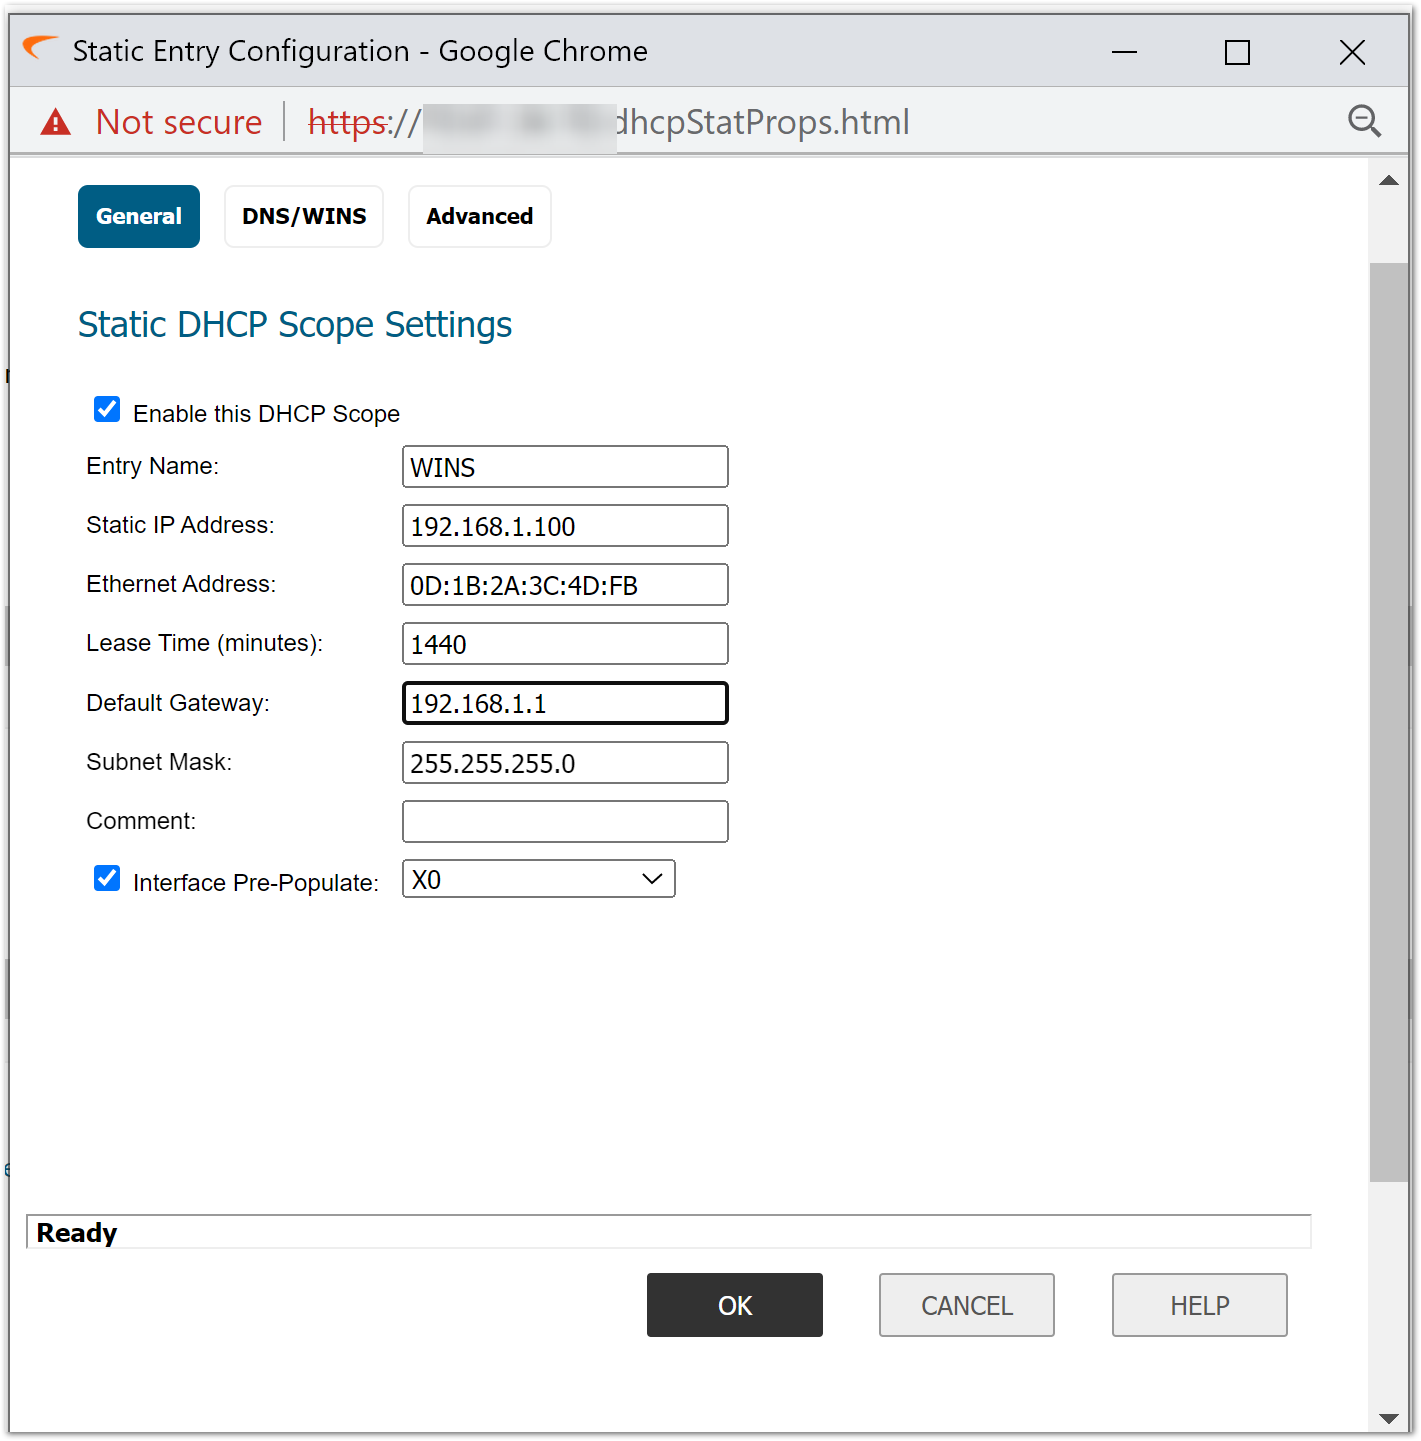
Related Articles
Categories
not finding your answers?