How can I route all Internet traffic through the client IPSec VPN?
Description
This article will show users how to configure a 'Route all Traffic' WAN GroupVPN Policy on a SonicWall UTM appliance. The result is that remote computers with SonicWall Global VPN Client (GVC) software connected to the policy will route all Internet traffic through its VPN connection to the UTM network. Once traffic from remote users' GVC computers to the UTM network is decrypted and encapsulated from the VPN, the original destinations of the traffic from the remote computer are honored and used for routing. Traffic from the GVC client destined for the Internet will be routed to the UTM device's WAN gateway router and traffic destined for the LAN and other internal networks will be routed as per the routing logic which applies to local hosts. Routing All Traffic through the SonicWall allows an administrator to protect a user by enforcing Intrusion Prevention, Gateway Anti-Virus, Anti-Spyware, Client Anti-Virus, Content Filtering, and other policies on remote users’ traffic.
The related configurations on the UTM appliance which has subscriptions for the various Security Services mentioned above are done in the Network | Zones screen. There are enforcement checkboxes for the various Security Services, and usually they are turned on the for the LAN and WAN zones. To accomplish the above mentioned protection of traffic coming across a 'Route all Traffic' WAN GroupVPN Policy, the administrator must enable the VPN zone enforcements for the Intrusion Prevention, Gateway Anti-Virus, Anti-Spyware, Client Anti-Virus, and / or Content Filtering services. The examples in this article use the default access rules which are created when enabling the WAN Group VPN. These default access rules allow all VPN Traffic to pass to the LAN and WAN.
Resolution for SonicOS 7.X
This release includes significant user interface changes and many new features that are different from the SonicOS 6.5 and earlier firmware. The below resolution is for customers using SonicOS 7.X firmware.
Before You Begin
- Decide if you are using an LDAP server or Local Users for authentication.
- Decide if you are using the SonicWall Internal DHCP server or an External DHCP server.
Configure Users
- Navigate to Device|Users|Local Usersscreen; for each user, there is a list of assigned network objects in the VPN Access tab. This is what dictates the type of GVC policy they have. (not needed if using LDAP).
- Click Add User
- For Global VPN Client users who need to have a route all Policy, you must include the object WAN RemoteAccess Networks ; this object has a value of 0.0.0.0 and is what makes the user's policy a route all Global VPN client policy.

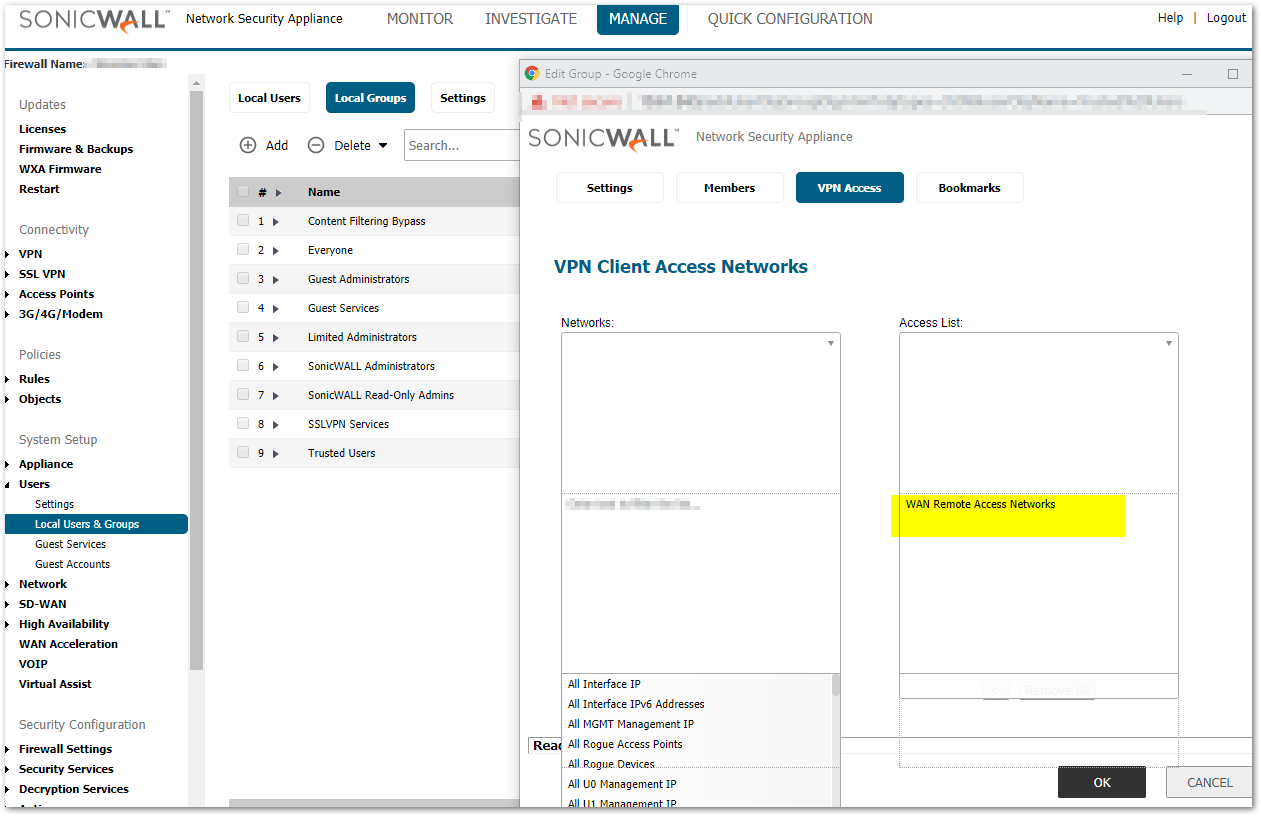
Configure Groups(not needed if using Local Users)
- Navigate to Device|Users|Local Users & Groups, Select Local Groups.
- Click the Configure icon by the Group for which you are providing VPN Access configurations.
- Click on the VPN Access tab and be sure to select a Network this group has access to ( WAN RemoteAccess Networks are selected in the example below)
- Click OK
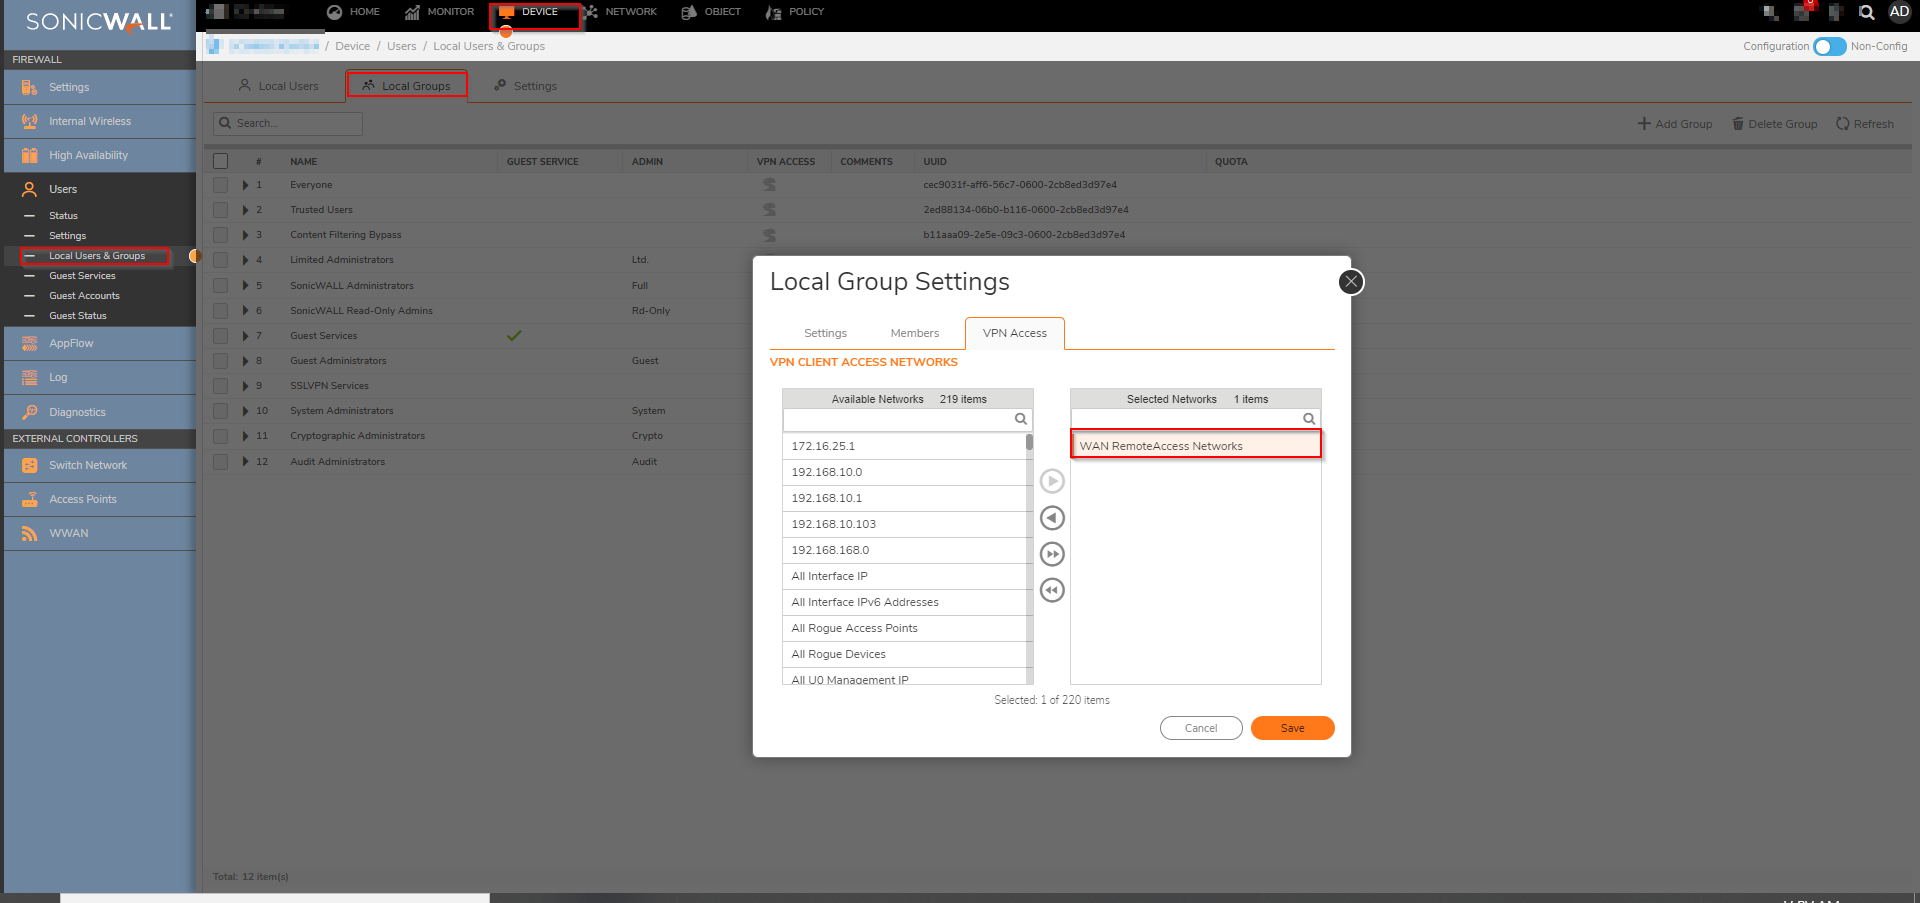
NOTE: For access to Local Network, you can add the local subnets under VPN Access List.
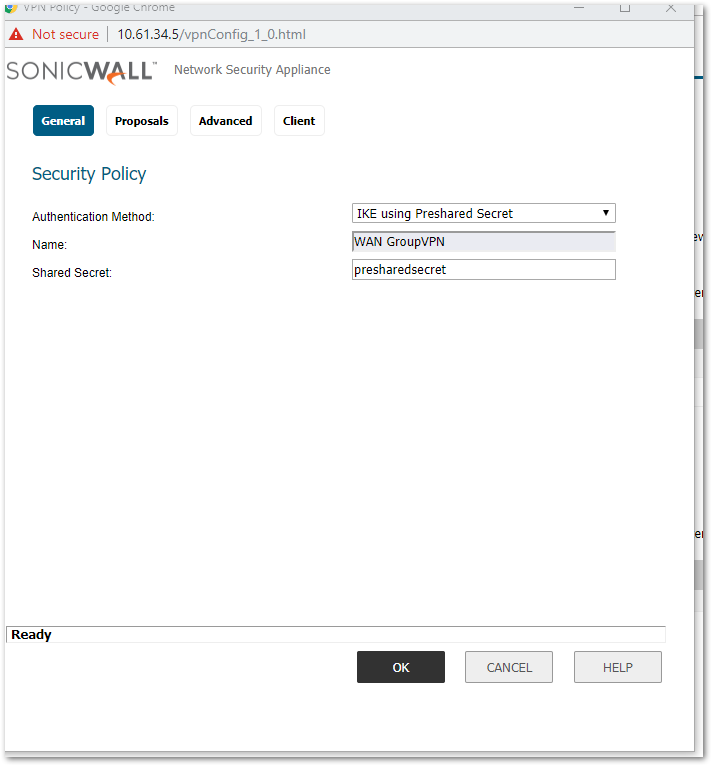
Configure WAN GroupVPN
- Navigate to Network|IPSec VPN| Rules and Settings screen.
- Check Enable for the WAN GroupVPN.
- Click the Configure icon for the WAN GroupVPN.

- Click on the General tab.
- Enter the Shared Secret (in this example, presharedsecret).

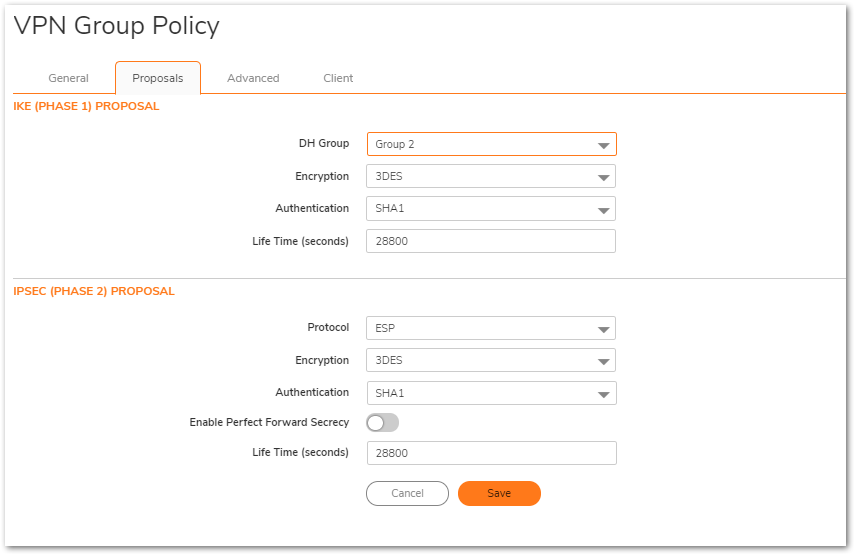
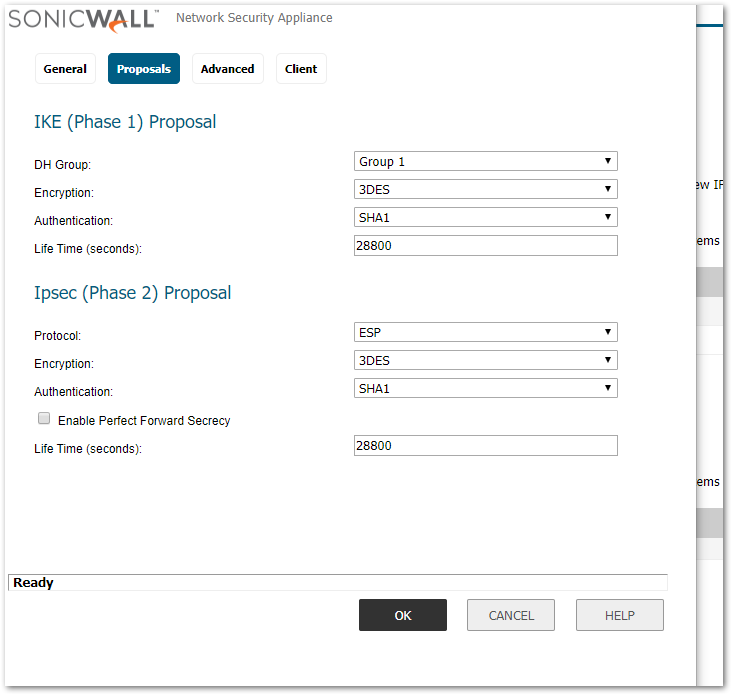
- Click on the Proposals tab.
- Enter the IKE and IPSec Proposal information, this example uses the default settings.
- Click on the Advanced tab.
- Verify that Require Authentication of VPN Clients via XAUTH is checked.
- Select User Group for XAUTH users (in this example, Trusted Users is selected).

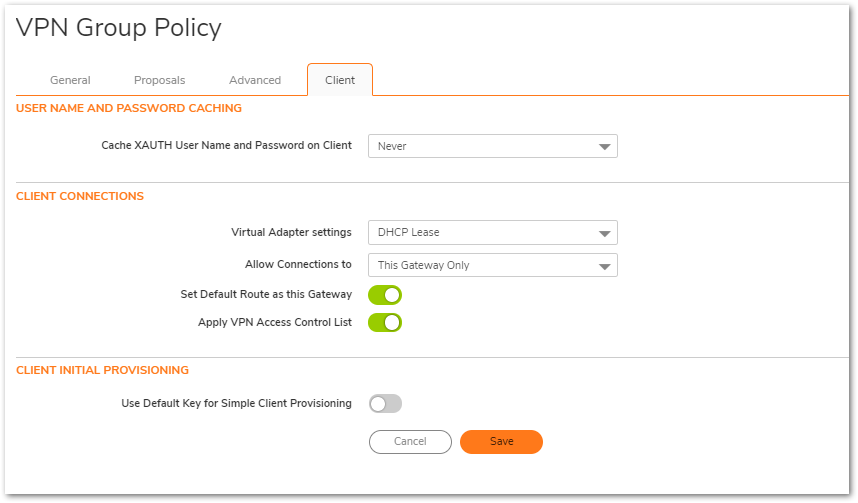
- Click on the Client tab.
- Select Allow Connections to: (in this example, This Gateway Only).
- Check Set Default Route as this Gateway.
- Check Apply VPN Access Control List (Optional: If WAN Remote Access Networks is NOT added to the VPN Access List you may keep this unchecked).
Configure Internal DHCP Server(Not needed for External DHCP Server)
- Navigate to Network | System | DHCP Server| DHCP server settings screen.
- Check Enable DHCPv4 Server.
- Check Enable Conflict Detection.

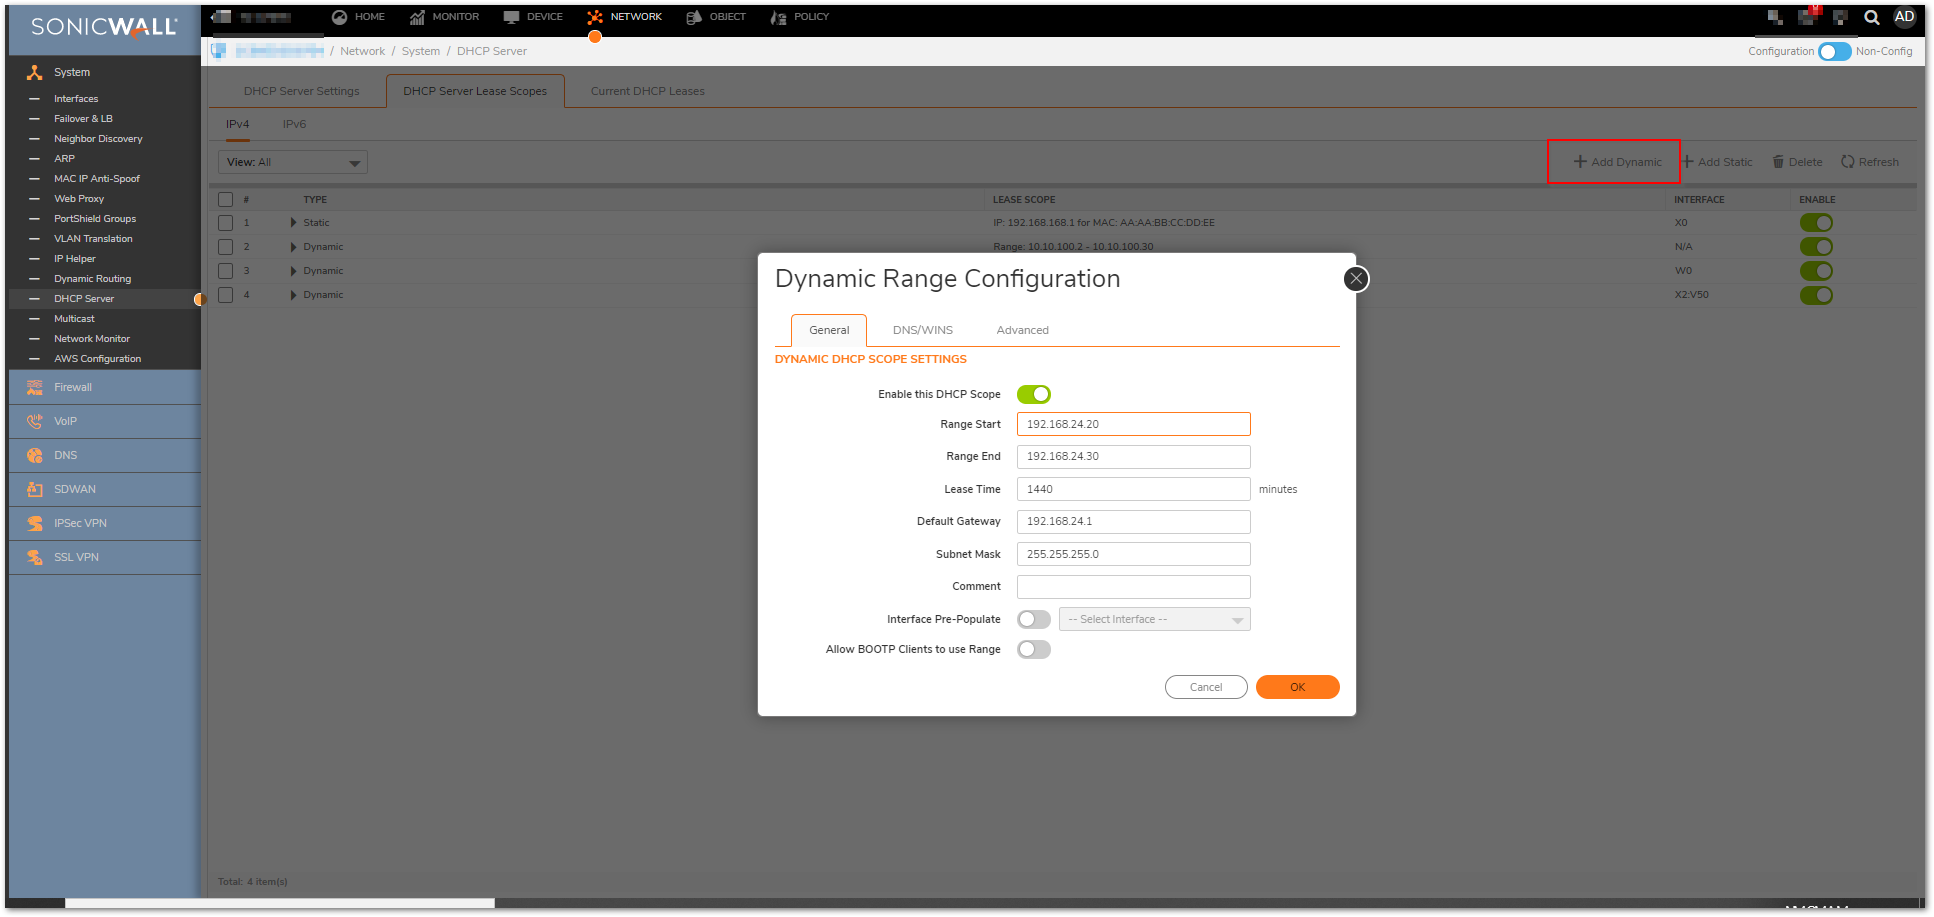
- Navigate to DHCP Server Lease Scopes and Click Add Dynamic.
- Enter a Range Start (example 192.168.24.20).
- Enter a Range End (example 192.168.24.30).
- Select a Gateway Preference (example 192.168.24.1).
- Click OK.
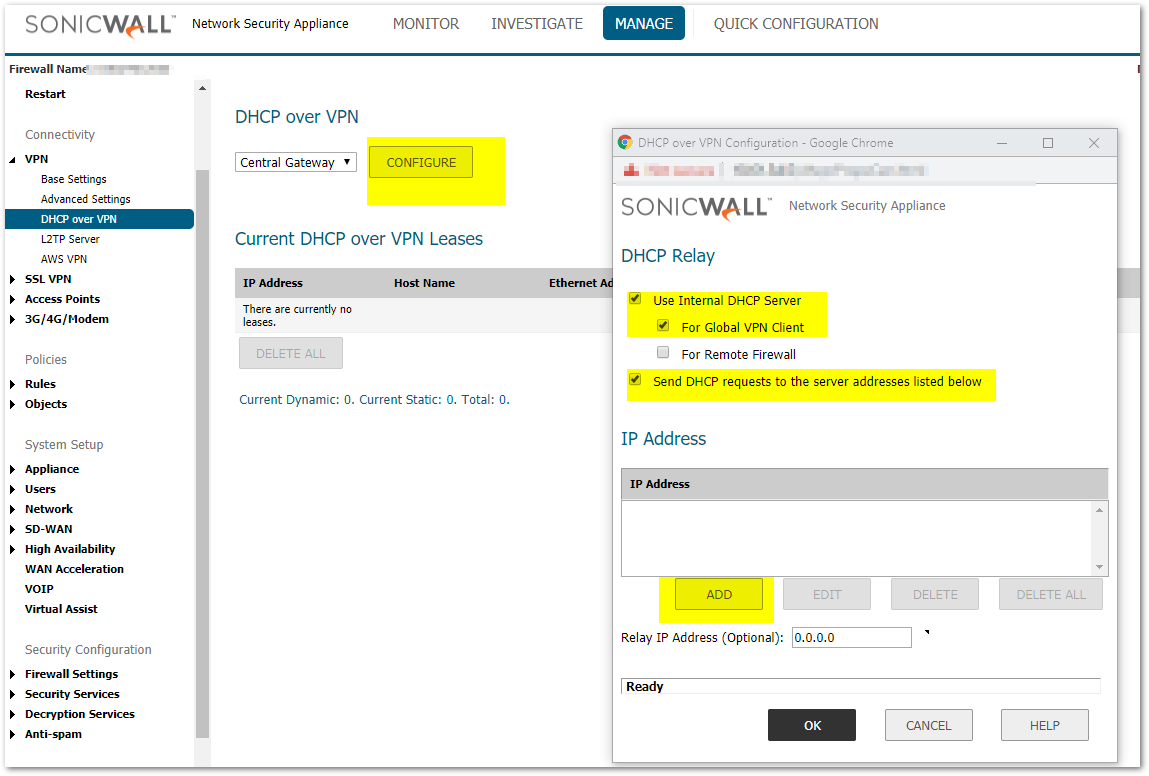
Configure DHCP over VPN for Internal Server(or Configure DHCP relay address for External Server)
- Go to the DHCP over VPN screen.
- Select Central Gateway.
- Click Configure.
- Check Use Internal DHCP Server.
- Check For Global VPN Clients.
OR
- Check Send DHCP Requests to the server address listed below.
- Click Add.
- Enter the IP Address of your DHCP Server.
- Click OK.

Configure NAT Policy
This NAT Policy is needed for many-to-one source IP address translation as remote VPN hosts go to the Internet via the VPN connection.
- Navigate to Policy|Rules and Settings| NAT Rules.
- Click Add.
Enter Original Source: Any
Enter Translated Source: X1 IP
Enter Original Destination: Any
Enter Translated Destination:Original
Enter Original Service: Any
Enter Translated Service: Original
Enter Inbound Interface: X1 (note this is your WAN interface)
Enter Outbound Interface: X1

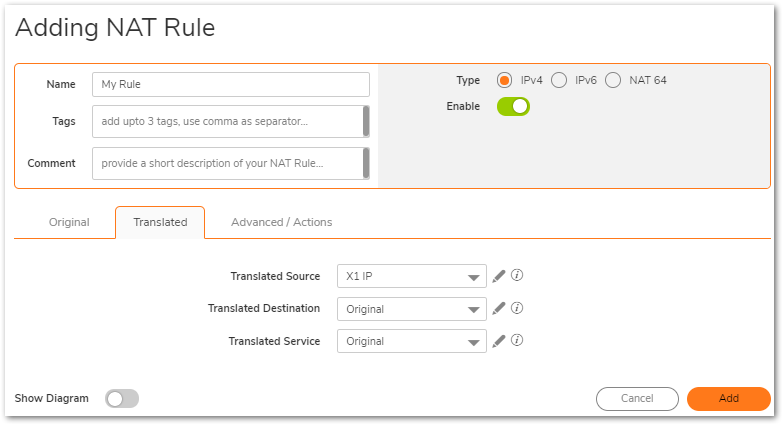
NOTE: In the Gen4 Pro products, and in NSA and NSA E-Class Products, the names of the network address objects are named after the interfaces. Thus the object named X1 IP will the correct choice for the Translated Source in those products, usually. Similar configurations can be done on other WANs, like X2, X3, etc. The TZ products instead use a friendlier name for the same network address object: WAN Primary IP. That object would be used as the Translated Source in those products. The TZ products also use friendlier names for the interfaces themselves. They are called LAN and WAN instead of X0 and X1. Thus the Inbound Interface and Outbound Interface would be set to WAN in those products, usually.
 TIP:Routing All Traffic through the SonicWall allows an administrator to protect a user by enforcing Intrusion Prevention, Gateway Anti-Virus, Anti-Spyware, Client Anti-Virus, Content Filtering, and other policies on remote users’ traffic. On the UTM appliance which has subscriptions for the various Security Services mentioned above, the relevant configurations are done on the Object- Zones screen. There are enforcement checkboxes for the various Security Services, and usually they are turned on the for the LAN and WAN zones.
 CAUTION: To protect traffic coming across a a 'Route all Traffic' WAN GroupVPN Policy, the administrator must edit the VPN zone and enable the checkboxes for the Intrusion Prevention, Gateway Anti-Virus, Anti-Spyware, Client Anti-Virus, and / or Content Filtering services.
Troubleshooting
- Verify WAN GroupVPN configuration is correct.
- Verify WAN GroupVPN is enabled.
- Check VPN Summary page or Log files to verify that the tunnel has been established.
- Review all configuration steps.
Resolution for SonicOS 6.5
This release includes significant user interface changes and many new features that are different from the SonicOS 6.2 and earlier firmware. The below resolution is for customers using SonicOS 6.5 firmware.
Before You Begin
- Decide if you are using an LDAP server or Local Users for authentication.
- Decide if you are using the SonicWall Internal DHCP server or an External DHCP server.
Configure Users
- Navigate to Users | Local Users screen; for each user, there is a list of assigned network objects in the VPN Access tab. This is what dictates the type of GVC policy they have. (not needed if using LDAP).
- Click Add User
- For Global VPN Client users who need to have a route all Policy, you must include the object WAN RemoteAccess Networks ; this object has a value of 0.0.0.0 and is what makes the user's policy a route all Global VPN client policy.
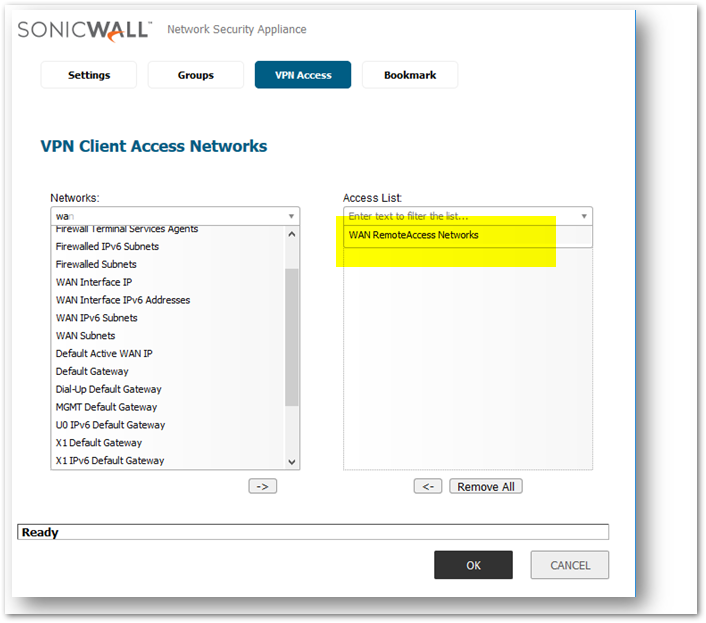
Configure Groups(not needed if using Local Users)
- Navigate to MANAGE|Local Users & Groups, Select Loca Groups.
- Click the Configure icon by the Group for which you are providing VPN Access configurations.
- Click on the VPN Access tab and be sure to select a Network this group has access to ( WAN RemoteAccess Networks are selected in the example below)
- Click OK
 NOTE: For access to Local Network, you can add the local subnets under VPN Access List.
Configure WAN GroupVPN
- Navigate to MANAGE|VPN| Base Settings screen.
- Check Enable for the WAN GroupVPN.
- Click the Configure icon for the WAN GroupVPN.

- Click on the General tab.
- Enter the Shared Secret (in this example, presharedsecret).
- Click on the Proposals tab.
- Enter the IKE and IPSec Proposal information, this example uses the default settings.
- Click on the Advanced tab.
- Verify that Require Authentication of VPN Clients via XAUTH is checked.
- Select User Group for XAUTH users (in this example, Trusted Users is selected).

- Click on the Client tab.
- Select Allow Connections to: (in this example, This Gateway Only).
- Check Set Default Route as this Gateway.
- Check Apply VPN Access Control List (Optional: If WAN Remote Access Networks is NOT added to the VPN Access List you may keep this unchecked).

Configure Internal DHCP Server(Not needed for External DHCP Server)
- Navigate to MANAGE|Network | DHCP Server screen.
- Check Enable DHCPv4 Server.
- Check Enable Conflict Detection.
- Click Add Dynamic.
- Enter a Range Start (example 192.168.24.20).
- Enter a Range End (example 192.168.24.30).
- Select a Gateway Preference (example 192.168.24.1).
- Click OK.

Configure DHCP over VPN for Internal Server(or Configure DHCP relay address for External Server)
- Go to the DHCP over VPN screen.
- Select Central Gateway.
- Click Configure.
- Check Use Internal DHCP Server.
- Check For Global VPN Clients.
OR
- Check Send DHCP Requests to the server address listed below.
- Click Add.
- Enter the IP Address of your DHCP Server.
- Click OK.
Configure NAT Policy
This NAT Policy is needed for many-to-one source IP address translation as remote VPN hosts go to the Internet via the VPN connection.
- Navigate to MANAGE|Rules| NAT Policies.
- Click Add.
Enter Original Source: Any
Enter Translated Source: X1 IP
Enter Original Destination: Any
Enter Translated Destination:Original
Enter Original Service: Any
Enter Translated Service: Original
Enter Inbound Interface: X1 (note this is your WAN interface)
Enter Outbound Interface: X1 NOTE: In the Gen4 Pro products, and in NSA and NSA E-Class Products, the names of the network address objects are named after the interfaces. Thus the object named X1 IP will the correct choice for the Translated Source in those products, usually. Similar configurations can be done on other WANs, like X2, X3, etc. The TZ products instead use a friendlier name for the same network address object: WAN Primary IP. That object would be used as the Translated Source in those products. The TZ products also use friendlier names for the interfaces themselves. They are called LAN and WAN instead of X0 and X1. Thus the Inbound Interface and Outbound Interface would be set to WAN in those products, usually.
TIP:Routing All Traffic through the SonicWall allows an administrator to protect a user by enforcing Intrusion Prevention, Gateway Anti-Virus, Anti-Spyware, Client Anti-Virus, Content Filtering, and other policies on remote users’ traffic. On the UTM appliance which has subscriptions for the various Security Services mentioned above, the relevant configurations are done on the Network - Zones screen. There are enforcement checkboxes for the various Security Services, and usually they are turned on the for the LAN and WAN zones.
CAUTION: To protect traffic coming across a a 'Route all Traffic' WAN GroupVPN Policy, the administrator must edit the VPN zone and enable the checkboxes for the Intrusion Prevention, Gateway Anti-Virus, Anti-Spyware, Client Anti-Virus, and / or Content Filtering services.
Troubleshooting
- Verify WAN GroupVPN configuration is correct.
- Verify WAN GroupVPN is enabled.
- Check VPN Summary page or Log files to verify that the tunnel has been established.
- Review all configuration steps.