Filtering SonicWall event logs in SonicOS
Description
This article explains how to filter Logs on the SonicWall as per requirement to see selected log events.
Resolution for SonicOS 7.X
This release includes significant user interface changes and many new features that are different from the SonicOS 6.5 and earlier firmware. The below resolution is for customers using SonicOS 7.X firmware.
This article briefs about how to filter the event logs based on categories, Source IP, Destination IP, Interfaces, Ports, and Protocols.
Enabling Log Categories
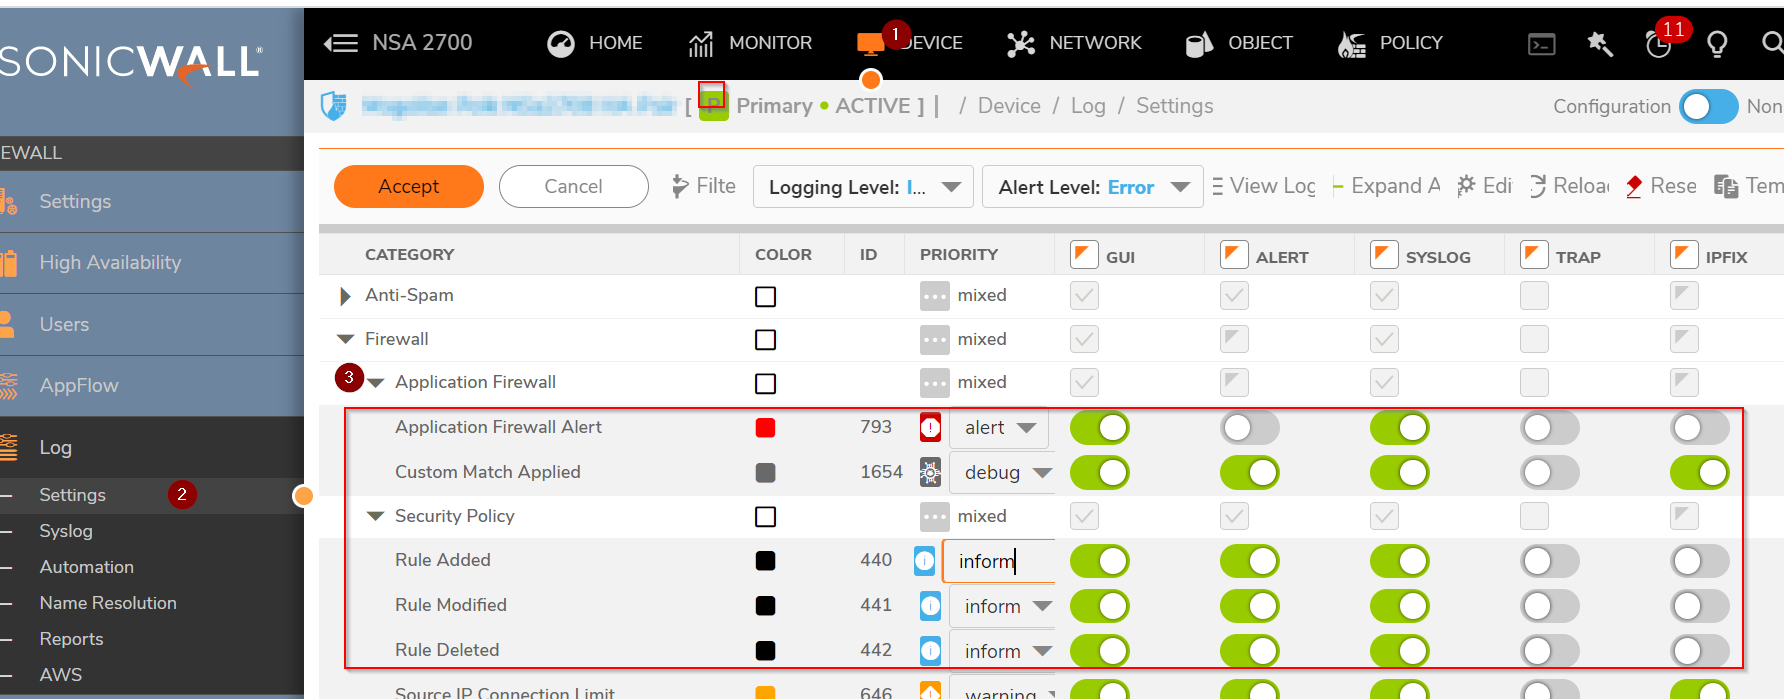
- Navigate to Device| Logs | Settings
- Select/ check categories that you would like to view in logs.
Filtering log based on Category
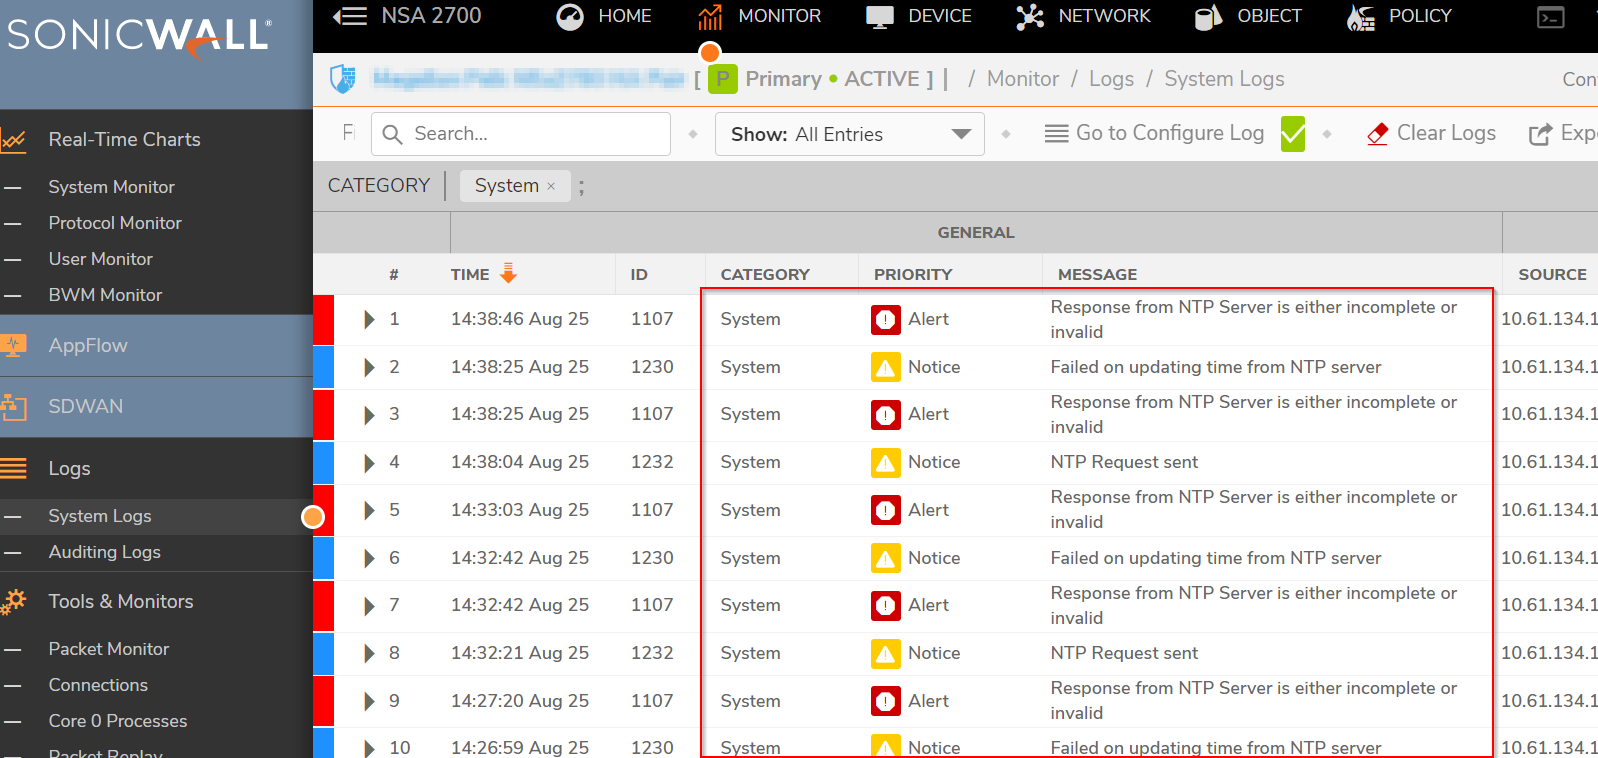
Navigate to Monitor| Logs | System Logs
Click on Filter View
Select System in Category drop-down box for which you would like to see traffic in log.

- Once filter is setup, the Event Logs will show logs only for the specified category.
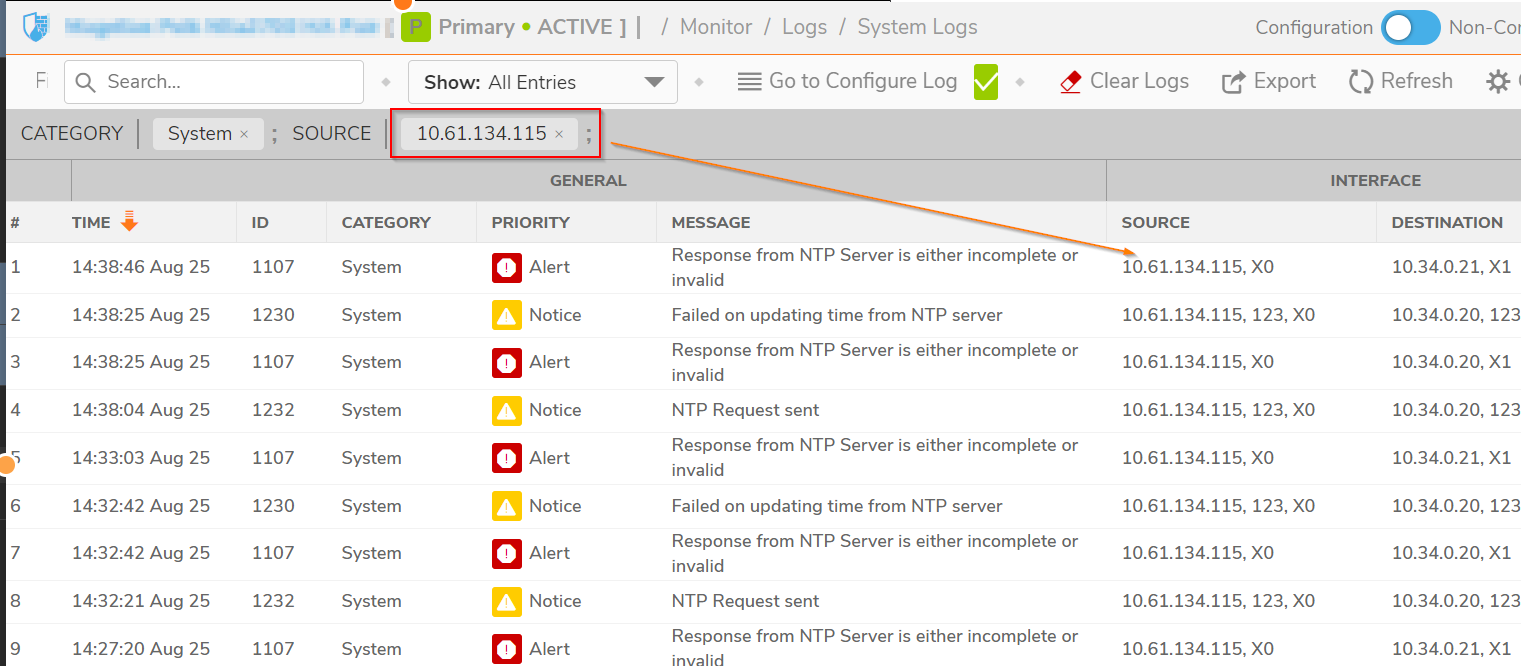
Filtering log based on Source IP
- Navigate to Monitor| Logs | System Logs
- Click on Filter View.
- Specify an IP (10.61.134.115) in the Source IP (Type any IP which you would like to see in log).
- Same procedure applies if we need to filter based on Destination IP for which you would like to see traffic in log.
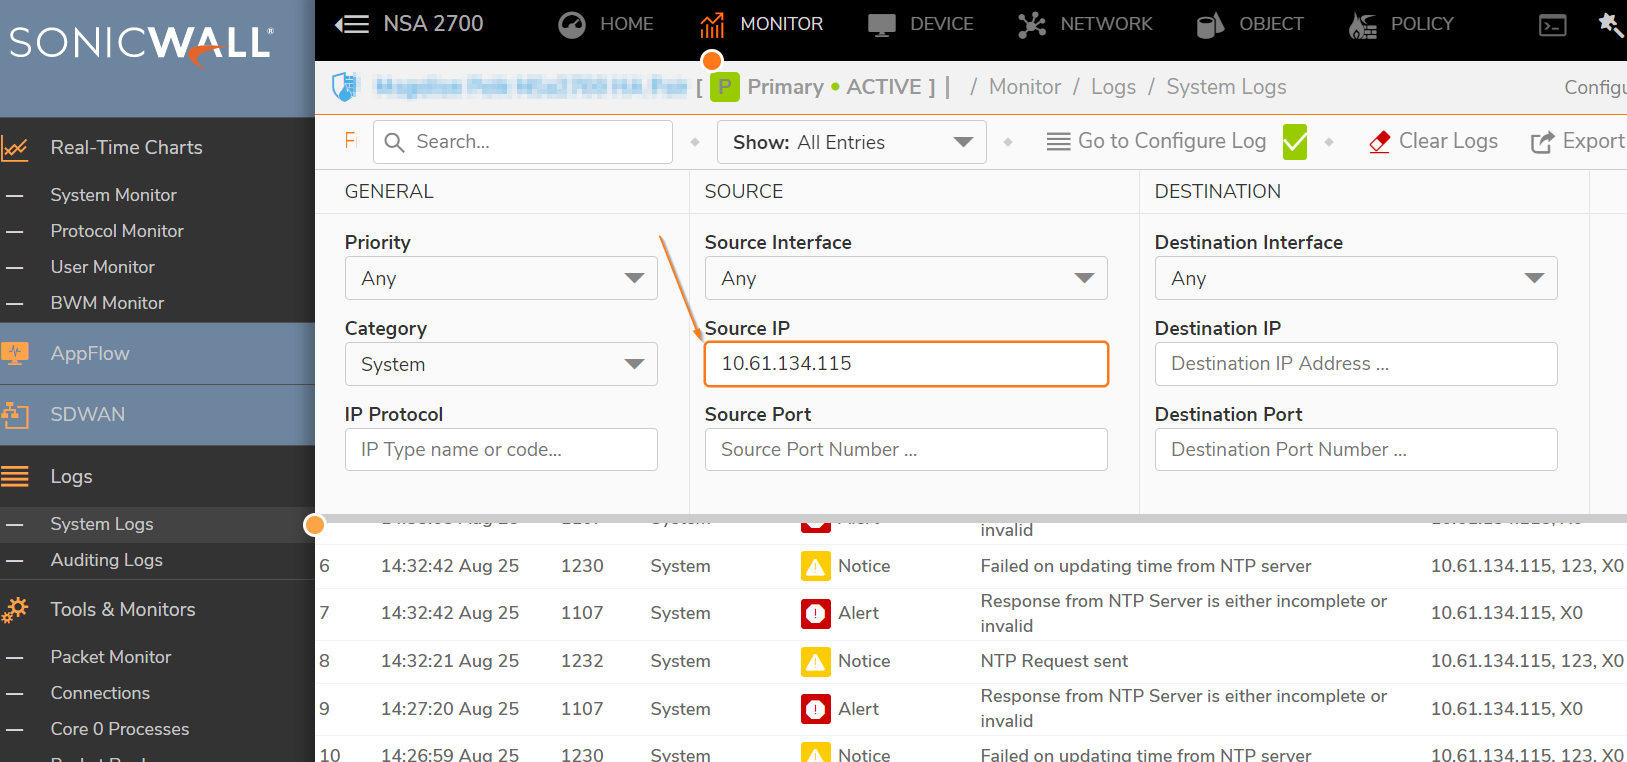
- Once filter is configured, all the logs with respect to the specified Source (10.61.134.115) will show up in the event logs.
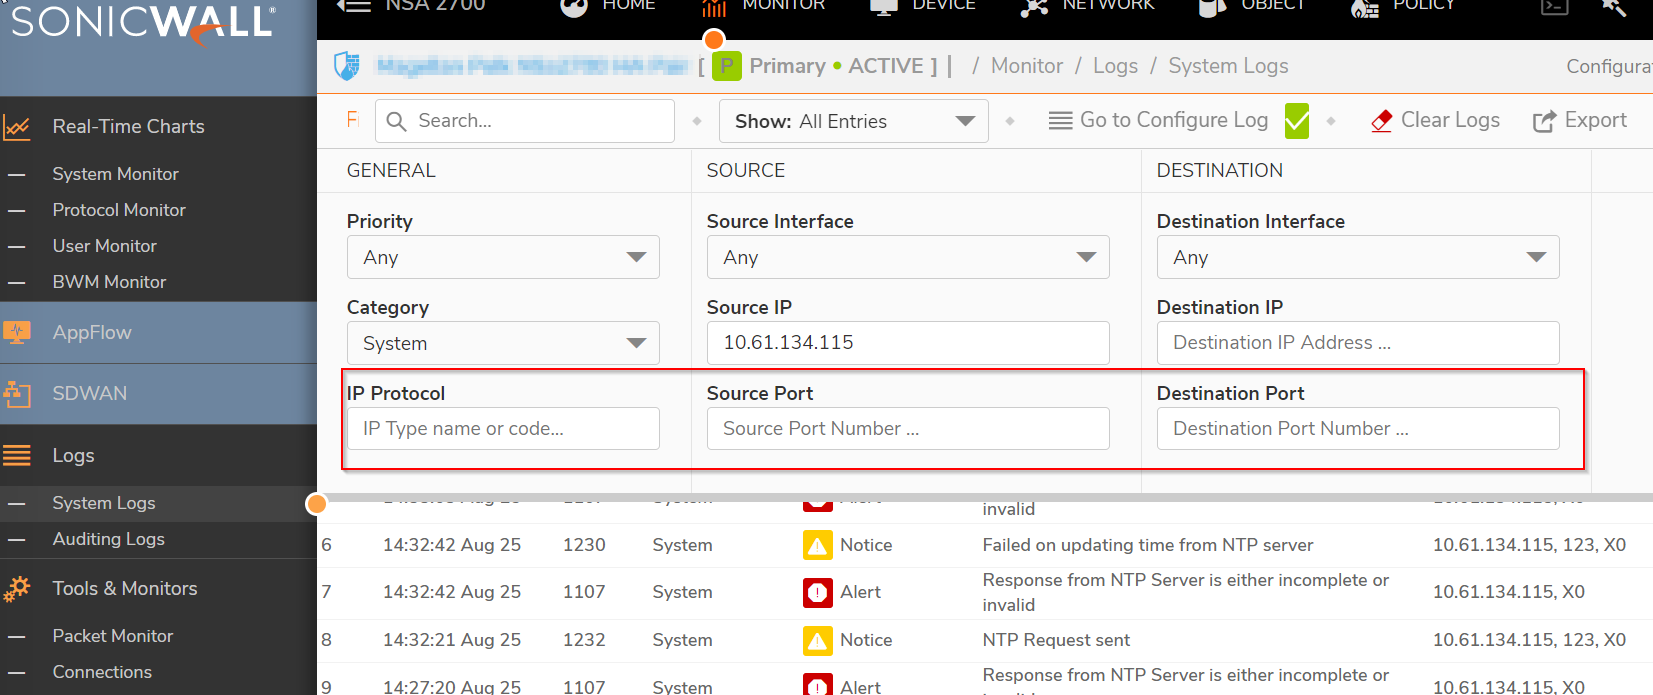
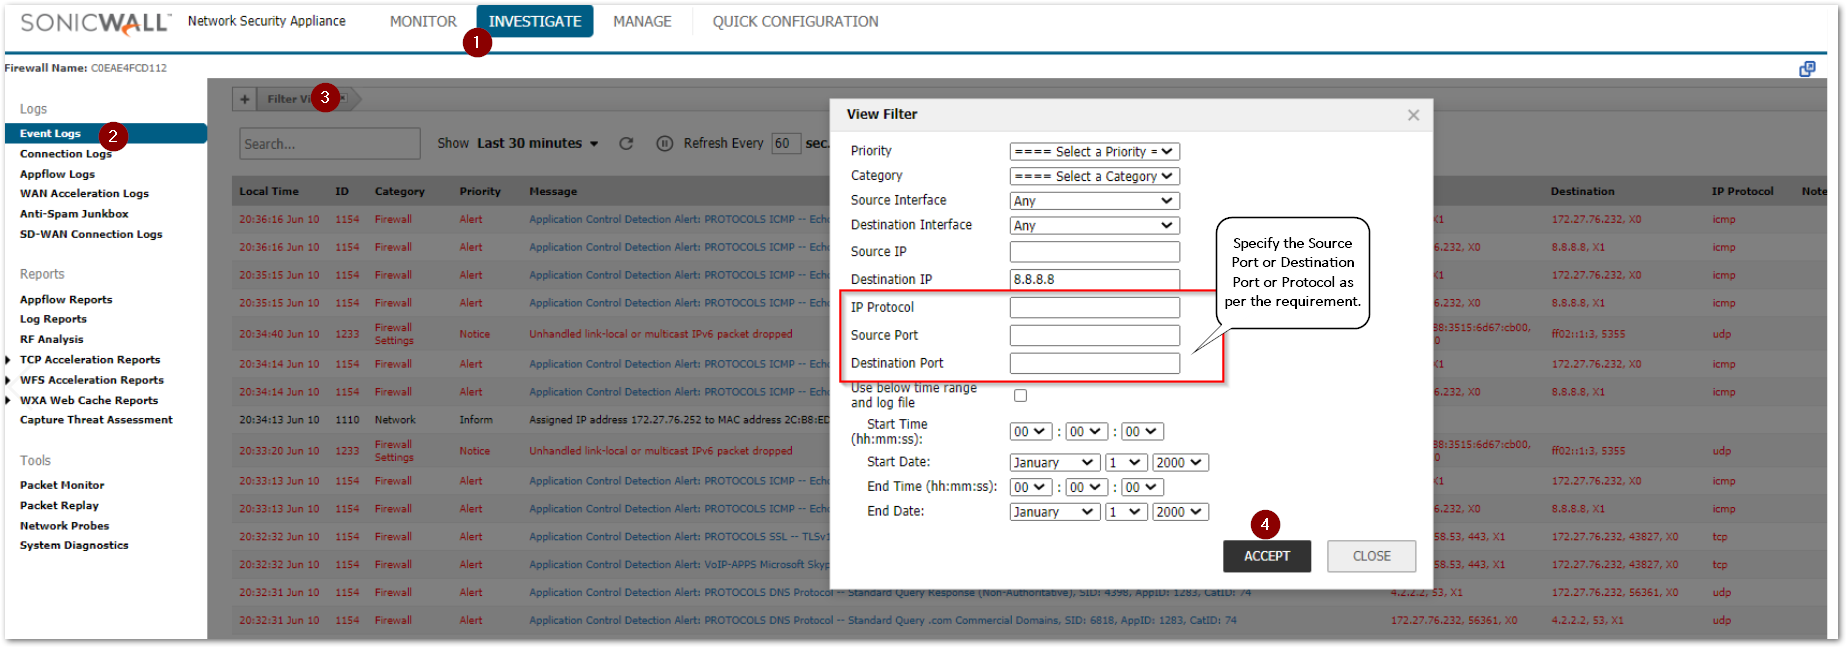
Filtering log based on Ports and Protocol
- Navigate to Monitor| Logs | System Logs
- Click on Filter View
- Specify the Source Port or Destination Port or Protocol for which you would like to see traffic in log.
Resolution for SonicOS 6.5
This release includes significant user interface changes and many new features that are different from the SonicOS 6.2 and earlier firmware. The below resolution is for customers using SonicOS 6.5 firmware.
This article briefs about how to filter the event logs based on categories, Source IP, Destination IP, Interfaces, Ports, and Protocols.
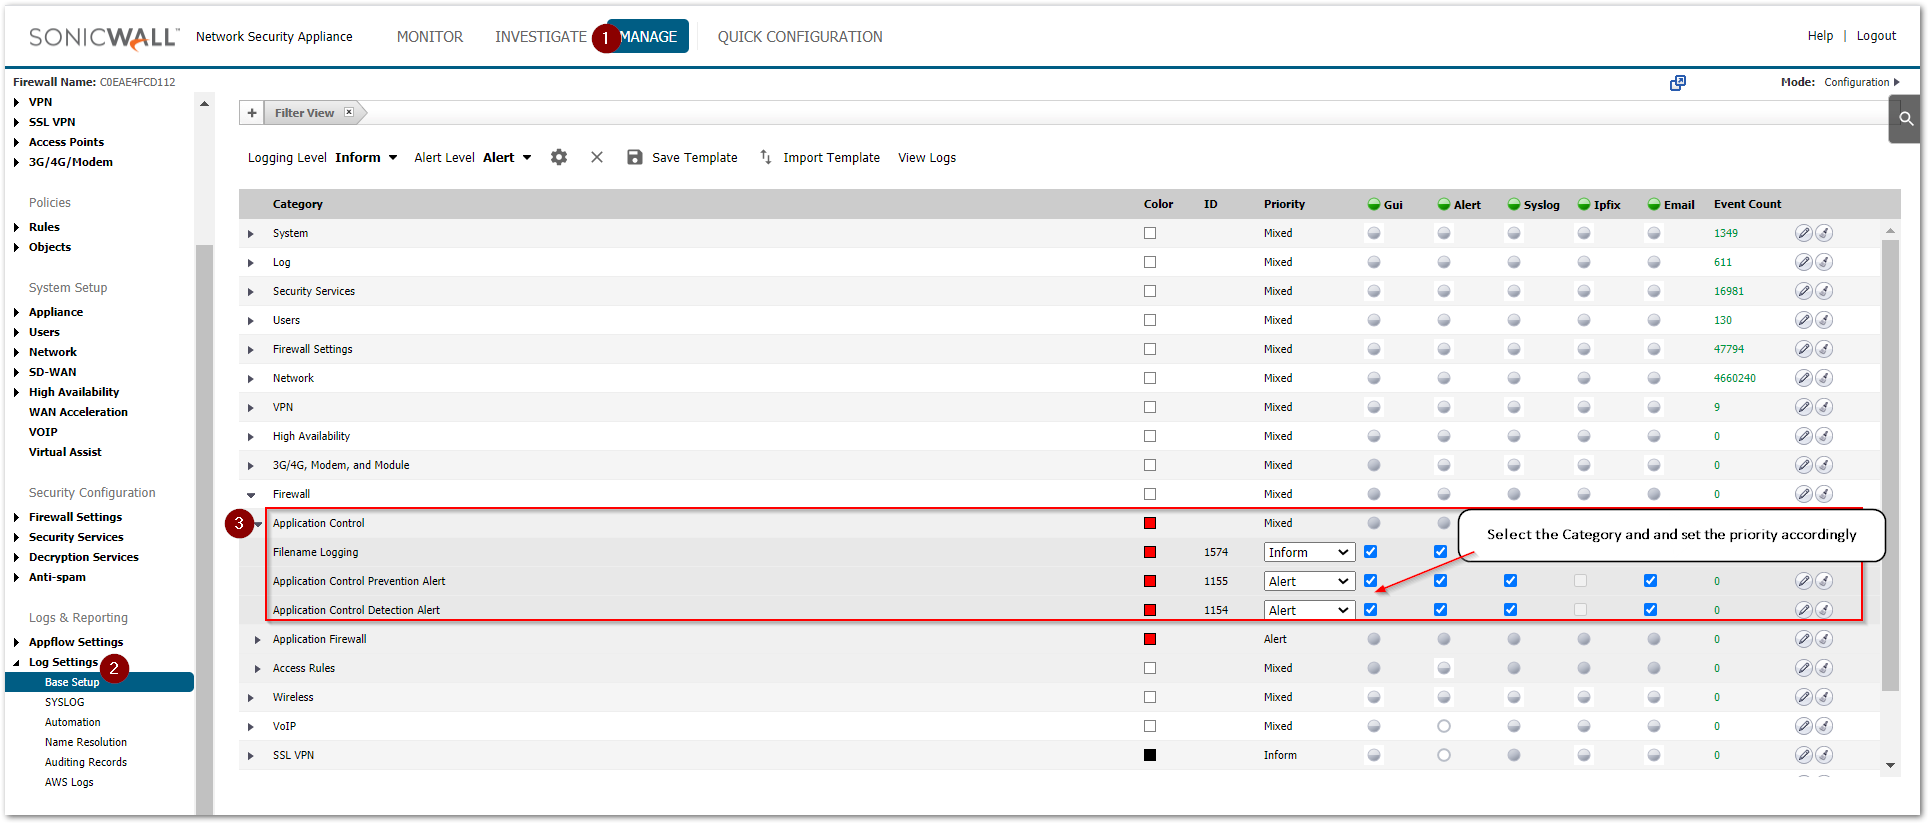
Enabling Log Categories
- Navigate to Manage| Logs &Reporting | Log Settings |Base Setup.
- Select/ check categories that you would like to view in logs.
- Click Accept button at the top of the page.
Filtering log based on Category
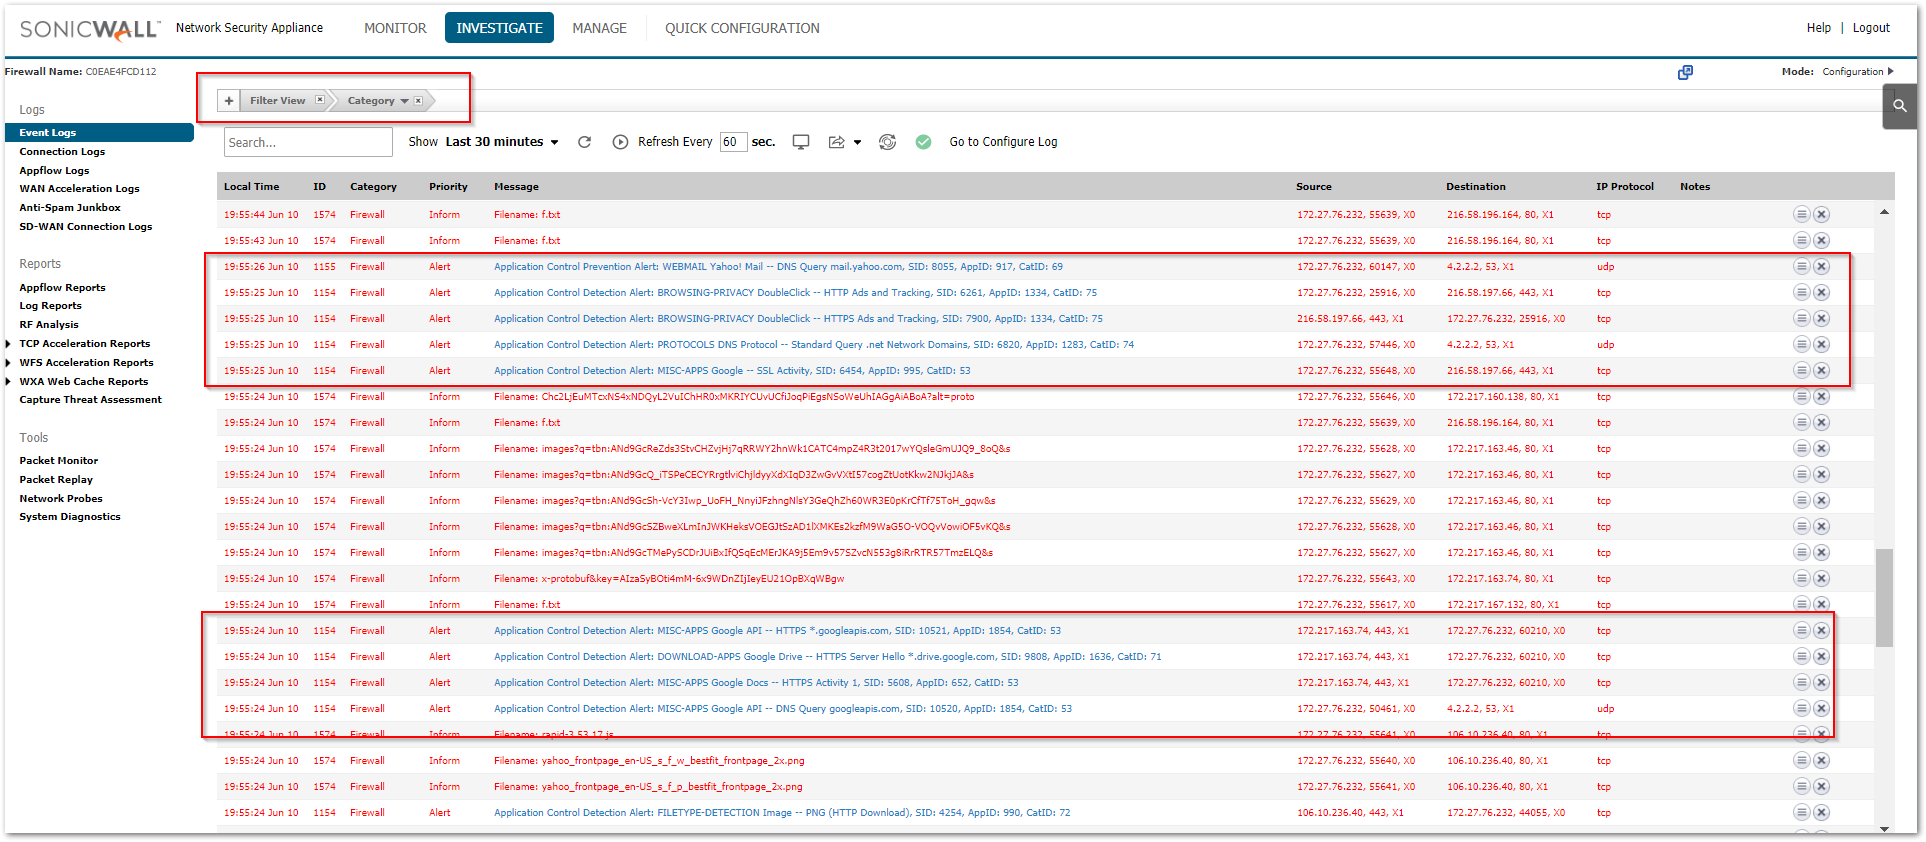
Navigate to Iinvestigate| Logs | Event Logs
Click on Filter View
Select Firewall in Category drop down box.
- Click Accept button to see only logs related to Firewall as below.

- Once filter is setup, the Event Logs will show logs only for the specified category.
Filtering log based on Source IP
- Navigate to Investigate| Logs | Event Logs.
- Click on Filter View.
- Specify an IP (172.27.76.232) in the Source IP (Type any IP which you would like to see in log).
- Click Accept button to see only logs related to traffic with source IP (172.27.76.232).
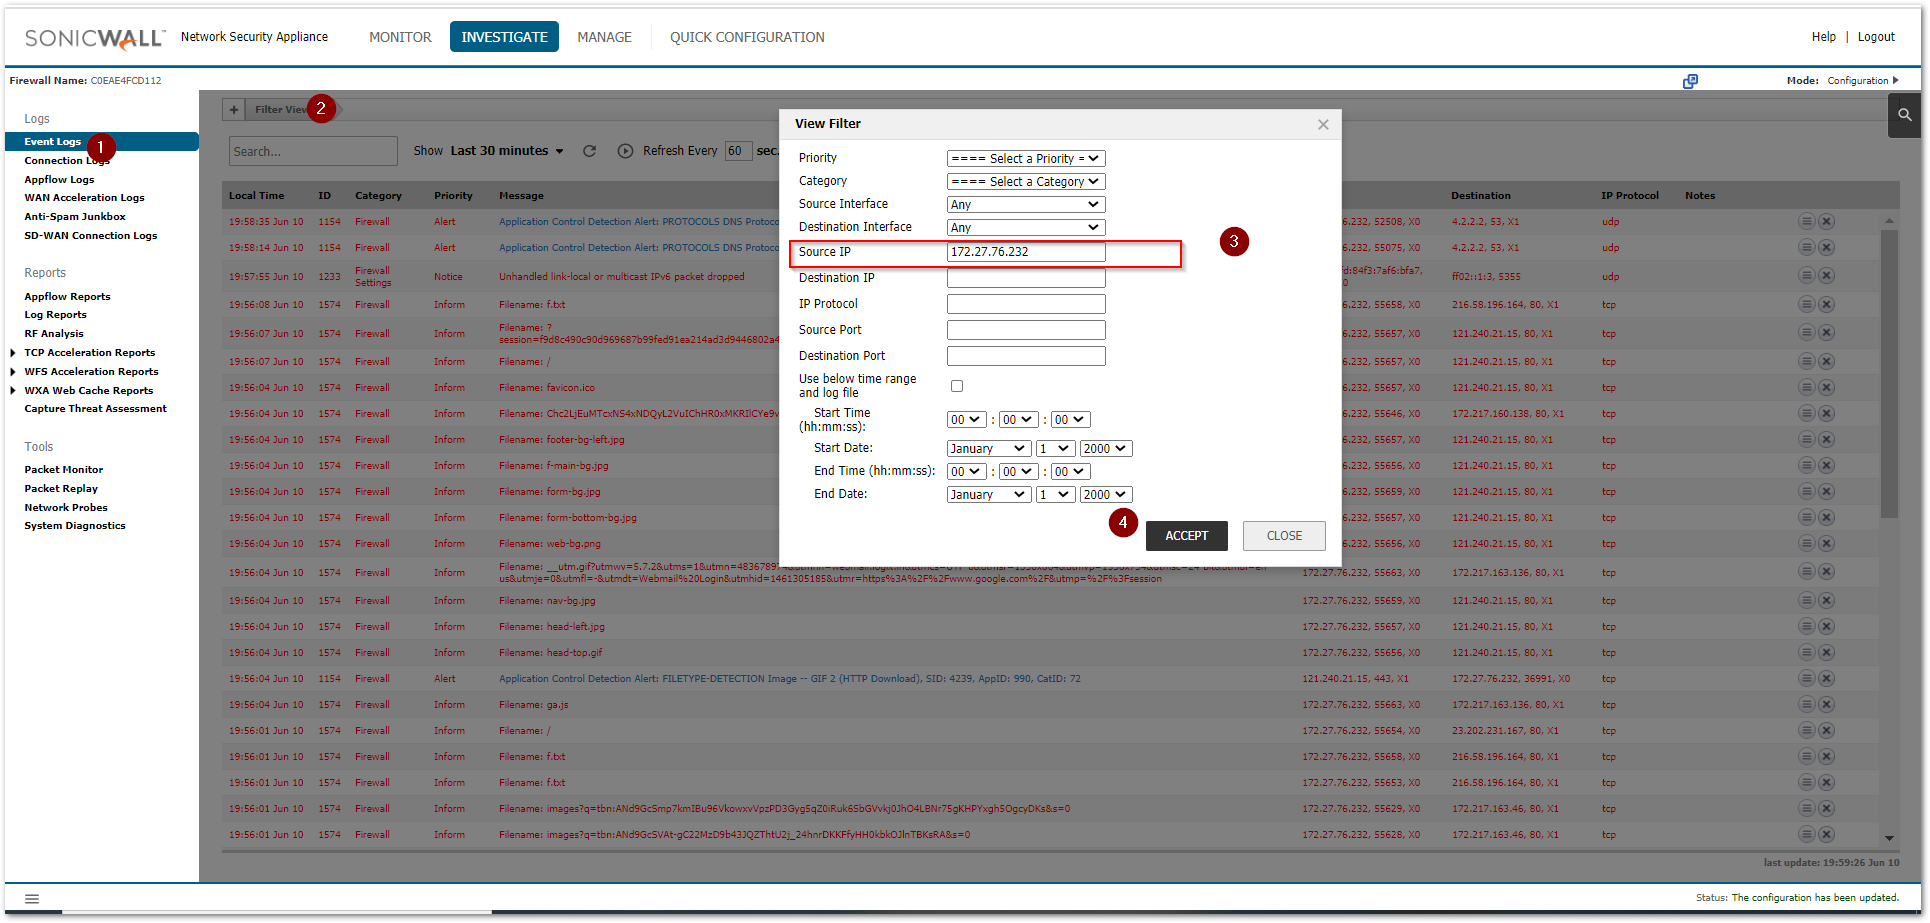
- Once filter is configured, all the logs with respect to the specified Source (172.27.76.232) will show up in the event logs.

Filtering log based on Destination IP
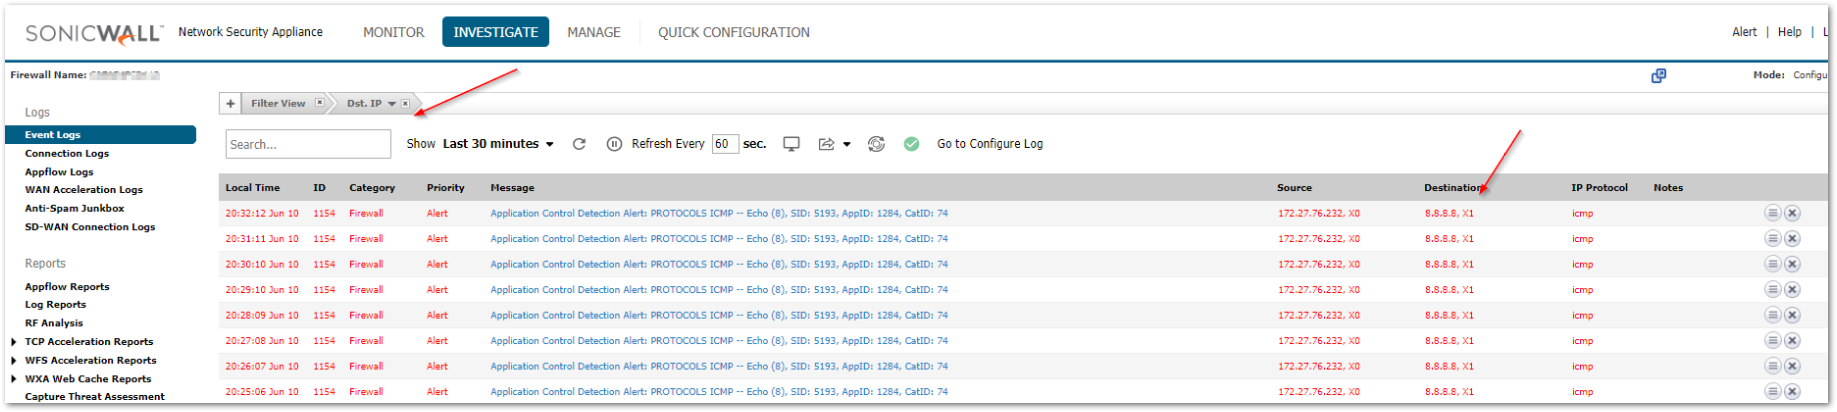
- Navigate to Investigate| Logs | Event Logs.
- Click on Filter View
- Specify an IP (8.8.8.8) in the Destination IP (Type any IP which you would like to see in log).
- Click Accept button to see only logs related to traffic with destination IP (8.8.8.8).
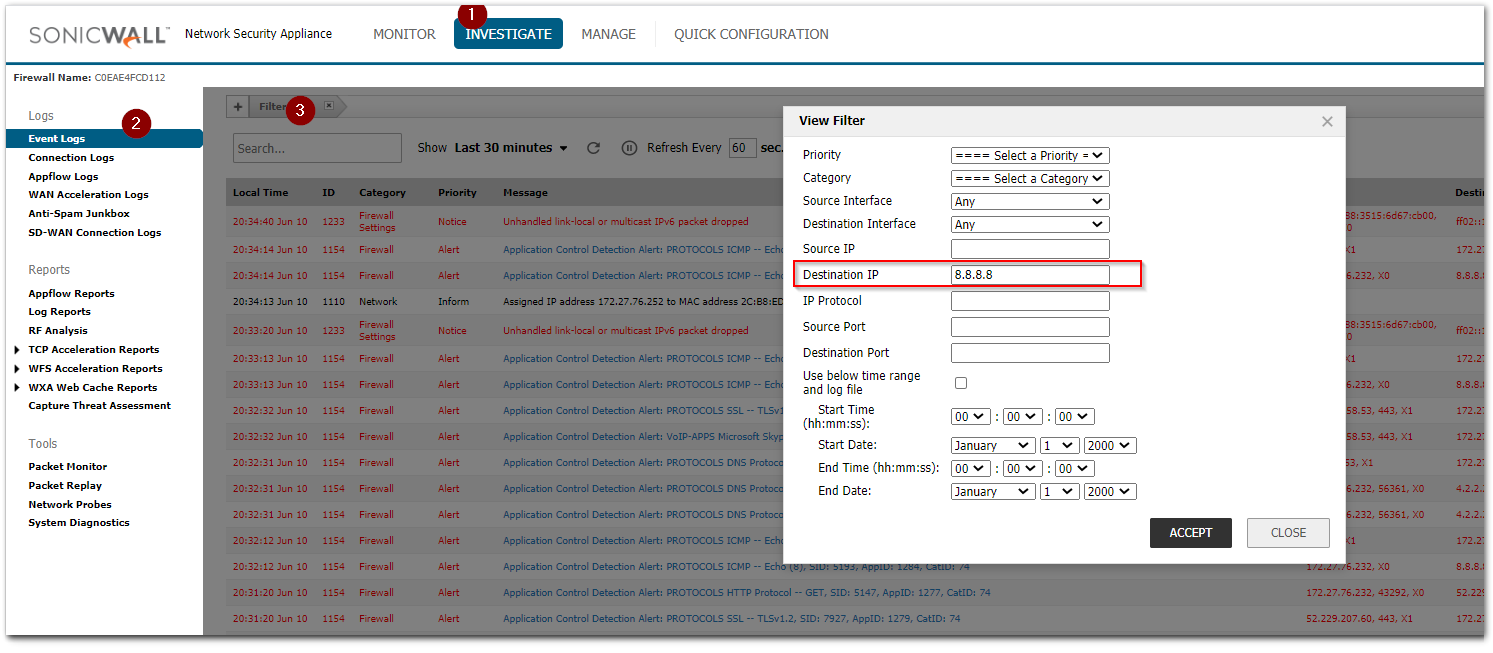
- Once the filter view is setup, all the logs with respect to the specified destination (8.8.8.8) will show up in the event logs.
Filtering log based on Interfaces
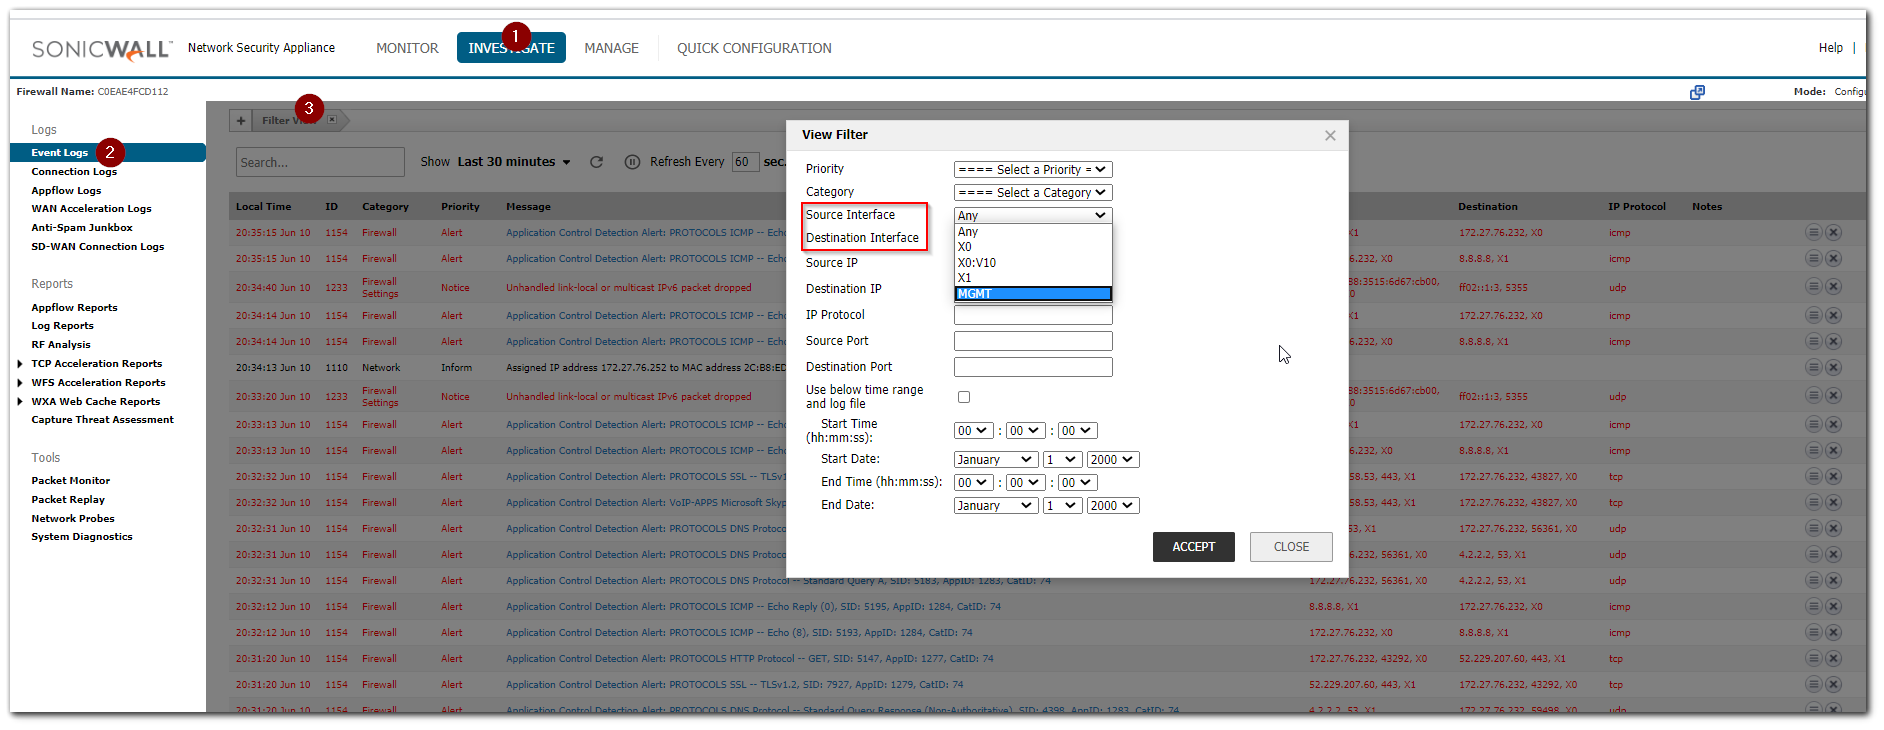
- Navigate to Investigate| Logs | Event Logs
- Click on Filter View
- Select Source Interface or Destination Interface for which you would like to see traffic in log
- Click Accept button to see only logs related to traffic with selected interface.
Filtering log based on Ports and Protocol
- Navigate to Investigate| Logs | Event Logs
- Click on Filter View
- Specify the Source Port or Destination Port or Protocol for which you would like to see traffic in log
- Click Accept button to see only logs related to traffic with selected ports or protocols.
Resolution for SonicOS 6.2 and Below
The below resolution is for customers using SonicOS 6.2 and earlier firmware. For firewalls that are generation 6 and newer we suggest to upgrade to the latest general release of SonicOS 6.5 firmware.
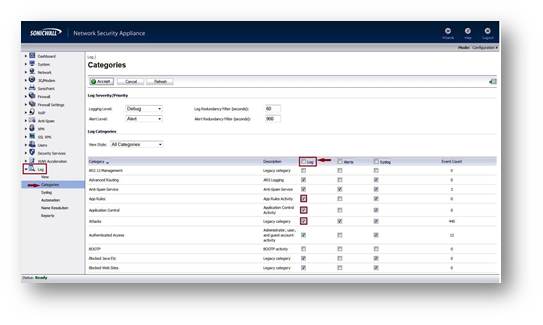
Enabling Log Categories
Log in to SonicWall Management Page and follow below steps
- Navigate to Log | Categories.
- Select/ check categories which you would like to view in log under Log Check box.
- Click Accept Button at the top of the page.
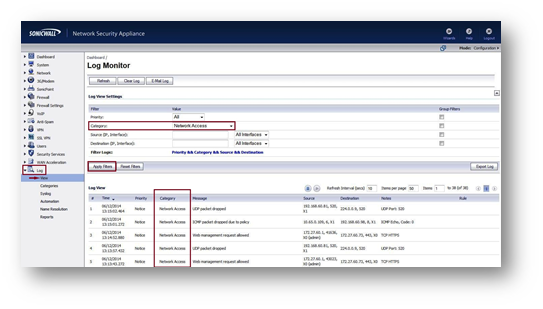
Filtering log based on Category
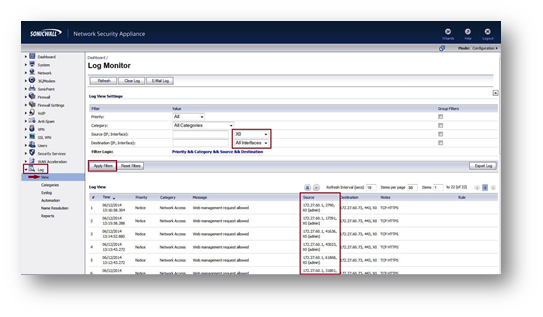
Log in to SonicWall Management Page and follow below steps - Navigate to Log | View.
- Select Network Access in Category drop down box.
- Click Apply Filter Button to see only logs related to Network Access as below.
Filtering log based on Source IP
Log in to SonicWall Management Page and follow below steps - Navigate to Log | View.
- Type 192.168.60.81 (Type any IP which you would like to see in log) in Source (IP, Interface).
- Click Apply Filter Button to see only logs related to traffic with source IP (192.168.60.81).

Filtering log based on Destination IP
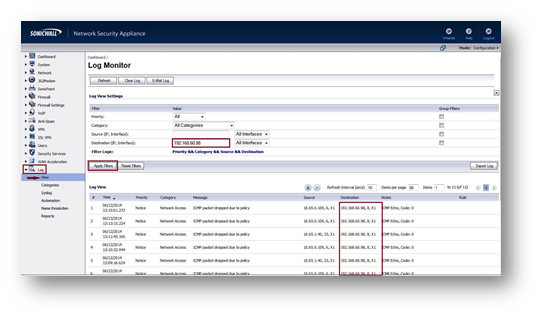
Log in to SonicWall Management Page and follow below steps - Navigate to Log | View.
- Type 192.168.60.98 (Type any IP which you would like to see in log) in Destination (IP, Interface).
- Click Apply Filter Button to see only logs related to traffic with source IP (192.168.60.98).
Filtering log based on Interfaces
Log in to SonicWall Management Page and follow below steps - Navigate to Log | View.
- Select X0 (select any interface for which you would like to see traffic in log) in Source (IP, Interface) & Destination (IP, Interface).
- Click Apply Filter Button to see only logs related to traffic with selected interface.