Configuring RADIUS and LDAP authentication concurrently
Description
This article illustrates a scenario wherein the primary authentication in the SonicWall has been set to LDAP but since LDAP does not usually support CHAP/MSCHAP authentication, L2TP VPN clients and other CHAP/MSCHAP authentication cannot be authenticated by their AD user credentials.
The solution is to configure the new feature RADIUS may also be required for CHAP to automatically divert CHAP/MSCHAP authentications to RADIUS.
This article assumes that L2TP settings have been configured in the SonicWall and describes only the configuration needed for L2TP authentication.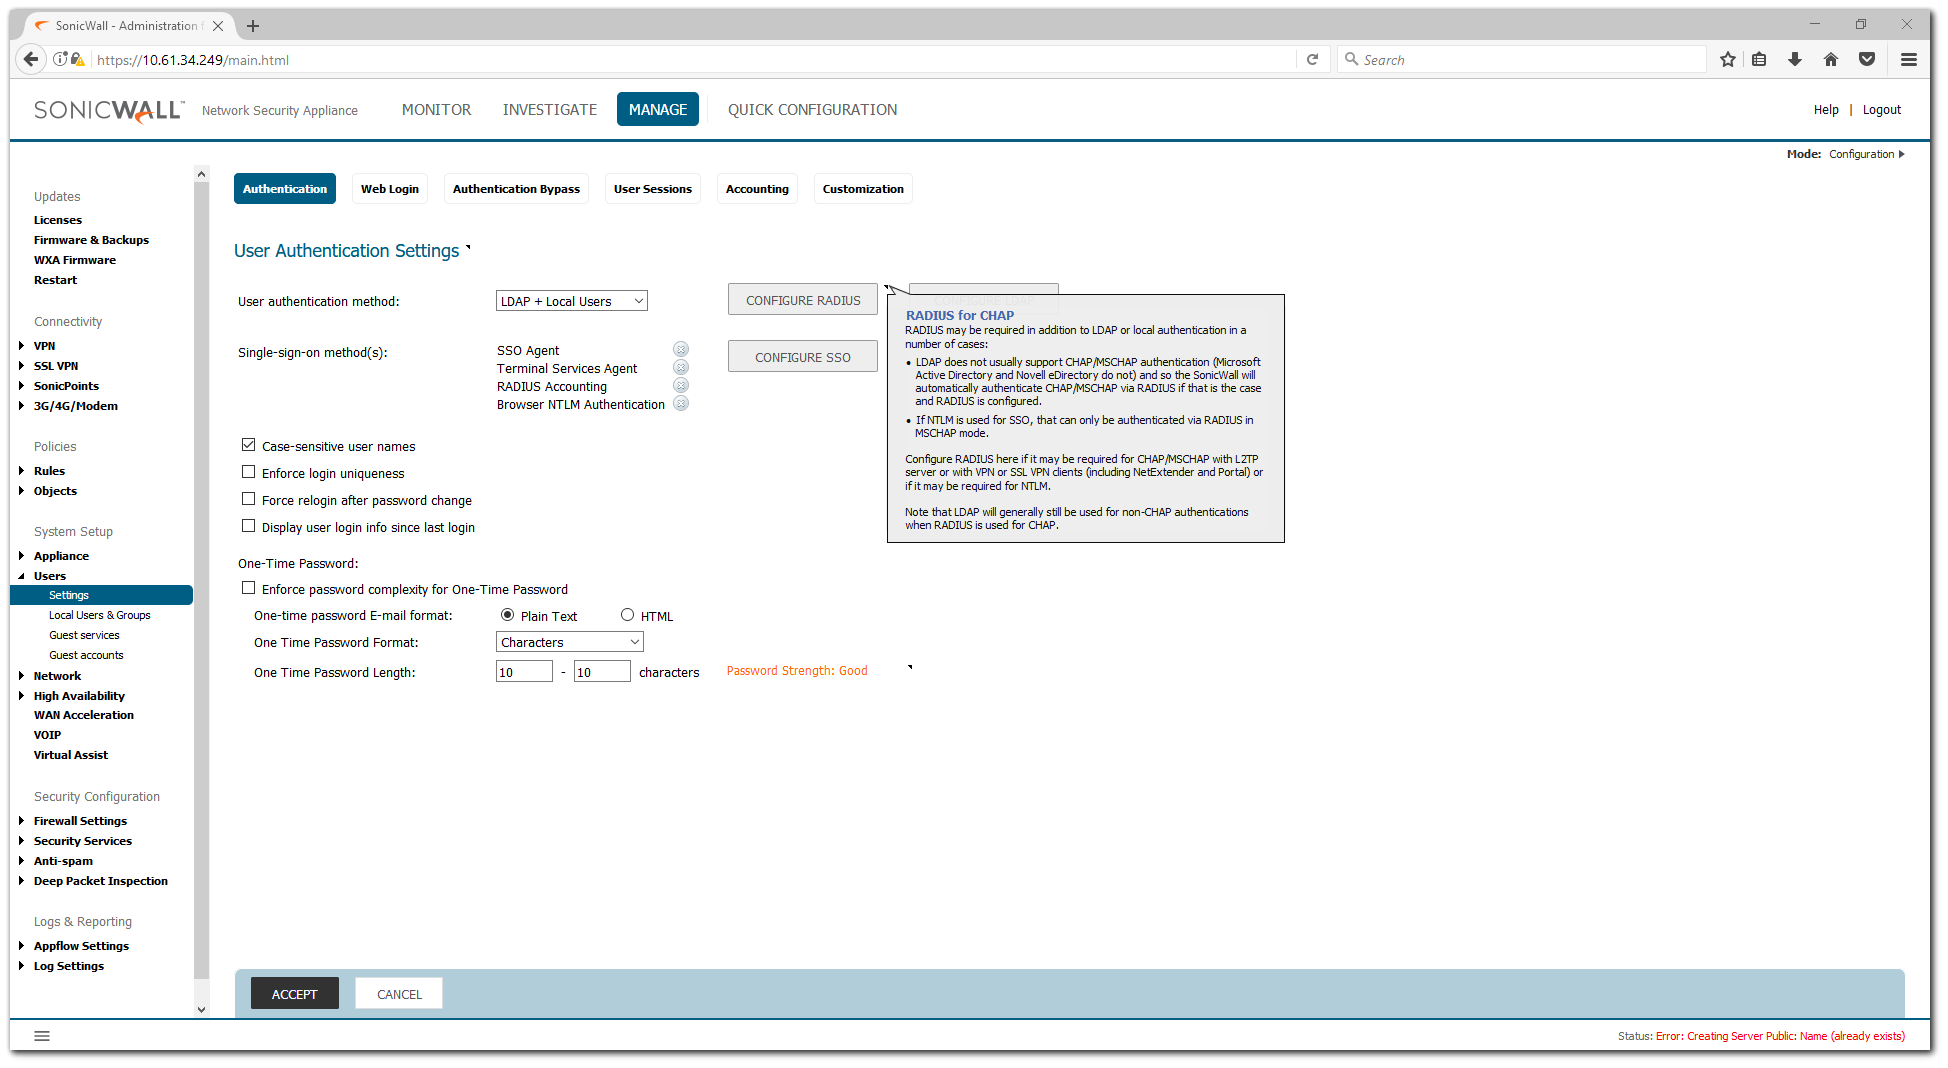
Resolution for SonicOS 7.X
This release includes significant user interface changes and many new features that are different from the SonicOS 6.5 and earlier firmware. The below resolution is for customers using SonicOS 7.X firmware.
Creating User Groups and configuring User Management for RADIUS Authentication in Active Directory
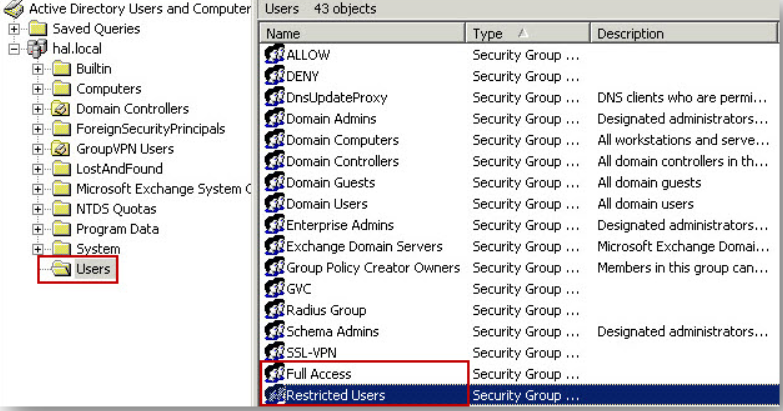
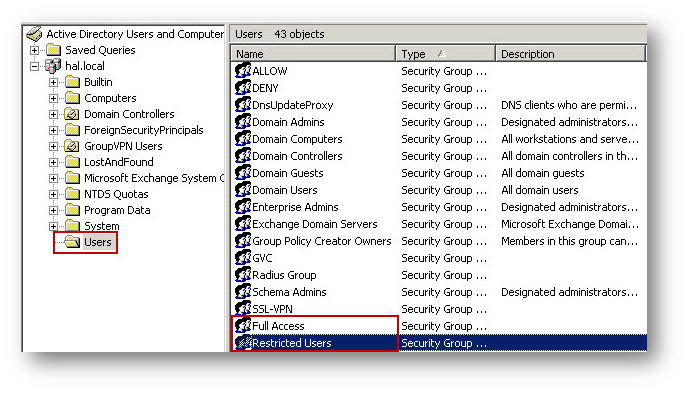
- Open Active Directory Users and Computers and create a user group in the Users folder.
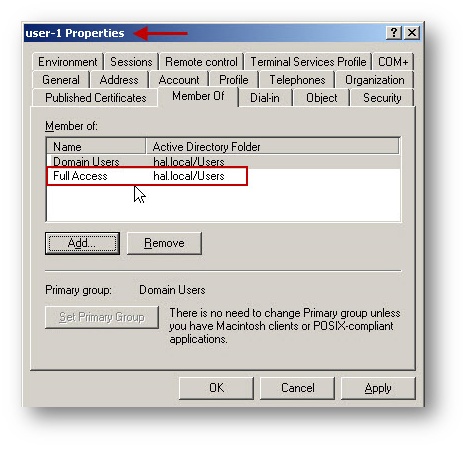
- Create a user and add the user as a member of the new User Group.

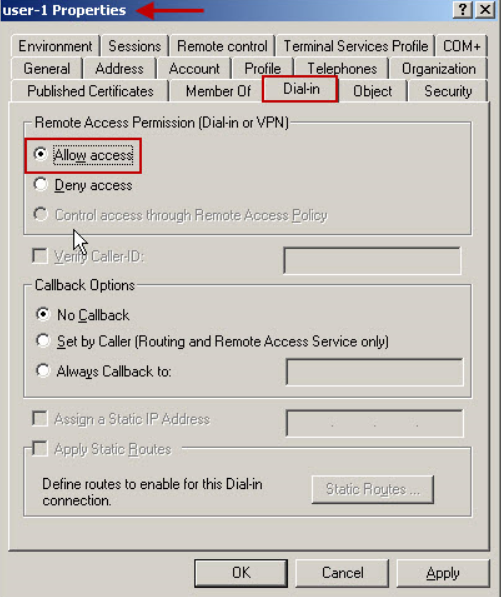
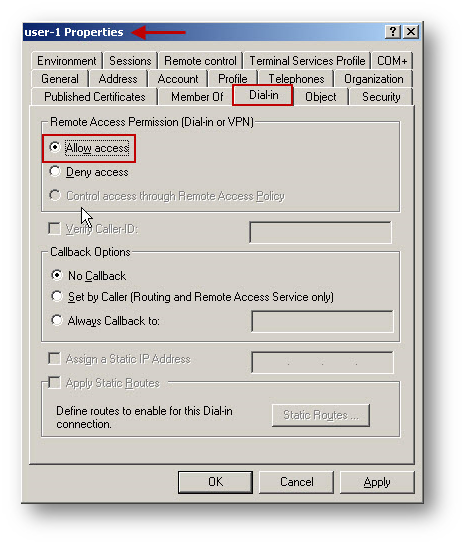
- Select the Dial-in tab and enable the Allow access option under Remote Access Permission.
Configuring the IAS Server to Support RADIUS Clients
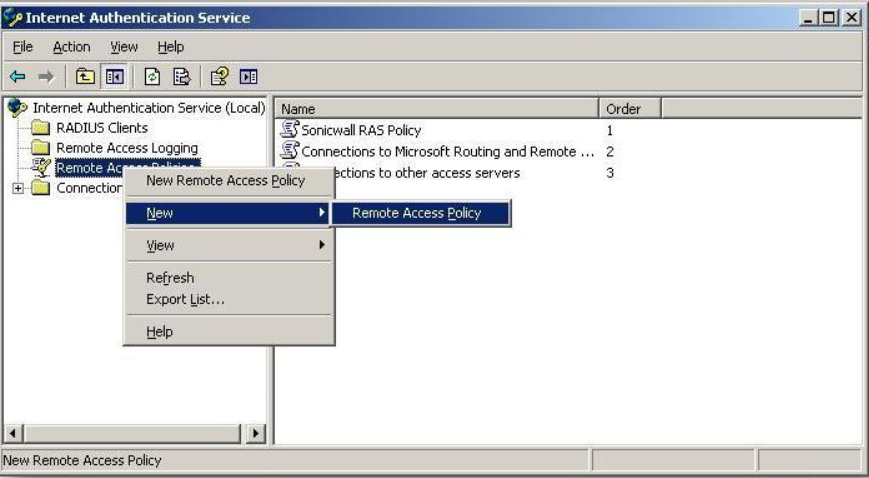
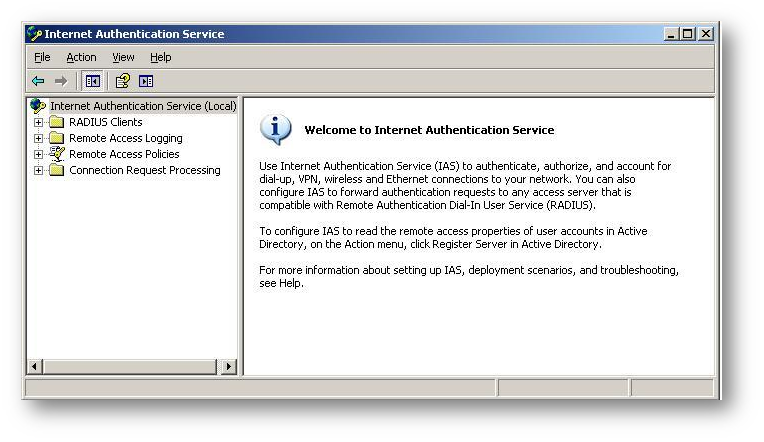
- Launch the IAS Console by clicking on Start | All Program | Administrative Tools | Internet Authentication Service. The following IAS console will appear.
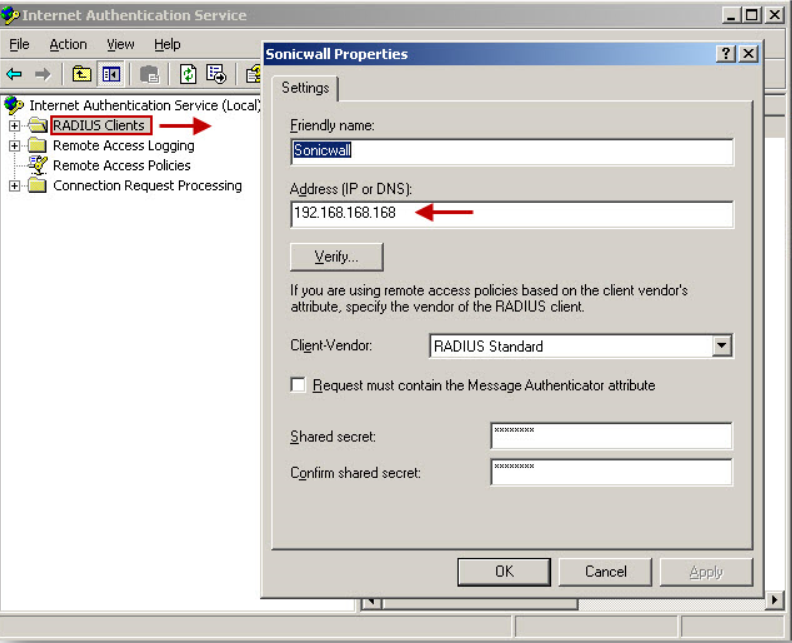
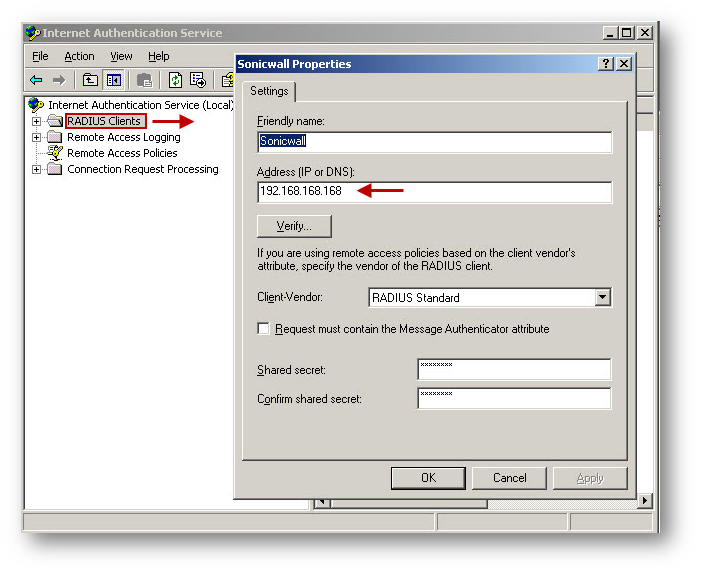
- Right click the RADIUS Clients folder in the left pane and select New RADIUS Client from the menu.
- Enter a name for the new RADIUS client and enter the LAN IP Address of the SonicWall.
- Select RADIUS Standard, (also the default option), enter a Shared Secret. This shared secret is needed later on the SonicWall security appliance, so note this for future reference.
- Click Finish.

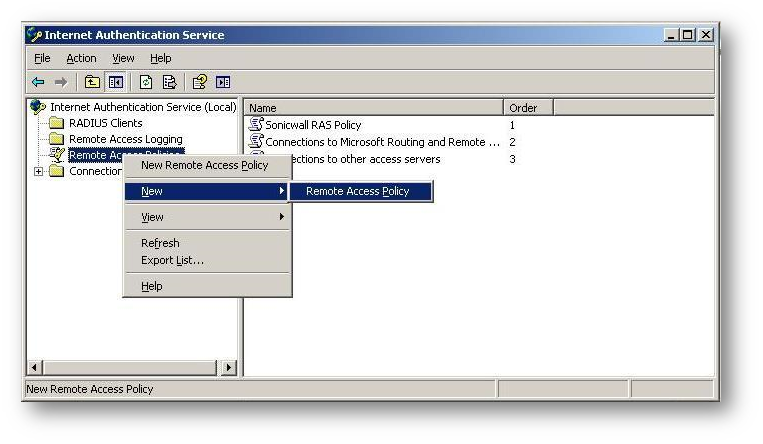
- To setup the access criteria for users, right click on the Remote Access Policies and select New Remote Access Policy.
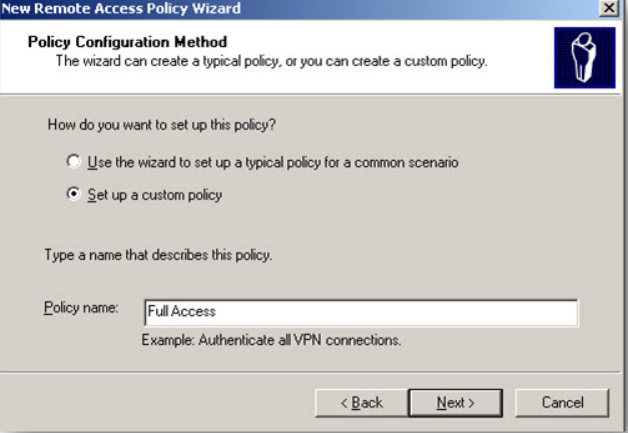
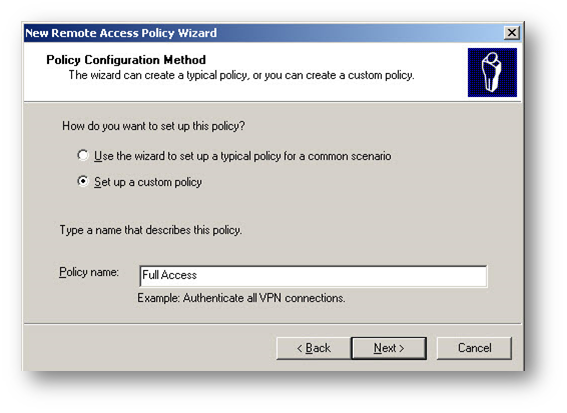
- Click Next on New Policy Wizard. Select Set up a custom policy radio button and then enter a name for this policy.
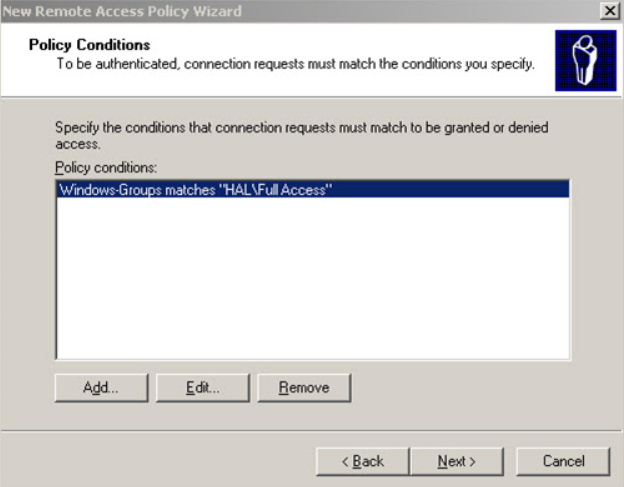
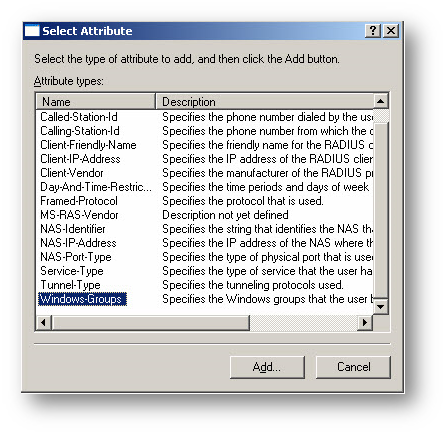
- Click Add on the Policy Conditions window.
- From this list, select Windows Groups, and click OK. By selecting Windows Groups, you can authenticate a user who is a member of a User Group in the Windows AD.

- Click Add, then enter the Windows User Group "Full Access". Click OK.

- Back on the New Remote Access Policy window, click Next.
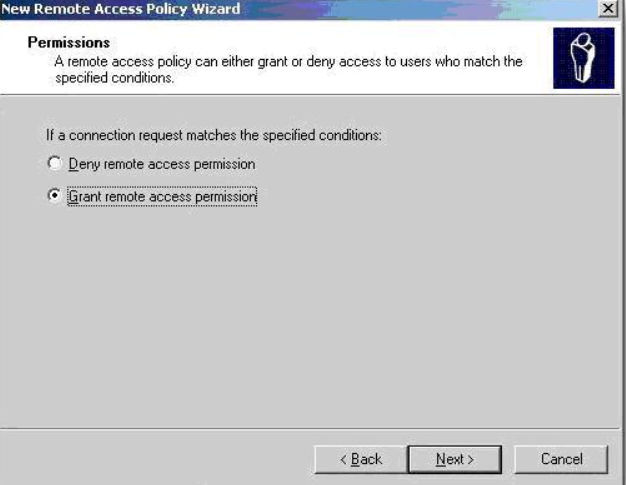
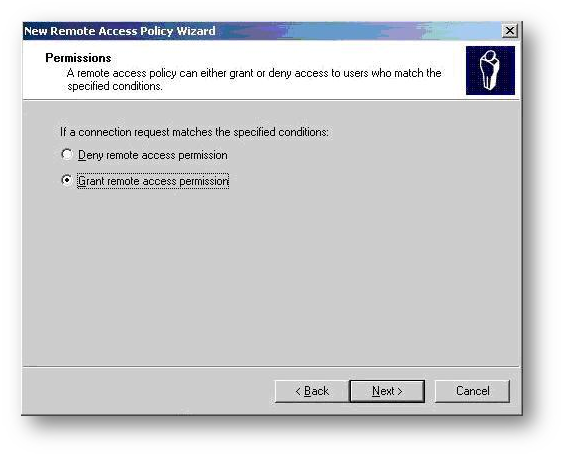
- Select the Grant remote access permission radio button under the option If a connection request matches the specified conditions.
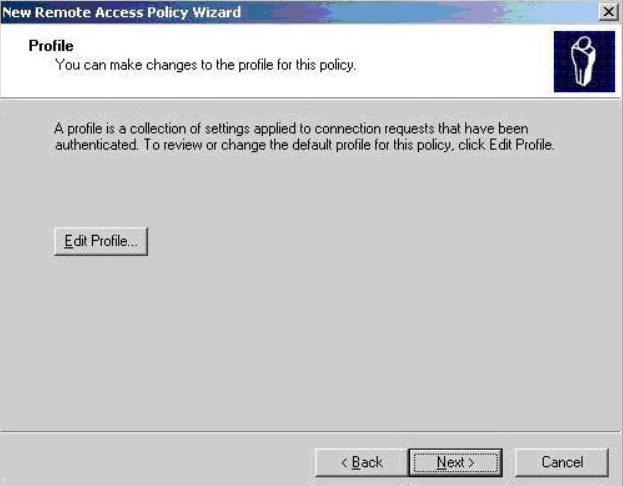
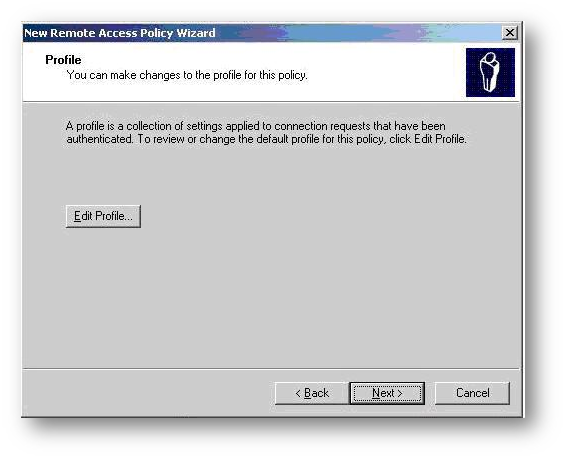
- On the Profile window click on the Edit Profile button.
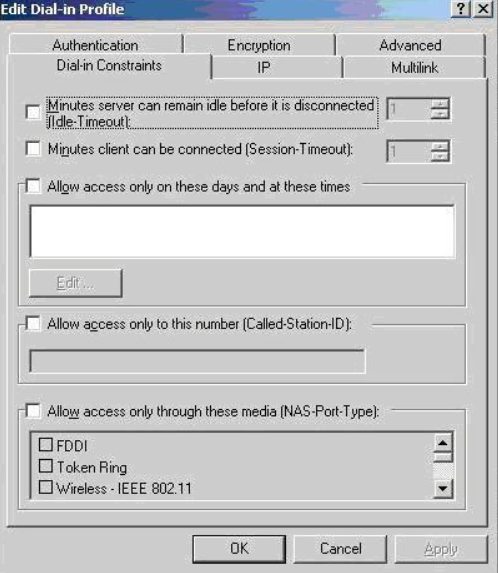
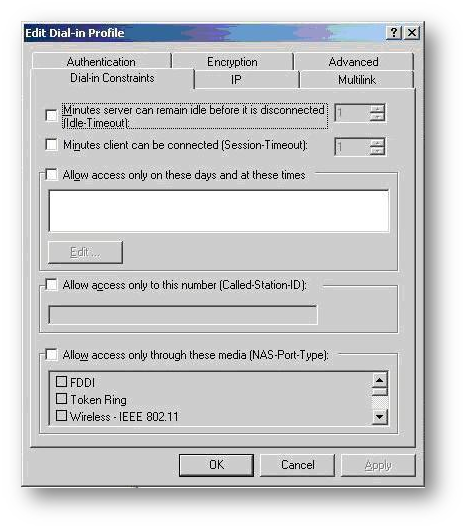
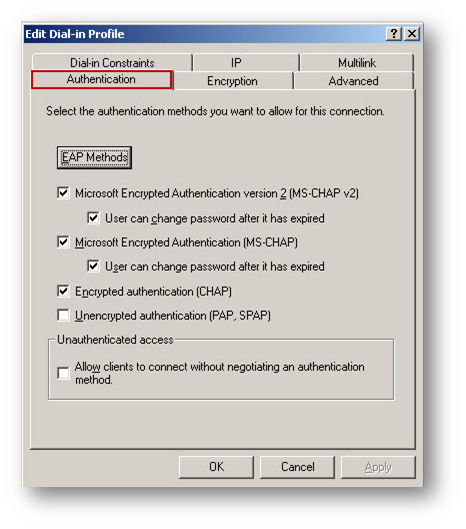
- The Edit Dial-in Profile window will appear. Click on the Authentication tab.
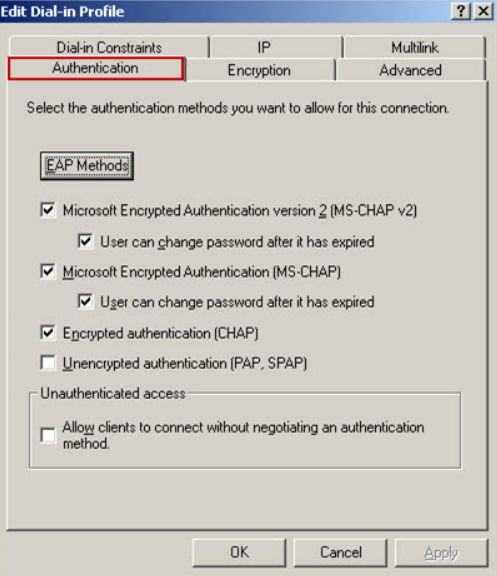
- Under the Authentication tab select MS-CHAP-V2, MS-CHAP and PAP as authentication method.
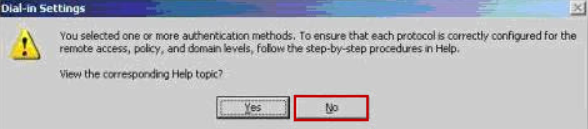
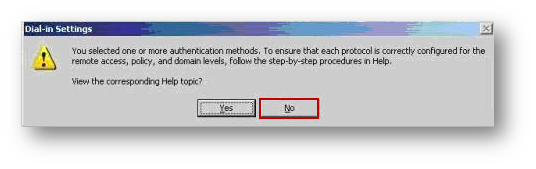
- The following message box appears, Click No on the help message box.
- Click Next on the Policy Window and then click Finish to complete.
 TIP: This completes the IAS configuration. If you have other groups on the AD that needs different access, you can add more Remote authentication policies.
Enabling Reversibly Encrypted Passwords
 NOTE: Reversibly encrypted passwords are saved during the change-password process, so existing users must change their passwords to use CHAP. For a Windows 2000-based remote access server that is a member of a domain, you can select the Store password using reversible encryption for all users in the domain option on the domain server as described below.
Alternatively, you can enable reversible storage of passwords for individual users. By using the Directory Services snap-in, you can select this feature through the properties of an individual user. Again, note that reversibly encrypted passwords are saved during the change-password procedure, so existing users must change their passwords to use CHAP.Enabling reversibly encrypted passwords (CHAP) in a domain (Active Directory server) Group Policy
- Open Active Directory Users and Computers.
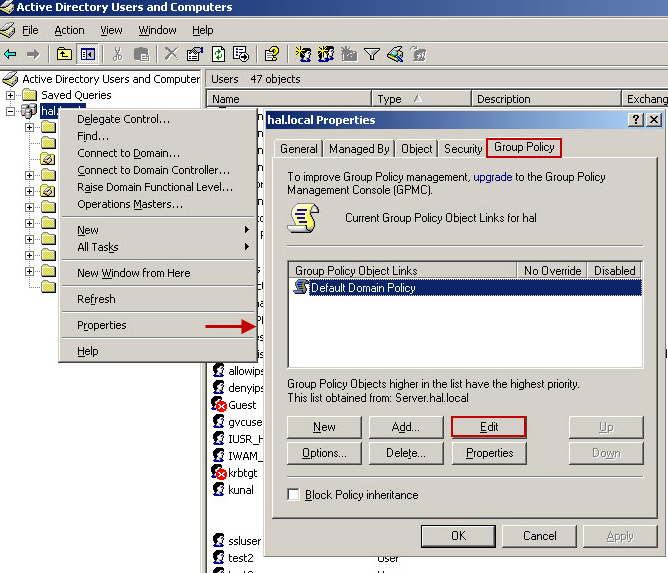
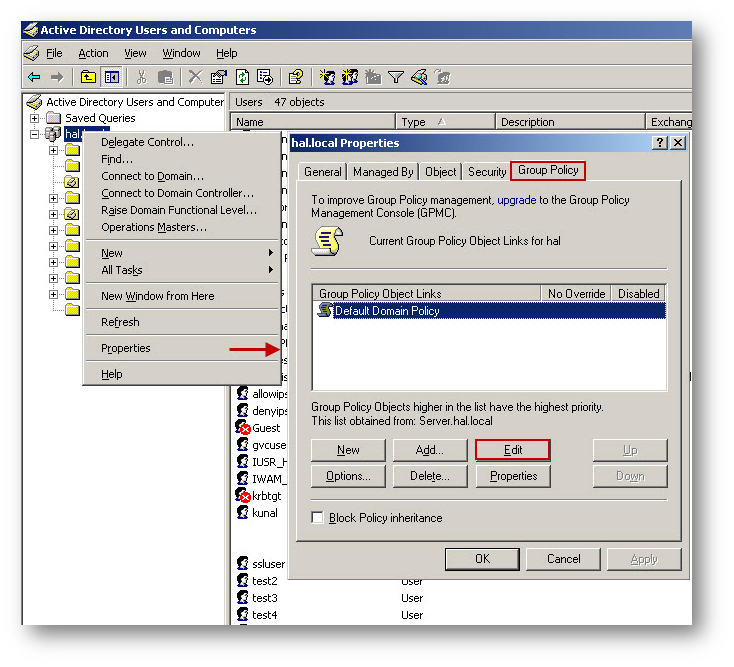
- In the console tree, double-click Active Directory Users and Computers, right-click the domain name, and then click Properties.
- On the Group Policy tab, click Default Domain Policy, and then click Edit.
- In the console tree, click on Windows Settings.
- Click Security Settings.
- Click Accounting Policies.
- Click Password Policy.
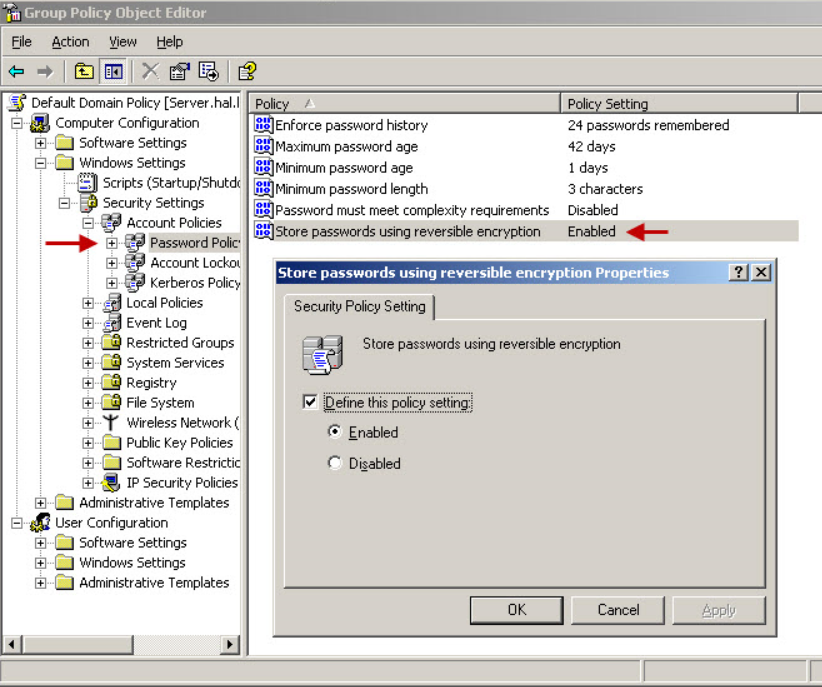
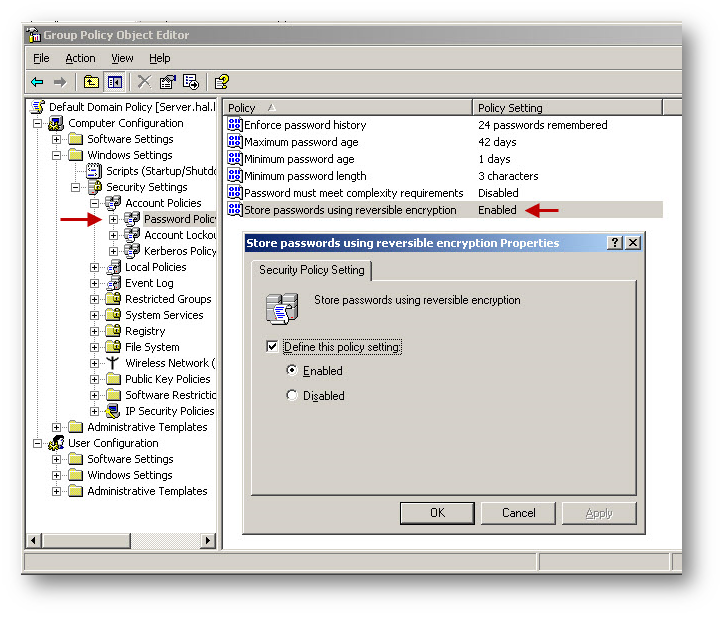
- In the details pane, double-click Store password using reversible encryption for all users in the domain.
- Click Enabled, and then click OK.
To enable reversibly encrypted passwords (CHAP) in a domain (stand-alone server) Local Security Policy
- Start | Run | gpedit.msc.
- In the console tree, select Computer Configuration -| Windows Settings -| Security Settings -| Account Policy-| Password Policy.
- Enable Store password using reversible encryption.
Configuring SonicWall User Settings for RADIUS Authentication.
- Login to the SonicWall management GUI.
- Navigate to Device | Users | Settings.
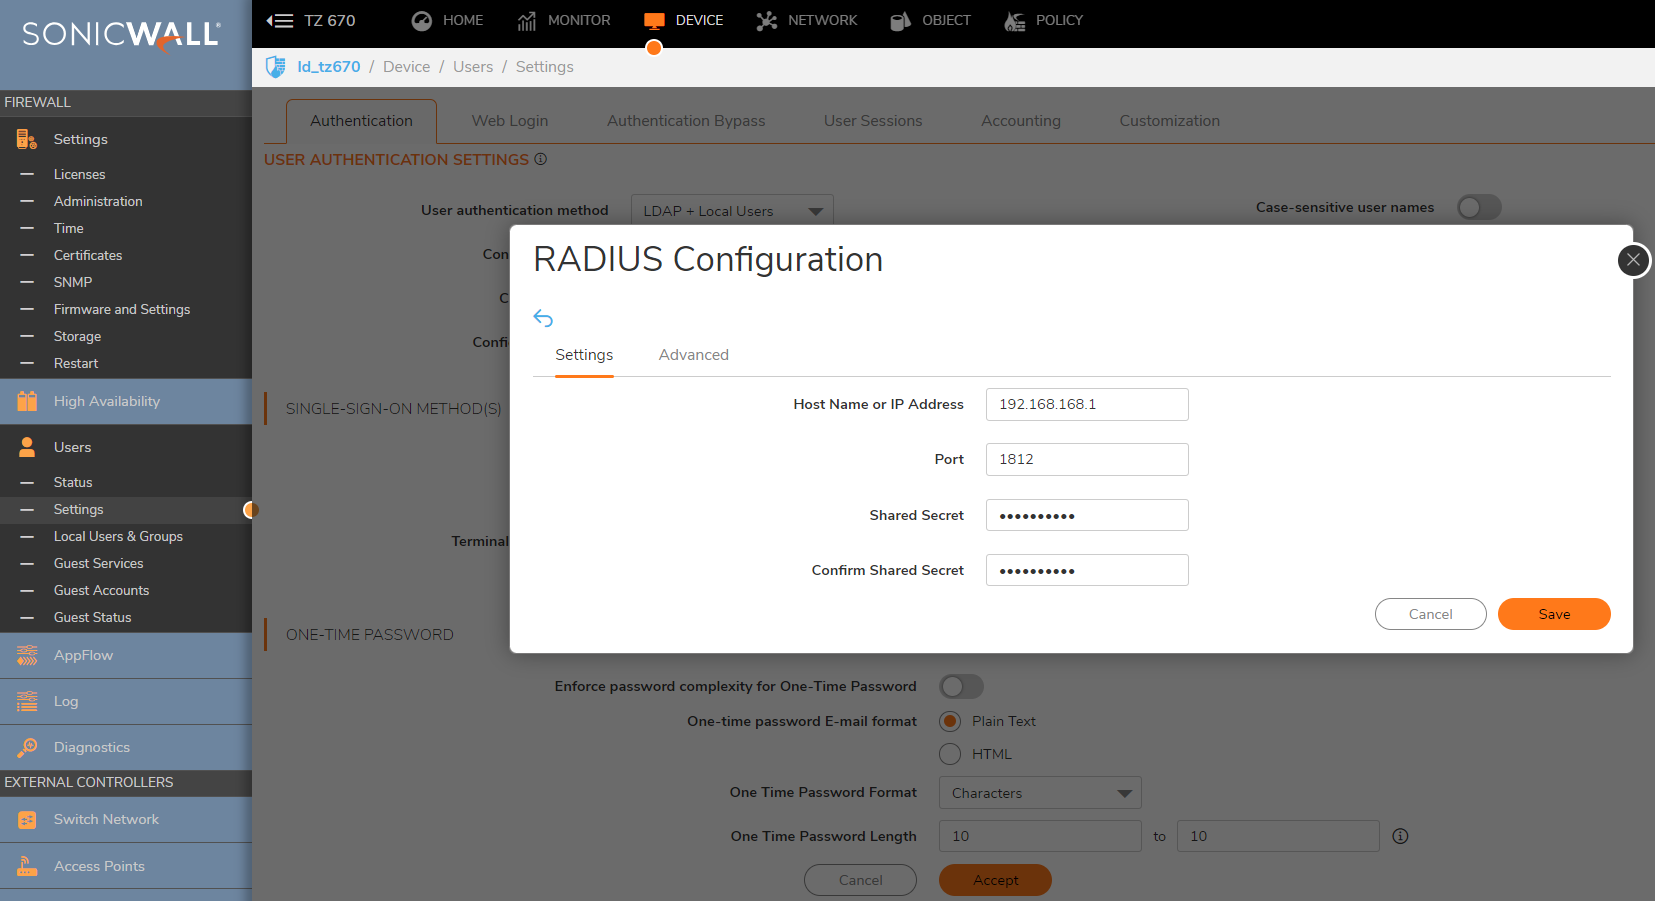
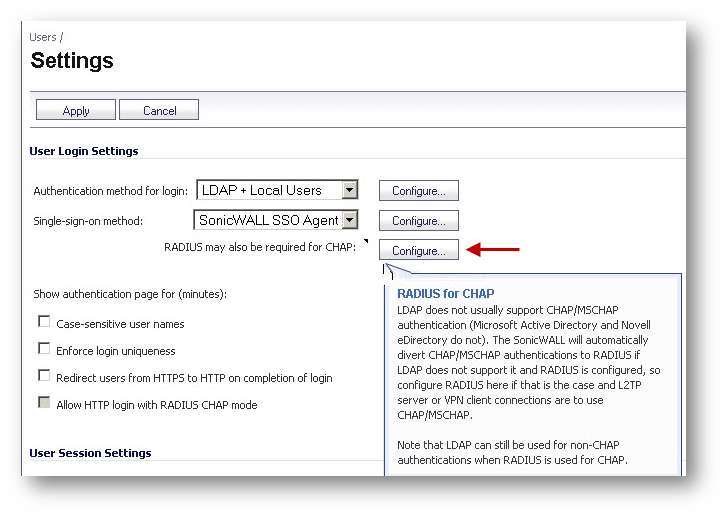
- Click on the Configure button under RADIUS may also be required for CHAP.

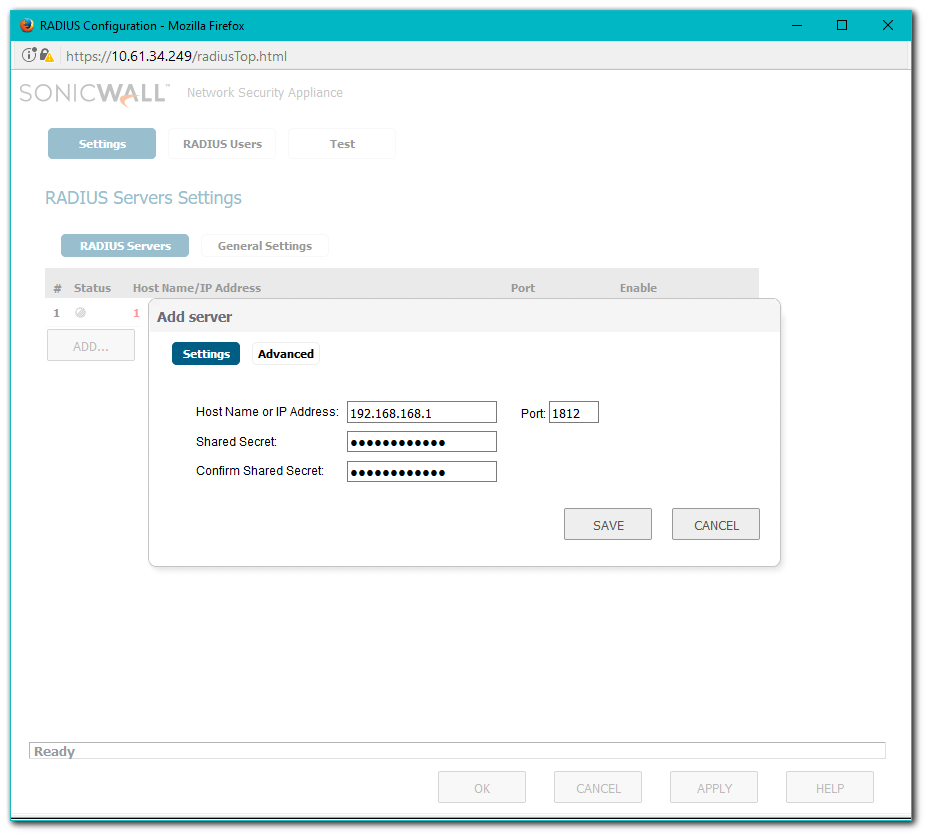
- Enter the IP address of the RADIUS Server and the Shared Secret for the RADIUS server. NOTE: The Shared Secret has to be identical to the one entered in the RADIUS Client in IAS.
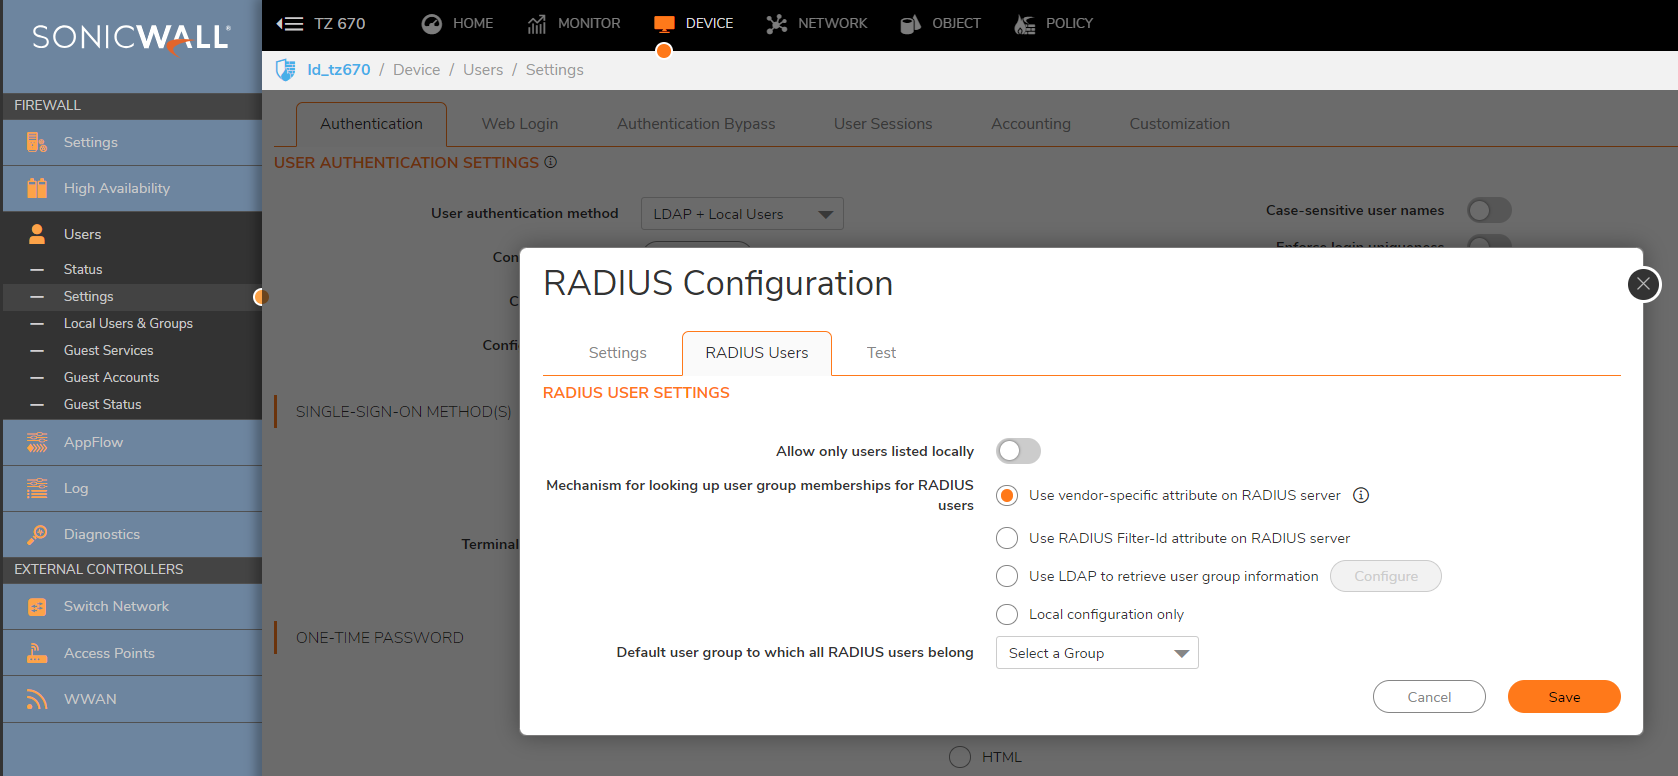
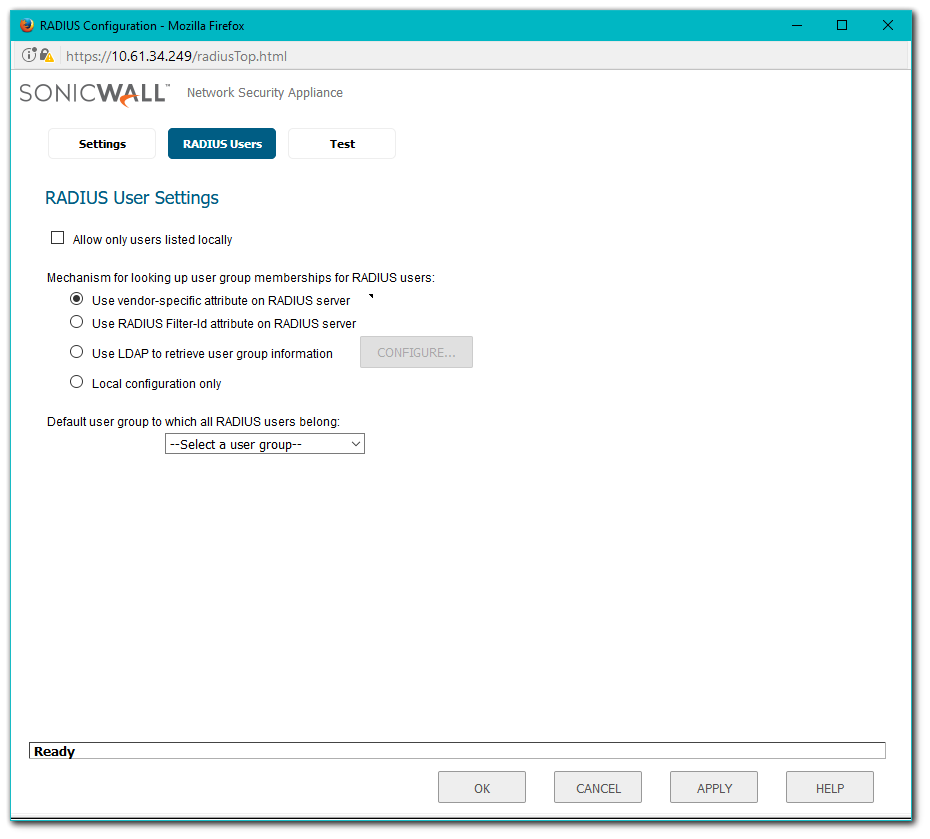
- Click RADIUS Users tab and select the radio button under Use RADIUS Filter-Id attribute on RADIUS server.
- Click Apply and then click on the Test tab. Type in the user name created earlier (User-1) and enter password and test the authentication.
How to Test
- Initiate a connection from a remote L2TP client.
- When prompted for username and password, enter the username "user-1" and the password set for that user.
- On successfully connecting after being authenticated, try to ping the IP Address of a host in the LAN.
- Enter the IP address of the RADIUS Server and the Shared Secret for the RADIUS server. Note: The Shared Secret has to be identical to the one entered in the RADIUS Client in IAS.
- Click on the RADIUS Users tab and select the radio button under Use RADIUS Filter-Id attribute on RADIUS server.
- Click Apply and then click on the Test tab. Type in the user name created earlier (User-1) and enter password and test the authentication.
Resolution for SonicOS 6.5
This release includes significant user interface changes and many new features that are different from the SonicOS 6.2 and earlier firmware. The below resolution is for customers using SonicOS 6.5 firmware.
Creating User Groups and configuring User Management for RADIUS Authentication in Active Directory
- Open Active Directory Users and Computers and create a user group in the Users folder.
- Create a user and add the user as a member of the new User Group.
- Select the Dial-in tab and enable the Allow access option under Remote Access Permission.
Configuring the IAS Server to Support RADIUS Clients
- Launch the IAS Console by clicking on Start | All Program | Administrative Tools | Internet Authentication Service. The following IAS console will appear.
- Right click the RADIUS Clients folder in the left pane and select New RADIUS Client from the menu.
- Enter a name for the new RADIUS client and enter the LAN IP Address of the SonicWall.
- Select RADIUS Standard, (also the default option), enter a Shared Secret. This shared secret is needed later on the SonicWall security appliance, so note this for future reference.
- Click Finish.
- To setup the access criteria for users, right click on the Remote Access Policies and select New Remote Access Policy.
- Click Next on New Policy Wizard. Select Set up a custom policy radio button and then enter a name for this policy.
- Click Add on the Policy Conditions window.
- From this list, select Windows Groups, and click OK. By selecting Windows Groups, you can authenticate a user who is a member of a User Group in the Windows AD.
- Click Add, then enter the Windows User Group "Full Access". Click OK.

 Back on the New Remote Access Policy window, click Next.
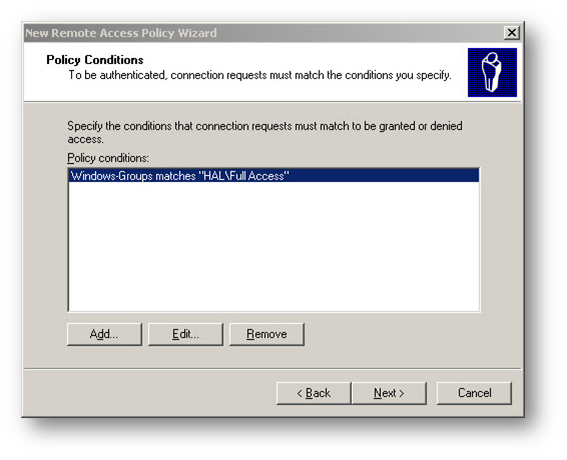
- Select the Grant remote access permission radio button under the option If a connection request matches the specified conditions.
- On the Profile window click on the Edit Profile button.
- The Edit Dial-in Profile window will appear. Click on the Authentication tab.
- Under the Authentication tab select MS-CHAP-V2, MS-CHAP and PAP as authentication method.
- The following message box appears, Click No on the help message box.
- Click Next on the Policy Window and then click Finish to complete.
TIP: This completes the IAS configuration. If you have other groups on the AD that needs different access, you can add more Remote authentication policies.
Enabling Reversibly Encrypted Passwords
NOTE: Reversibly encrypted passwords are saved during the change-password process, so existing users must change their passwords to use CHAP. For a Windows 2000-based remote access server that is a member of a domain, you can select the Store password using reversible encryption for all users in the domain option on the domain server as described below.
Alternatively, you can enable reversible storage of passwords for individual users. By using the Directory Services snap-in, you can select this feature through the properties of an individual user. Again, note that reversibly encrypted passwords are saved during the change-password procedure, so existing users must change their passwords to use CHAP.
Enabling reversibly encrypted passwords (CHAP) in a domain (Active Directory server) Group Policy
- Open Active Directory Users and Computers.
- In the console tree, double-click Active Directory Users and Computers, right-click the domain name, and then click Properties.
- On the Group Policy tab, click Default Domain Policy, and then click Edit.
- In the console tree, click on Windows Settings.
- Click Security Settings.
- Click Accounting Policies.
- Click Password Policy.
- In the details pane, double-click Store password using reversible encryption for all users in the domain.
- Click Enabled, and then click OK.
To enable reversibly encrypted passwords (CHAP) in a domain (stand-alone server) Local Security Policy
- Start | Run | gpedit.msc.
- In the console tree, select Computer Configuration -| Windows Settings -| Security Settings -| Account Policy-| Password Policy.
- Enable Store password using reversible encryption.
Configuring SonicWall User Settings for RADIUS Authentication.
- Login to the SonicWall management GUI.
- Navigate to Manage | Users | Settings.
- Click on the Configure button under RADIUS may also be required for CHAP.
- Enter the IP address of the RADIUS Server and the Shared Secret for the RADIUS server. NOTE: The Shared Secret has to be identical to the one entered in the RADIUS Client in IAS.
- Click RADIUS Users tab and select the radio button under Use RADIUS Filter-Id attribute on RADIUS server.
- Click Apply and then click on the Test tab. Type in the user name created earlier (User-1) and enter password and test the authentication.
How to Test
- Initiate a connection from a remote L2TP client.
- When prompted for username and password, enter the username "user-1" and the password set for that user.
- On successfully connecting after being authenticated, try to ping the IP Address of a host in the LAN.
- Enter the IP address of the RADIUS Server and the Shared Secret for the RADIUS server. Note: The Shared Secret has to be identical to the one entered in the RADIUS Client in IAS.
- Click on the RADIUS Users tab and select the radio button under Use RADIUS Filter-Id attribute on RADIUS server.
- Click Apply and then click on the Test tab. Type in the user name created earlier (User-1) and enter password and test the authentication.
Resolution for SonicOS 6.2 and Below
The below resolution is for customers using SonicOS 6.2 and earlier firmware. For firewalls that are generation 6 and newer we suggest to upgrade to the latest general release of SonicOS 6.5 firmware.
Creating User Groups and configuring User Management for RADIUS Authentication in Active Directory.
- Open Active Directory Users and Computers and create a user group in the Users folder.
- Create a user and add the user as a member of the new User Group.
- Select the Dial-in tab and enable the Allow access option under Remote Access Permission.
Configuring the IAS Server to Support RADIUS Clients
- Launch the IAS Console by clicking on Start | All Program| Administrative Tools | Internet Authentication Service. The following IAS console will appear.
- Right click the RADIUS Clients folder in the left pane and select New RADIUS Client from the menu.
- Enter a name for the new RADIUS client and enter the LAN IP Address of the SonicWall.
- Select RADIUS Standard, (also the default option), enter a Shared Secret. This shared secret is needed later on the SonicWall security appliance, so note this for future reference.
- Click Finish.
- To setup the access criteria for users, right click on the Remote Access Policies and select New Remote Access Policy.
- Click Next on New Policy Wizard. Select “Set up a custom policy” radio button and then enter a name for this policy.
- Click Add on the Policy Conditions window.
- From this list, select Windows Groups, and click OK. By selecting Windows Groups, you can authenticate a user who is a member of a User Group in the Windows AD.
- Click Add, then enter the Windows User Group Full Access. Click OK.
- Back on the New Remote Access Policy window, click Next.
- Select the Grant remote access permission radio button under the option If a connection request matches the specified conditions.
- On the Profile window click Edit Profile.
- The Edit Dial-in Profile window will appear. Click Authentication tab.
- Under the Authentication tab select MS-CHAP-V2, MS-CHAP and PAP as authentication method.
- The following message box appears, Click No on the help message box.
- Click Next on the Policy Window and then click Finish to complete.
- This completes the IAS configuration. If you have other groups on the AD that needs different access, you can add more Remote authentication policies.
Enabling Reversibly Encrypted Passwords
NOTE: Reversibly encrypted passwords are saved during the change-password process, so existing users must change their passwords to use CHAP. For a Windows 2000-based remote access server that is a member of a domain, you can select the Store password using reversible encryption for all users in the domain option on the domain server as described below.
Alternatively, you can enable reversible storage of passwords for individual users. By using the Directory Services snap-in, you can select this feature through the properties of an individual user. Again, note that reversibly encrypted passwords are saved during the change-password procedure, so existing users must change their passwords to use CHAP.
Enabling reversibly encrypted passwords (CHAP) in a domain (Active Directory server) Group Policy
- Open Active Directory Users and Computers.
- In the console tree, double-click Active Directory Users and Computers, right-click the domain name, and then click Properties.
- On the Group Policy tab, click Default Domain Policy, and then click Edit.
- In the console tree, click Windows Settings.
- Click Security Settings.
- Click Accounting Policies.
- Click Password Policy..
- In the details pane, double-click Store password using reversible encryption for all users in the domain.
- Click Enabled, and then click OK.
To enable reversibly encrypted passwords (CHAP) in a domain (stand-alone server) Local Security Policy
- Start | Run | gpedit.msc.
- In the console tree, select Computer Configuration -| Windows Settings -| Security Settings -| Account Policy-| Password Policy.
- Enable Store password using reversible encryption.
Configuring SonicWall User Settings for RADIUS Authentication.
- Login to the SonicWall management GUI.
- Navigate to Users | Settings.
- Click Configure button under RADIUS May Also Be Required for CHAP.
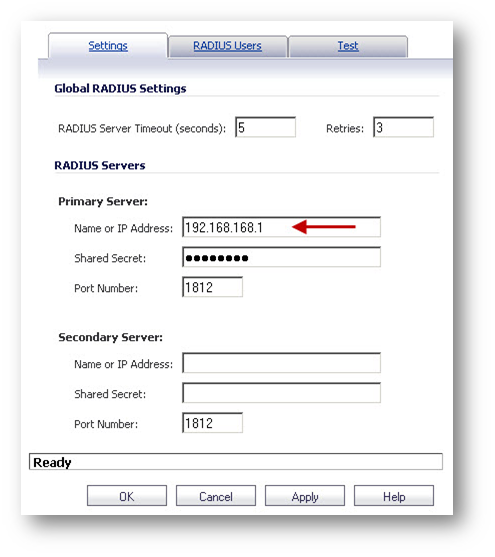
- Enter the IP address of the RADIUS Server and the Shared Secret for the RADIUS server. NOTE: The Shared Secret has to be identical to the one entered in the RADIUS Client in IAS.
- Click RADIUS Users tab and select the radio button under Use RADIUS Filter-Id attribute on RADIUS server.
- Click Apply and then click on the Test tab. Type in the user name created earlier (User-1) and enter password and test the authentication.
How to Test
- Initiate a connection from a remote L2TP client.
- When prompted for username and password, enter the username "user-1" and the password set for that user.
- On successfully connecting after being authenticated, try to ping the IP Address of a host in the LAN.