-
Products
-
SonicPlatform
SonicPlatform is the cybersecurity platform purpose-built for MSPs, making managing complex security environments among multiple tenants easy and streamlined.
Discover More
-
-
Solutions
-
Federal
Protect Federal Agencies and Networks with scalable, purpose-built cybersecurity solutions
Learn MoreFederalProtect Federal Agencies and Networks with scalable, purpose-built cybersecurity solutions
Learn More - Industries
- Use Cases
-
-
Partners
-
Partner Portal
Access to deal registration, MDF, sales and marketing tools, training and more
Learn MorePartner PortalAccess to deal registration, MDF, sales and marketing tools, training and more
Learn More - SonicWall Partners
- Partner Resources
-
-
Support
-
Support Portal
Find answers to your questions by searching across our knowledge base, community, technical documentation and video tutorials
Learn MoreSupport PortalFind answers to your questions by searching across our knowledge base, community, technical documentation and video tutorials
Learn More - Support
- Resources
- Capture Labs
-
- Company
- Contact Us
CSE Getting Started: Create A Trust Profile


Description
In SonicWall CSE, Trust Profiles are sets of rules for your devices. Depending on whether the target device meets these rules, a score will be generated of Always Deny, Low, Medium, or High. These scores are used in the policies for access to your CSE-protected services as exercised in Part Five of the CSE Getting Started Series.
 CAUTION: These changes may affect access to resources protected behind SonicWall CSE. If you have active users, please be careful to select assignment criteria that do not affect them.
Resolution
To begin this procedure, log into the CSE Command Center and Navigate to Trust | Profiles.
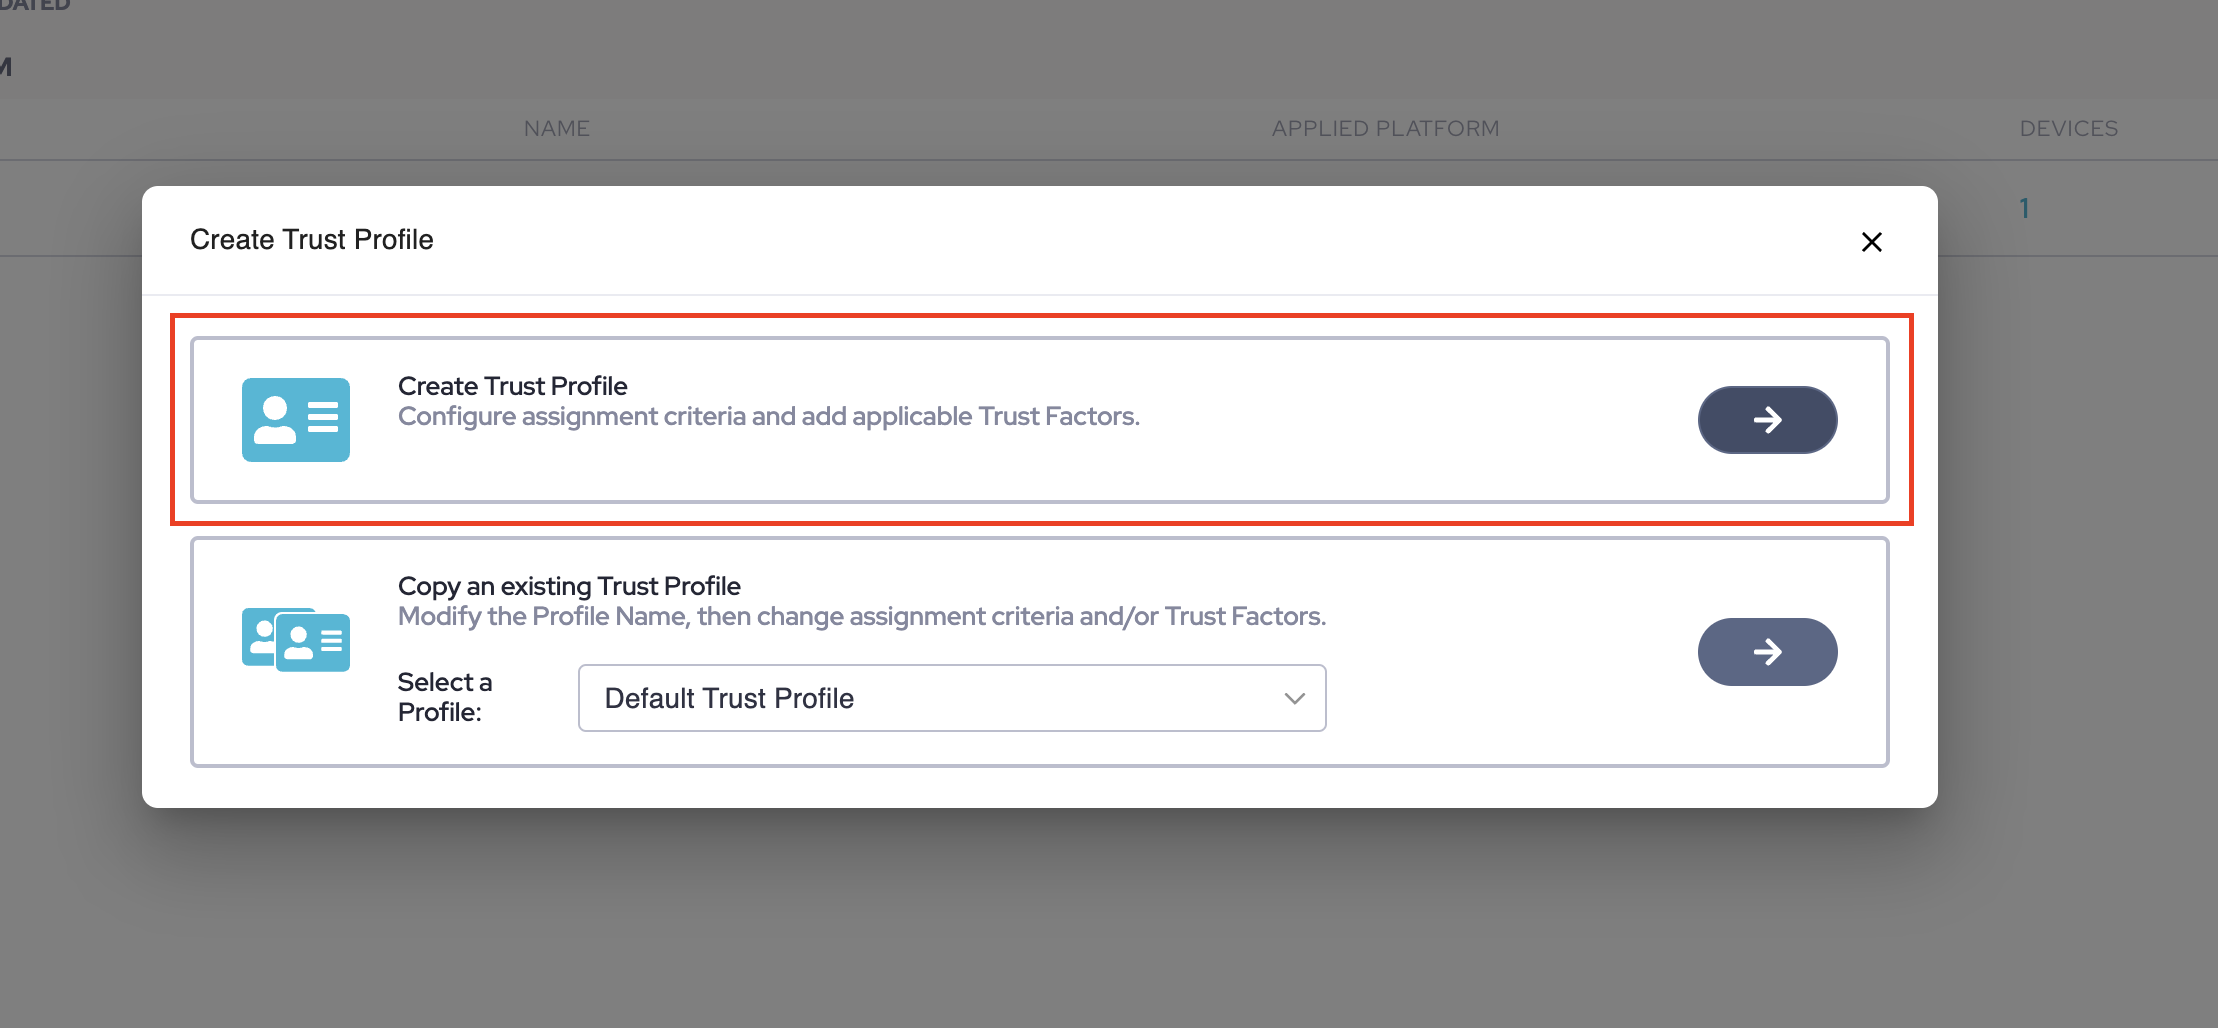
- By default, you will only have one "Default Trust Profile" profile with some pre-configured factors to get you started. In this guide, we will create a new Trust Profile, assign it to our device, and then prioritize the new profile over the default. Start by clicking "Create Profile".

- This will bring up your first options. For this article choose "Create Trust Profile", however, be aware of the option below which lets you copy existing profiles for ease of setup for future profiles.

- Then enter a friendly name and description for your Trust Profile. In this article, we will continue to use the Security Team Example.

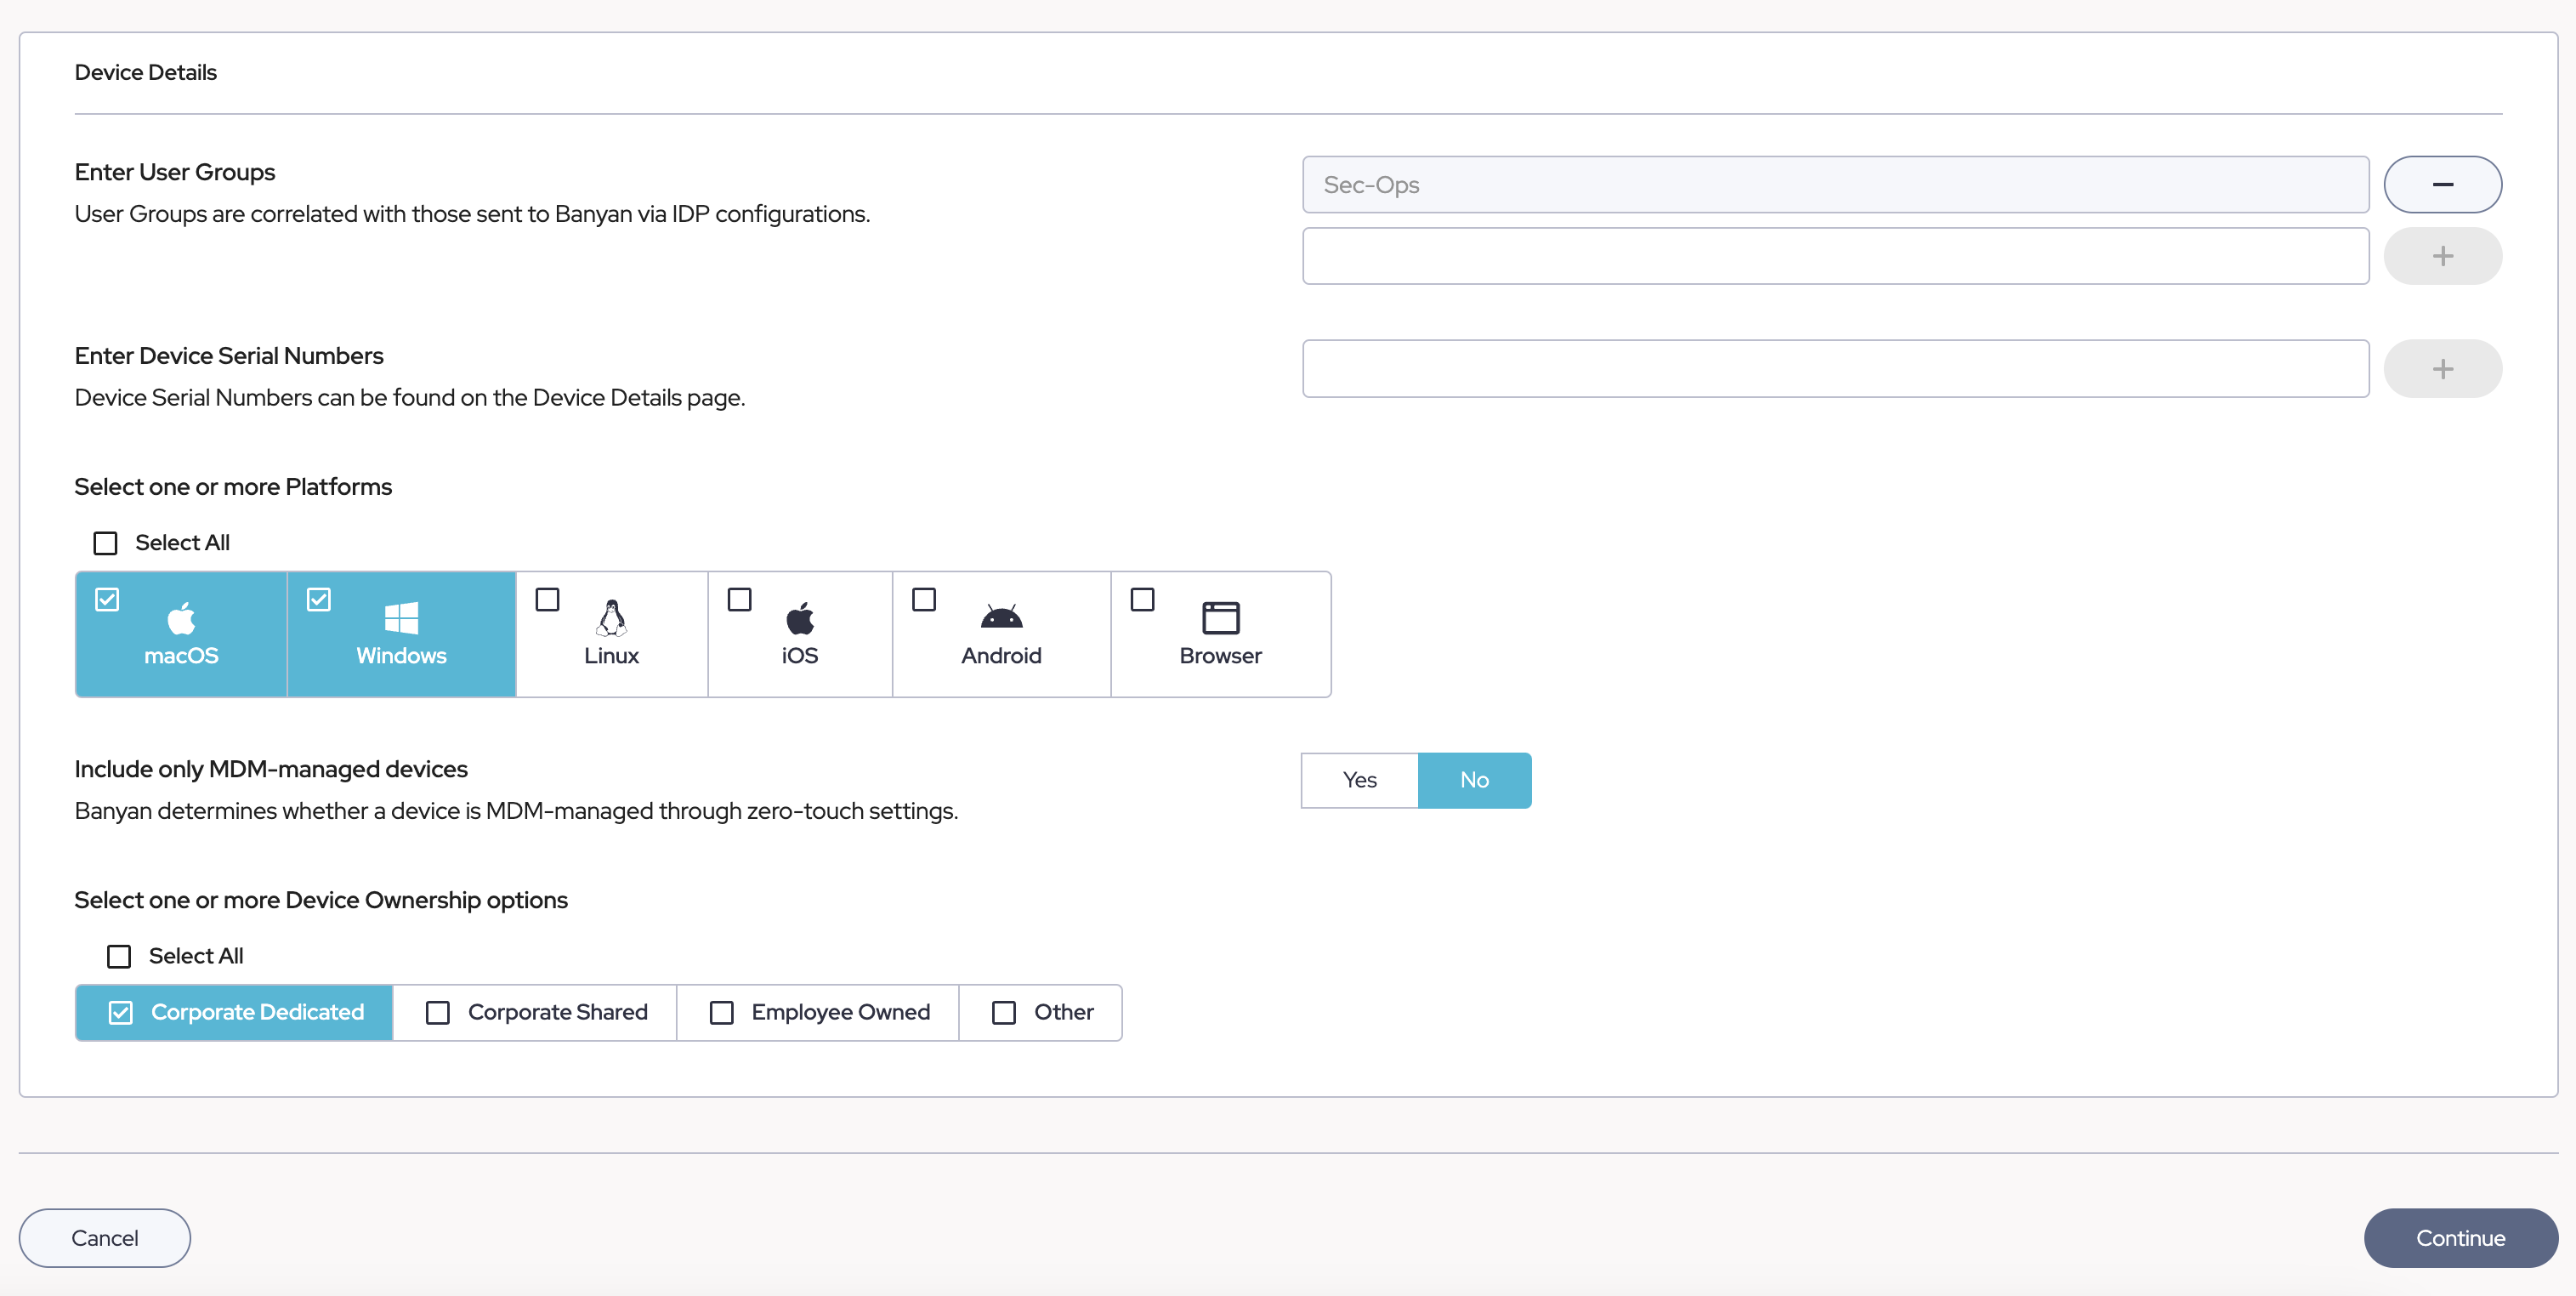
- Below this section is the Device Details section. This section dictates which devices the profile will be applied to. Use the following Fields according to the test case you used in previous parts of the CSE Getting Started Guides.
- User Groups = Group Name from the Identity Provider - This should match the group name in Part Three, Creating a Role.
- Device Serial Numbers = Not used in this article, however, you can restrict the profile to only apply to device serial numbers defined in this field.
- Platforms = Select the OS Platform you or your users in the target test group in which, you registered a device using the CSE App, in Part Two, Registering Your Device(s).
- Include Only MDM-Managed Devices = Not used in this article but with Zero-Touch app deployment via Mobile Device Managers (MDM). By toggling on this option, you can restrict profiles to only apply to such devices.
- Device Ownership = This option allows you to restrict the profile based on the device ownership status selected during registration such as in Part Two, Registering Your Device(s).

Once you have configured these to fit your requirements, click "Continue".
- This will land you on the Trust Factors page. Here we can configure the criteria we evaluate on an end user's device to calculate a Trust Score used for policy decisions. In this article, we will give you recommendations to get you started. To begin click "Add Trust Factor".

This will prompt you to select a factor to configure. For our first factor, we will choose "Auto Update". This factor checks if the OS of the user's device has Automatic OS Updates enabled. Click the Arrow Icon to the right of the desired factor.
- Next, you will be presented with a new panel on the page for Auto Update.

Here we can select the score effect the failing factor will have on the device's trust score. Other factors may have additional configuration options in this panel as well. Select "Medium TL" changing the score effect from low to medium. This will help reduce the response time it takes your environment to get security and zero-day patches to the end user's OS.
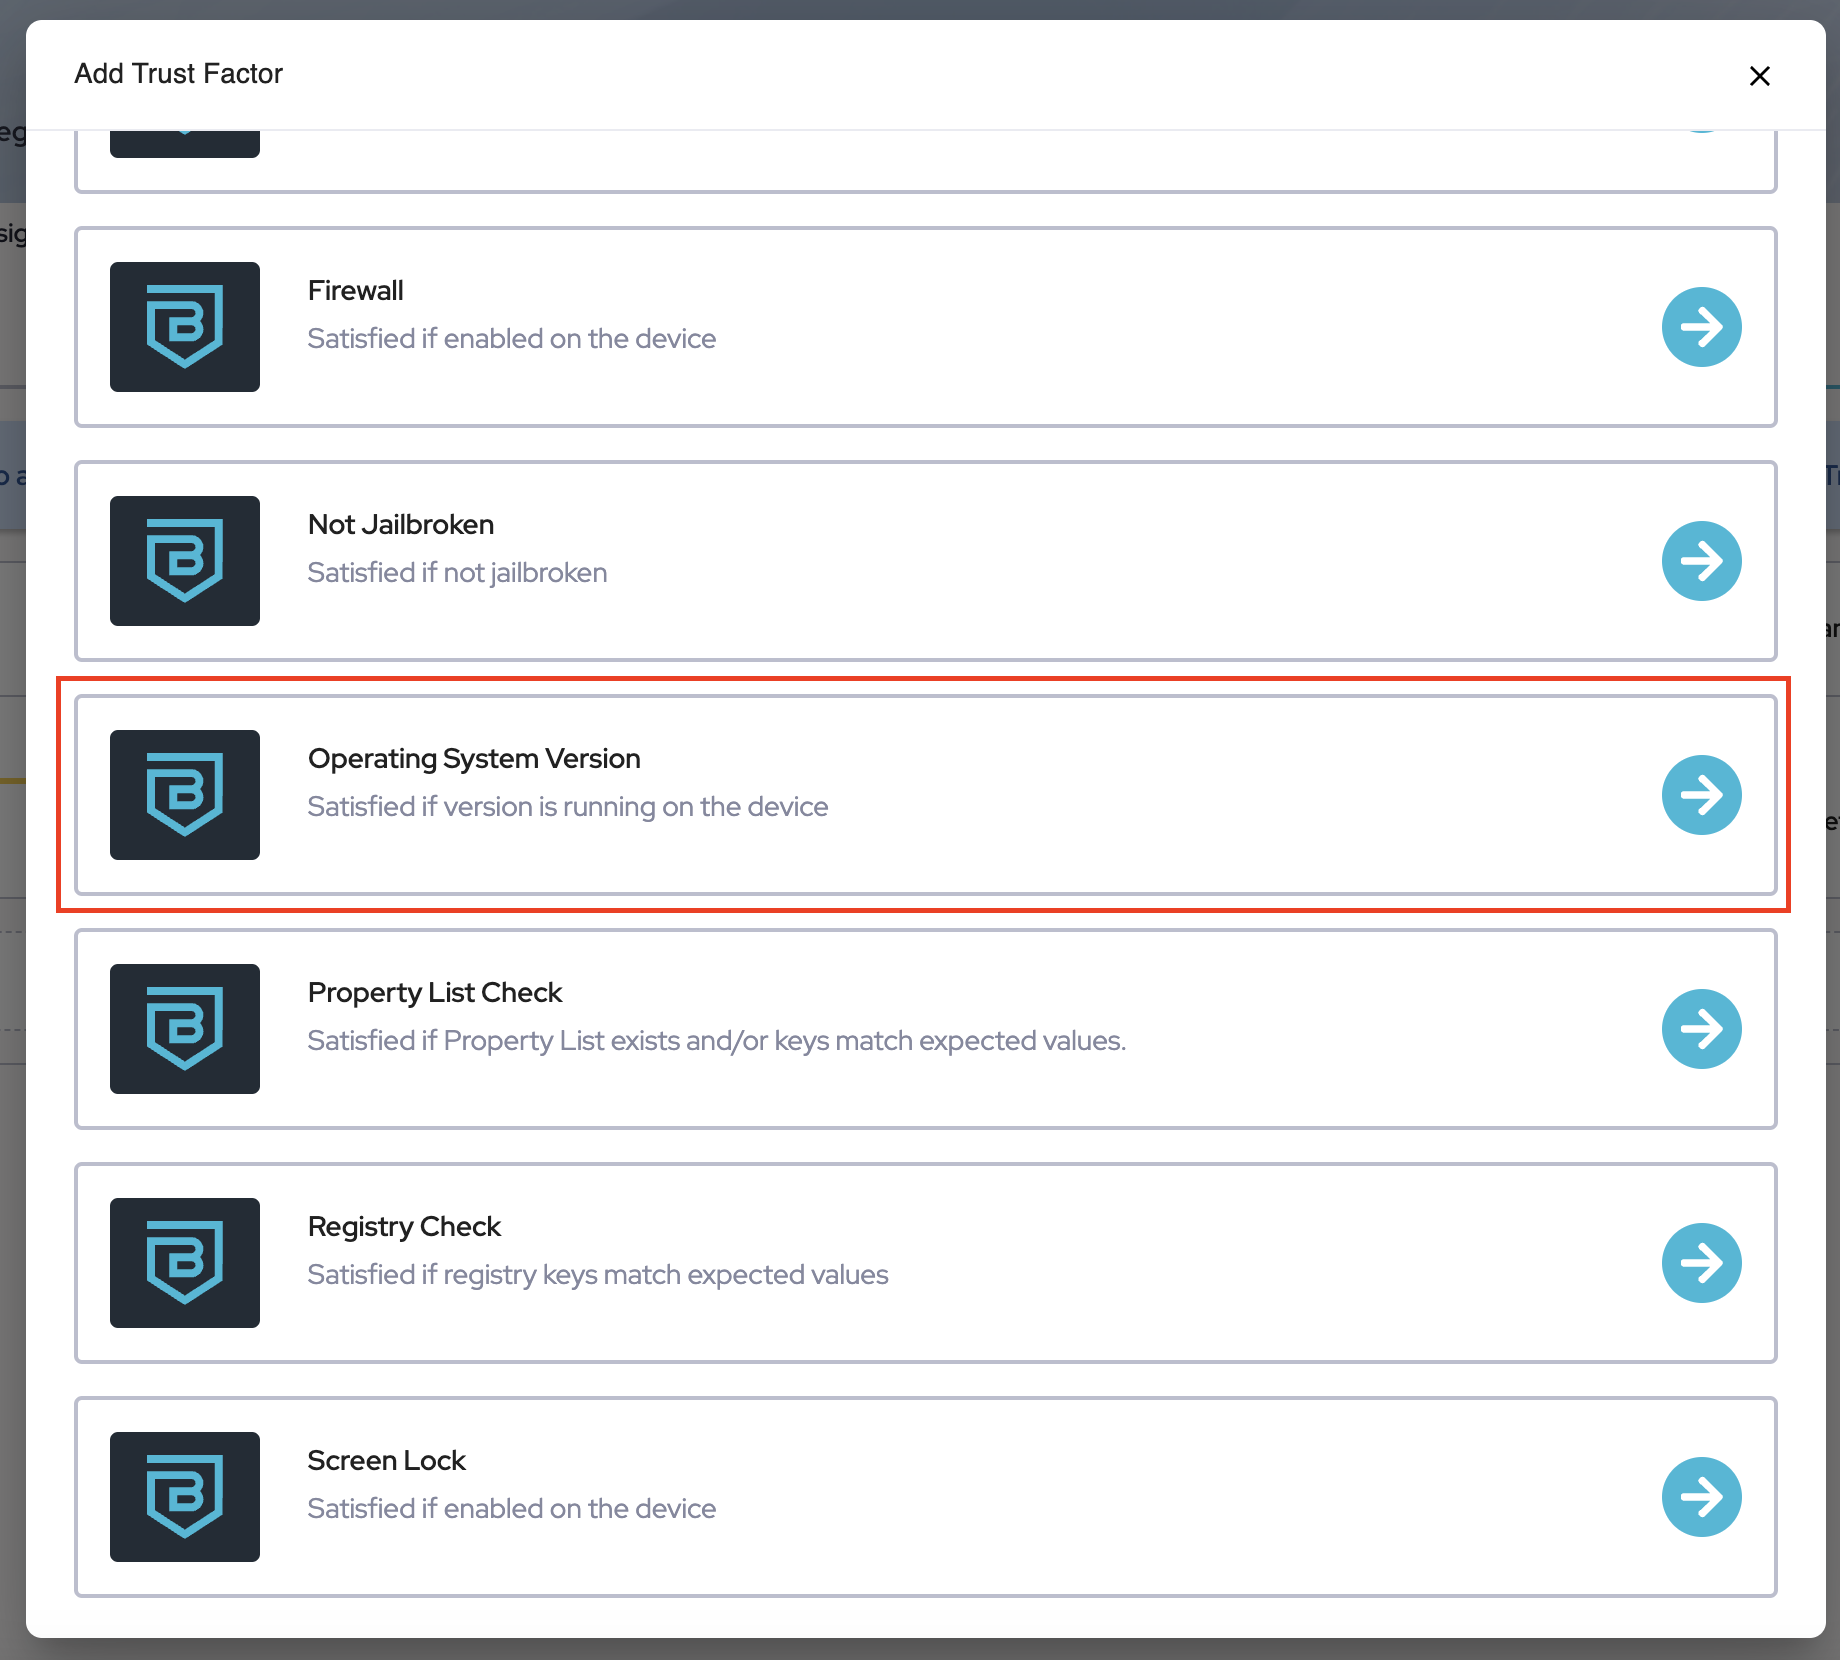
- Now select "Add Trust Factor" again and choose "Operating System Version".

This factor requires more configuration as you must define the versions to evaluate as the minimum version you will allow to pass the factor. In this example, we are only using MacOS and Windows and thus only need to fill out the values for these two fields. You may find the latest release information at the OS Platform's respective documentation site. NOTE: It is recommended to revisit these minimum versions periodically to ensure they are up to date.
Once configured, we recommend leaving the score effect to "Low TL" as updates to the OS often contain critical security updates that protect both users and your corporate environment. - Next, follow the same procedure to add a new Trust Factor as you did for the previous two factors. However, click to configure "Disk Encryption" and "Firewall" respectively.
Here we recommend setting Disk Encryption to "Always Deny" as local encryption of the disk is critical to prevent sensitive information from being stolen in the event of a lost, stolen, or improperly disposed machine.
Then it is recommended to configure the Firewall factor's effect to "Low TL" as this can help prevent remote attacks on your user's devices.
- (OPTIONAL) Once done, you may explore additional factors to add to the Trust Profile of your choosing. Below you can find a list of documentation for the current factors available in SonicWall Cloud Secure Edge. Be sure to follow step 10 to save your work.
Application Check
File Check
Property List Check
Registry Key Check
Disk Encryption
Auto Update
OS Version
App Version
Chrome Version
Device Geolocation
Firewall
CrowdStrike Integration
SentinelOne Integration
Capture Client Integration - When ready to save your Trust Profile, click "Create" at the bottom of the screen. You may always come back and edit this at any time.

- (OPTIONAL) Next, you may choose the arrow buttons at the top right of the Trust Profile page to change the priority of your Trust Profiles. This is only required if you have other non-default Trust Profiles. The default profile always acts as a catch-all profile and may be modified as such. You can use the bars that appear on the left-hand side of the screen to drag profiles up or down in priority.
 NOTE: If a device matches multiple Trust Profiles, the profile with the highest priority will be used. In this scenario "1" is the highest priority.
Validation
Your device should now be pending a sync with the CSE TrustProvider to assign the updated Trust Profile to the target devices. This sync can take up to 20 min.
-
- To confirm the Trust Profile is set and the sync has been completed. Navigate to "Directory" > "Devices" and look for your device to find the applied Trust Profile

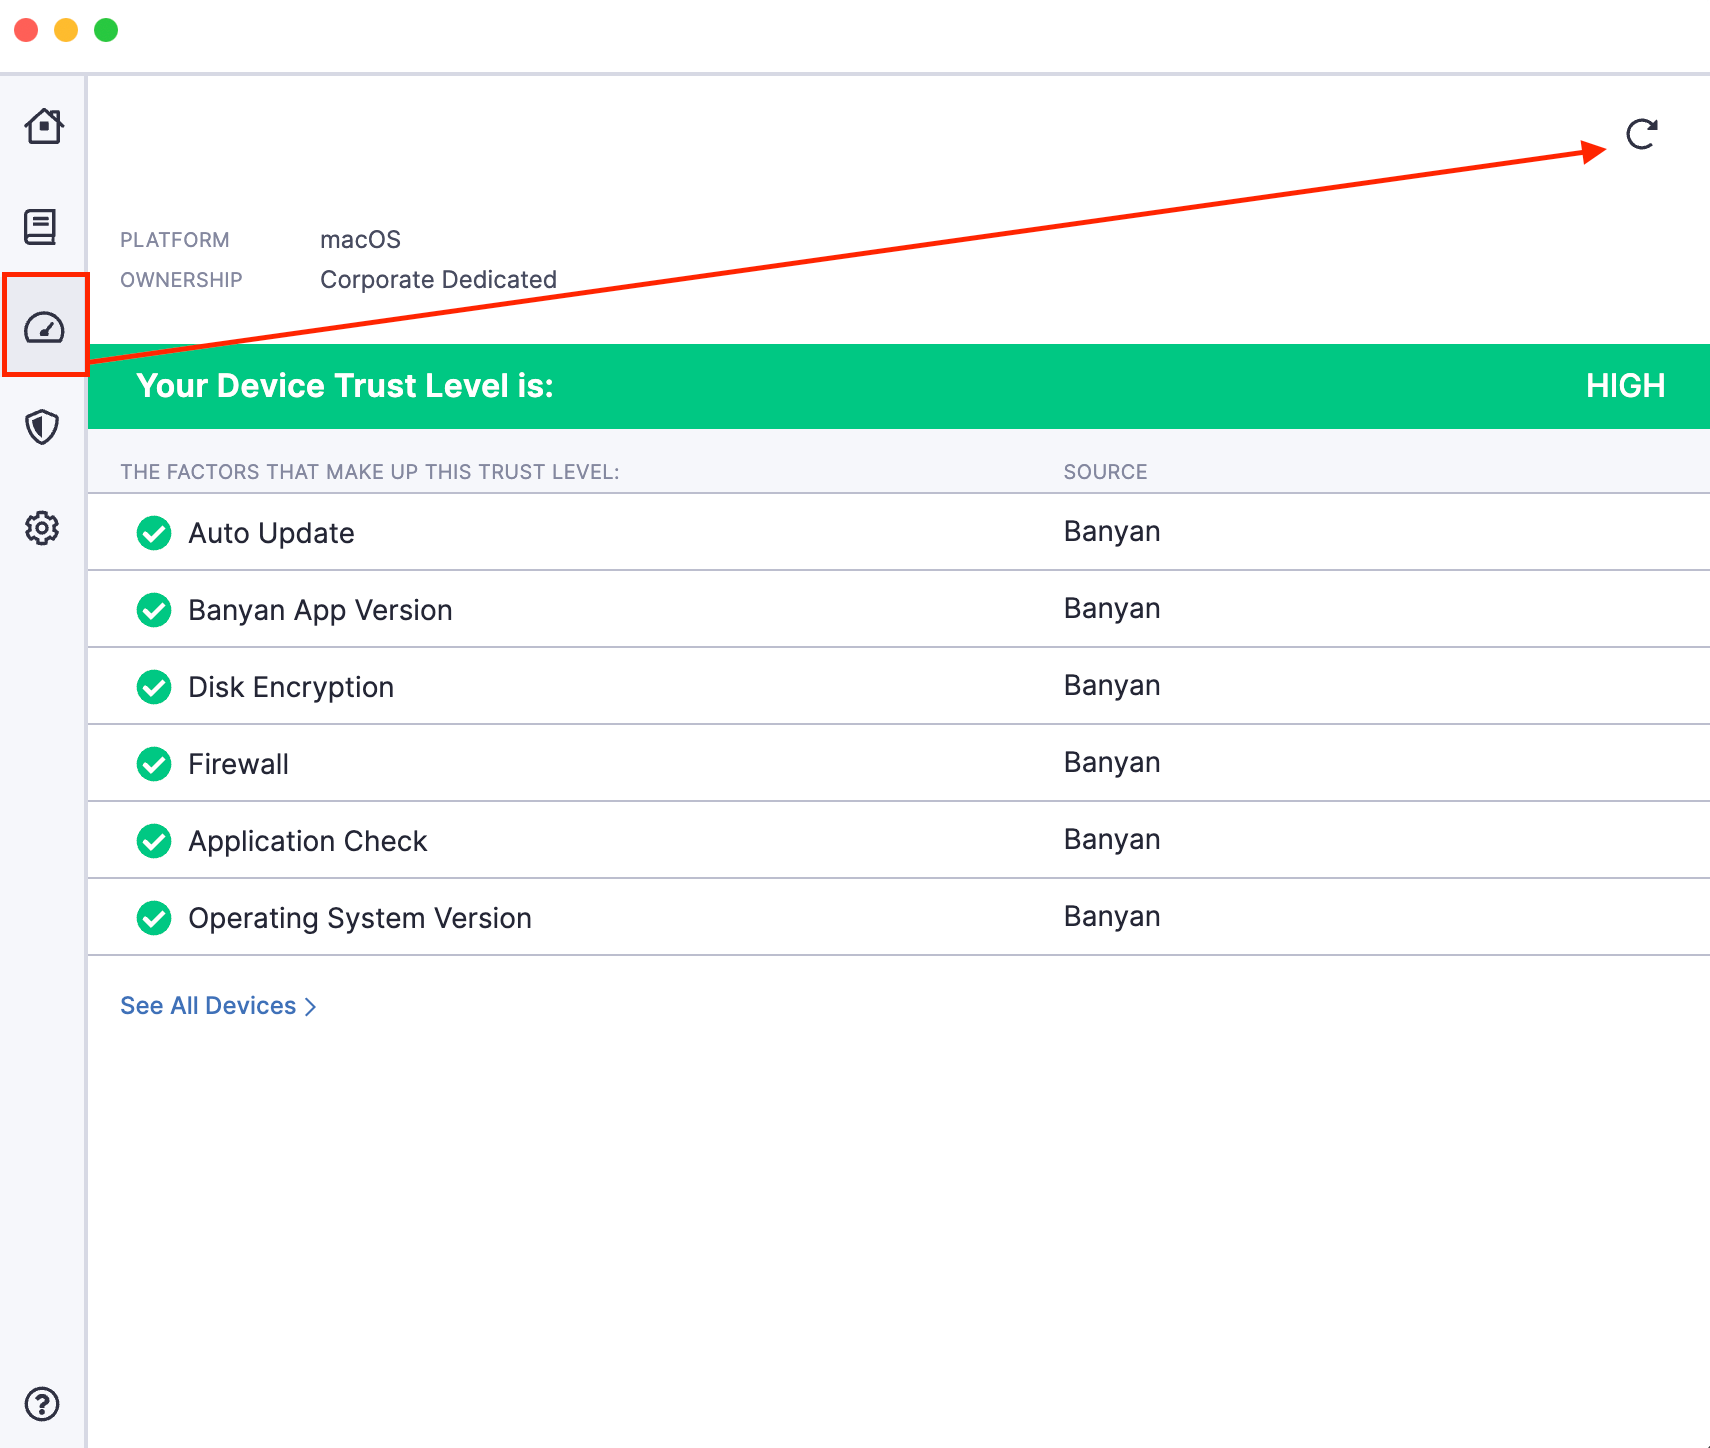
- Then open the CSE App on the device and refresh the trust score.

- Note the Trust Factors and how they affect your device. You may add additional factors to your profile at any time.
- To confirm the Trust Profile is set and the sync has been completed. Navigate to "Directory" > "Devices" and look for your device to find the applied Trust Profile
Related Articles
- Trust Profiles
- Trust Score Effect
- Trust Score Calculation
- Regular Expressions
- Trust Remediation Messaging
Related Articles
- Cloud Secure Edge How to remove a Infrastructure service
- CSE Getting Started Overview: Service Tunnel on GlobalEdge
- CSE Getting Started: Deploy A Standalone Connector


 YES
YES NO
NO