-
Products
-
SonicPlatform
SonicPlatform is the cybersecurity platform purpose-built for MSPs, making managing complex security environments among multiple tenants easy and streamlined.
Discover More
-
-
Solutions
-
Federal
Protect Federal Agencies and Networks with scalable, purpose-built cybersecurity solutions
Learn MoreFederalProtect Federal Agencies and Networks with scalable, purpose-built cybersecurity solutions
Learn More - Industries
- Use Cases
-
-
Partners
-
Partner Portal
Access to deal registration, MDF, sales and marketing tools, training and more
Learn MorePartner PortalAccess to deal registration, MDF, sales and marketing tools, training and more
Learn More - SonicWall Partners
- Partner Resources
-
-
Support
-
Support Portal
Find answers to your questions by searching across our knowledge base, community, technical documentation and video tutorials
Learn MoreSupport PortalFind answers to your questions by searching across our knowledge base, community, technical documentation and video tutorials
Learn More - Support
- Resources
- Capture Labs
-
- Company
- Contact Us
CSE Getting Started: Create A Service Tunnel


Description
A Service Tunnel in Cloud Secure Edge (CSE) is a Split Tunnel Wireguard VPN, with Identity Aware Device Posturing layered on top. Service Tunnels are great options to provide remote or secure access into private and more sensitive environments. In this article, we will create a Service Tunnel that routes to both public and private resources, then apply the policy created from Part Five of the CSE Getting Started Series.
Cause
To begin this exercise, log into the CSE Command Center as well as keep note of the IP address of the internal service you wish to configure for your first Service Tunnel connection. Ensure this service is available from a networking perspective to the Connector that we deployed in Part Three.
- On the Command Center, navigate to Private Access | Service Tunnels. Then click "Add Service Tunnel".

- Then fill out the General Information Section with a Friendly Name and a Description for your tunnel. In this article, we will continue to use the Security Team as an example.

- Now move to the next section on the page and choose "Add Network", this will be set to the Connector which was set up from Part Three in front of the desired destination service. You may only have one option until you deploy more Connectors to more environments.

- (OPTIONAL) - Since we left the Connector in Part Three with its default settings. The private IPs of the services used in this example (172.31.40.50 and 172.31.43.1 from Part Four) are already covered by the Connector's Pre-configured Private CIDR Range of 172.16.0.0/12.
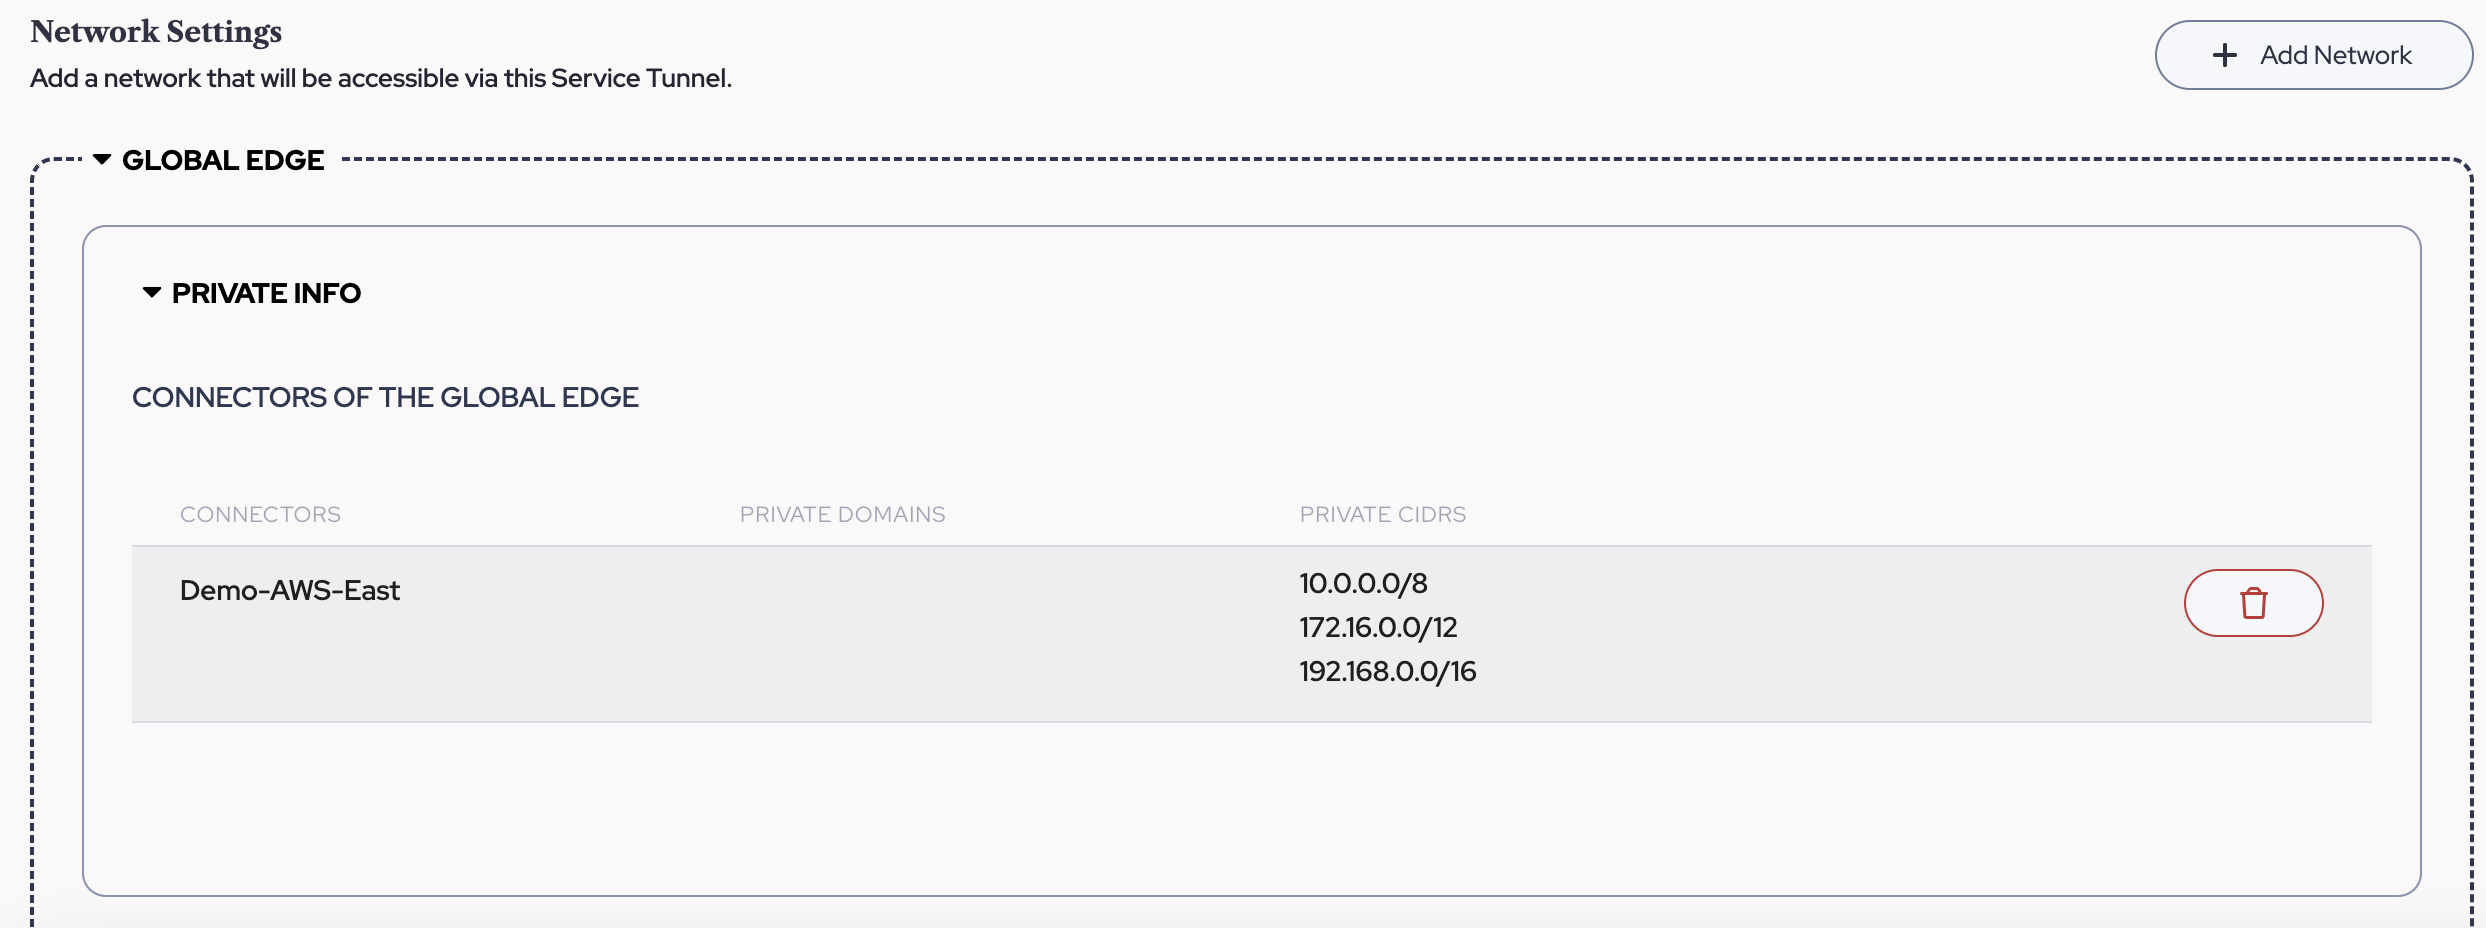
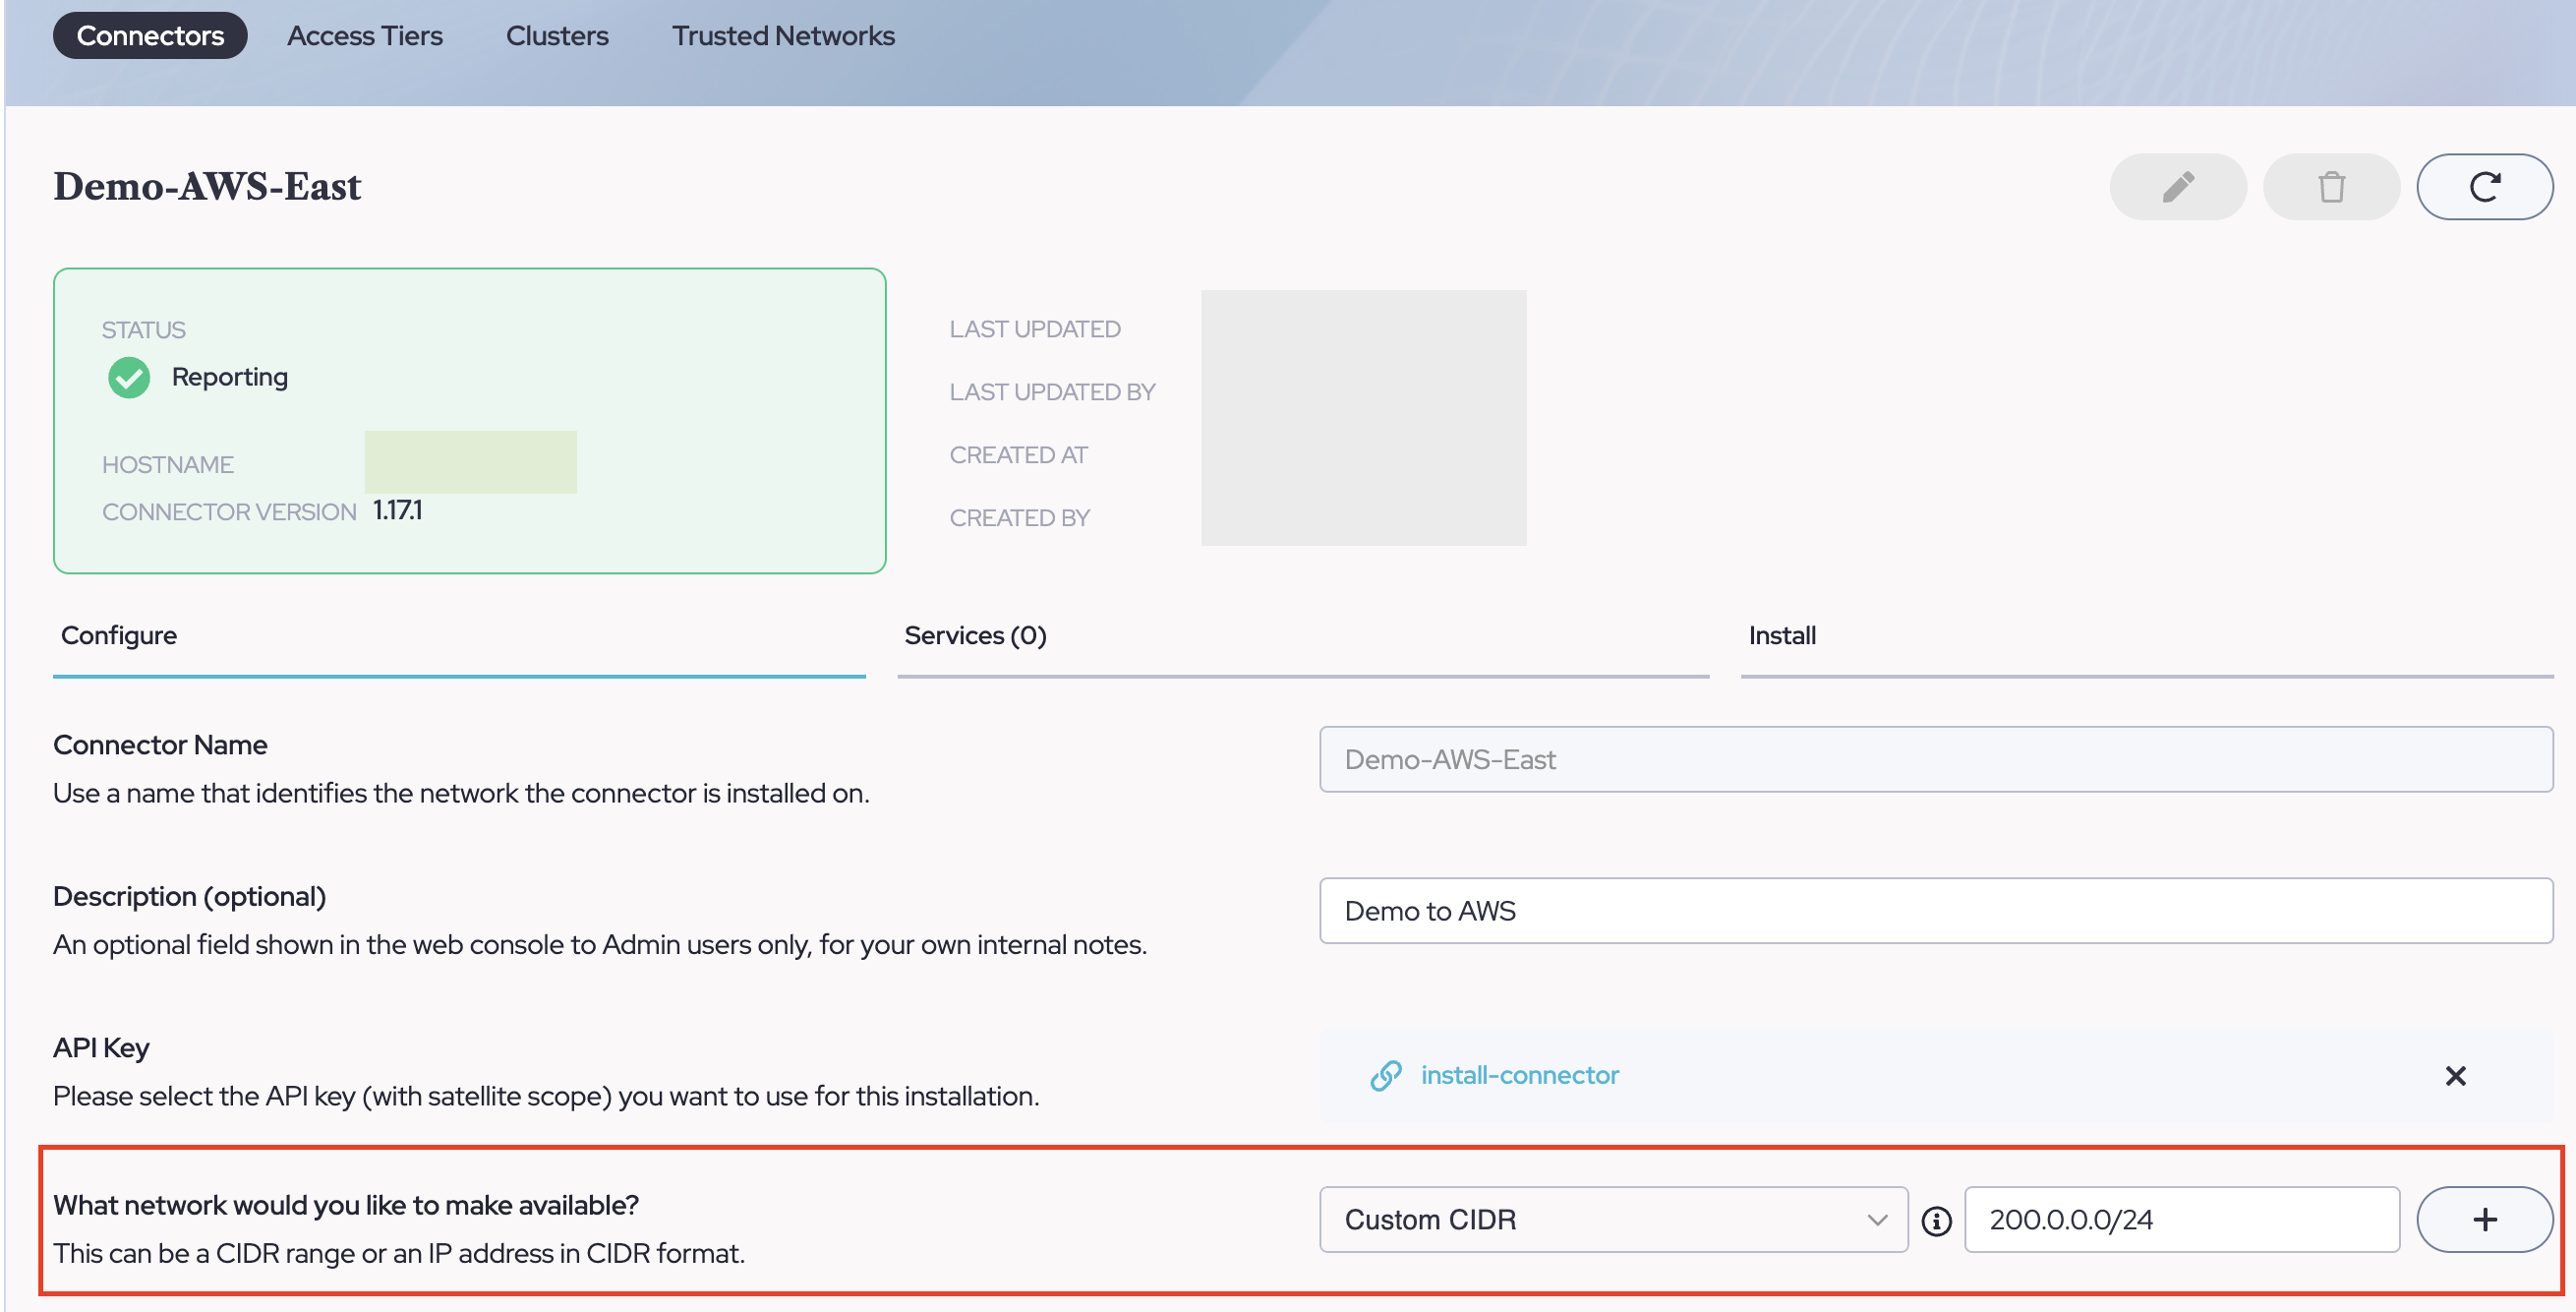
If you need to change or add additional ranges, navigate to "Networks" > "Connectors" and adjust the CIDR ranges served by the connector as needed. Be sure to click the Plus button to add multiple lines. NOTE: Public Domains do not need to be defined in this manner, for public domains or public IP Addresses, please ignore these ranges as they only apply to private resources accessed via a Connector.
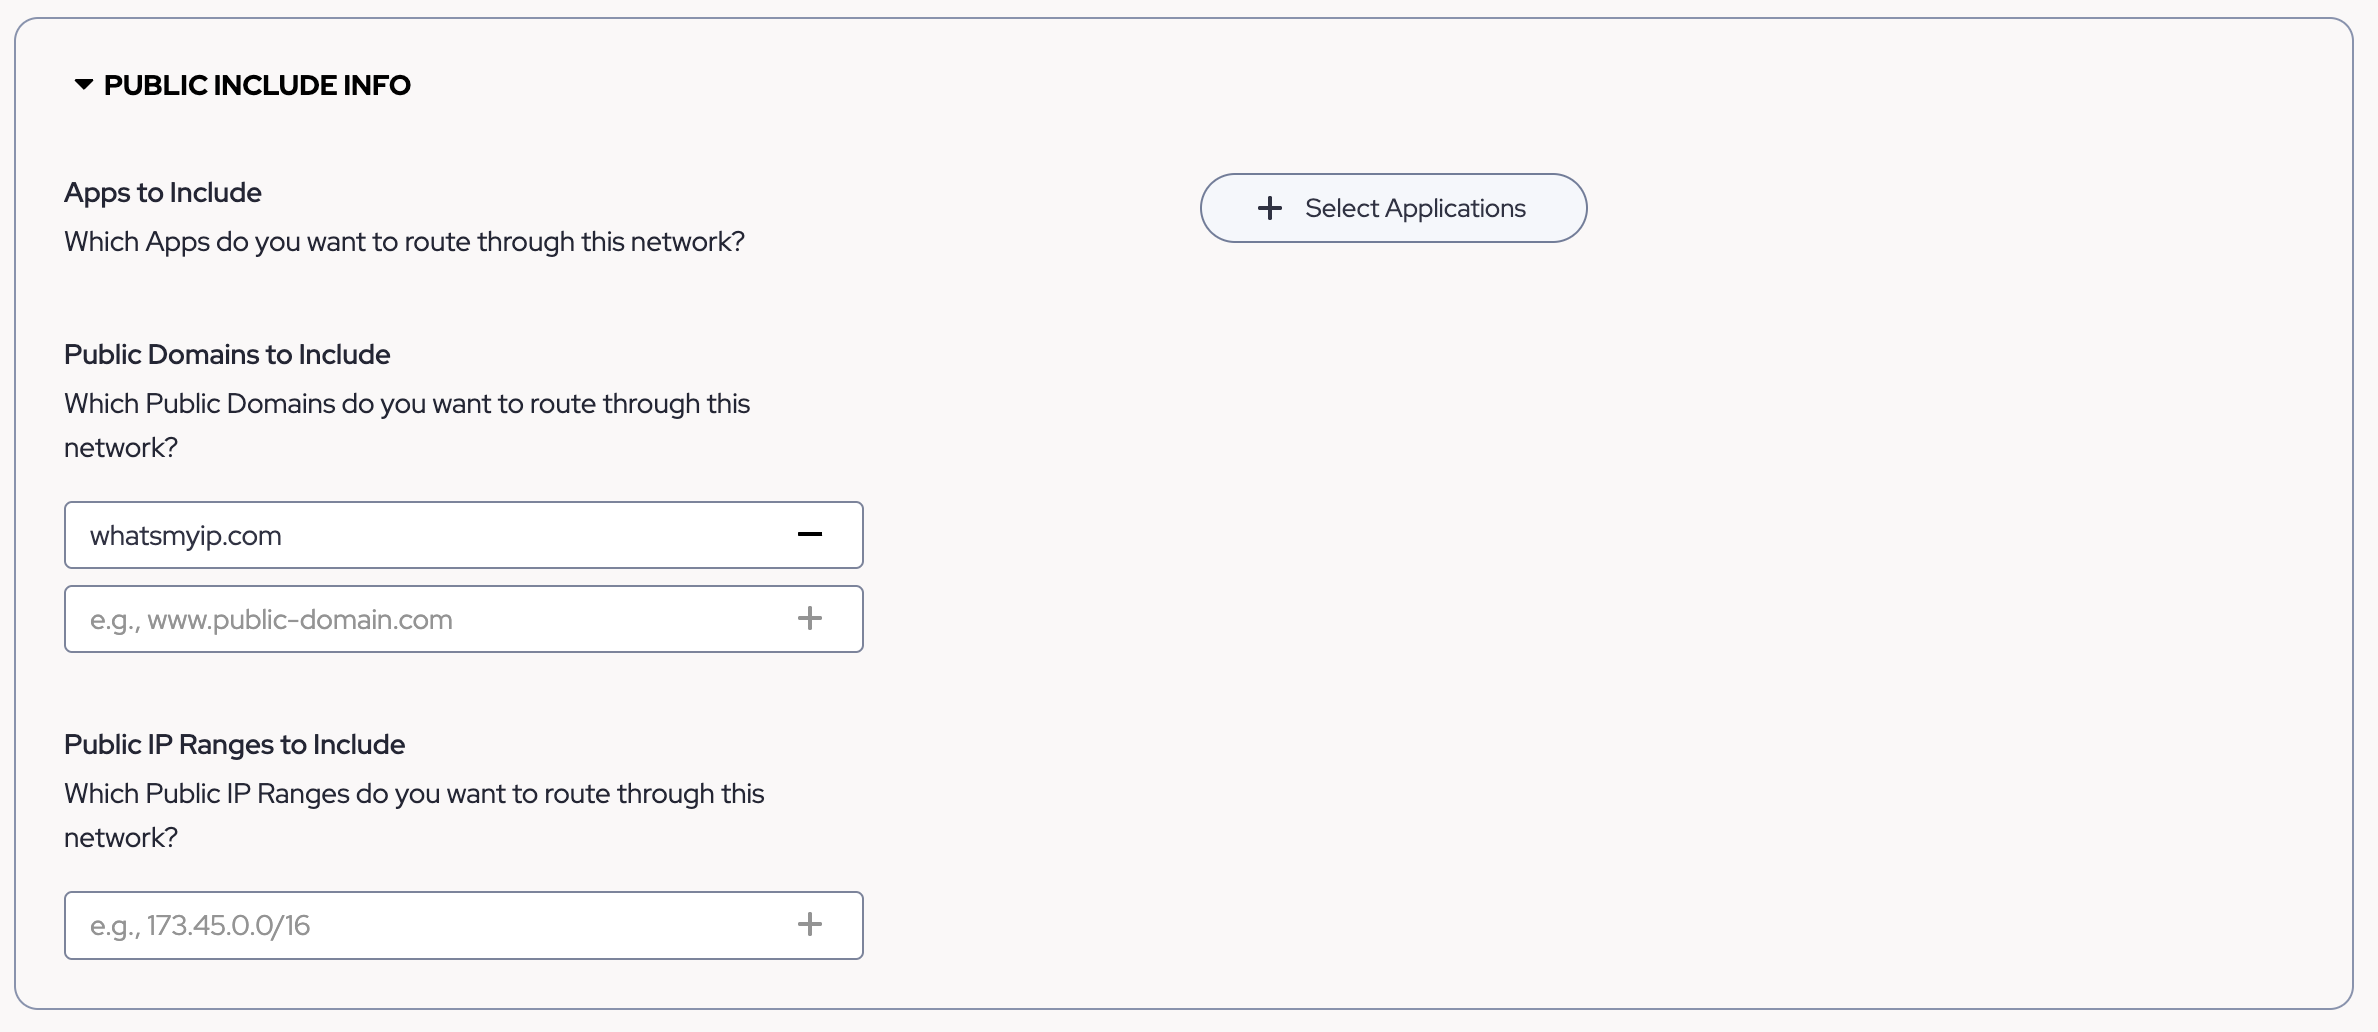
- Next, on the Service Tunnel page, move down to the Public Include section and define the Public Domains or IP Addresses you would like to route through the tunnel. In this example, we used an IP-checking website to validate that the traffic is going down our Service Tunnel.
 TIP: The Domains defined here should be in an FQDN format such as "example.com". Each entry is treated like a wildcard domain meaning they will match one domain level down. Therefore "test.example.com" will match the route for "example.com" created by Service Tunnel. If you wish to exclude a subdomain from this behavior, please use the public exclude section which is not covered by this article.
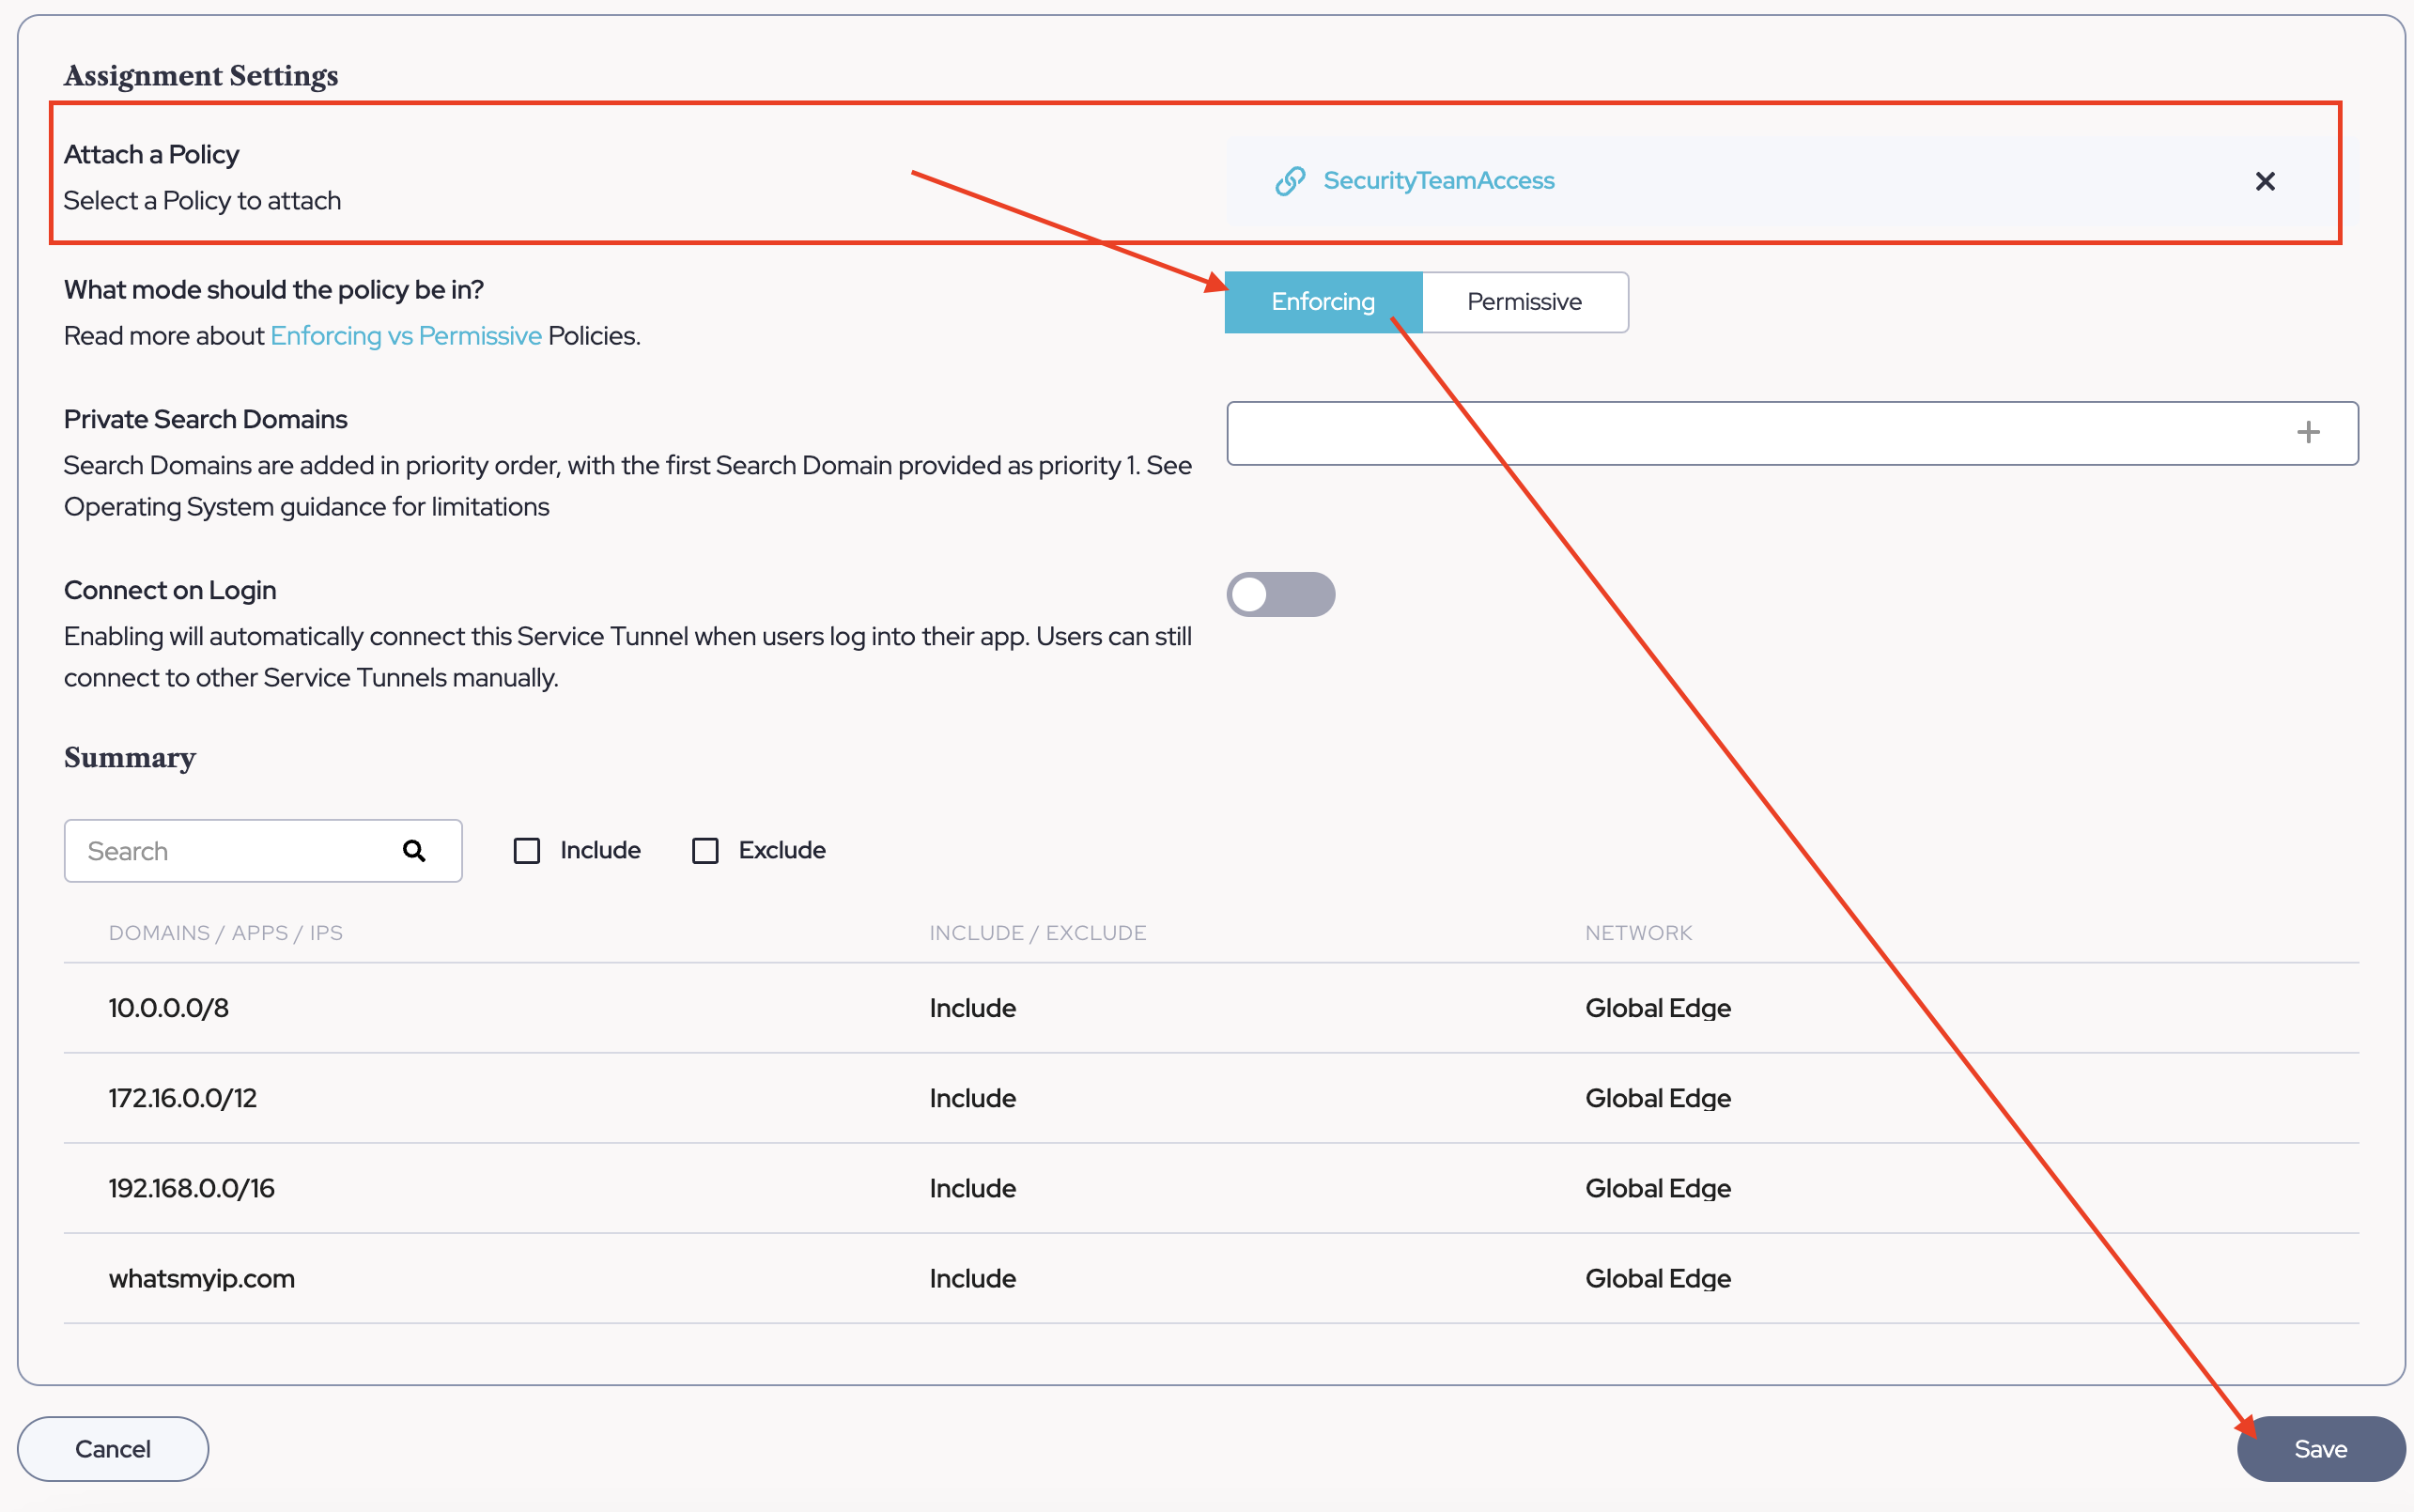
- Next, move toward the bottom of the Service Tunnel Configuration Page to the "Assignment Settings". choose the policy previously made from Part Four, ensure it is "Enforcing", and click "Save".
 NOTE: Policy Enforcement in Permissive Mode will allow users to access but will not block users with low scores from accessing.
Validation
To validate our work we, will want to test our connection to our service through the tunnel we just made. To start this be sure you have completed Step Two of the CSE Getting Started Guides as we will need to log into the CSE App from a registered device.
- Log into the CSE App. Open the app and click the "Log In" button, then follow your Identity Provider's prompts

- Once completed, navigate back to the app and you will be placed on the app's home screen. On this page note the Service Tunnel Panel which has appeared. To toggle the tunnel on click the large power button.
 CAUTION: If you have multiple tunnels already, be sure to select the correct one from the drop-down under the power button.
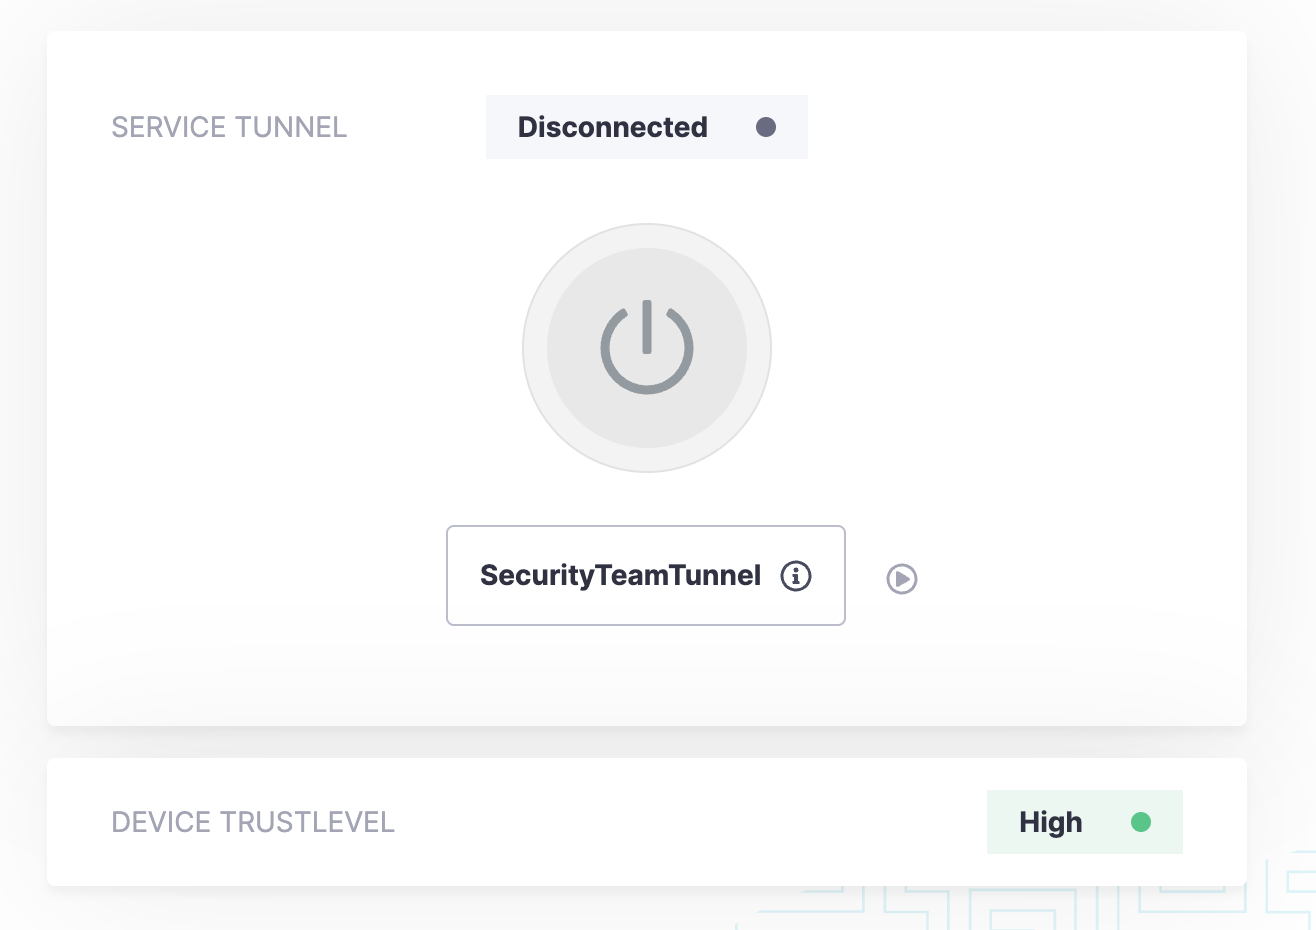
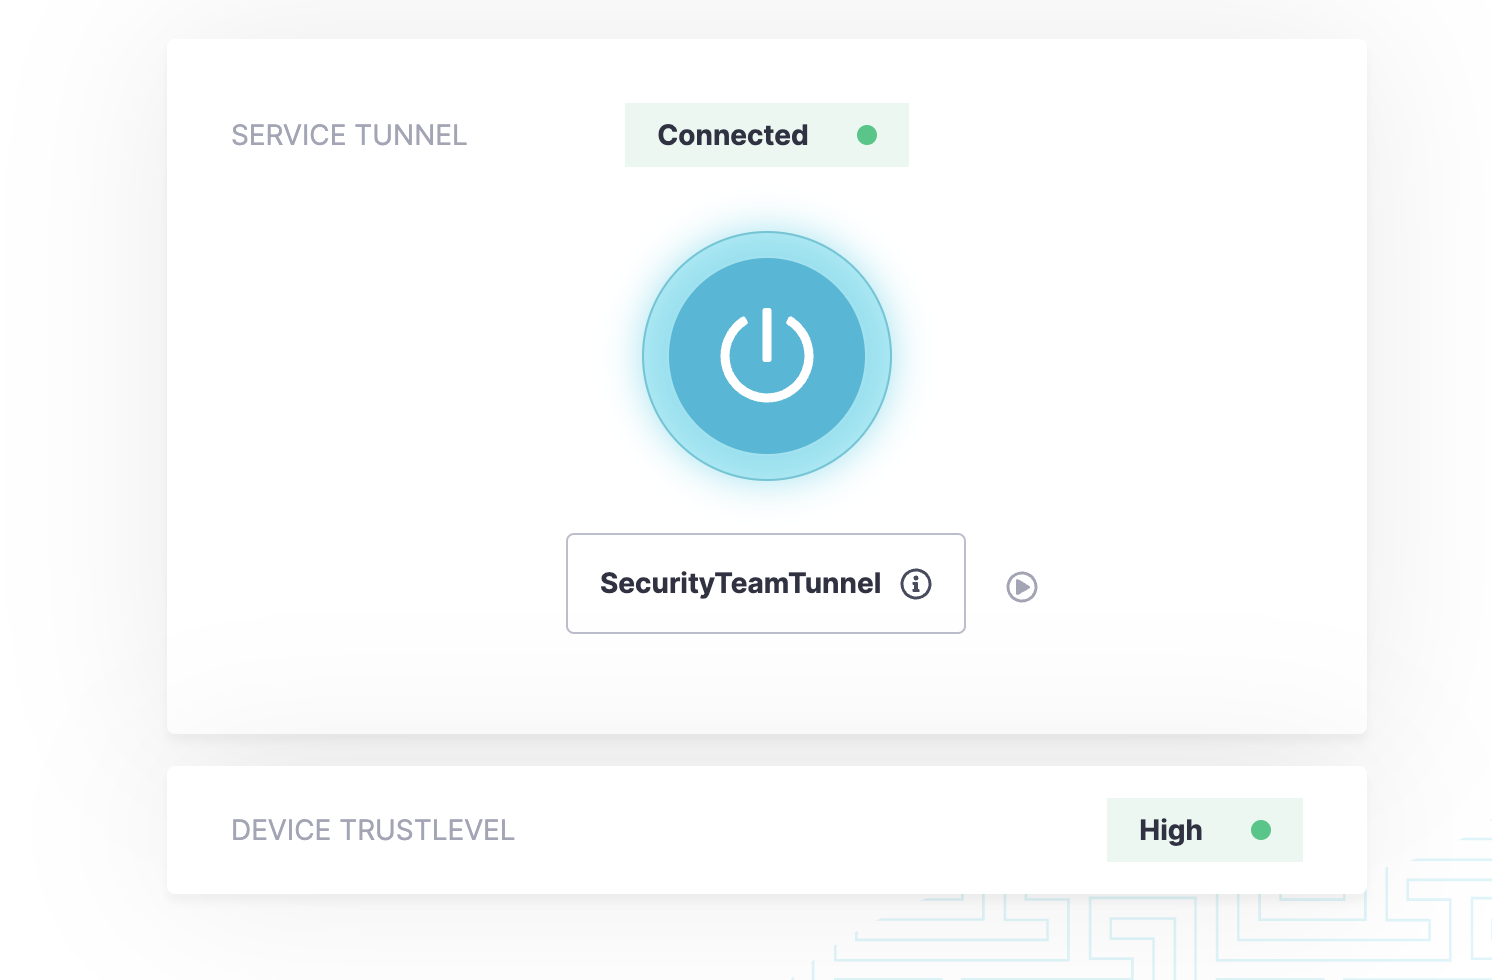
- Once the tunnel is connected, the power button will change colors and the status will display as "Connected".
- To test our private resources. Open the required tool used to access your service and use the private address to connect such as with a traditional VPN. In this example, we will use an SSH client to demonstrate SSH connectivity to our internal service.
In this example, we connect to 172.31.40.50 on port 22 which is a server on AWS without a public-facing interface.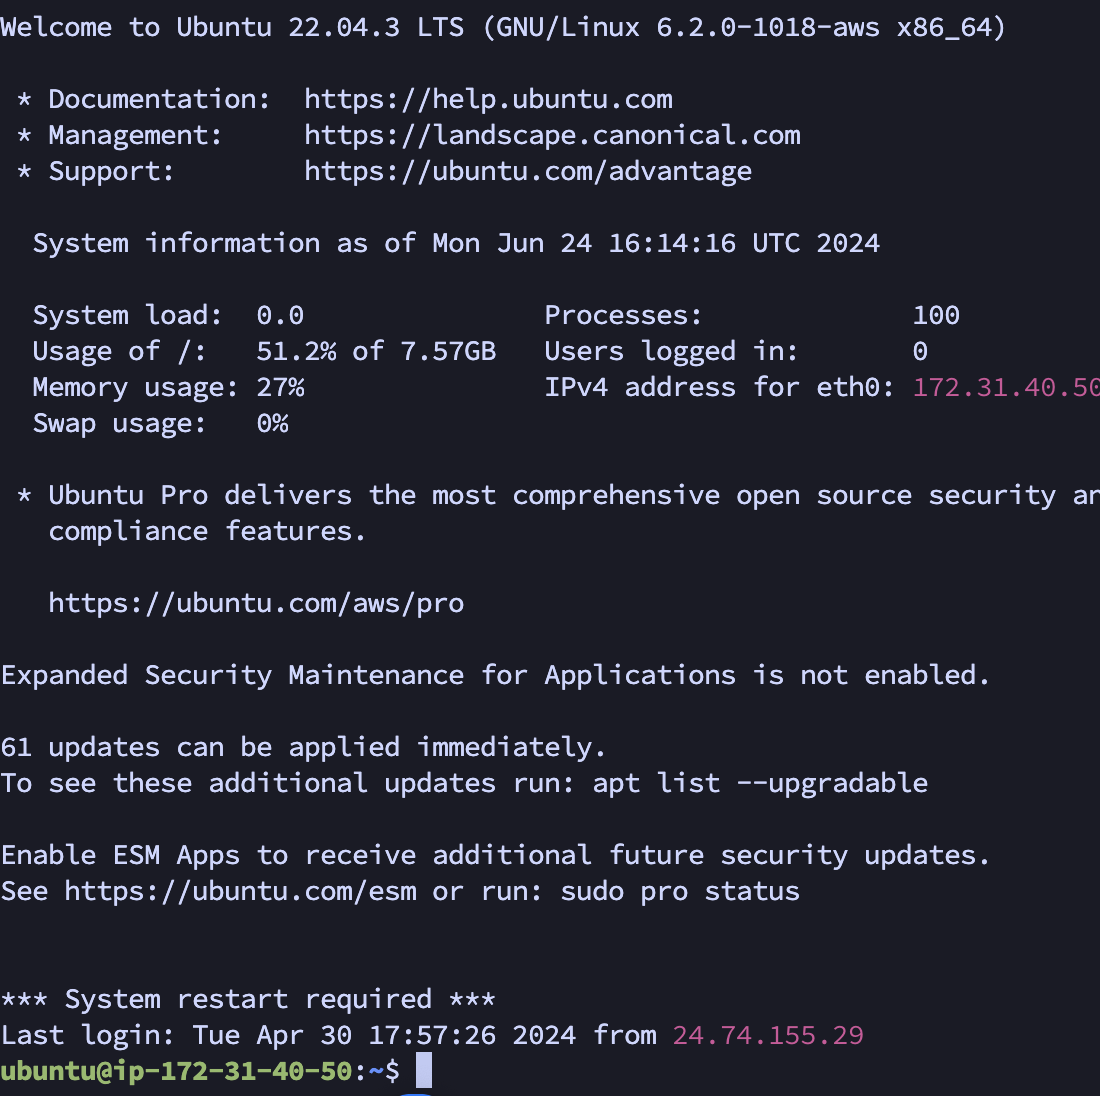
- Finally, we will test the public service put behind the tunnel in Step 5 above. Navigate the public FQDN defined in the tunnel. In this case, we are using an IP checker to validate that the traffic from our device is going through the service tunnel. Note the IP listed and ensure it is part of the Global Edge IP Range for SonicWall's managed infrastructure.
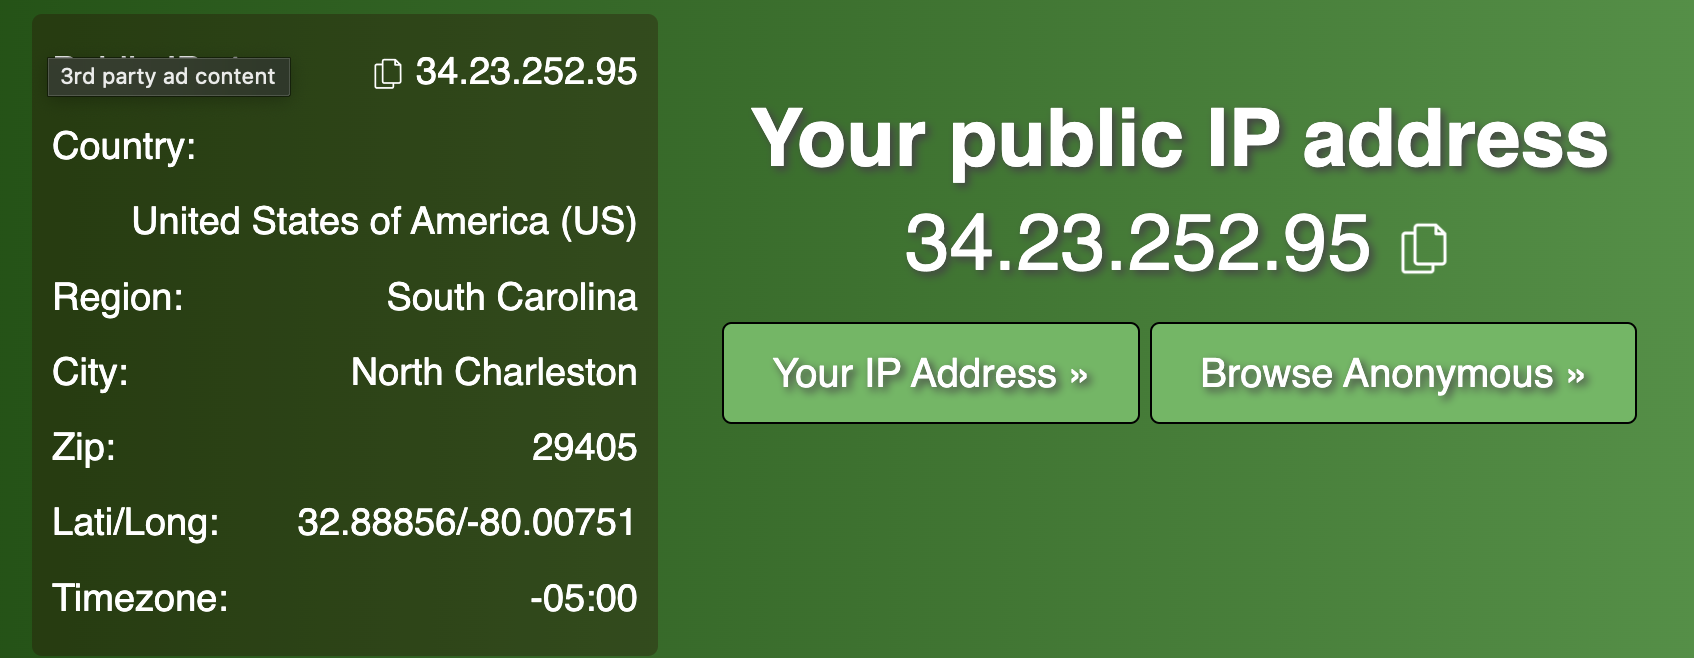
You have now completed Part Six. You may feel free to continue to add to this tunnel, adjust as needed, or create as many as needed for your desired use cases. In Part Seven, we will look at Device Posture and how to tweak it to serve your environment's needs.
CSE Getting Started: Create A Trust Profile
Related Articles
Related Articles
- DNS Filtering Transition FAQ
- Cloud Secure Edge (CSE) behavior when firewall is replaced or upgraded
- Cloud Secure Edge How to remove a Infrastructure service


 YES
YES NO
NO