


-
Products
-
SonicPlatform
SonicPlatform is the cybersecurity platform purpose-built for MSPs, making managing complex security environments among multiple tenants easy and streamlined.
Discover More
-
-
Solutions
-
Federal
Protect Federal Agencies and Networks with scalable, purpose-built cybersecurity solutions
Learn MoreFederalProtect Federal Agencies and Networks with scalable, purpose-built cybersecurity solutions
Learn More - Industries
- Use Cases
-
-
Partners
-
Partner Portal
Access to deal registration, MDF, sales and marketing tools, training and more
Learn MorePartner PortalAccess to deal registration, MDF, sales and marketing tools, training and more
Learn More - SonicWall Partners
- Partner Resources
-
-
Support
-
Support Portal
Find answers to your questions by searching across our knowledge base, community, technical documentation and video tutorials
Learn MoreSupport PortalFind answers to your questions by searching across our knowledge base, community, technical documentation and video tutorials
Learn More - Support
- Resources
- Capture Labs
-
- Company
- Contact Us
CSE Getting Started: Deploy A Standalone Connector
 09/24/2024
  5 People found this article helpful
 78,959 Views

Description
When using SonicWall Cloud Secure Edge (CSE) you're likely to use two architectures. The most common being Global Edge where you ingress into your on-prem resources using a dial-out Connector which establishes a secure tunnel to the Global Edge AccessTiers.
The Connector will then receive traffic from the AccessTiers which have passed the configured policy checks for their respective service and route it to the appropriate backend address.
Follow the guide below to configure the Connector on a standalone server. The examples provided by this article will use Ubuntu and aims to provide general guidance. If you are looking for step-by-step instructions for your particular Platform or OS, please refer to the Related Articles section below.
Requirements:
- Supported host for Connector
- Elevated Access to the desired host
Resolution
Start by navigating to the SonicWall CSE Command Center and log in.
- On the SonicWall CSE Command Center, go to Networks|Connectors and choose Create Connector
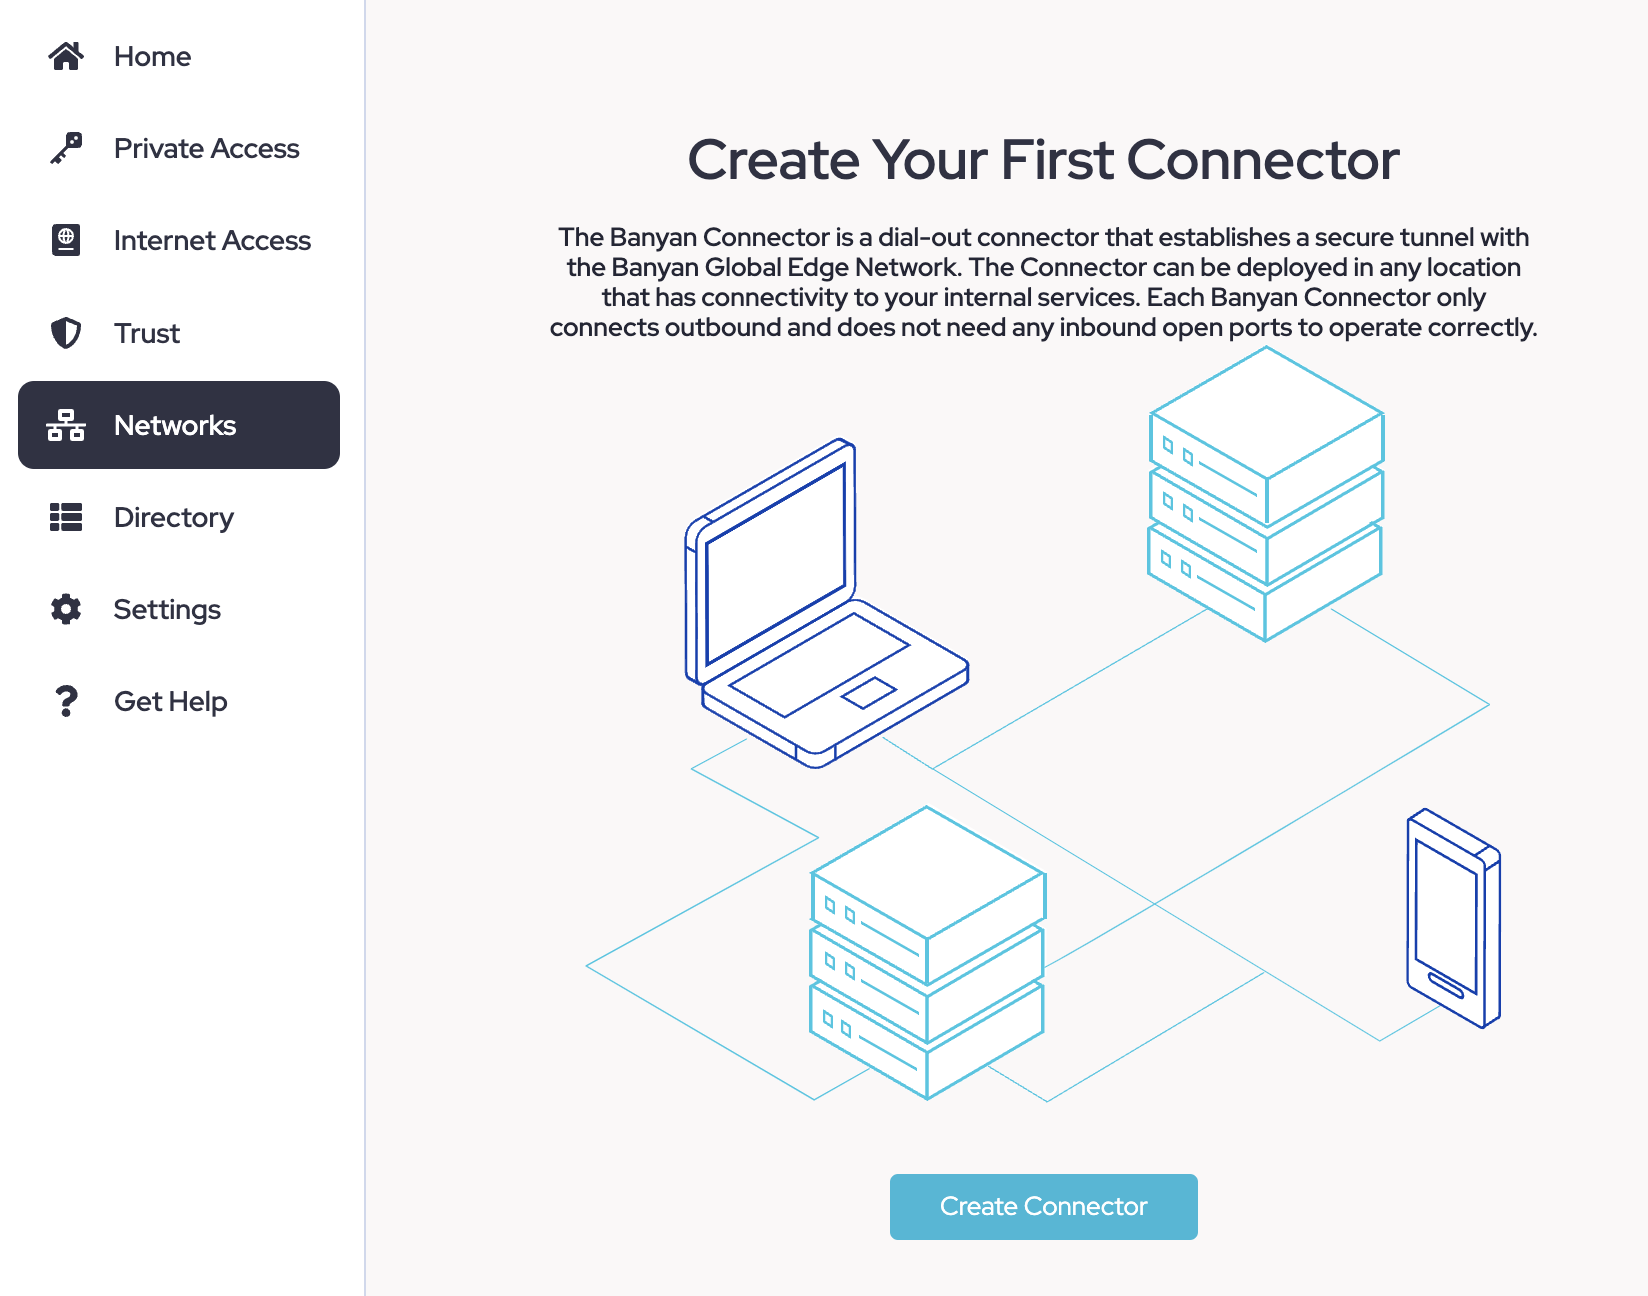
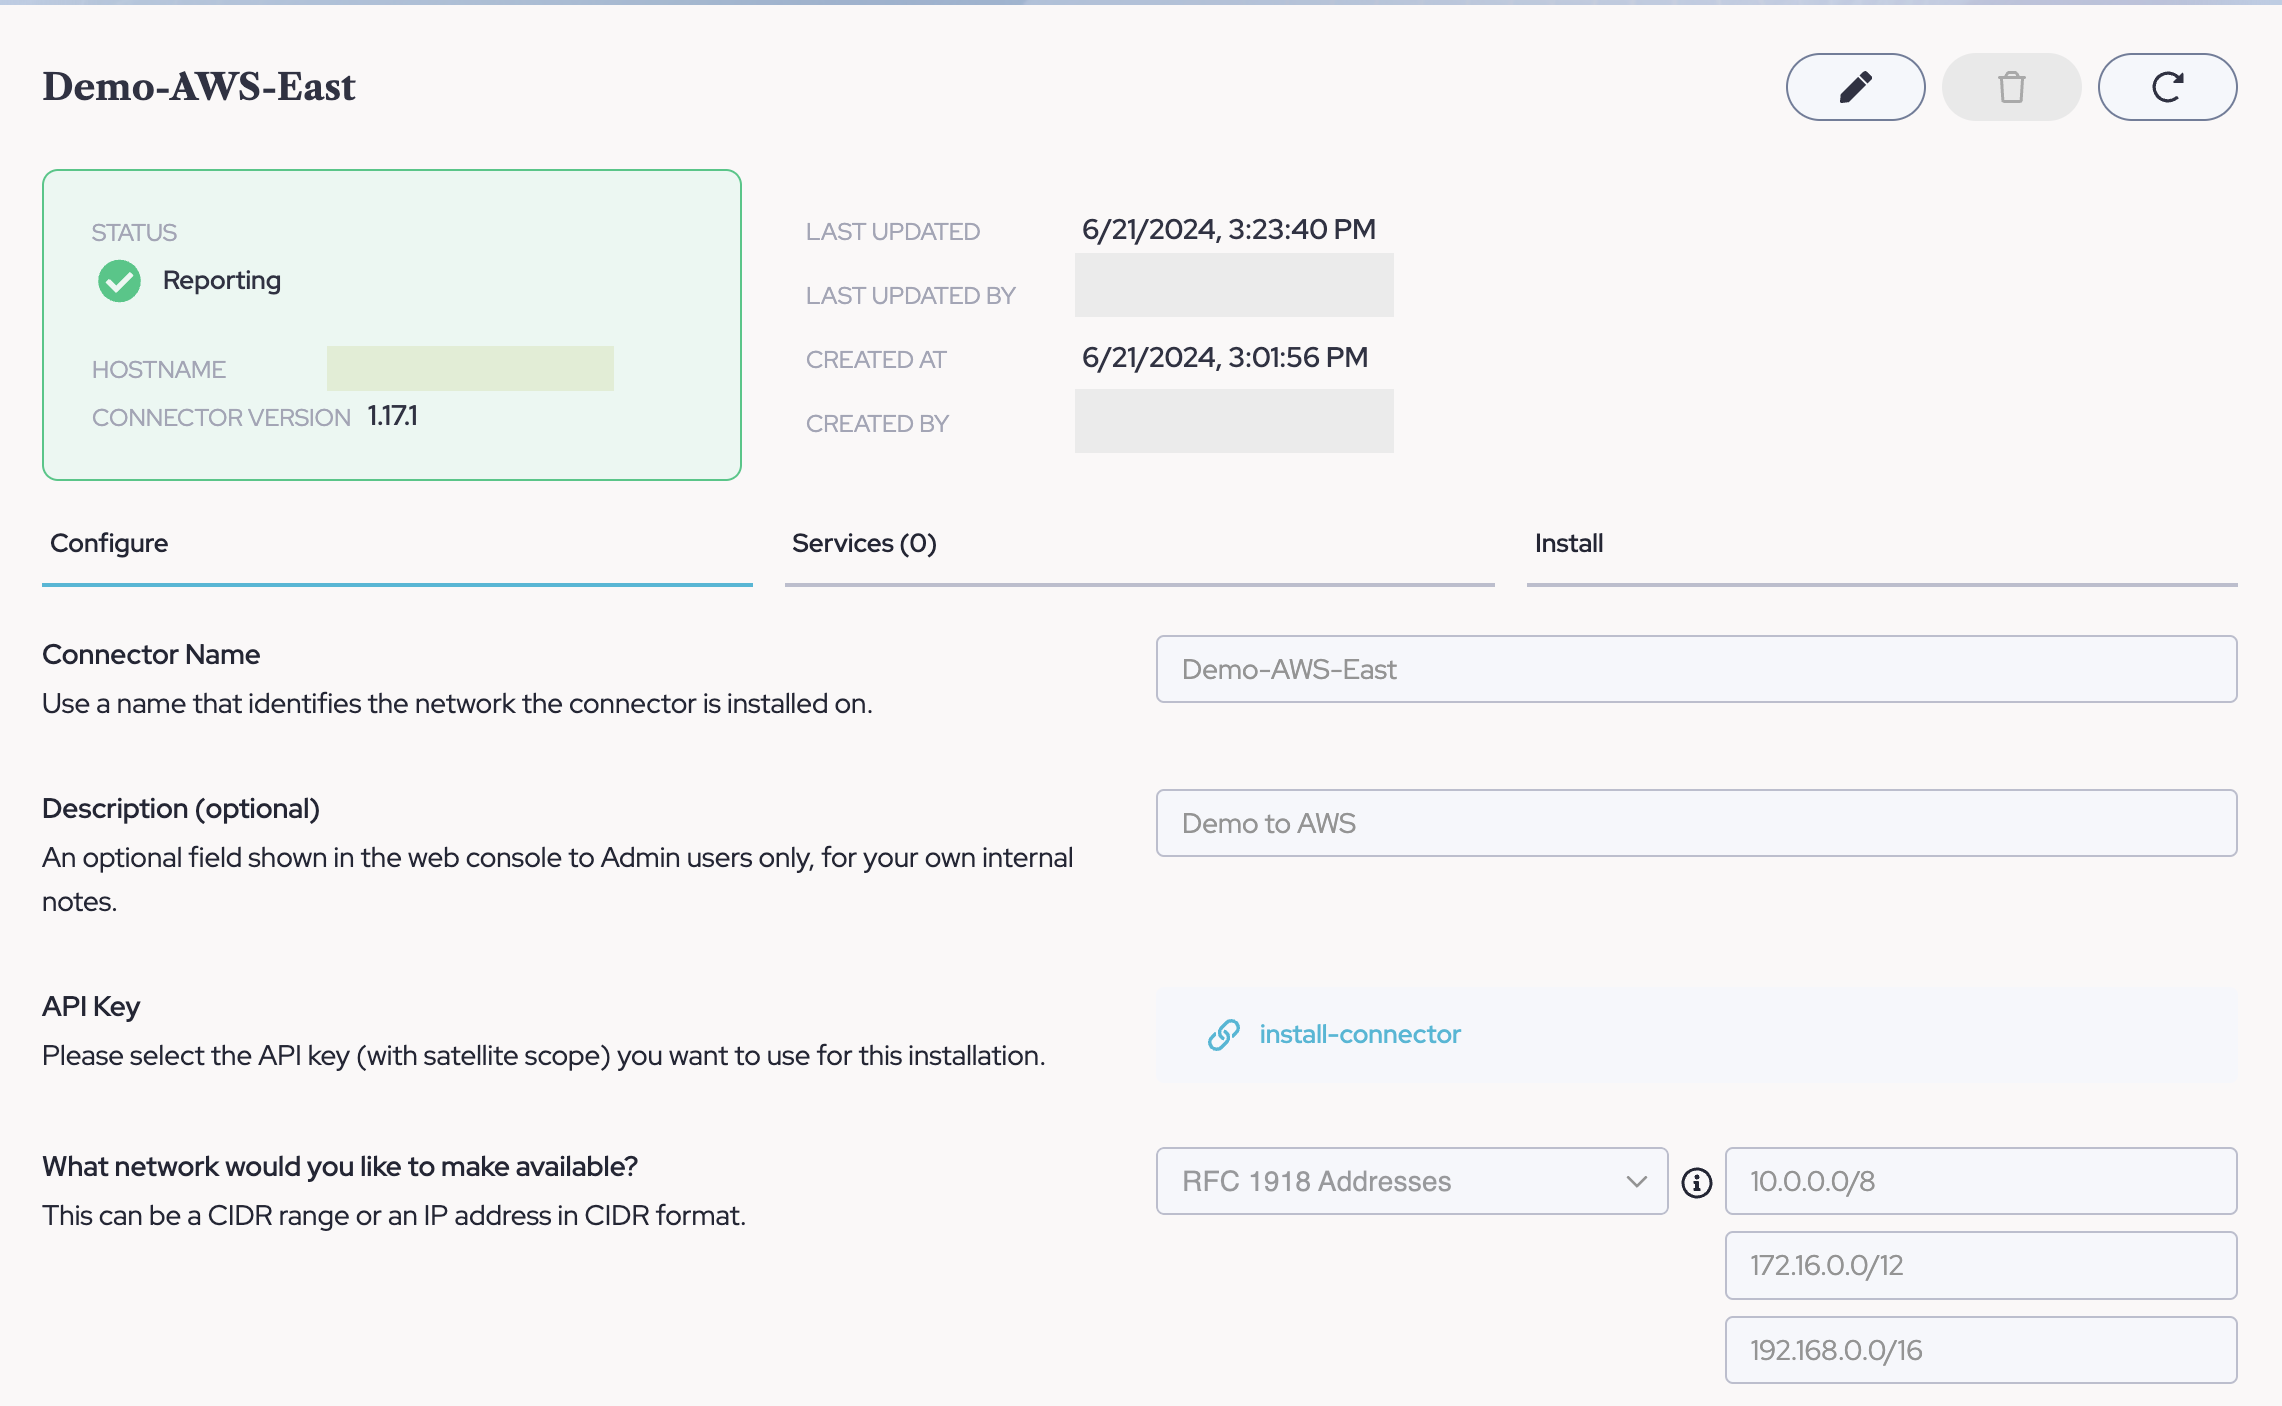
- Once clicked, this will bring you to the initial configuration page for the Connector. Fill out the following fields and click Continue.
The remaining fields are for more advanced configurations which may not apply to your environment. If you would like to learn more, please visit the Related Article section.
- Connector Name
- Description

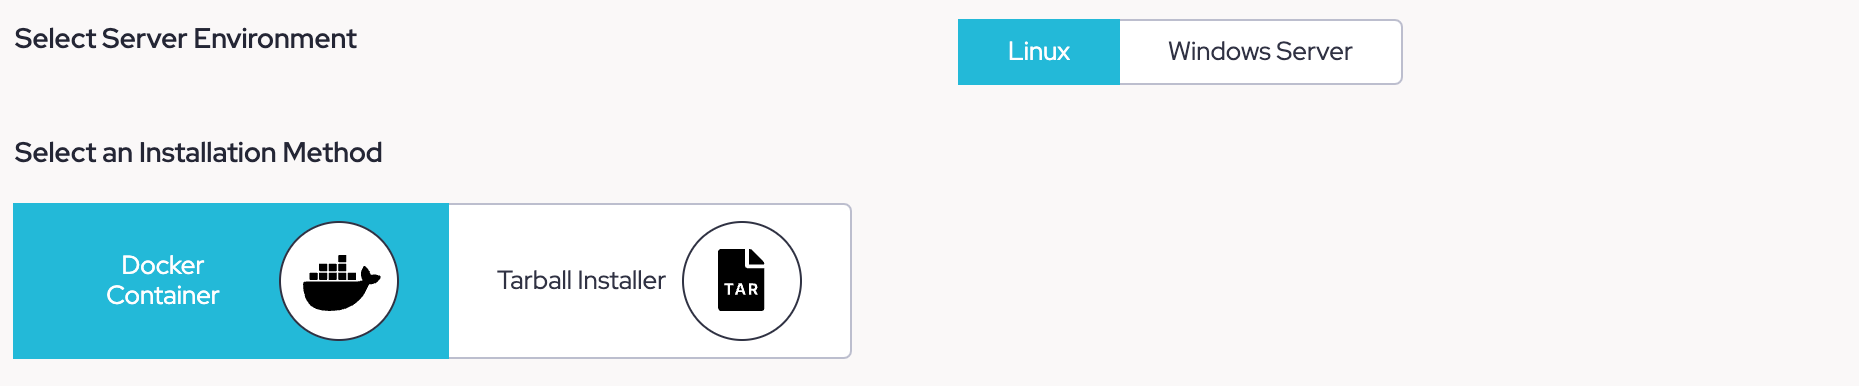
- Now the Command Center will supply with installation options. Please choose the Server Environment and Installation Method which best suits your needs.
- Once you select your Server Environment & Installation Method, scroll down to find the Pre-requirement Checklist and Installation Steps. In this article, we will use an Ubuntu 22.04 LTS Server as an example. Read through the Pre-requirement checklist and perform any necessary actions to complete it. This ensures your Connector will be able to function as intended within your networking rules and segment.
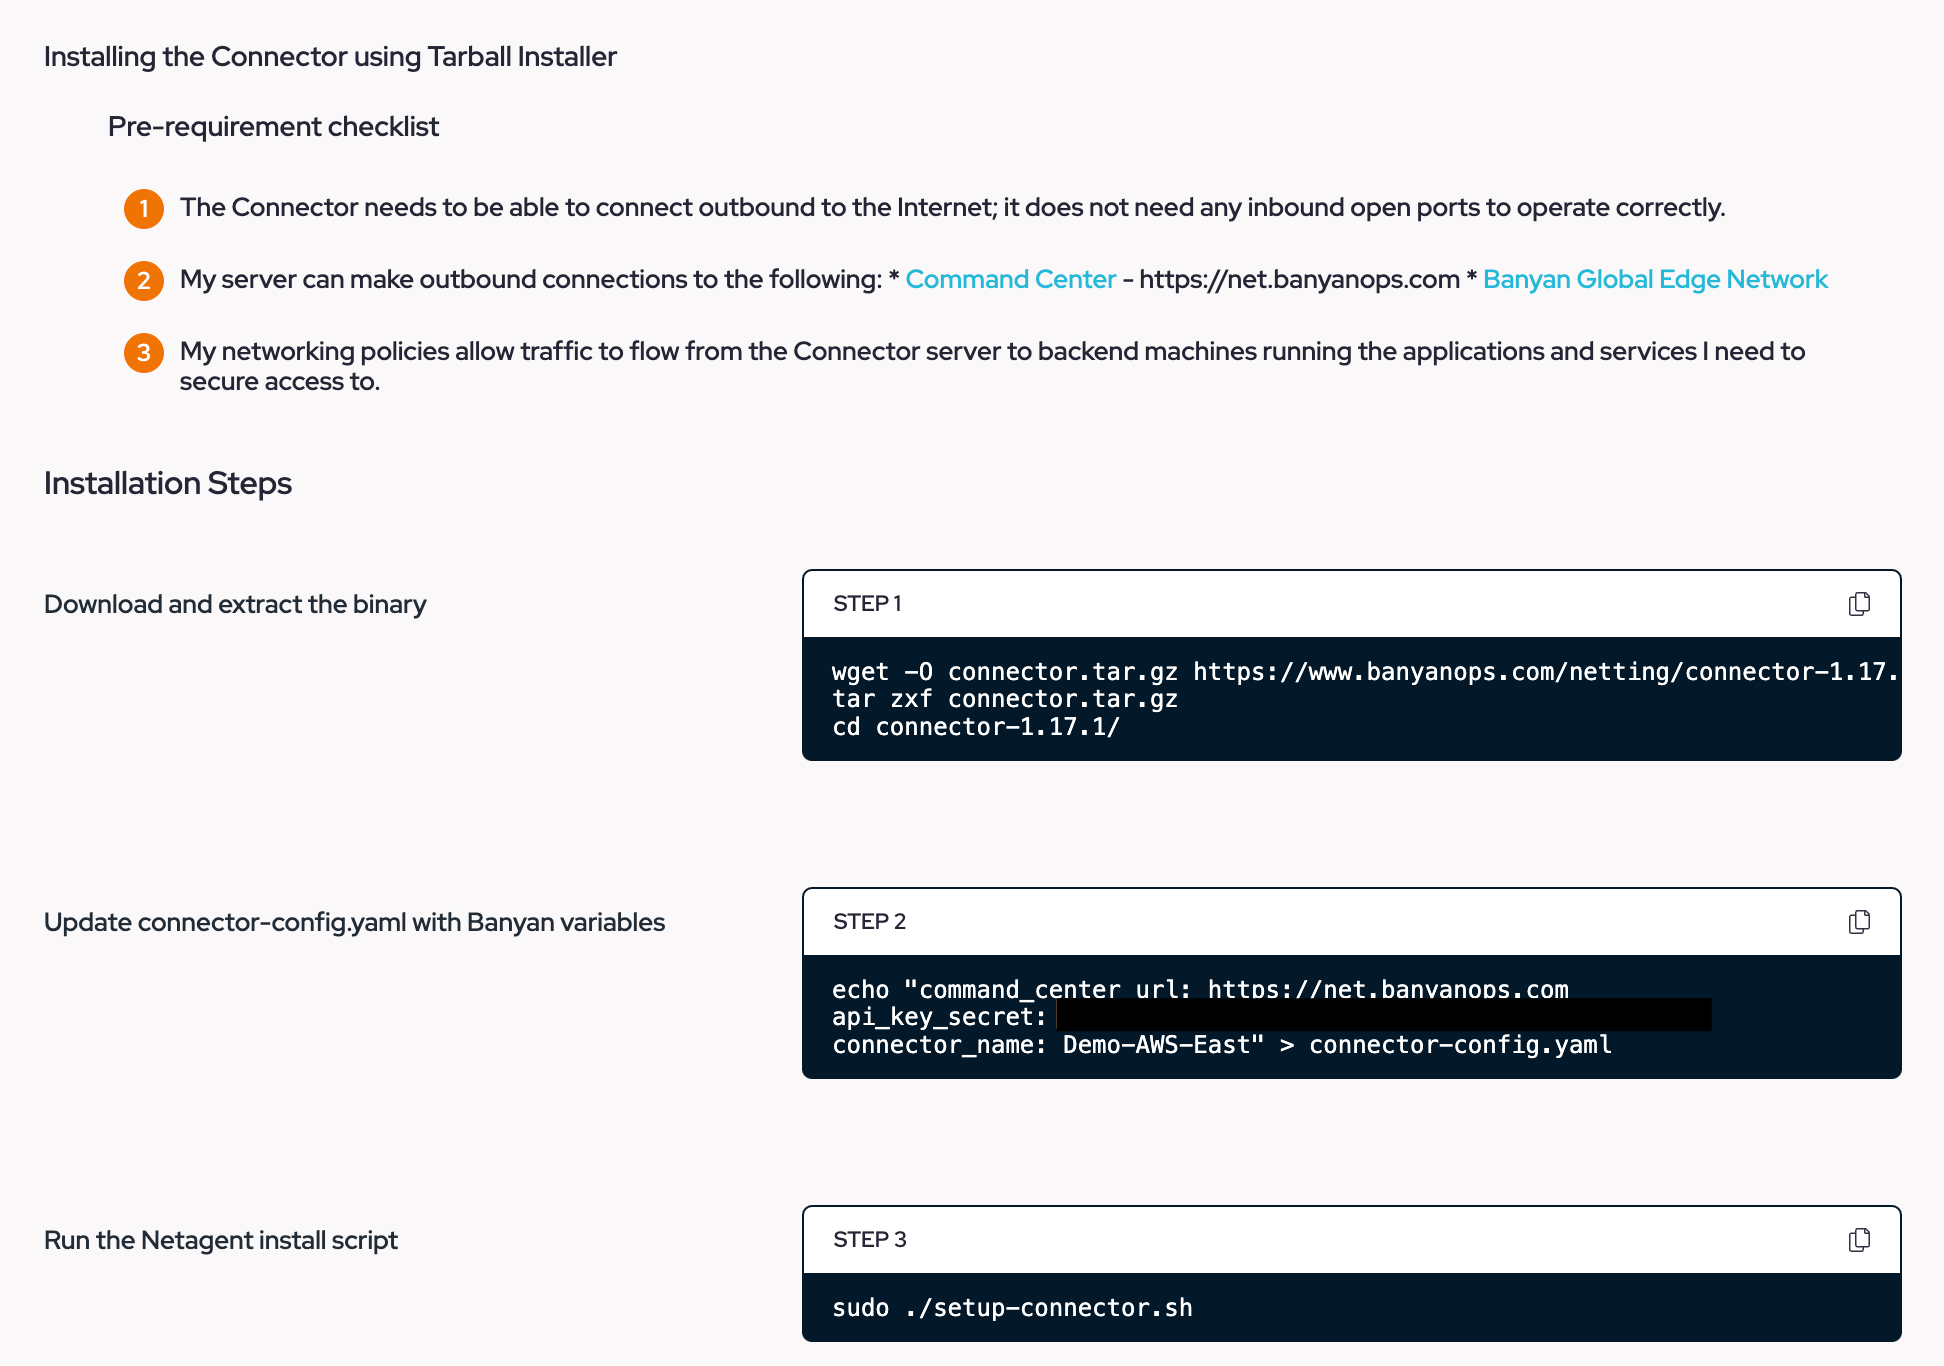
- Now follow the "Installation Steps" by entering each command into the CLI of the server. You may copy and paste each one as they are pre-configured for your Connector.
Steps 1 & 2 - Download & Configuration: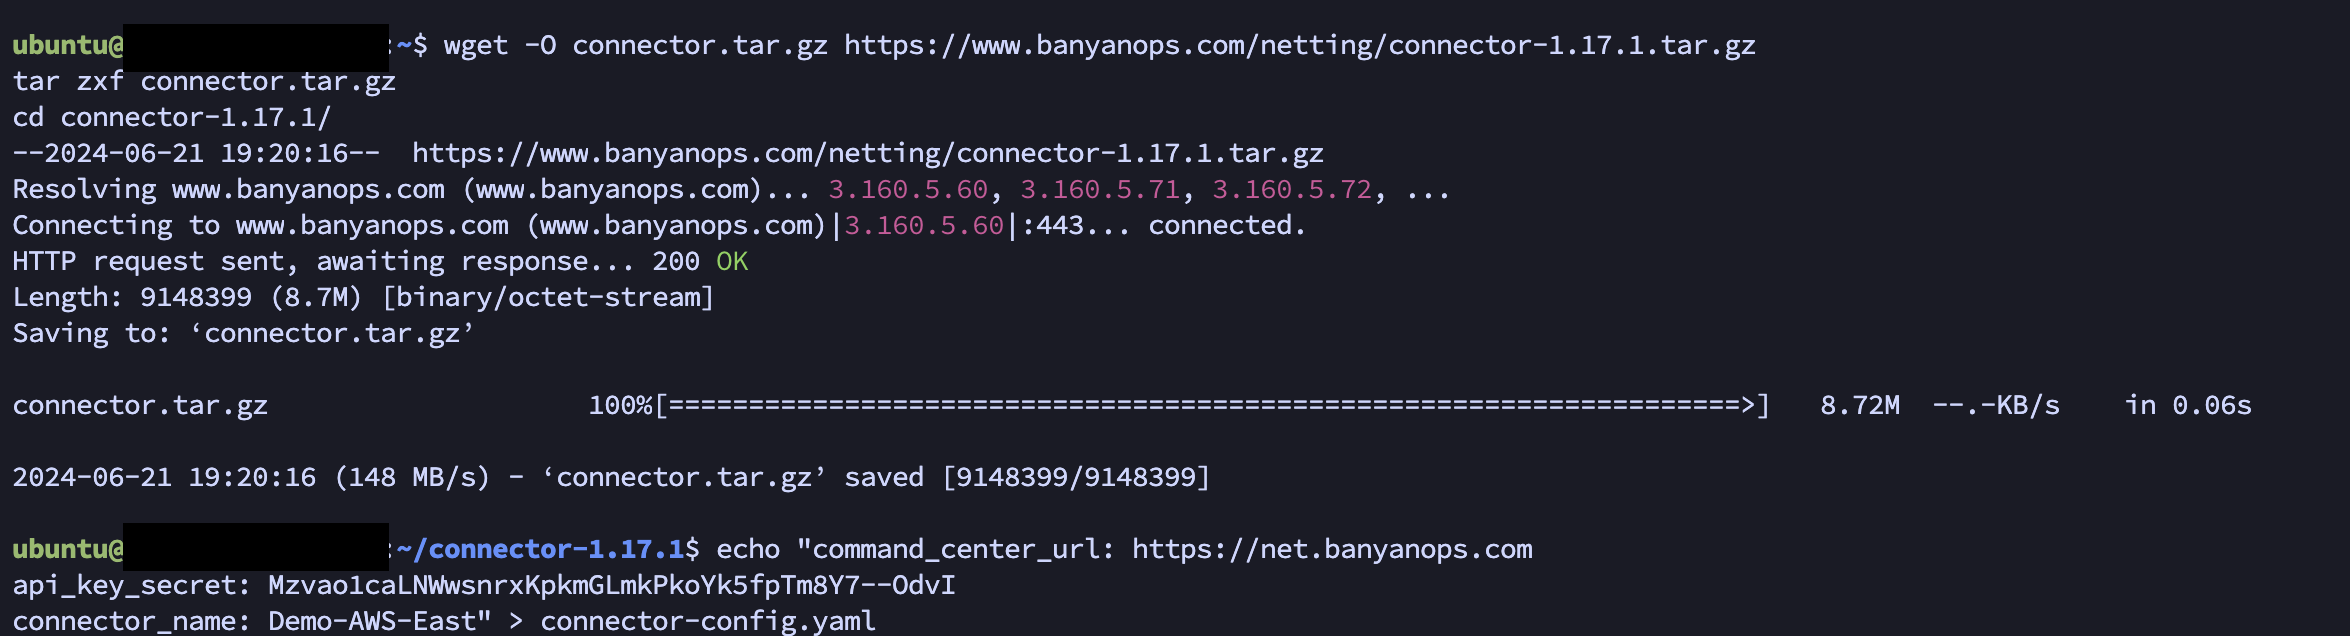
Step 3 - Installation: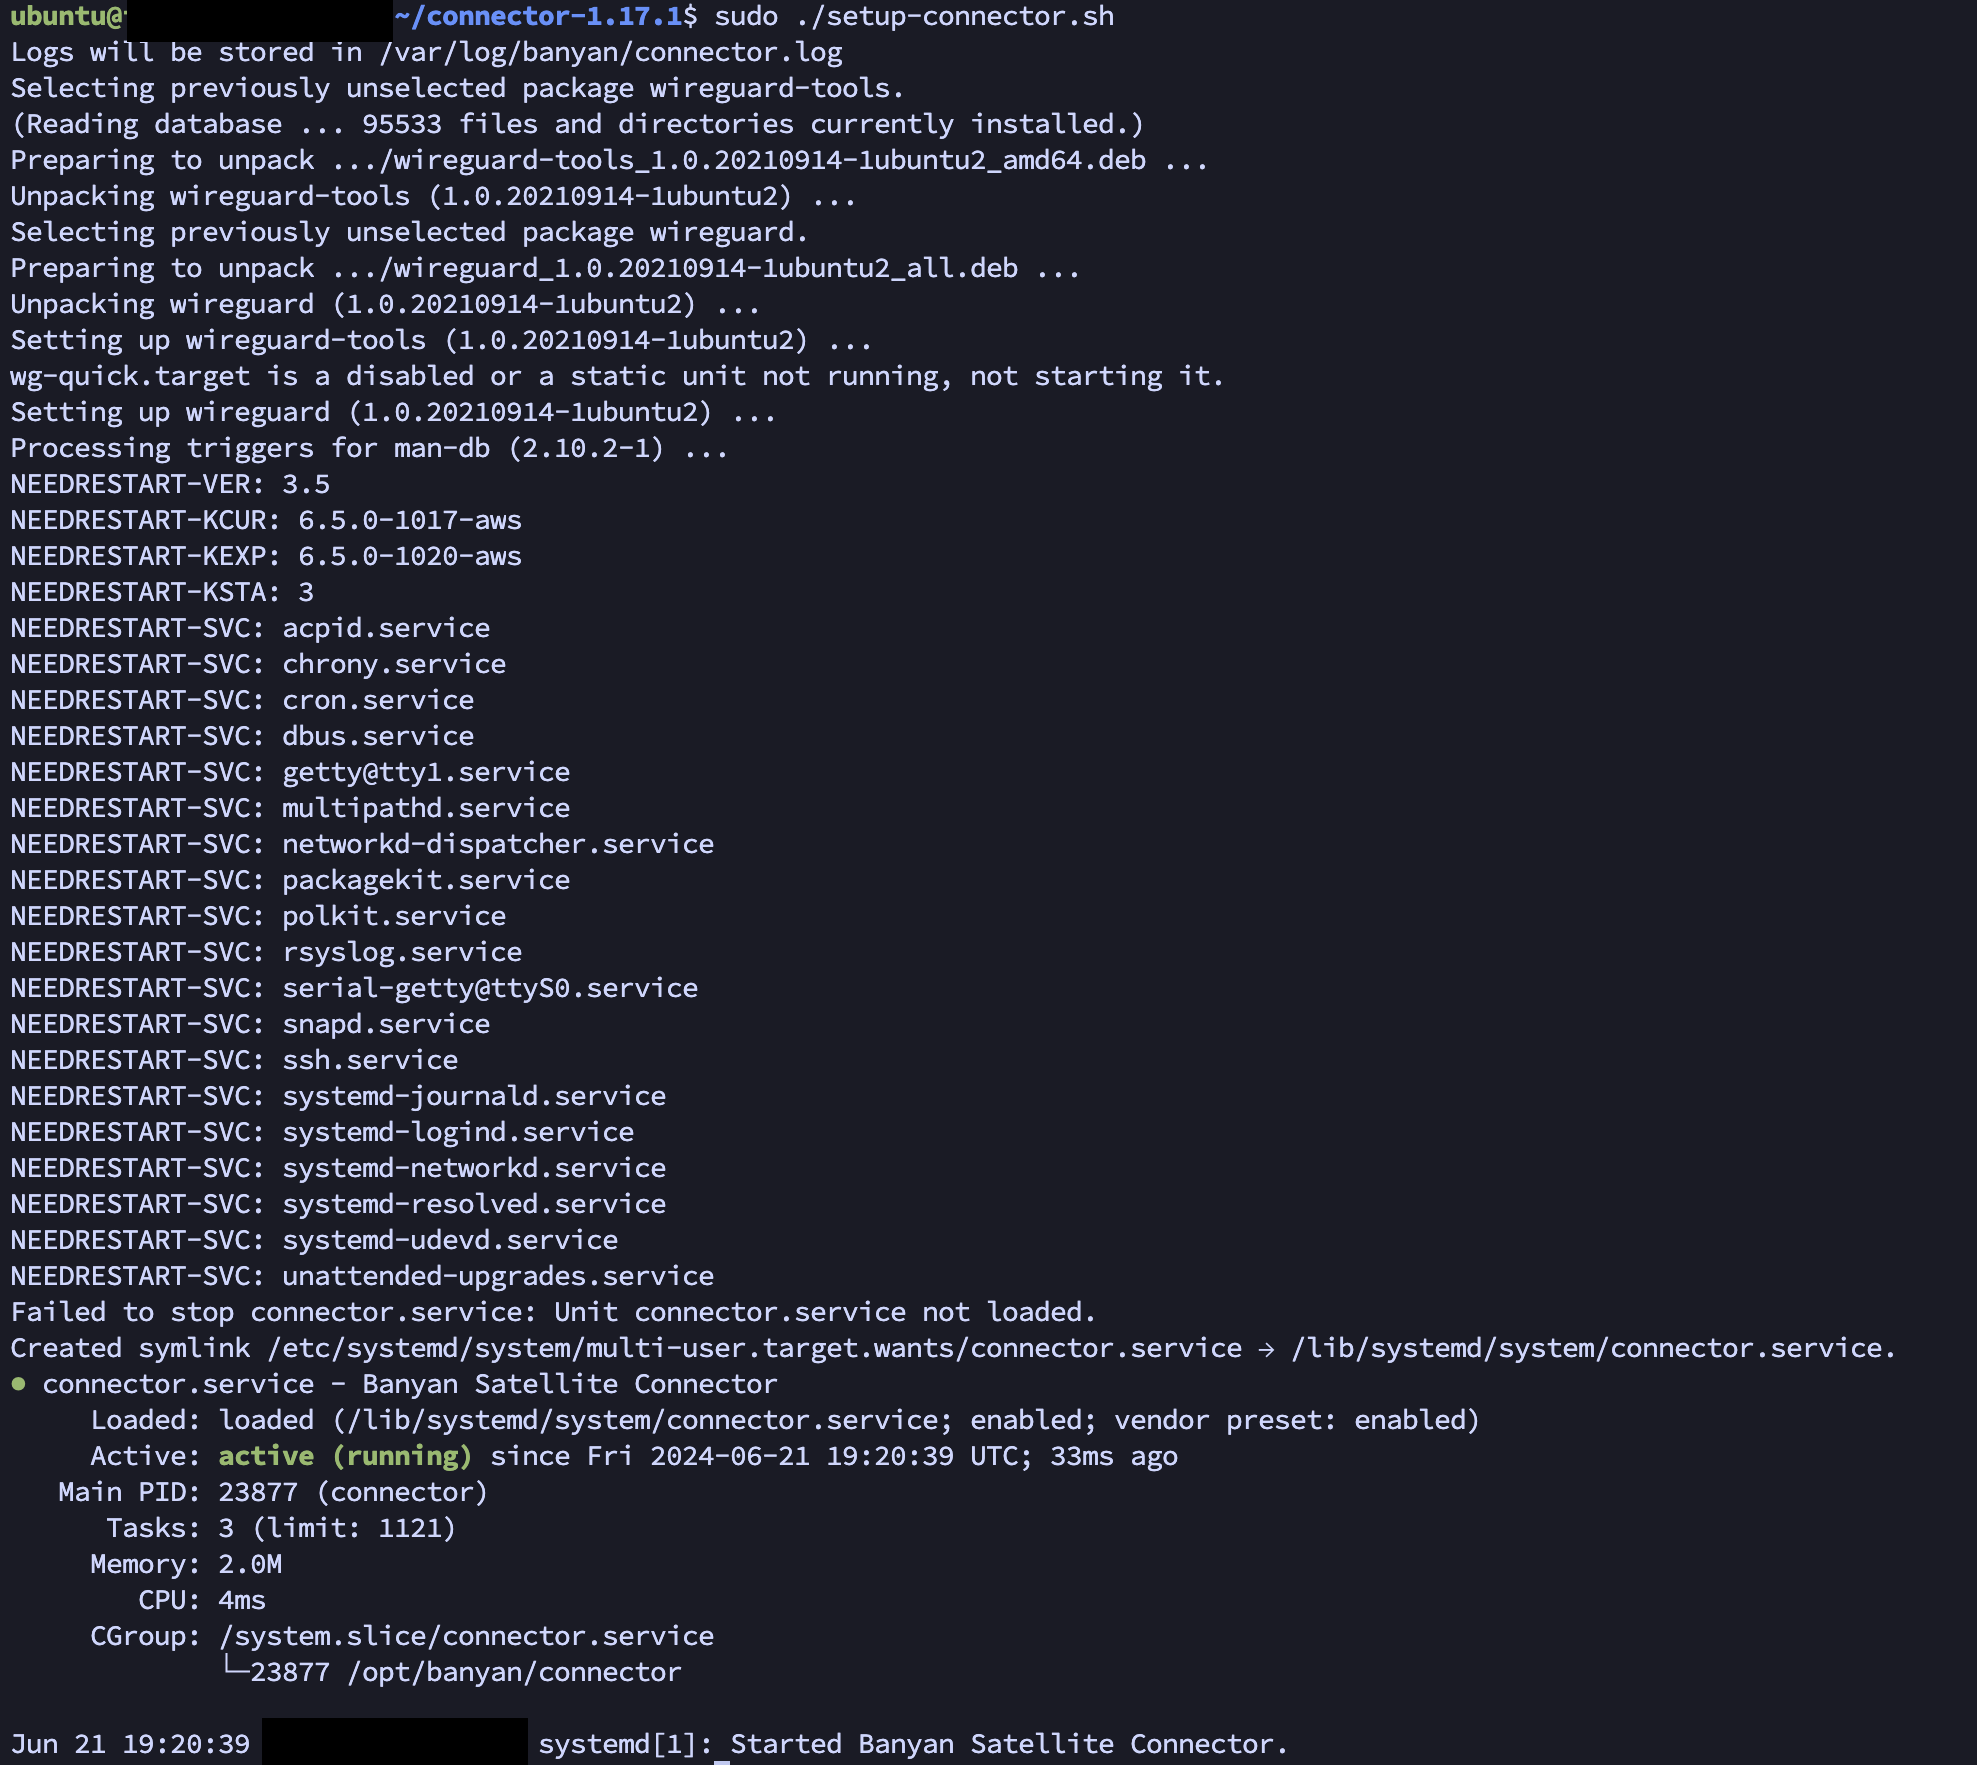
- Once the service shows on your server as running, swap to the Command Center. Then when Connector begins reporting, the "Continue" button at the bottom will light up and become clickable. Please click "Continue" once available.

Validation
Part 2 of this guide series will go over registering the CSE Desktop App which will validate the work we have done here. If you hit an error in Part 2, please ensure the steps in this guide were followed.
- Once completing Step 6 above. You will be redirected to the Connector Overview page showing your connector as "Reporting". If you are not able to get to this step or the Connector is not reporting. Please ensure steps 3-5 of this article have been completed in full. A "Reporting" status is the validation of steps in this article.
Next Steps
In Part Four, we will go through making your first role. This role will mapped with the user groups that CSE retrieved during the validation. In the background, your identity provider sent the user groups associated with your user to SonicWall's Cloud Secure Edge.
CSE Getting Started Part Four: Create A Role
Related Articles
Related Articles
- DNS Filtering Transition FAQ
- Cloud Secure Edge (CSE) behavior when firewall is replaced or upgraded
- Cloud Secure Edge How to remove a Infrastructure service
 YES
YES NO
NO