How can I configure Advanced Bandwidth Management on Gen 7 ?


Description
This article shows the steps to configure Advanced Bandwidth Management on Gen7 SonicWall devices.
Resolution
Configure Bandwidth Management in WAN Interface
- Navigate to Network|System|Interfaces, hover the mouse on the desired WAN interface and click the pen icon (Edit the interface) option.

- Navigate to Advanced tab and under BANDWIDTH MANAGEMENT, turn on the toggle option for Enable Interface Egress Bandwidth Limitation and Enable Interface Ingress Bandwidth Limitation.
- Input the Egress and Ingress bandwidth limitation values in Kbps. If you are unsure of these values, contact your ISP.
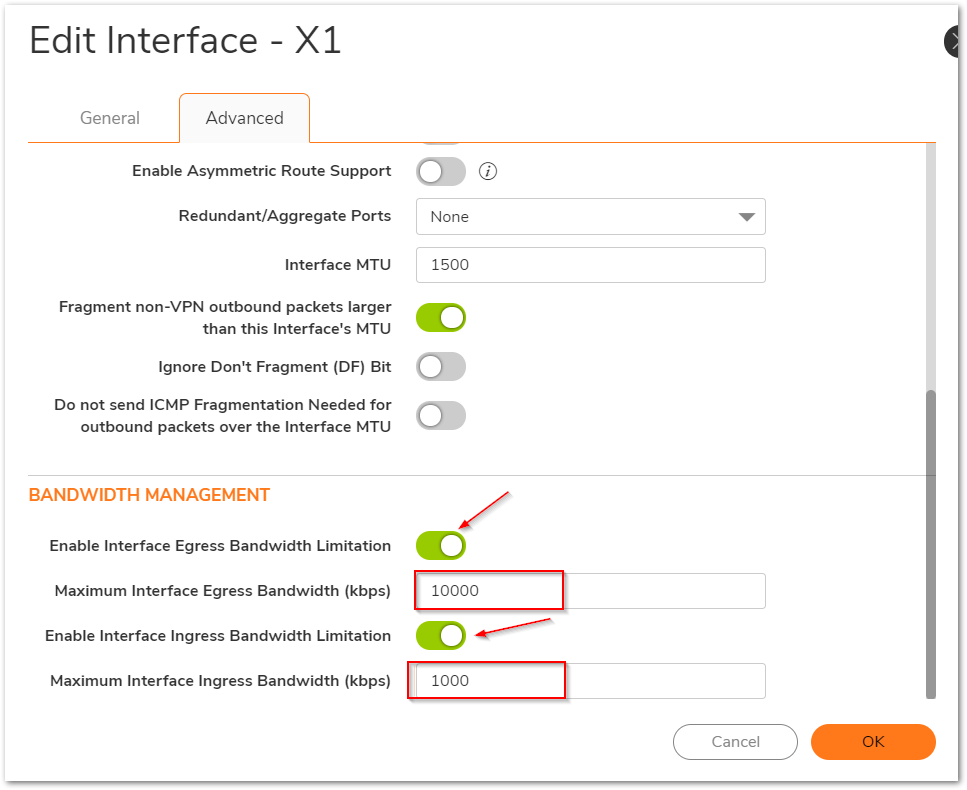
- Click OK.
Creating Bandwidth Object
- Navigate to Object|Profile Objects|Bandwidth, click Add.

- Under General Tab, add a Name, Guaranteed /Maximum Bandwidth, Traffic Priority and Violation Action.
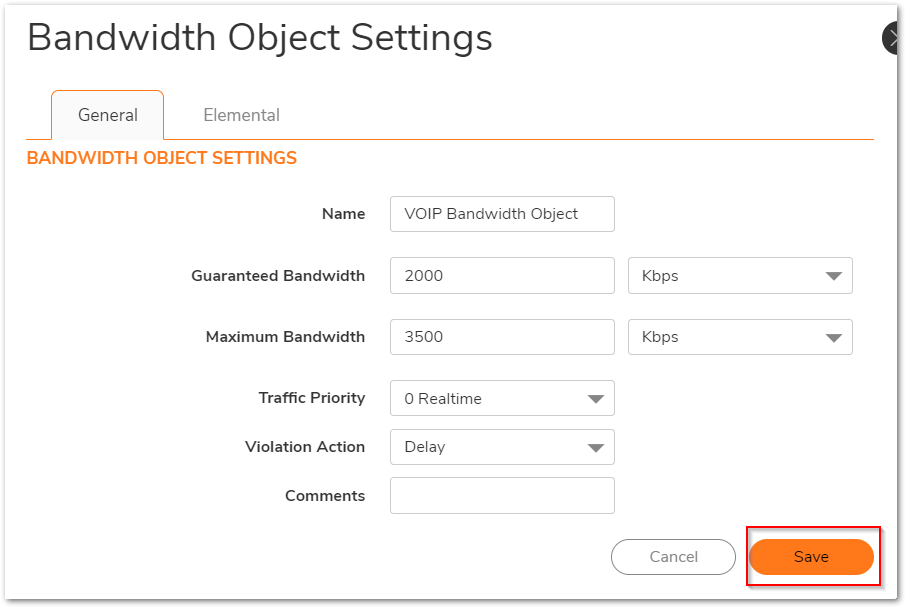
- Click Save.
Creating or Editing an Access Rule to apply Bandwidth Management
- Navigate to POLICY| Rules and Policies | Access Rules and find the access rule you'd like to apply BWM to.
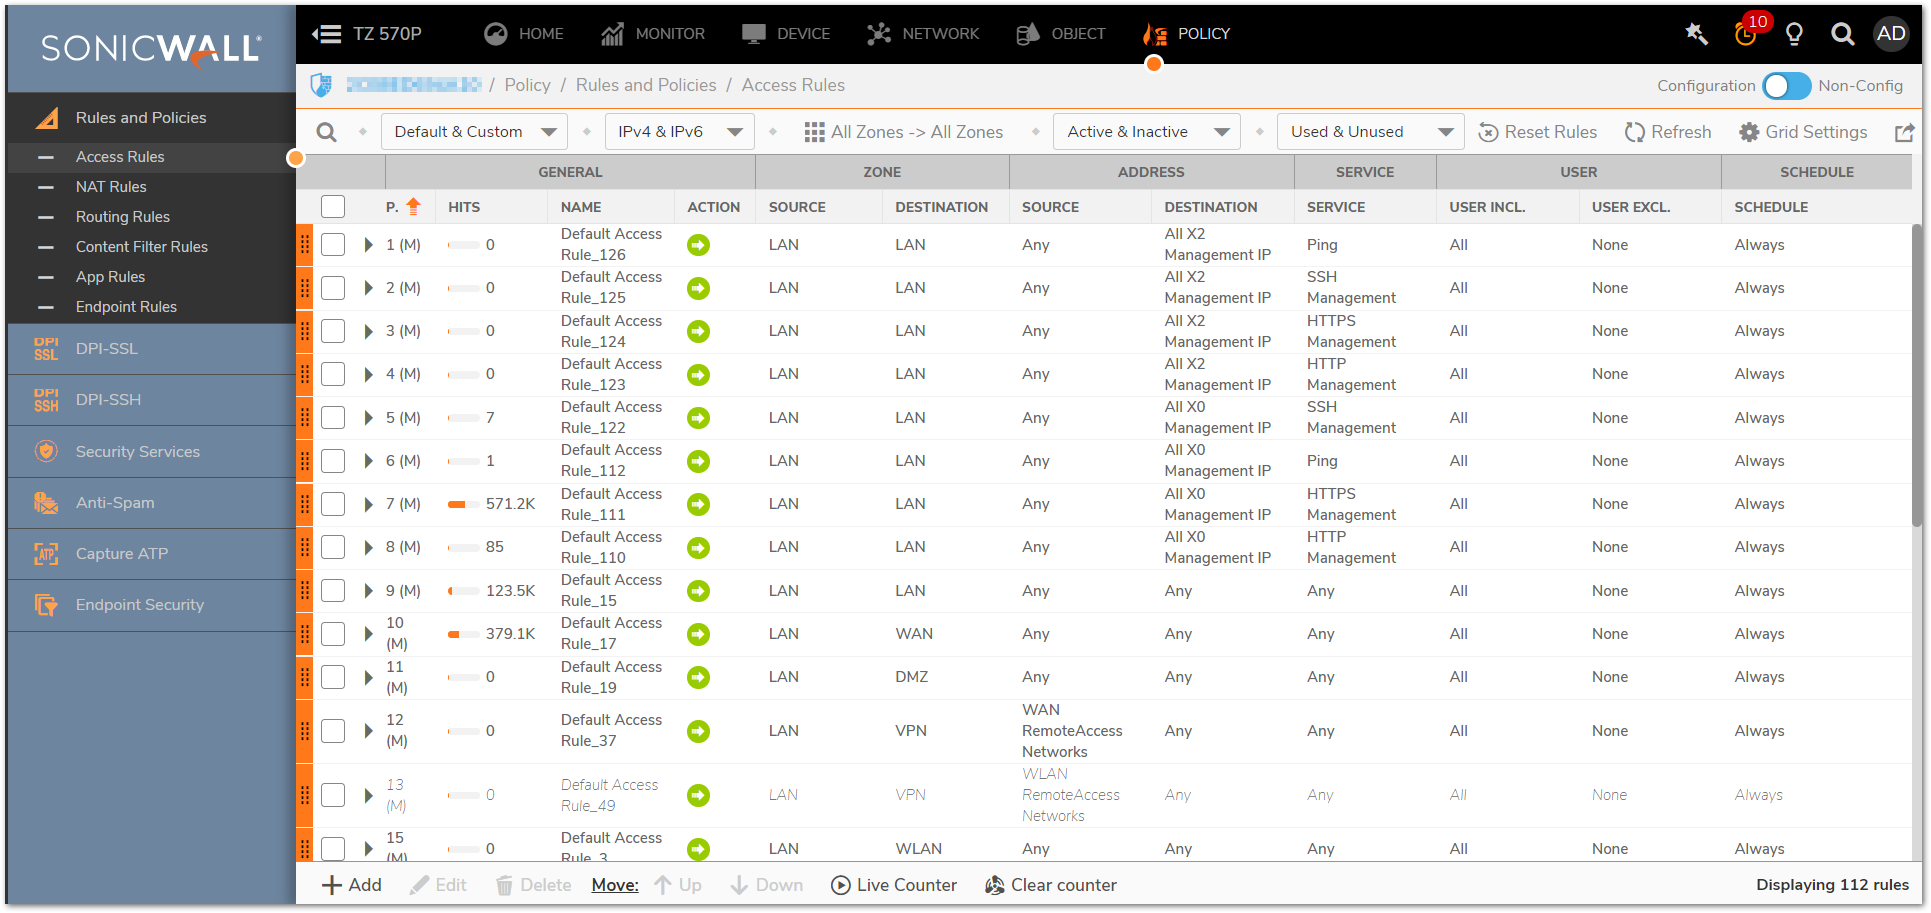
- If you would like to apply BWM on an existing access rule, hover the mouse on the desired rule and click the pen (edit) icon.
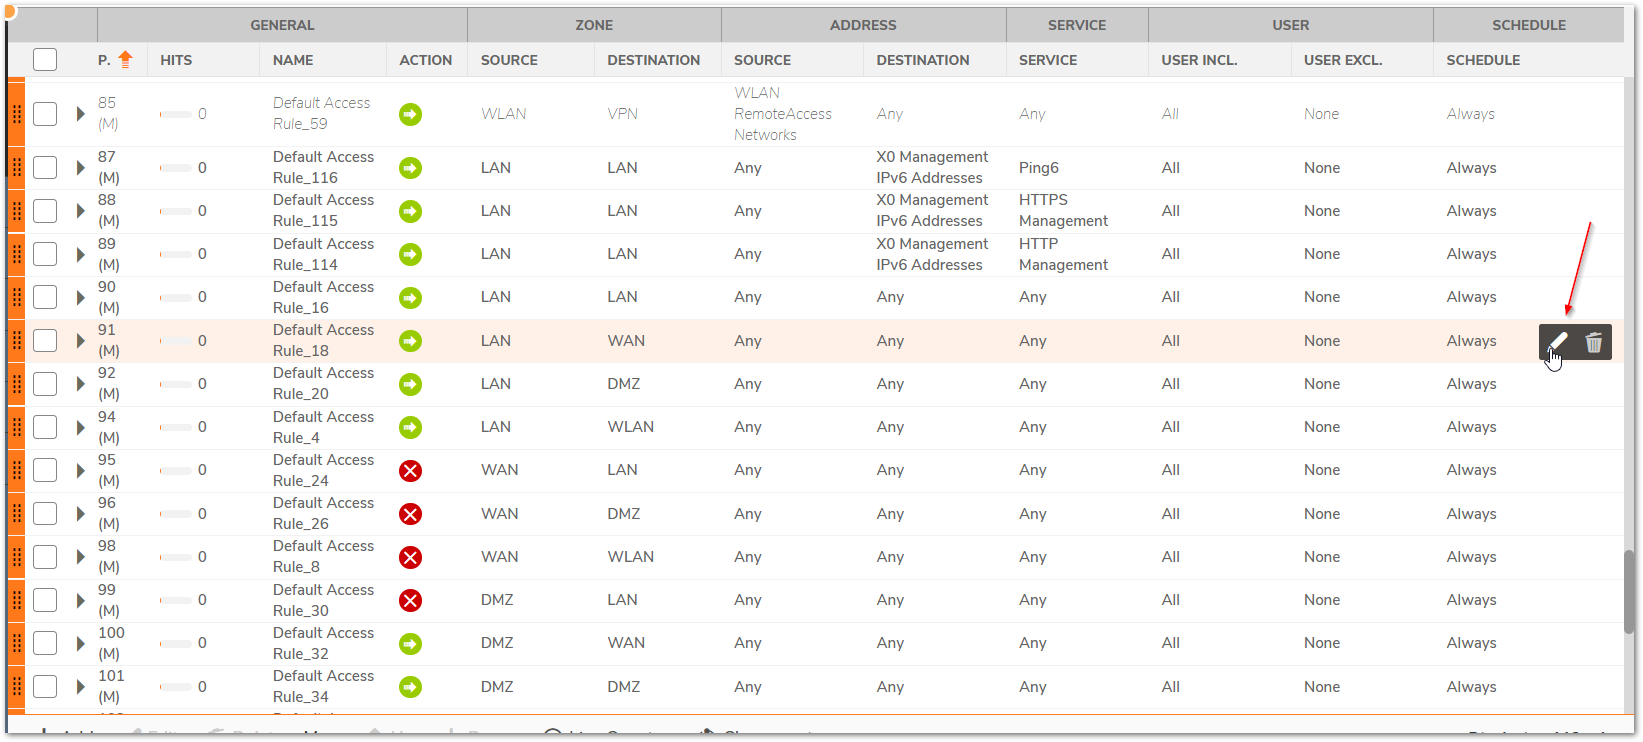
- If a new access rule is required, click Add and create the rule by entering desired Source, Destination, Service etc into the fields:
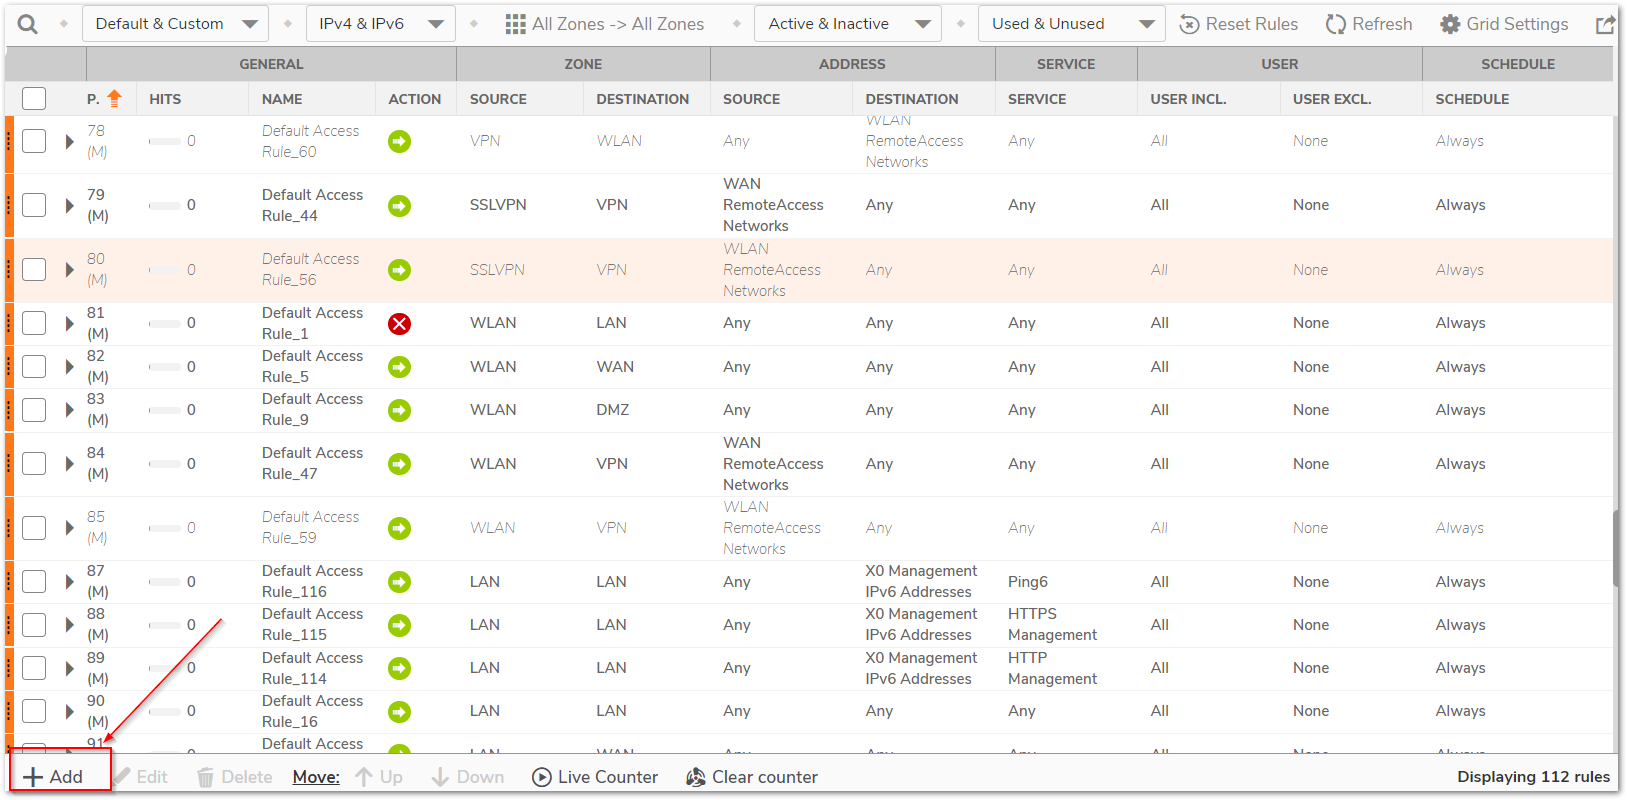
 TIP:If you are unfamiliar with setting up Access Rules, please refer to:How Can I Enable Port Forwarding And Allow Access To A Server Through The SonicWall?
 - On the access rule creation/modification screen, navigate to Traffic Shaping tab and under BWM (BANDWIDTH MANAGEMENT) option select the Egress and Ingress Bandwidth object.
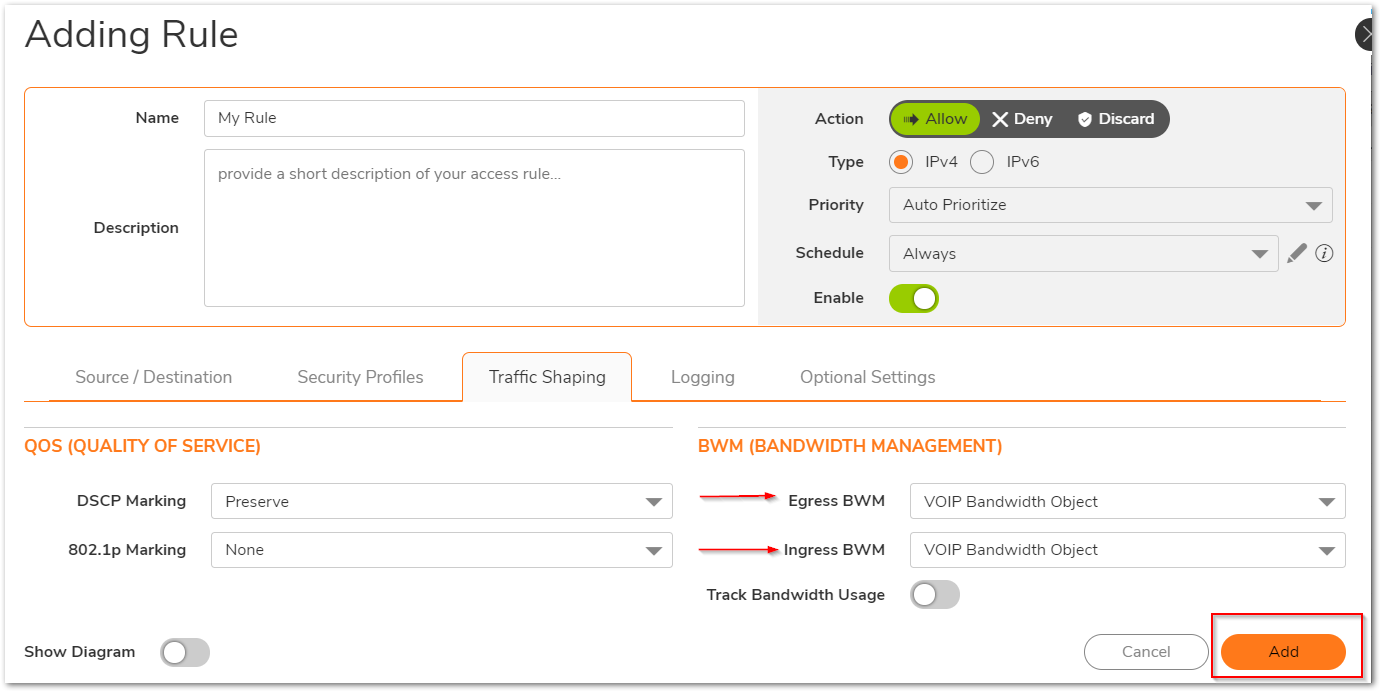
- Click Add.
Related Articles
- Error:"Invalid API Argument" when modifying the access rules
- Cysurance Partner FAQ
- Configure probe monitoring for WAN Failover and Loadbalancing - SonicWall UTM


 YES
YES NO
NO