NSM On-Prem Closed network guide
Description
This article goes over the steps for deploying Closed Network NSM On-Prem with a secondary High Availability (HA) server.
If not using a second High Availability NSM server, disregard those steps regarding the Secondary NSM server
Resolution
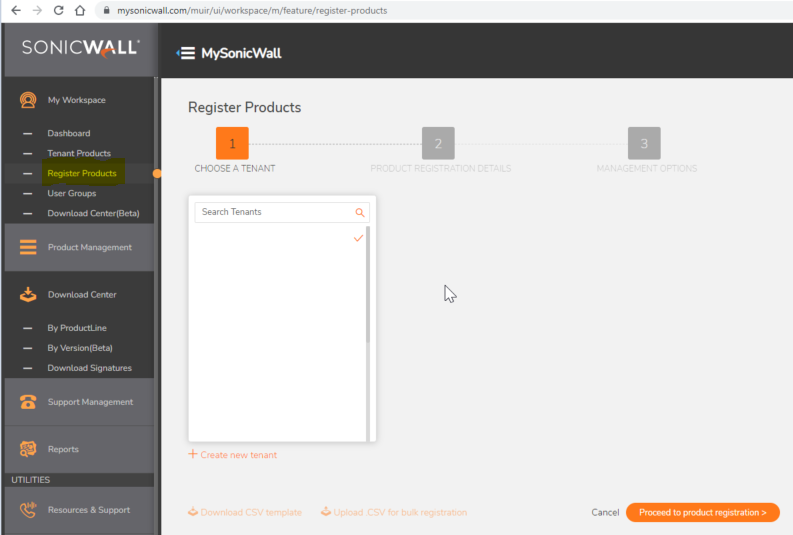
Steps on Mysonicwall.com:
1. Register your two standalone NSM On-Prem VM serial numbers.
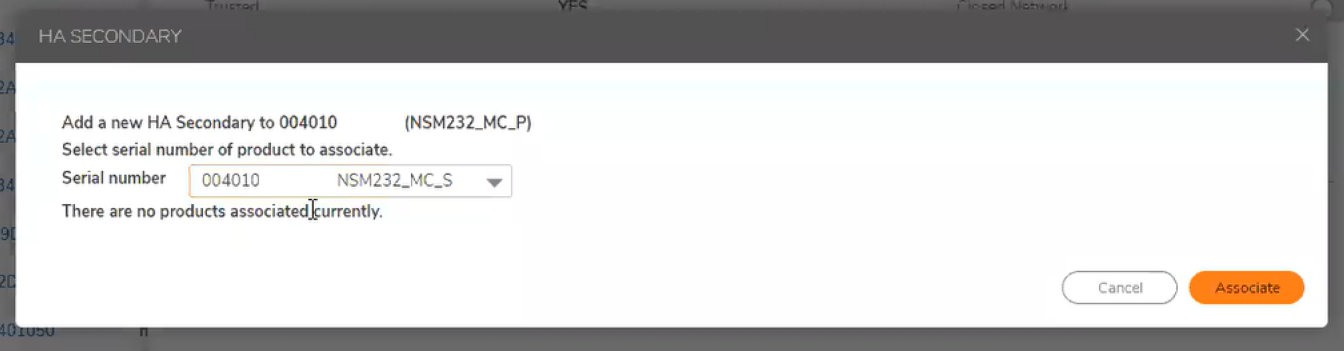
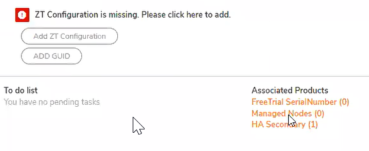
2. Associate the High Availability Secondary with the Primary.
-From the Primarys Mysonicwall.com page, Click the "HA Secondary" option.
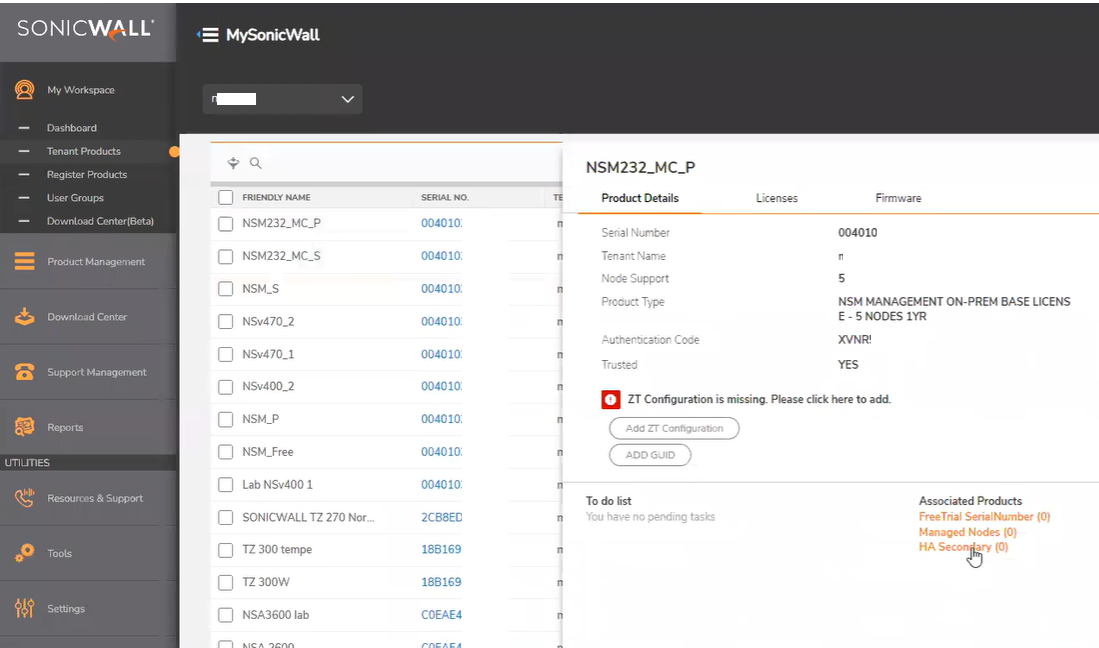
-Select the High Availability Secondarys Serial number from the drop down and click "Associate".
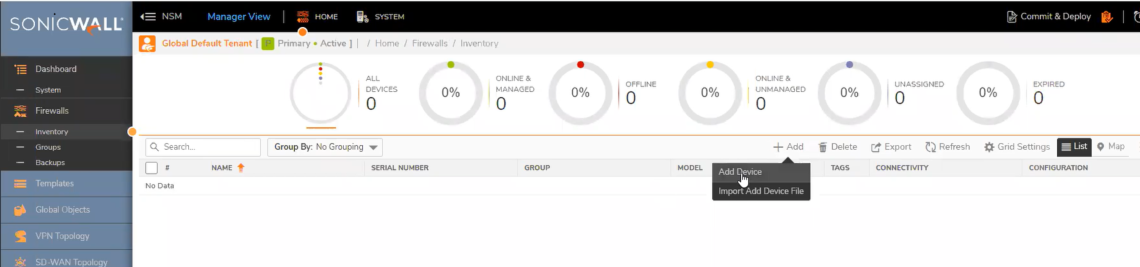
3. Associate Firewalls with the Primary High Availability NSM Server. If you don't see the proper firewalls in the drop down list, please remove them from any prior association with other NSM/GMS servers.
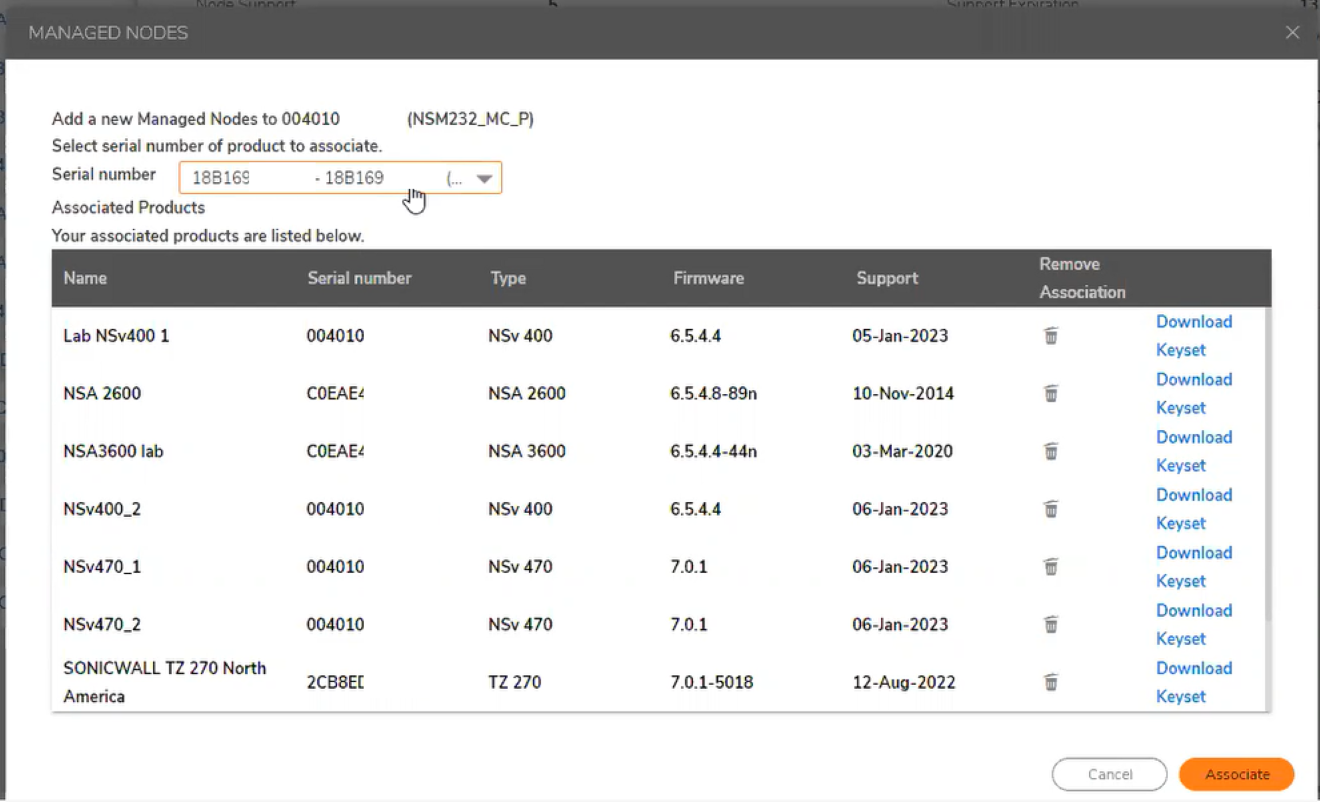
-Click on "Managed Nodes" to add firewalls to the Closed Network NSM deployment.
Use the drop down box to locate and Associate the firewalls needed for your Closed Network deployment and Click Associate after each one.
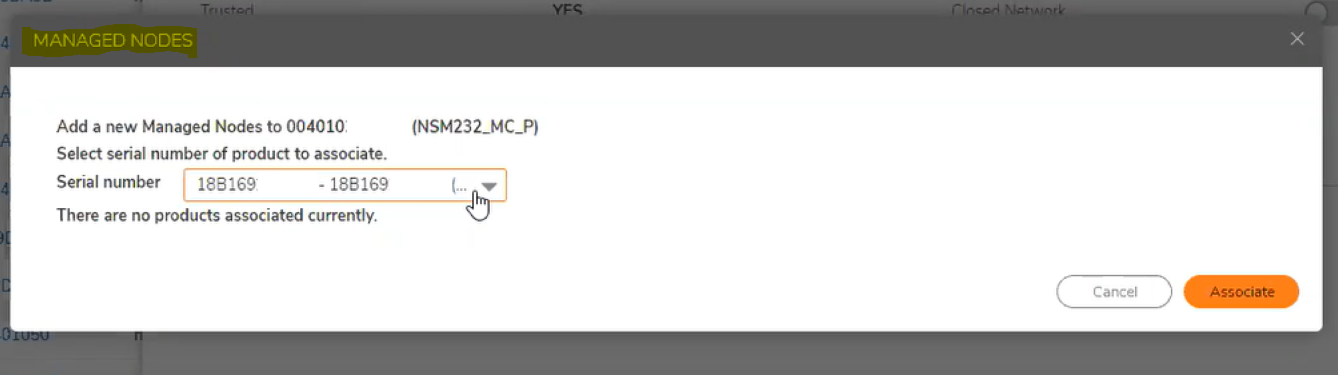
Once you have Associated all the needed firewalls you can close this window.
Keep in mind:
Only the Primary High Availability Firewalls need to be associated into NSM. Secondary High Availability Firewalls will not show.
Associate Firewalls up to what your NSM Server is licensed for. Associate only the firewalls needed for your Closed network environment.
Steps on NSM On-Prem Servers:
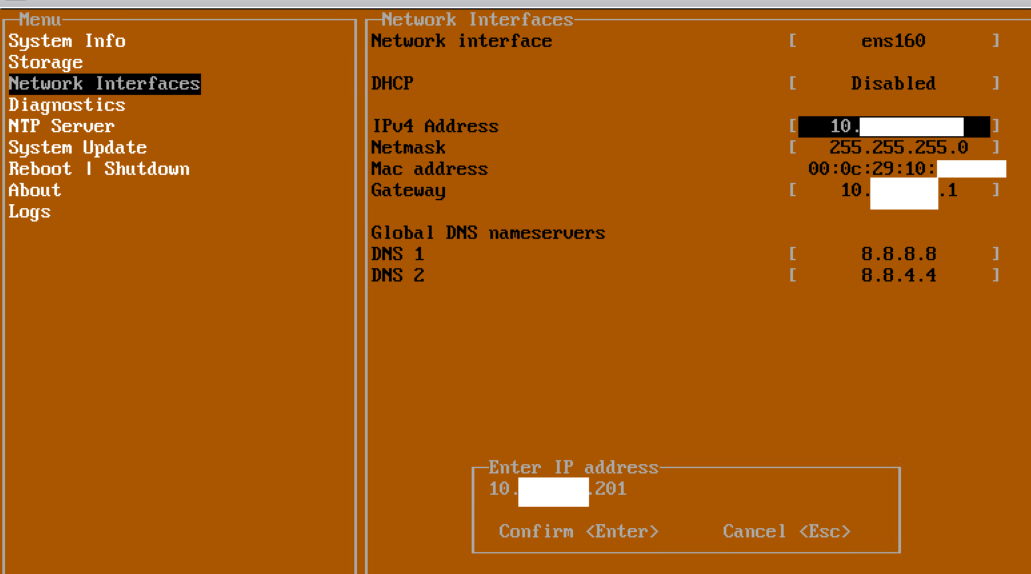
After Installation of the two VM servers, Set each to have their own independent IP addresses in the management console
Reboot Primary and Secondary Servers
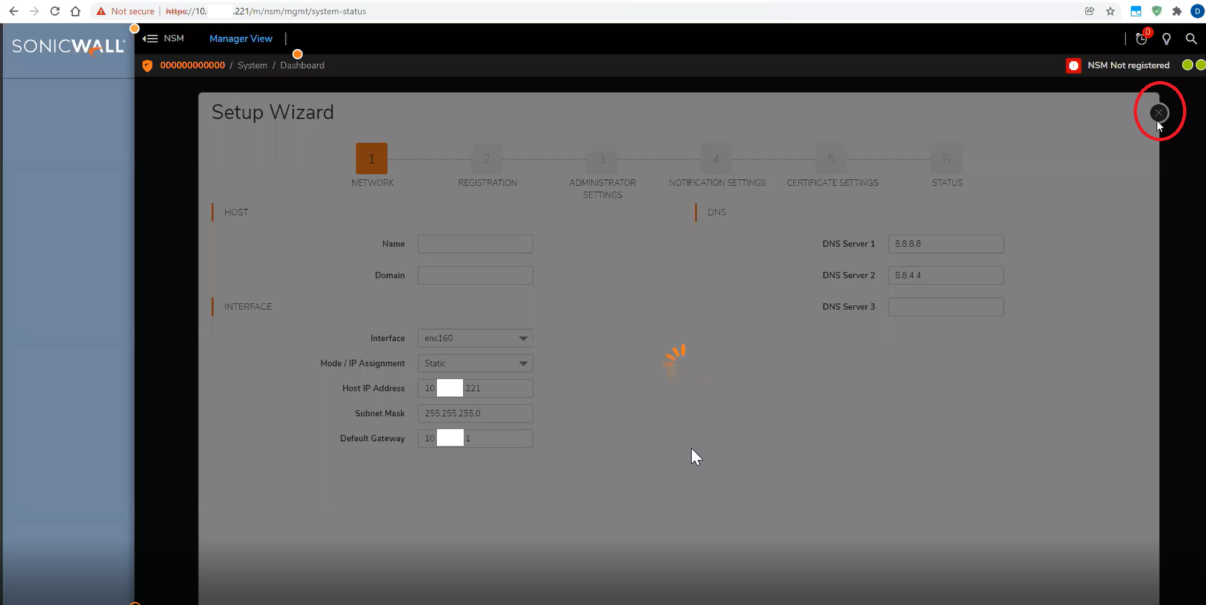
Log into the Primary NSM server and skip set up wizard by clicking the x on the top right section of the screen.
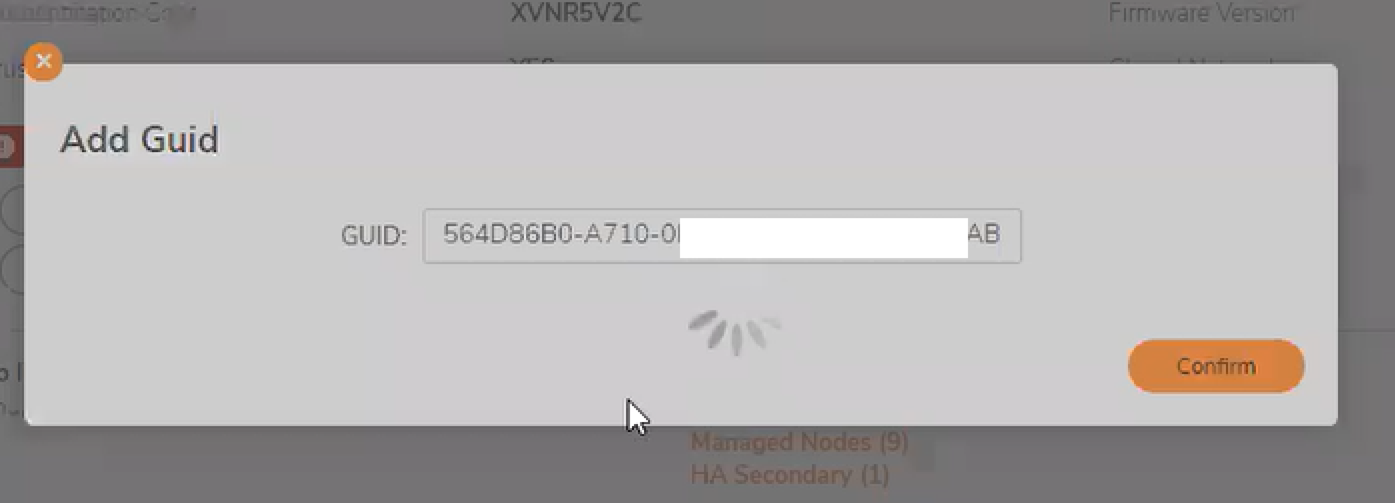
1. Attach GUIDs to NSM Primary and Secondary NSM servers
-On the System>Dashboard page, copy the GUID from the Primary NSM server
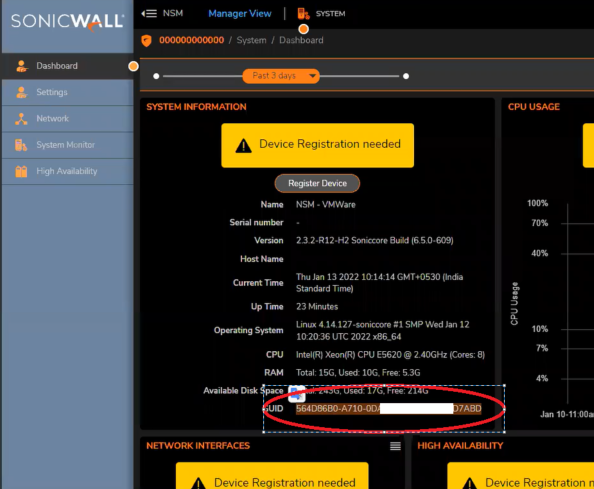
-Navigate back to Mysonicwall.com and click the GUID button to add the GUID
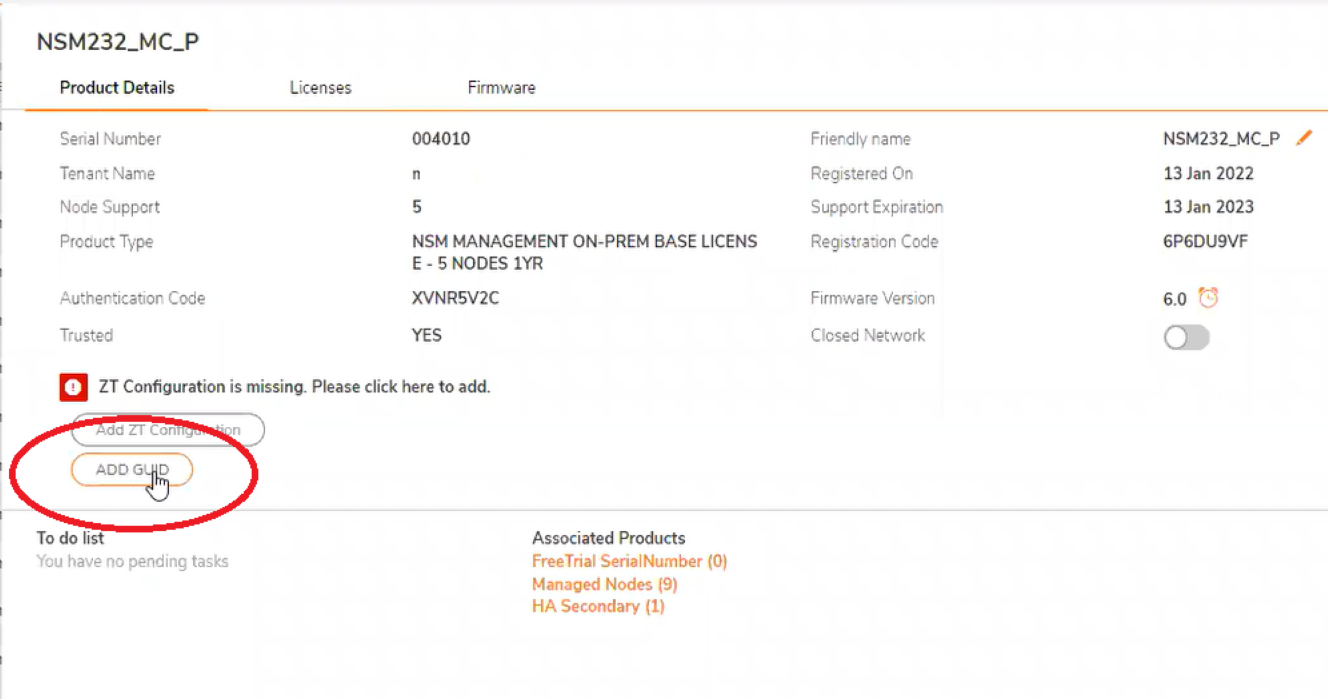
-Paste the GUID and click Confirm.
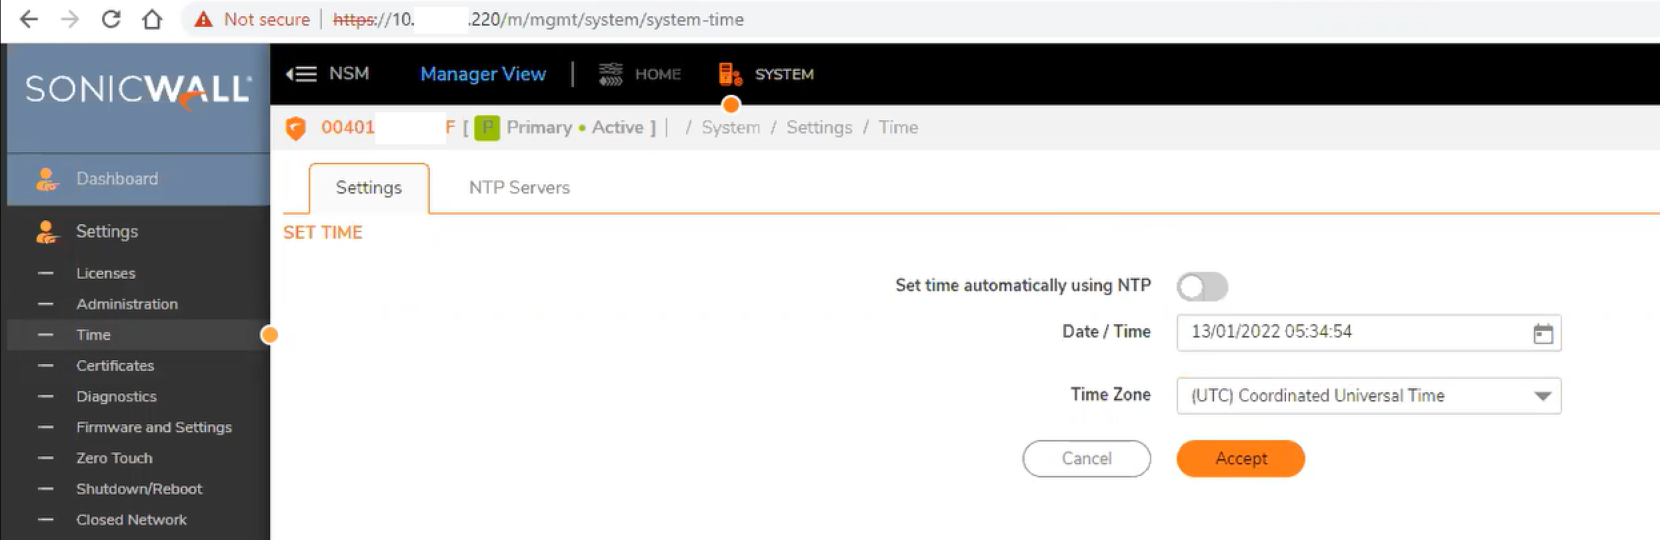
-Set Time settings at System/ Settings/ Time.
It's recommended to enable "Set time automatically using NTP" and point to an onsite NTP server, but this can also be set manually.
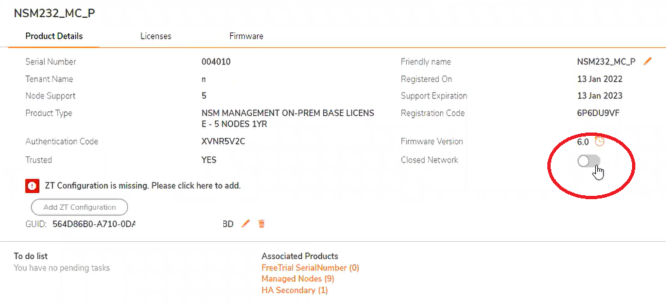
-Enable the Closed network option in Mysonicwall for the Primary High Availability unit in Mysonicwall.com.
Please follow the last 4 steps on the Secondary NSM High Availability server as well.
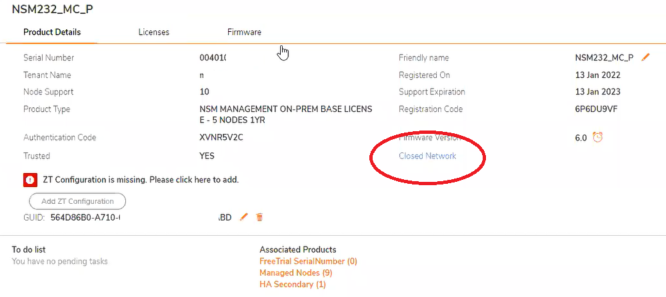
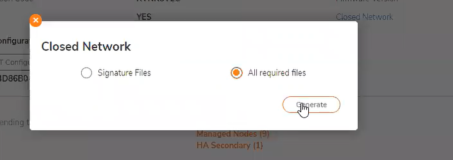
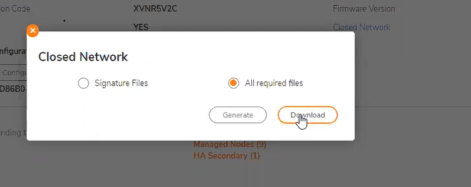
2. Generate closed NW files for "All Required Files" for both Primary and Secondary servers. Download button will show after 20 mins
-Click on the Closed Network lettering to open file generation window.
-Select "All required files" and then click "Generate"
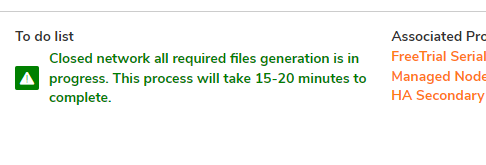
-You will see this message at the bottom of that window letting you know this will take 15-20 minutes to complete.
3. Download Closed Network files for Primary and Secondary
-When the To do list shows no pending tasks, the file should now be available for download.
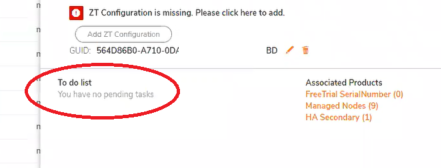
-Click on the Closed Network lettering again and you will see the download option is now available. Select "All required files" and then download the license file.
As stated above, this download procedure will need to be done on the Primary and Secondary NSM servers if using On-Prem High Availability.
On NSM:
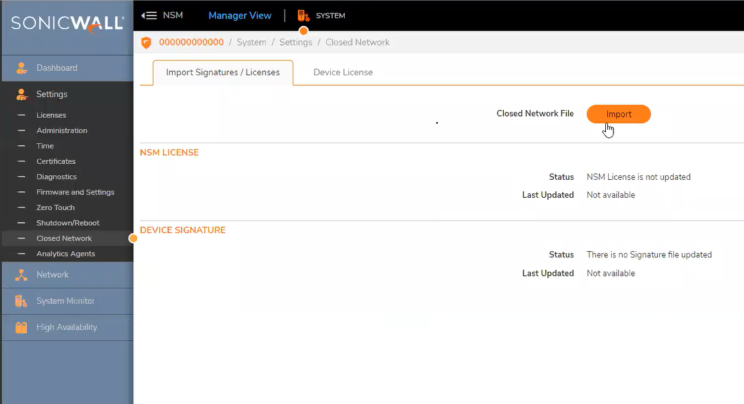
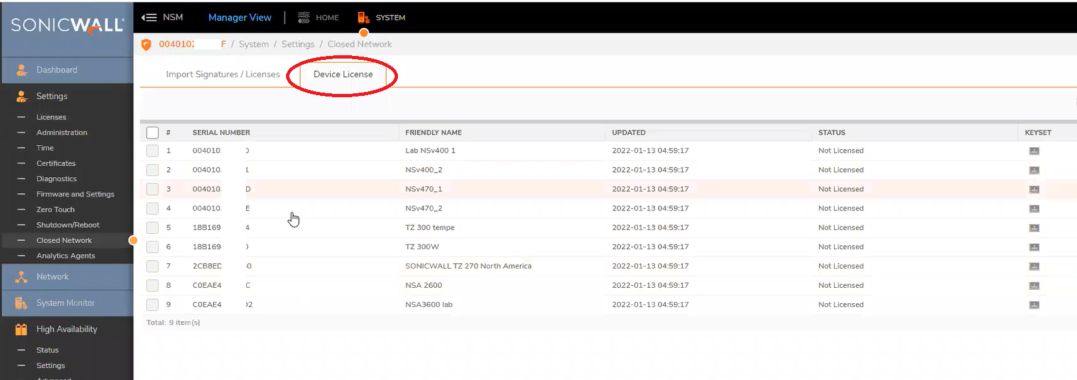
1. Import Closed Network file for Primary and Secondary from Closed Network page. Status should show signatures and licenses imported successfully. Verify all Firewalls are there
Uploading the license file

After successful upload of the license file.
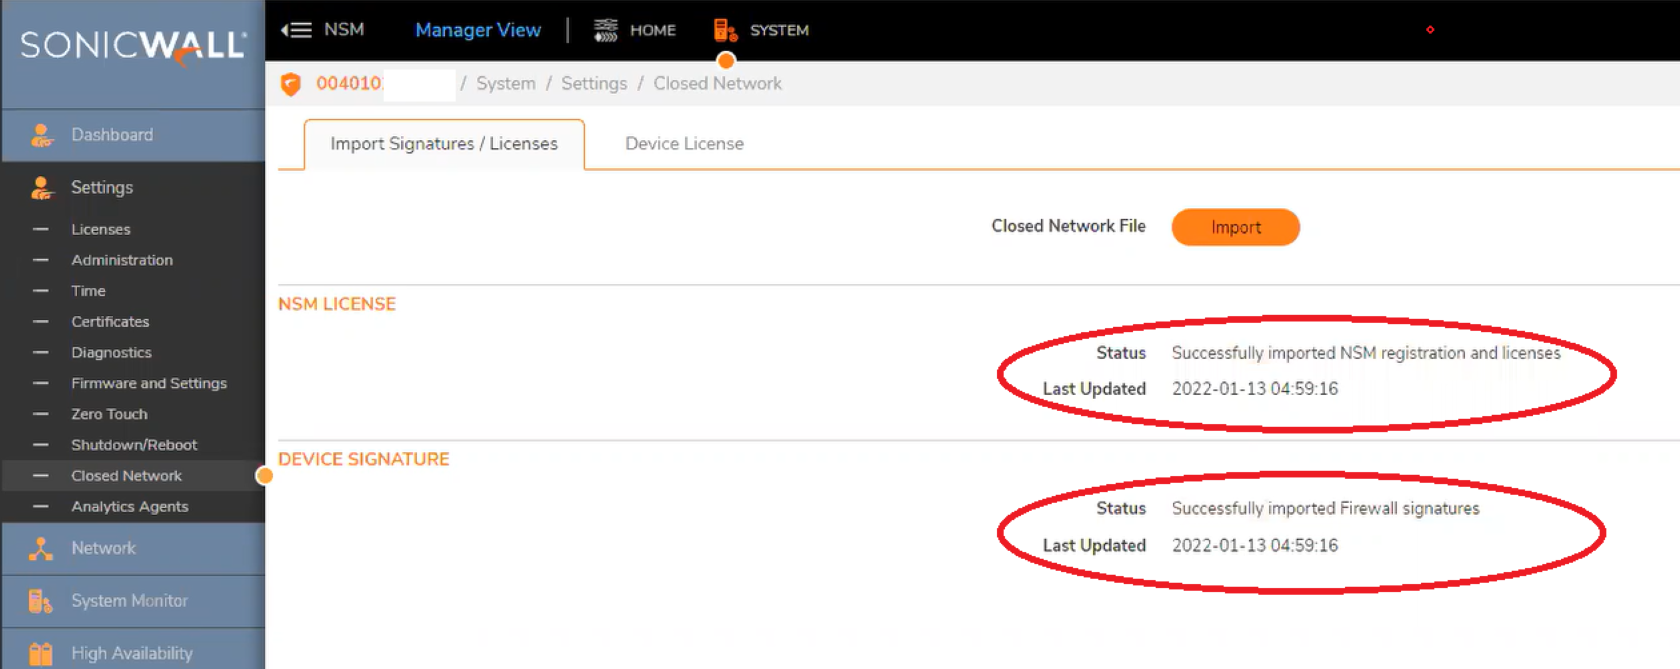
Verify all Firewalls that were added as Managed Nodes are showing here on the Device License tab.
Make sure the above licensing steps have been completed on the Primary and Secondary High Availability servers before enabling High Availability.
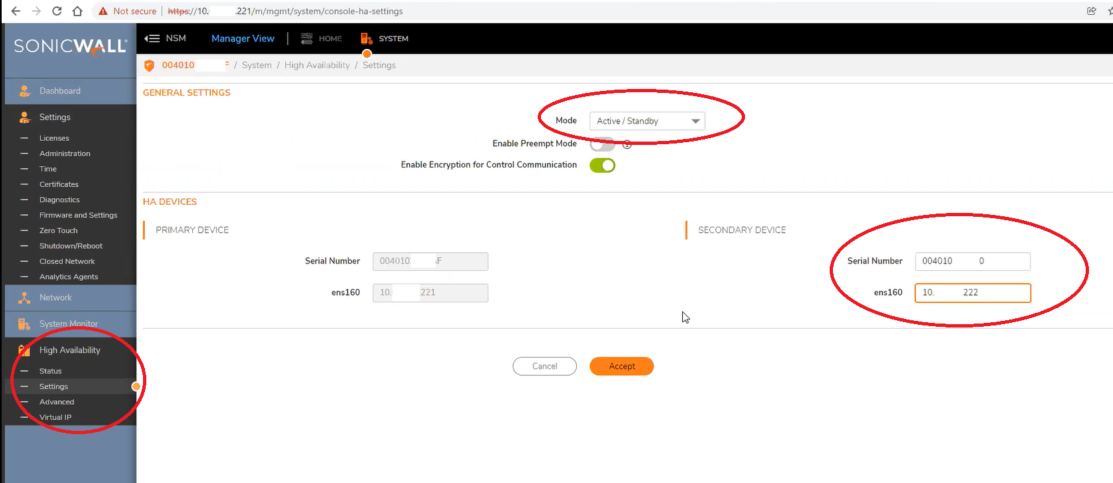
2. On the Primary NSM server go to the System/ High Availability/ Settings page and populate the Secondary HA servers Serial Number and IP address. Accept the changes.
(This step can be skipped if you are not using a Secondary High Availability NSM On-Prem Server.)
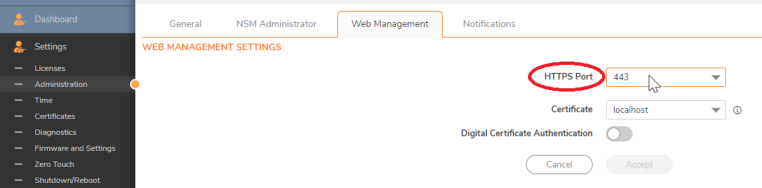
(Make sure to use same HTTPS Management port on Primary and Secondary before enabling High Availability. Located on the System/Settings/Administration tab.)
(If you are not able to add the IP and Serial number of secondary Server, try reboot of the Primary and Secondary NSM servers and try again.)
Select "Active/Standby" as the Mode then add the Secondary High Availabiliy Server IP address and Serial number. Click Accept.
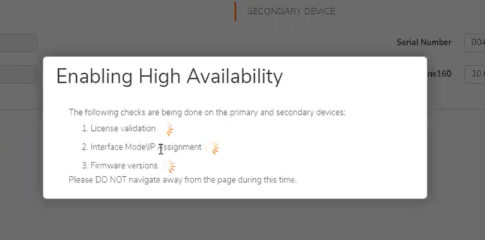
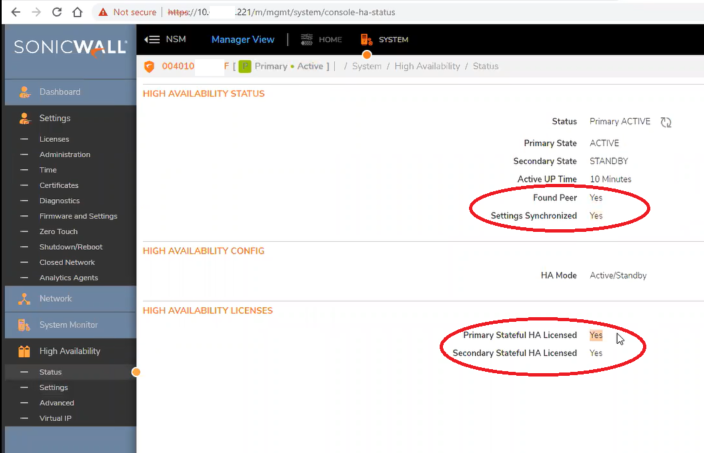
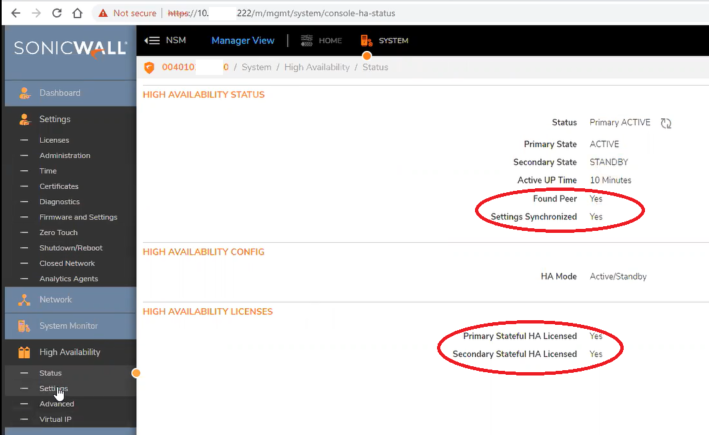
3. Verify High Availability Status on Primary and Secondary servers by going to the System/ High Availability/ Status page. Here we can verify it has found its peer, settings are synchronized and they are both showing as licensed.
-Primary
-Secondary
4. Configure Virtual IP found on the System/ High Availability/ Virtual IP tab.
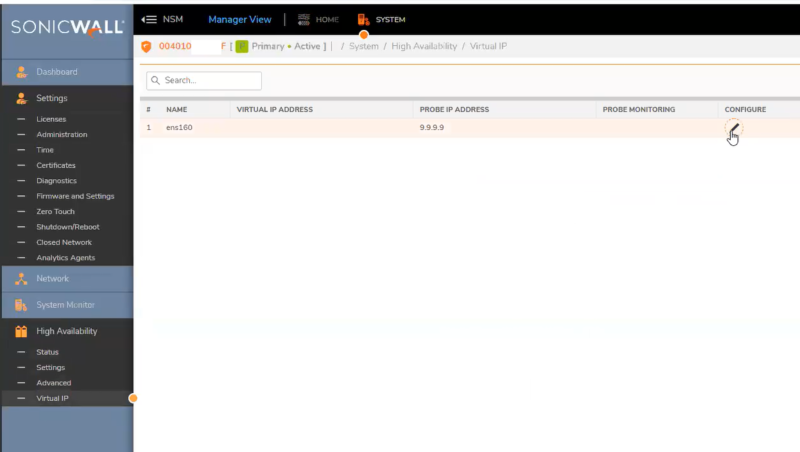
As this is a closed network, Probing IP should be set to an Internal reliable server or router that both NSM servers can access.
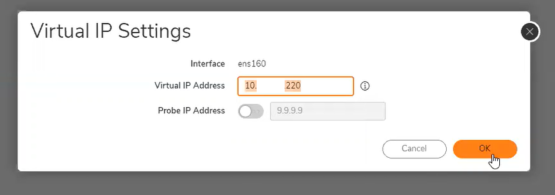
A warning will pop up letting you know it will take some time to set up the virtual IP.
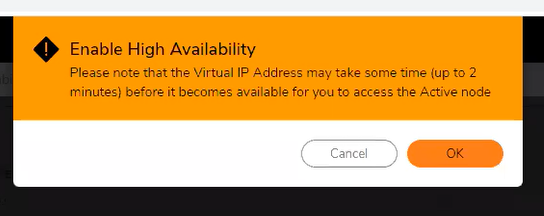
Virtual IP should now be set.

Going forward, you will use the virtual IP to manage NSM. The physical Primary and secondary IP addresses are only needed for system management.
You can now add firewalls to Primary NSM Server - signatures/licenses should get pushed automatically to firewalls
- Closed Network set up is complete
All of the primary's config should be synced to Secondary automatically - HA set up is complete
Make sure to use NSM High Availability Virtual IP to manage NSM.
If you need to add another firewall later on, you will need to Associate the firewall in Mysonicwall.com to the Primary NSM High Availability Serial number, then regenerate the license file.
Once the license file is generated it will need to be downloaded and imported into the Primary NSM server. The new firewall can then be added on the firewall Inventory page in NSM.