How can I obtain certificates for VPN connections (Site to Site, GVC, L2TP)?
Description
Using digital certificates for authentication instead of Preshared keys in VPNs is considered more secure. In SonicWall UTM devices, digital certificates are one way of authenticating two peer devices to establish an IPSec VPN tunnel. The other is IKE using Preshared key. The KB article describes the method to configure WAN GroupVPN and Global VPN Clients (GVC) to use digital certificates for authentication before establishing an IPSec VPN tunnel.
Features of IKE Authentication with Certificates in SonicWall WAN GroupVPN and GVC.
- A digital certificate either obtained from a third party CA (like Verisign) or from a private CA (like Microsoft CA or OpenSSL) must be used for this configuration. Self-signed certificates are not supported.
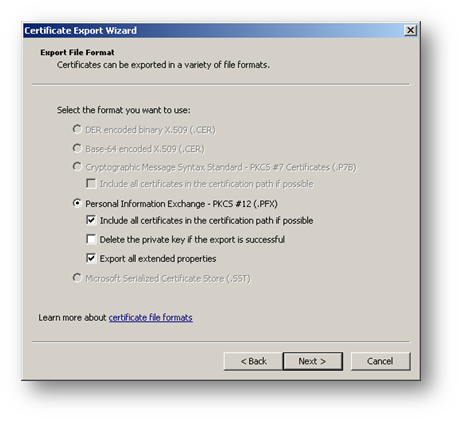
- In the SonicWall, the administrator has the option to create a Certificate Signing Request (CSR) and get it signed by a CA or import a signed certificate in the PKCS#12 format (.pfx or .p12 extension). When importing a signed certificate into the GVC client, it must be in the PKCS#12 format (.pfx or .p12 extension).
- Both peers must trust the issuer of the certificate. In other words, the CA certificate of the user certificate must be imported into the SonicWall as well as the remote GVC client.
- If a certificate has already been imported into the SonicWall signed by a 3rd party CA (for example, Versign), this can be selected in the WAN GroupVPN. The CA certificate must be imported into the GVC client.
- SonicWall supports digital certificates issued by different CAs to be imported into the SonicWall UTM device and the remote GVC client. SonicWall also supports forcing both peers to use certificates issued by the same CA.
Resolution for SonicOS 6.5
This release includes significant user interface changes and many new features that are different from the SonicOS 6.2 and earlier firmware. The below resolution is for customers using SonicOS 6.5 firmware.
 NOTE: The certificate signing process described here is using a Windows Server 2008 CA. To configure a Microsoft CA to accept a Subject Alternative Name attribute from a certificate request, refer this Microsoft article: How to configure a CA to accept a SAN attribute from a certificate request.
Create a Certificate Signing Request (CSR) in the SonicWall
- Login to the SonicWall management GUI.
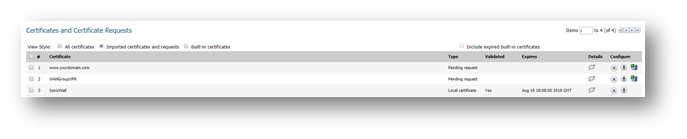
- Navigate to Manage | Appliance | Certificates.
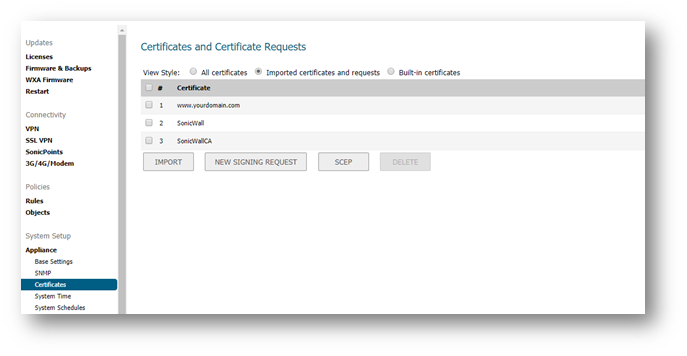
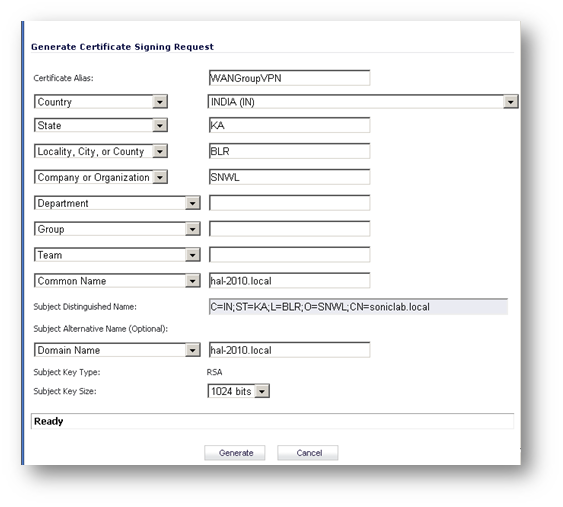
- Click New Signing Request to create a similar CSR as under.
- Click Generate to save.
- Refresh the page.

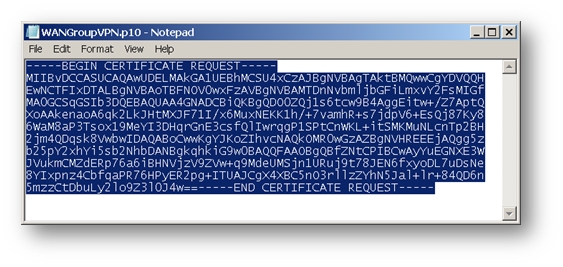
- Click download button to download the CSR.

Obtain a certificate using the Windows Server Certificate Enrollment Web Services
- Obtain a certificate to use in WAN GroupVPN configuration
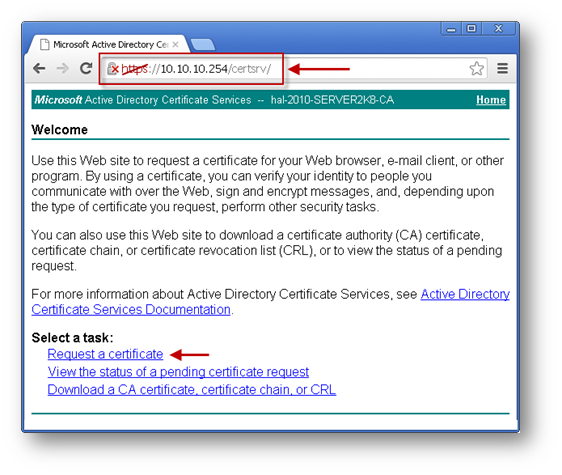
- Open a browser and navigate to the Microsoft Windows Certificate Enrollment page: http:///CertSrv.
- When prompted for authentication, enter username and password of administrator.
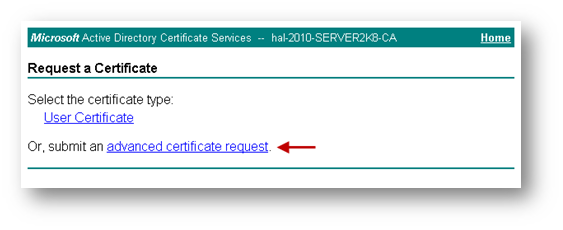
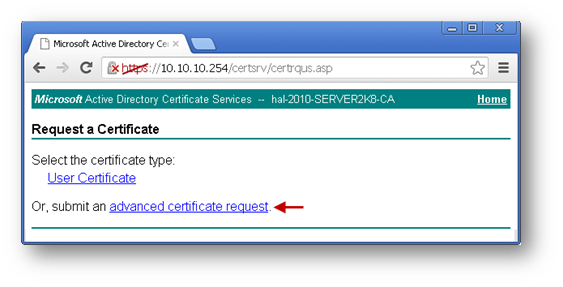
- Click Request a certificate.
- Click advanced certificate request.
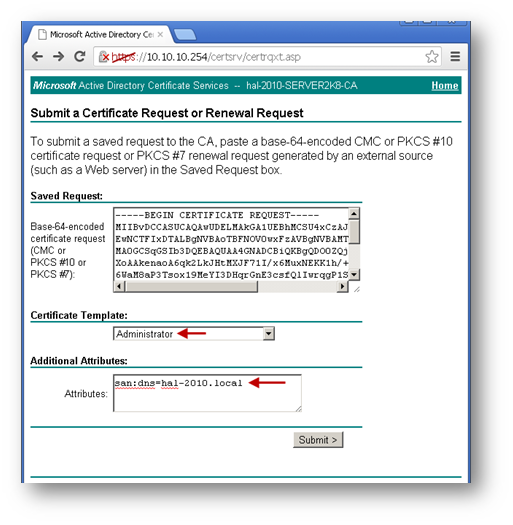
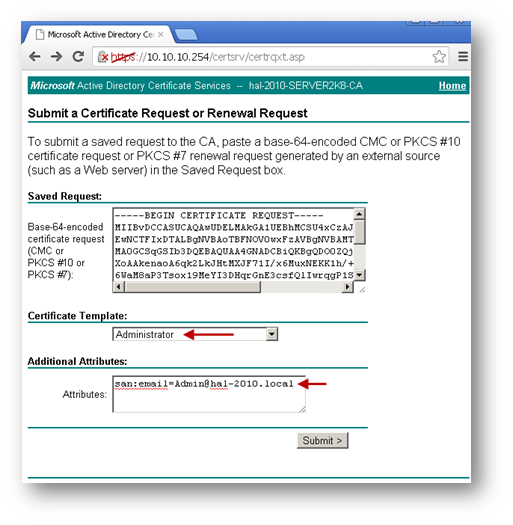
- Copy the contents of CSR in the Saved Request box.
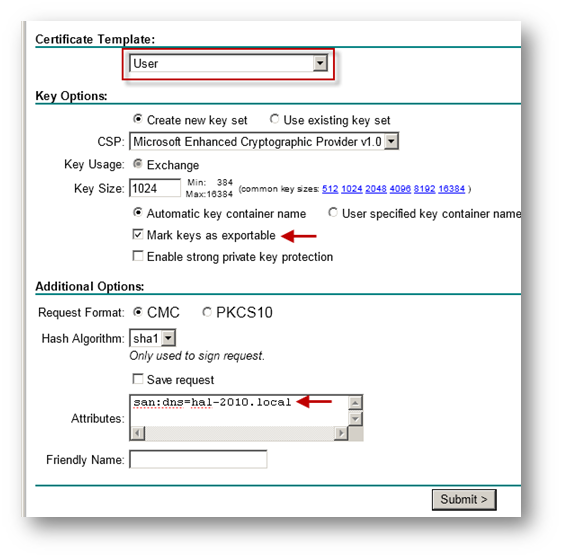
- Select Administrator under Certificate Template.
NOTE: User or Web Server template also could be selected. - Under Attributes, either enter san:dns=yourdomainname.com or san:email=<local-part@domain.com|.
 TIP: To configure a Microsoft CA to accept a Subject Alternative Name attribute from a certificate request, refer this Microsoft article: How to configure a CA to accept a SAN attribute from a certificate request.
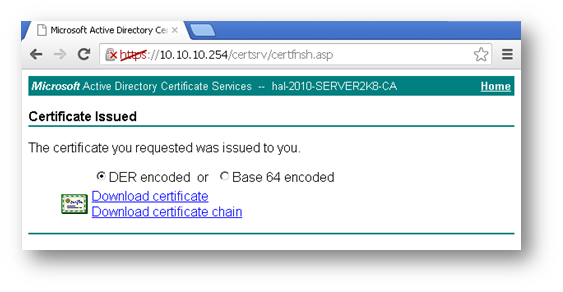
 - Click Submit and you will taken to the next page.
- On this page click Download certificate or Download certificate chain to save the signed certificate to disk.

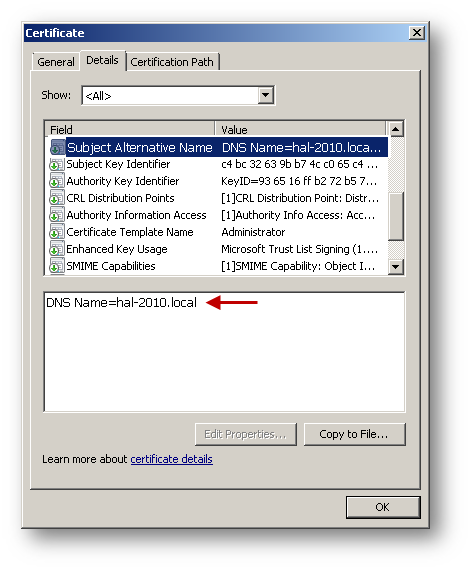
- Below is an example of a signed certificate's Subject Alternative Name (SAN).
- Download the CA certificate for the signed certificate.
- Navigate to the Microsoft Windows Certificate Enrollment page: http:///CertSrv
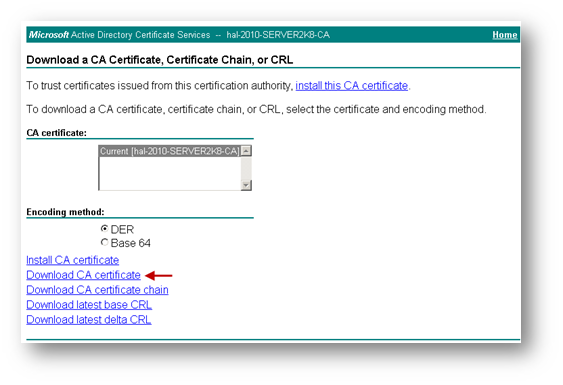
- Click Download a CA certificate.
- On the next page, click Download CA certificate and save the certificate to disk.

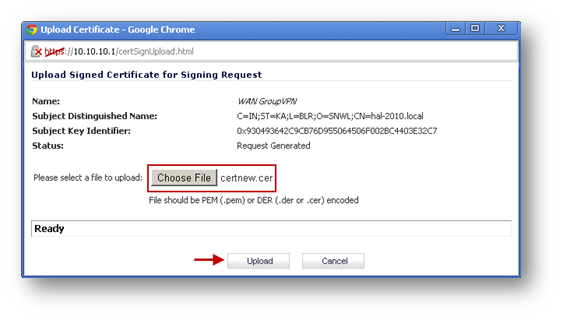
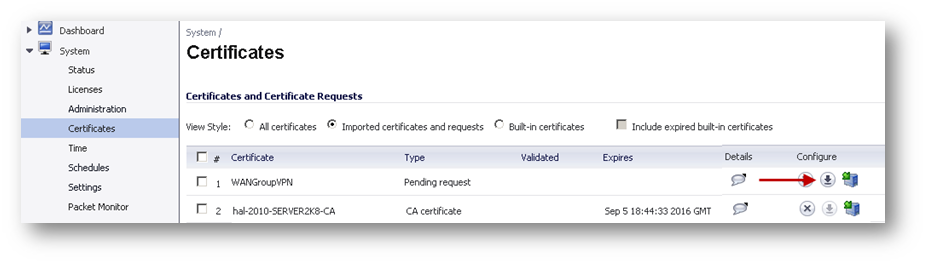
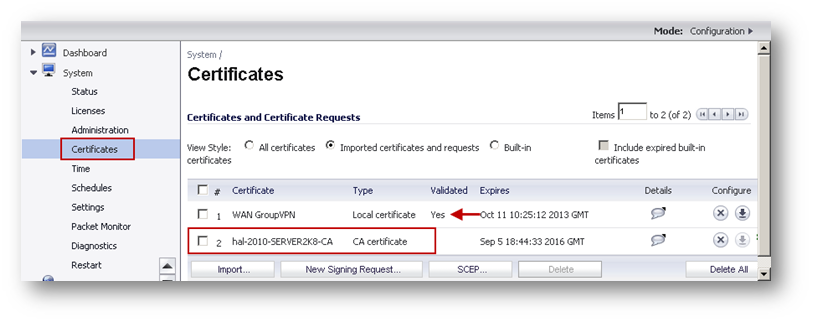
- Upload the signed certificate into the SonicWall via the upload button of the CSR pending request.
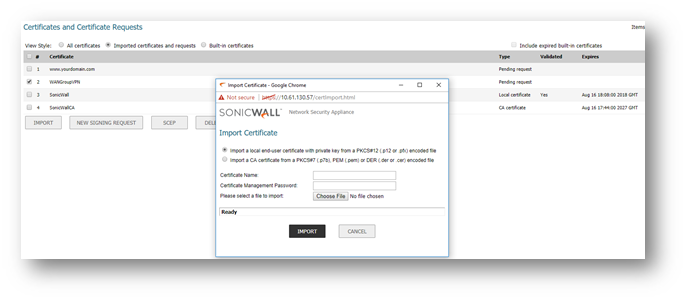
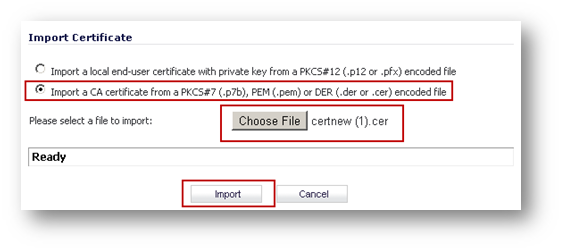
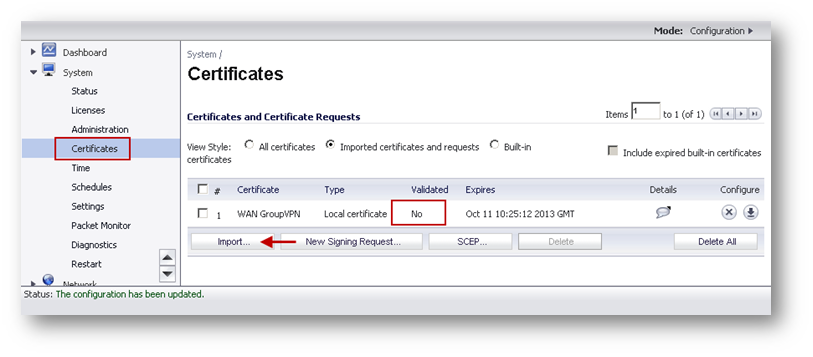
- To establish trust and complete the validation of the signed certificate, import the CA certificate.
- Obtain a certificate for GVC clients.
- Navigate to the Microsoft Windows Certificate Enrollment page: http:///CertSrv
- When prompted for authentication, enter username and password of a Domain User.
- Click Request a certificate.
- Click advanced certificate request.
- Select Administrator or User under Certificate Template.
NOTE: For Site to Site VPN or GVC, a certificate with Key Usage, if present, must have Digital Signature and/or Non-Repudiation and Extended Key Usage (EKU), if present, with Client Authentication seems to work. If, on the other hand, using L2TP/IPSec VPN, make sure, if Key Usage is present, to use Digital Signature and/or Non-Repudiation. The Extended Key Usage (EKU) field SHOULD NOT be used but, if present, may have Encrypted File System (1.3.6.1.4.1.311.10.3.4) and/or IP Security End System (1.3.6.1.5.5.8.2.1). - Under Attributes, either enter san:dns=yourdomainname.com or san:email=<local-part@domain.com|. Note: To configure a Microsoft CA to accept a Subject Alternative Name attribute from a certificate request.
- Click Submit and you will taken to the next page.
- On this page click on Download certificate or Download certificate chain to save the signed certificate to disk.
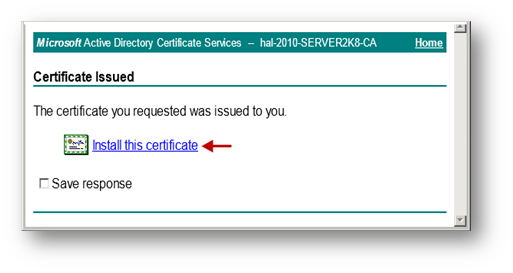
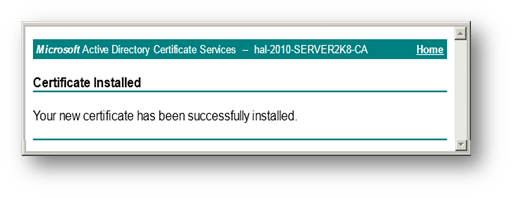
- The signed certificate will be Installed within the browser.
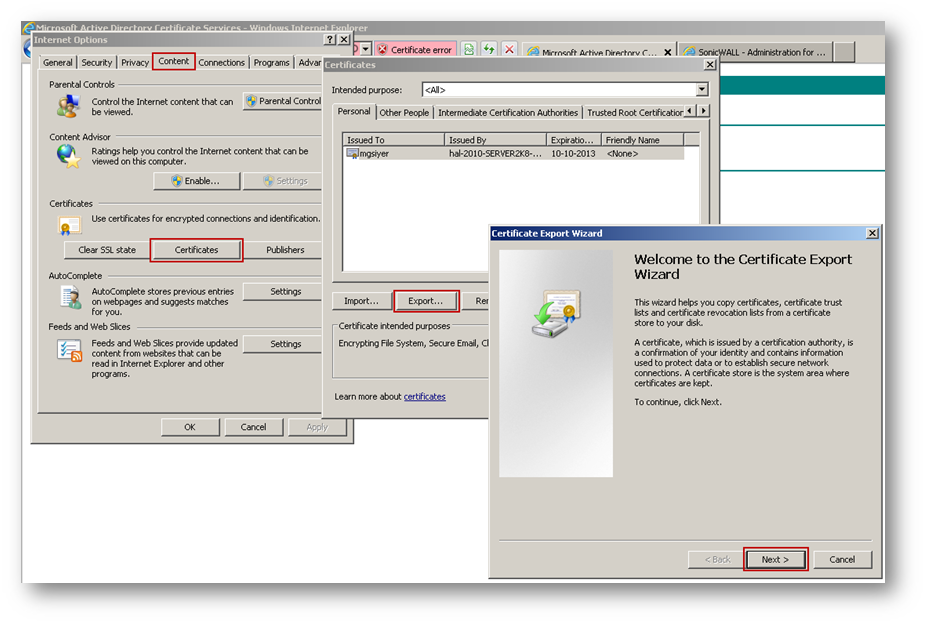
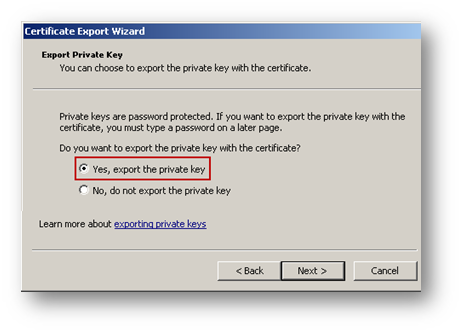
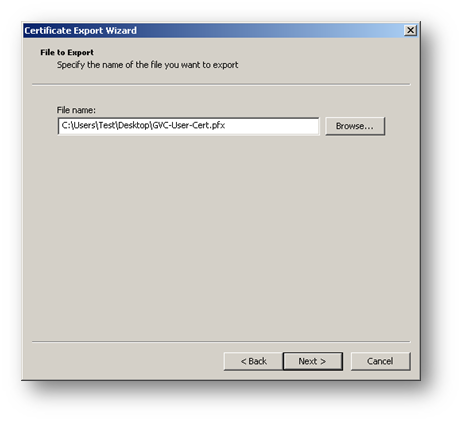
- Export the certificate with its private key from the browser.

Resolution for SonicOS 6.2 and Below
The below resolution is for customers using SonicOS 6.2 and earlier firmware. For firewalls that are generation 6 and newer we suggest to upgrade to the latest general release of SonicOS 6.5 firmware.
Create a Certificate Signing Request (CSR) in the SonicWall
- Login to the SonicWall management GUI.
- Navigate to System | Certificate page.
- Click on New Signing Request to create a similar CSR as under.
- Click Generate.
- Refresh the page.
- Click download button to download the CSR.
Obtain a certificate using the Windows Server Certificate Enrollment Web Services
- Obtain a certificate to use in WAN GroupVPN configuration
- Open a browser and navigate to the Microsoft Windows Certificate Enrollment page: http:///CertSrv
- When prompted for authentication, enter username and password of administrator.
- Click Request a certificate.
- Click advanced certificate request.
- Copy the contents of CSR in the Saved Request box.
- Select Administrator under Certificate Template.
NOTE: User or Web Server template also could be selected. - Under Attributes, either enter san:dns=yourdomainname.com or san:email=<local-part@domain.com|.
TIP: To configure a Microsoft CA to accept a Subject Alternative Name attribute from a certificate request, refer this Microsoft article: How to configure a CA to accept a SAN attribute from a certificate request. - Click Submit and you will taken to the next page.
- On this page click on Download certificate or Download certificate chain to save the signed certificate to disk.
- Below is an example of a signed certificate's Subject Alternative Name (SAN).
- Download the CA certificate for the signed certificate.
- Navigate to the Microsoft Windows Certificate Enrollment page: http:///CertSrv.
- Click Download a CA certificate.
- On the next page, click Download CA certificate and save the certificate to disk.
- Upload the signed certificate into the SonicWall via the upload button of the CSR pending request.

- To establish trust and complete the validation of the signed certificate, import the CA certificate.
- Obtain a certificate for GVC clients.
- Navigate to Microsoft Windows Certificate Enrollment page: http:///CertSrv.
- When prompted for authentication, enter username and password of a Domain User.
- Click Request a certificate.
- Click advanced certificate request.
- Select Administrator or User under Certificate Template. NOTE: For Site to Site VPN or GVC, a certificate with Key Usage, if present, must have Digital Signature and/or Non-Repudiation and Extended Key Usage (EKU), if present, with Client Authentication seems to work. If, on the other hand, using L2TP/IPSec VPN, make sure, if Key Usage is present, to use Digital Signature and/or Non-Repudiation. The Extended Key Usage (EKU) field SHOULD NOT be used but, if present, may have Encrypted File System (1.3.6.1.4.1.311.10.3.4) and/or IP Security End System (1.3.6.1.5.5.8.2.1).
- Under Attributes, either enter san:dns=yourdomainname.com or san:email=<local-part@domain.com.
- Click Submit and you will taken to the next page.
- On this page click on Download certificate or Download certificate chain to save the signed certificate to disk.
- The signed certificate will be installed within the browser.
- Export the certificate with its private key from the browser.
