How the SNMPv3 can be enabled and configured
Description
SNMP (Simple Network Management Protocol) is a network protocol used over User Datagram Protocol (UDP) that allows network administrators to monitor the status of the SonicWall security appliance and receive notification of critical events as they occur on the network. The SonicWall supports SNMP v1/v2c/v3 and all relevant Management Information Base II (MIB) groups except eg and at. The SonicWall replies to SNMP Get commands for MIBII via any interface and supports a custom SonicWall MIB for generating trap messages. The custom SonicWall MIB is available for download from the mysonicwall.com web site and can be loaded into third-party SNMP management software such as HP Open view, Tivoli or SNMPC
 NOTE: SNMP versions 1 and 2c, that these versions are vulnerable and insecure, and is recommended to use of SNMPv3.
Resolution
Resolution for SonicOS 7.X
This release includes significant user interface changes and many new features that are different from the SonicOS 6.5 and earlier firmware. The below resolution is for customers using SonicOS 7.X firmware.
Enable SNMP and configure SNMP parameters
- Login to the SonicWall management GUI as admin.
- Click on DEVICE, navigate to Settings | SNMP.
- Check the box Enable SNMP, click on Accept.
- Click Configure button and supply the parameters for SNMP NOTE: For the SNMP functionality, the Community name should be the same in the SonicWall and the SNMP monitoring software. Get Community Name is considered a credential (secret key) and should be as complex as possible.

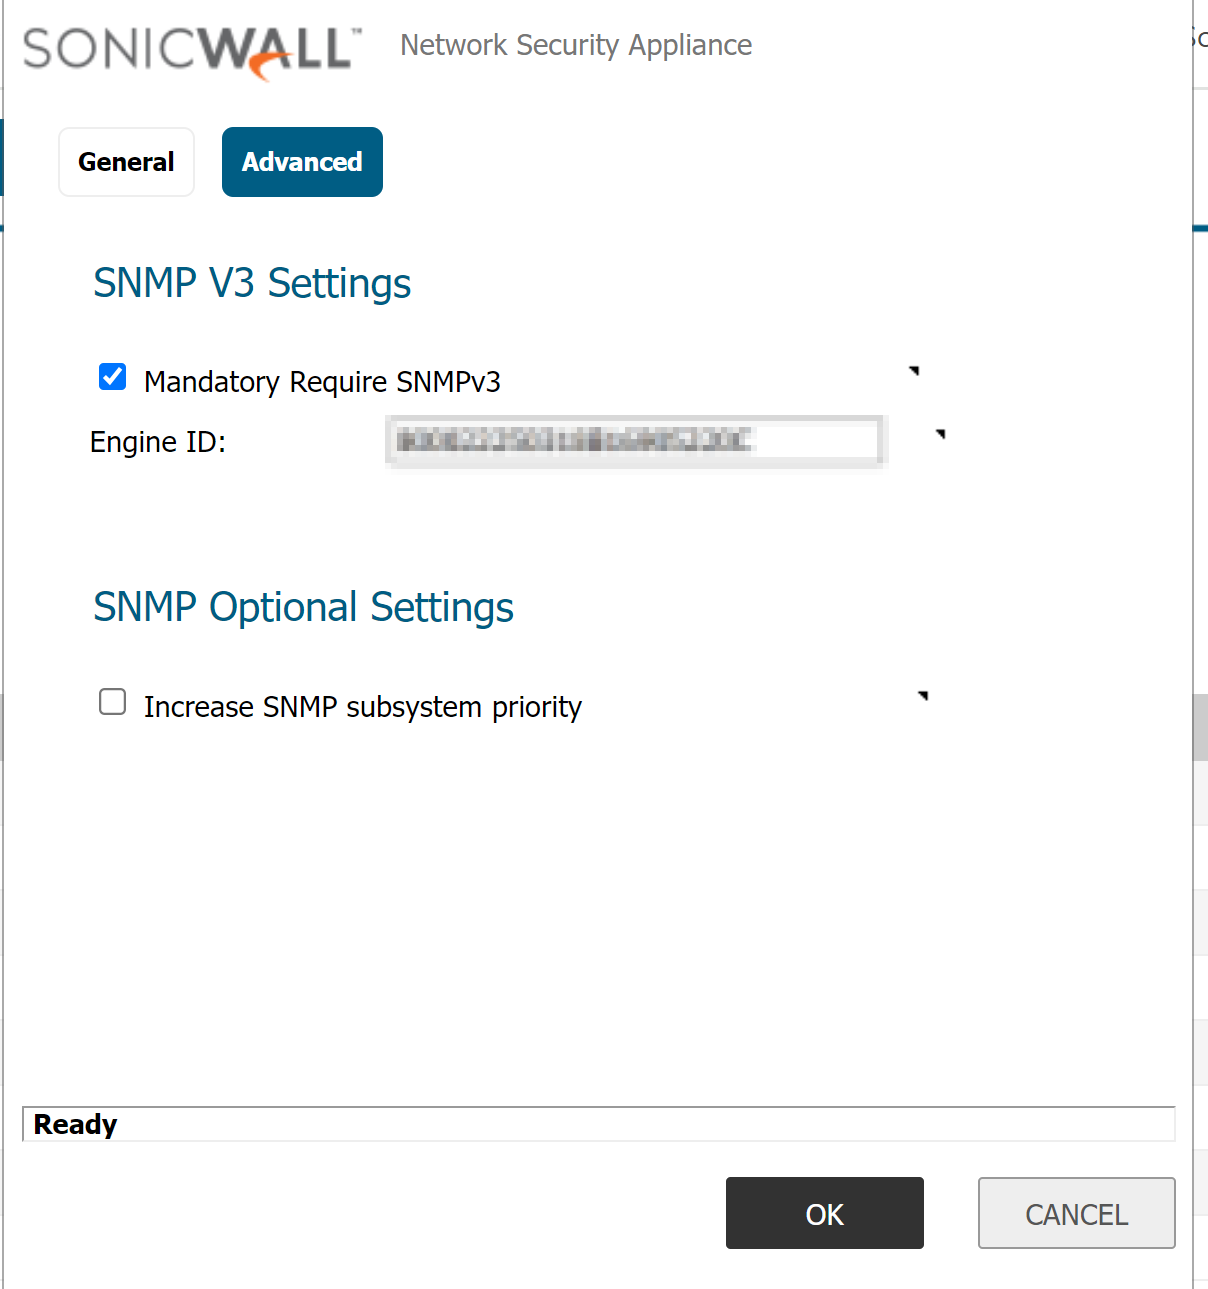
- Click on Advanced Tab and enable the toggle for “Mandatory Require SNMPv3” option.
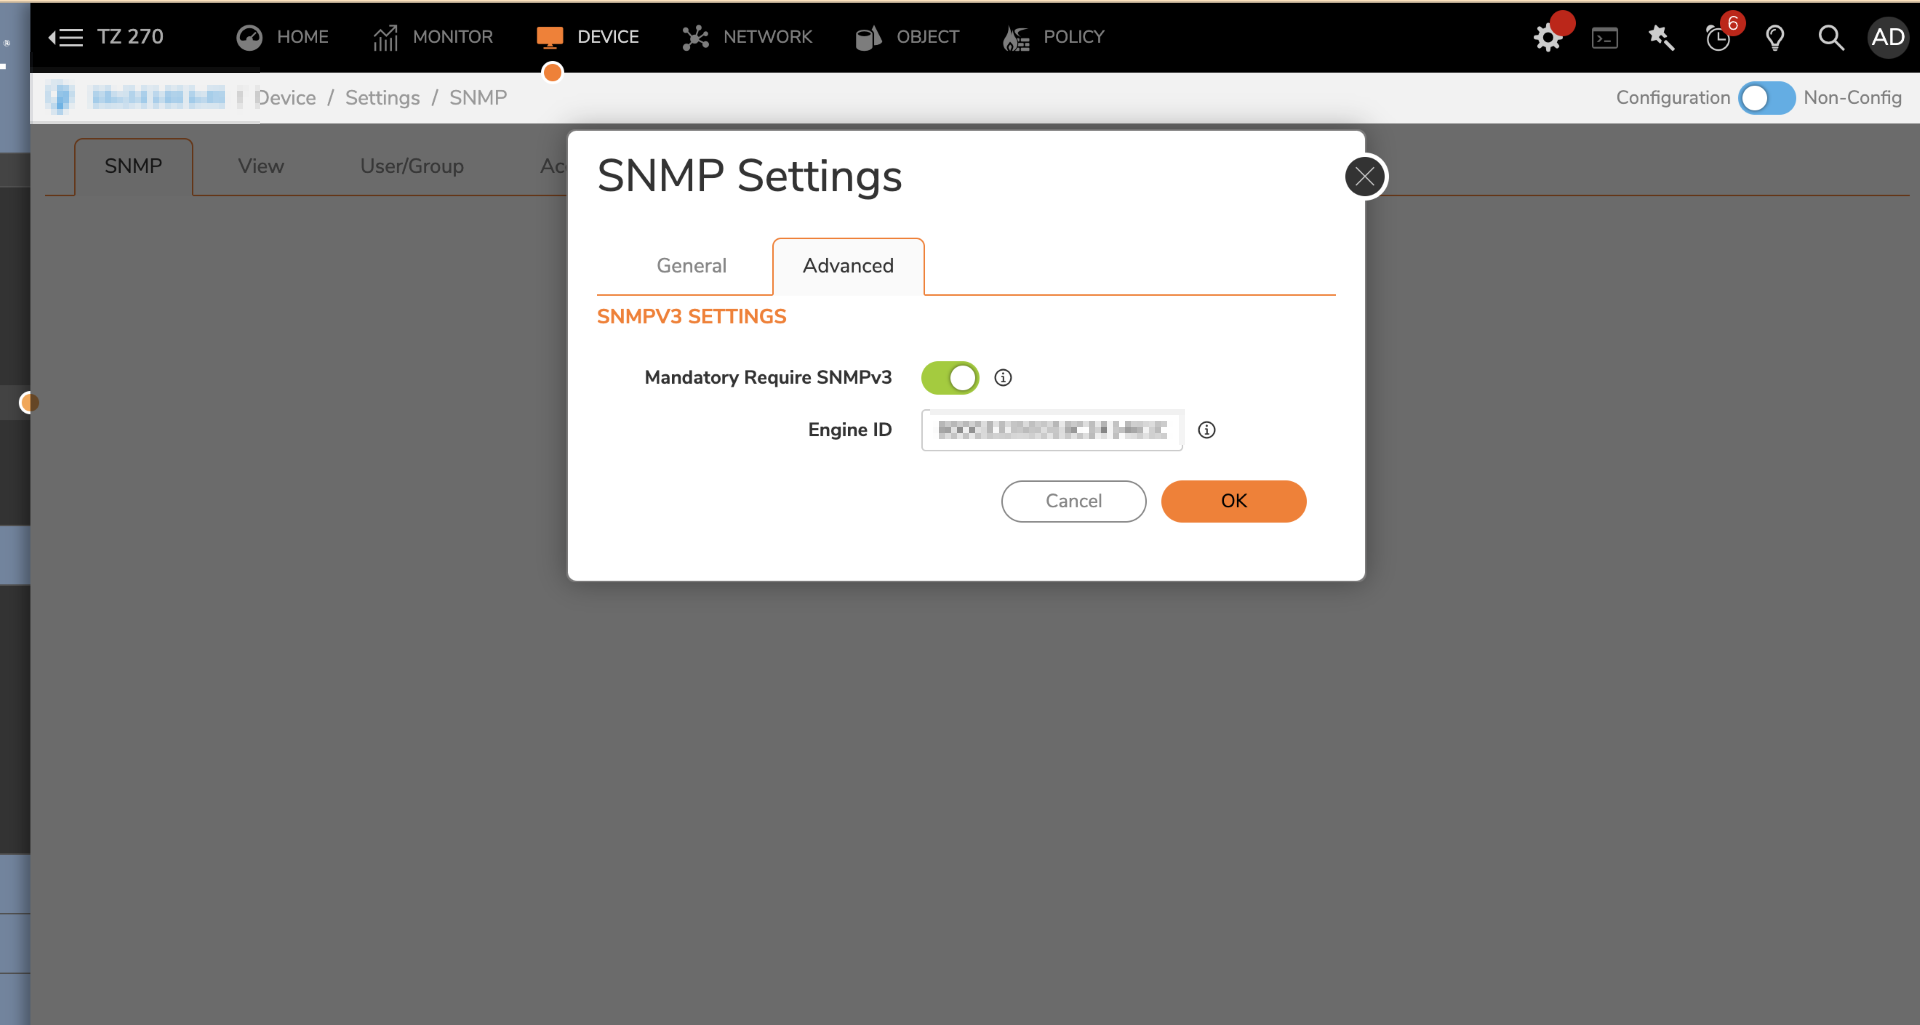
- Click OK .
Enable SNMP on the SonicWall interface
- Login to the SonicWall management GUI as admin.
- Click NETWORK, Navigate to System | Interfaces and click on the configure button in front of the LAN & WAN interface.
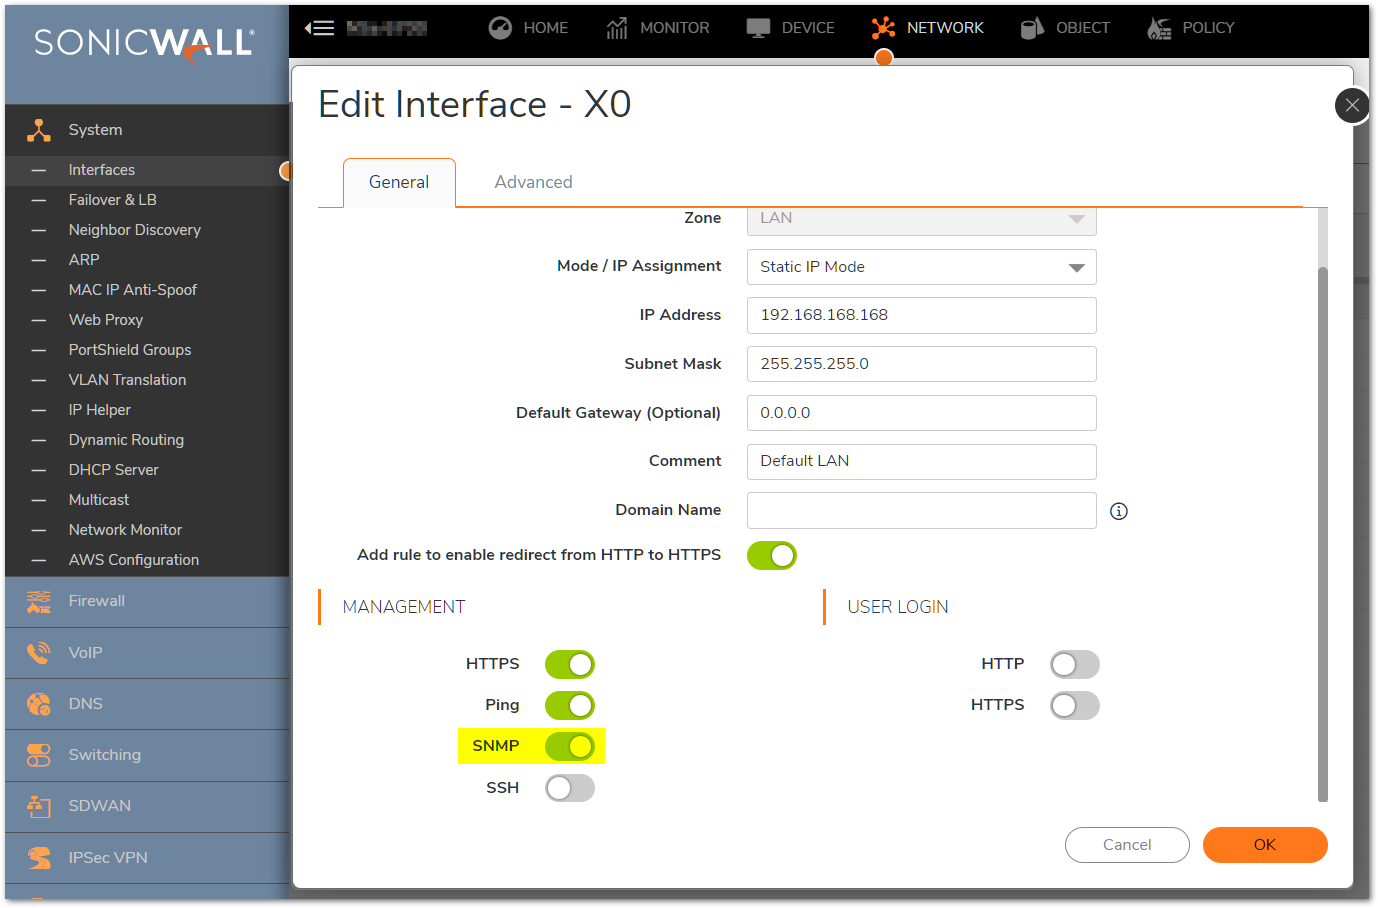
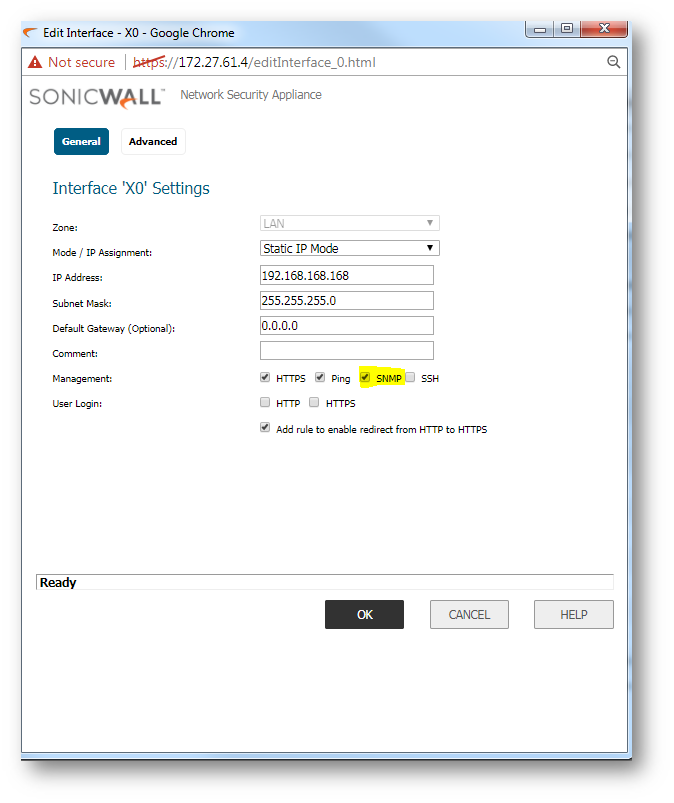
LAN Interface (X0)
- In the Management section of Edit X0 interface window, check the SNMP box.
- Click OK.
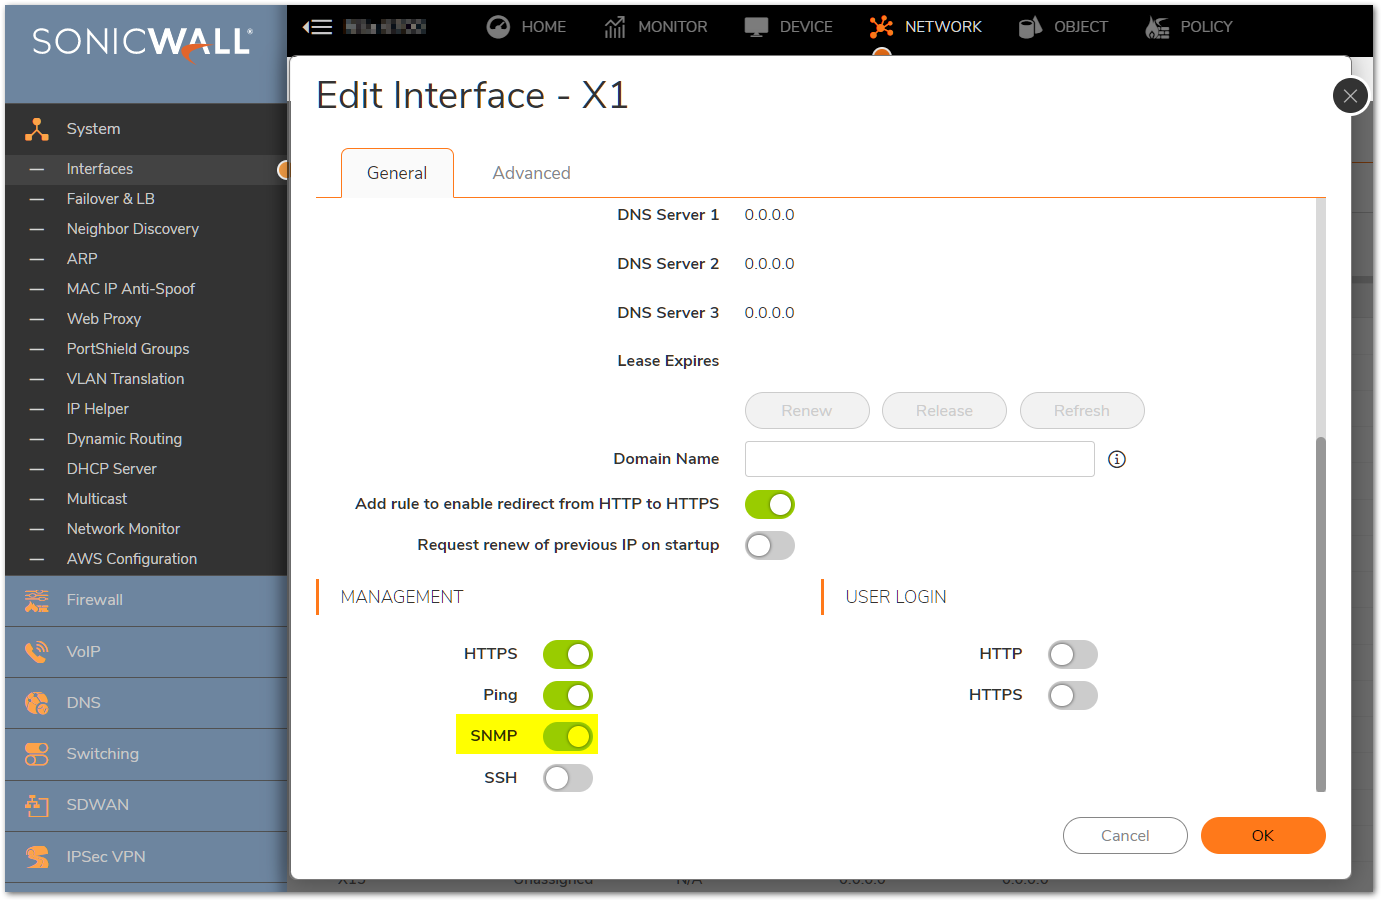
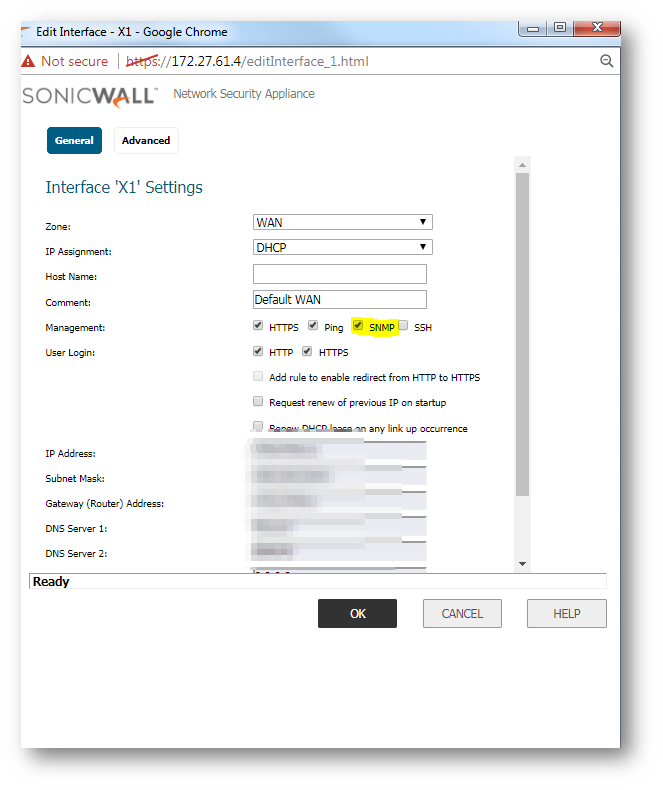
WAN Interface (X1)
 CAUTION: it is not recommended to have SNMP enabled on untrusted networks unless it is a requirement.
- In the Management section of Edit X1 interface window, check the SNMP box.
- Click OK .
Allow SNMP Management
- Please login to the SonicWall management GUI as admin.
- There are two ways to allow access to SNMP management on an interface's IP address:
NOTE: The LAN to WAN access rule is only needed when the admin needs to manage the WAN interface from a LAN PC. Enabling SNMP in the WAN (typically X1) interface should only be done if it is required as per requirement. It is recommended to have strict security policies implemented in such cases.
Create an explicit access rule; in our example, it's a LAN to WAN rule
- Click POLICY, navigate to Rules and Policies | Access Rules.
- Click Add to create an access rule.
- Enter specific address objects on Service, Source and Destination fields and click Add
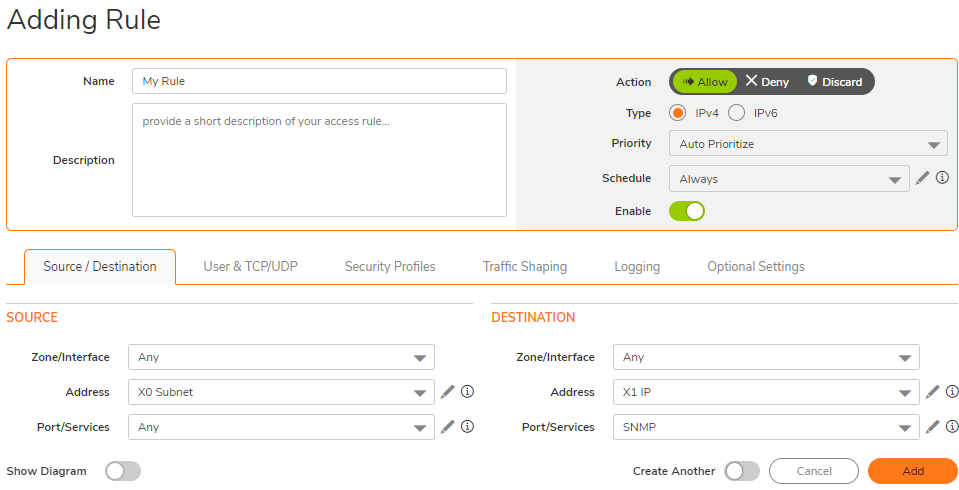
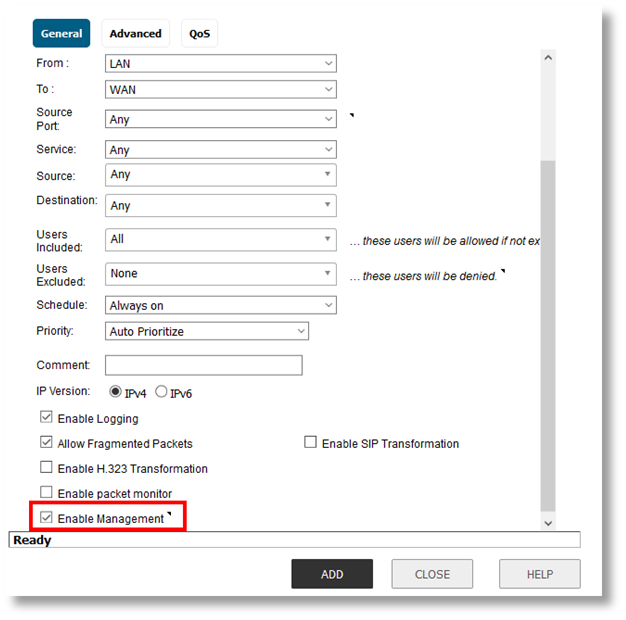
Create an access rule; in our example, it's a LAN to WAN rule
- Click POLICY, navigate to Rules and Policies | Access Rules.
- Click Add to create an access rule.
- Leave Service, Source and Destination fields as Any (Default).
- Check Enable Management.
- Click Add.


Resolution for SonicOS 6.5
This release includes significant user interface changes and many new features that are different from the SonicOS 6.2 and earlier firmware. The below resolution is for customers using SonicOS 6.5 firmware.
Enable SNMP and configure SNMP parameters
- Login to the SonicWall management GUI as admin.
- Click on MANAGE, navigate to Appliance| SNMP.
- Check the box Enable SNMP, click ACCEPT.
- Click Configure button and supply the parameters for SNMP NOTE: For the SNMP functionality, the Community name should be the same in the SonicWall and the SNMP monitoring software. Get Community Name is considered a credential (secret key) and should be as complex as possible.

- Click on Advanced Tab and enable the toggle for “Mandatory Require SNMPv3” option.
- Click OK .
Enable SNMP on the SonicWall interface
- Login to the SonicWall management GUI as admin.
- Click MANAGE, Navigate to Network | Interfaces and click on the configure button in front of the LAN & WAN interface.
LAN Interface (X0)
- In the Management section of Edit X0 interface window, check the SNMP box.
- Click OK.
WAN Interface (X1)
CAUTION: it is not recommended to have SNMP enabled on untrusted networks unless it is a requirement.
- In the Management section of Edit X1 interface window, check the SNMP box.
- Click OK.
Allow SNMP Management
- Please login to the SonicWall management GUI as admin.
- There are two ways to allow access to SNMP management on an interface's IP address:
Create an explicit access rule; in our example, it's a LAN to WAN rule
NOTE: The LAN to WAN access rule is only needed when the admin needs to manage the WAN interface from a LAN PC. Enabling SNMP in the WAN (typically X1) interface should only be done if it is required as per requirement. It is recommended to have strict security policies implemented in such cases.
- Click MANAGE, navigate to Rules | Access Rules.
- Click Add to create an access rule.
- Enter specific address objects on Service, Source and Destination fields.
- Click Add .

Create an access rule; in our example, it's a LAN to WAN rule
- Click MANAGE, navigate to Rules | Access Rules.
- Click Add to create an access rule.
- Leave Service, Source and Destination fields as Any (Default).
- Check Enable Management.
- Click Add.
Configuring SNMP & adding SonicWall unit in PRTG Monitoring software
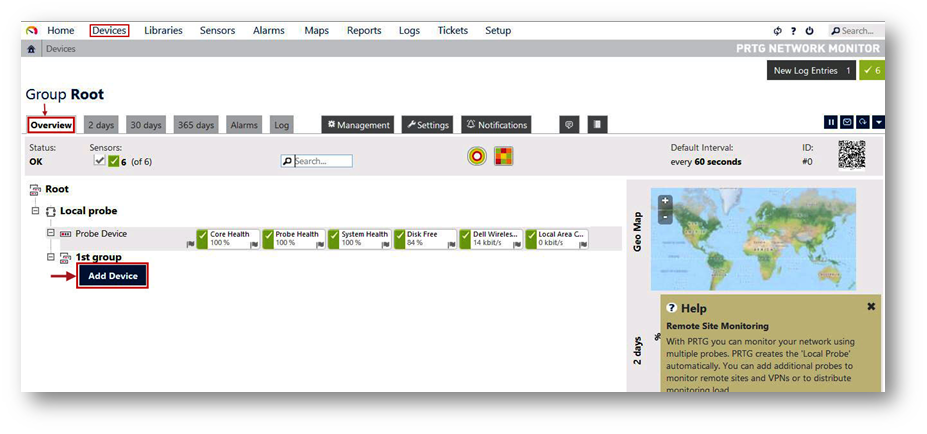
- Open the SNMP software and register the SonicWall. (You can download and install a free edition of PRTG from http://www.paessler.com/prtg/download).Screen shots for PRTG (V14.2.9.1689) are attached below, just enter the SonicWall appliance's LAN IP address, along with the community string and it will start gathering data from the SonicWall.Select Device tab in the PRTG software. Under Overview Click Add Device button to add your SonicWall device.
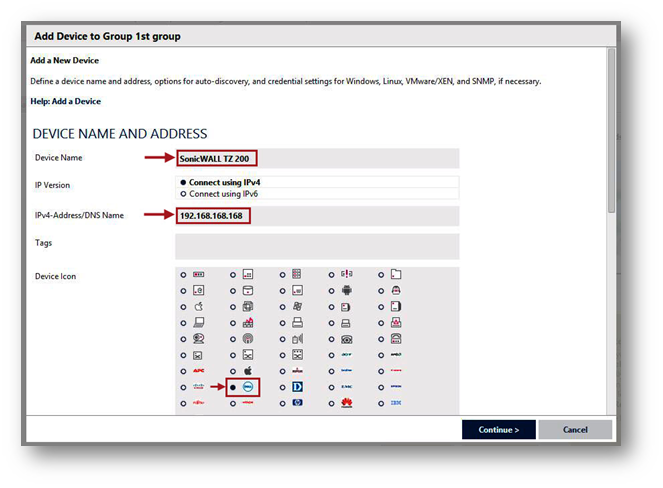
- In the device name enter SonicWall TZ 200 (You should use the same name which you used in SNMP configuration of SonicWall.
- In IPV4- Address/DNS Name 192.168.168.168 (IP address of the SonicWall interface to which server is connected).
- Device Icon: Select Icon.
- Click Continue for next step.
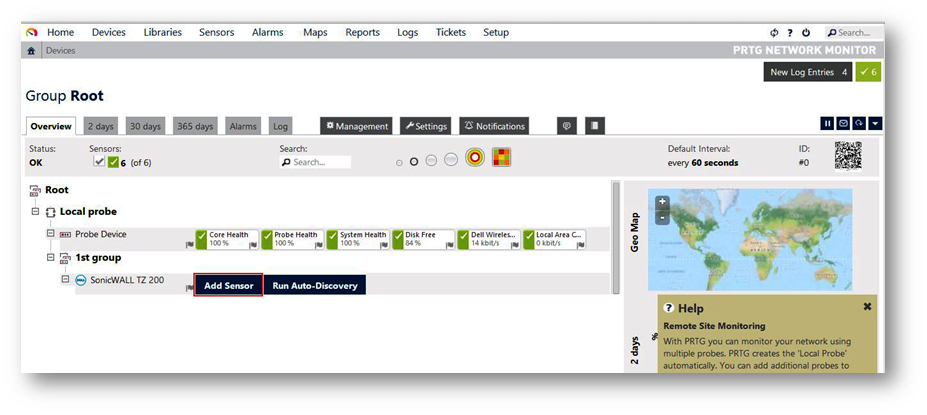
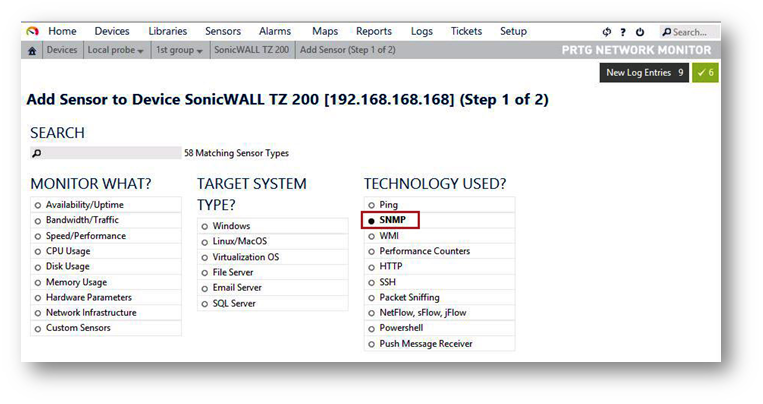
- You will find the new device which we added. Click Add Sensor button to select the sensor type.
- Select SNMP under Technology Used.
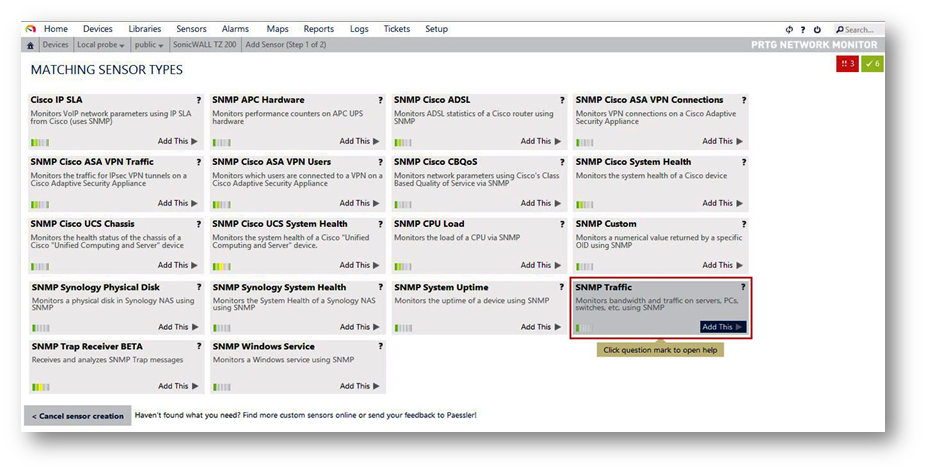
- Select SNMP Traffic under Matching Sensor Type.
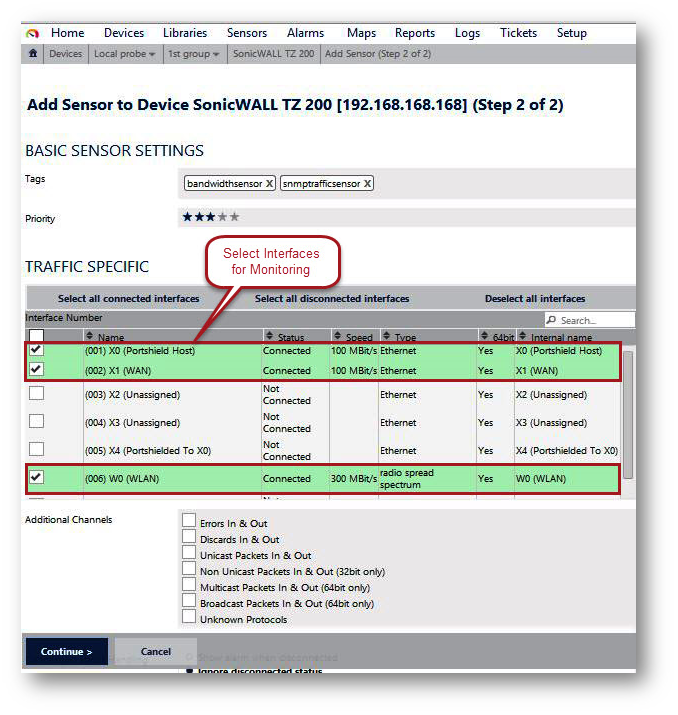
- Select the interface for which you would like to monitor traffic. In this scenario select X0, X1 & W0 interface and click Continue button:
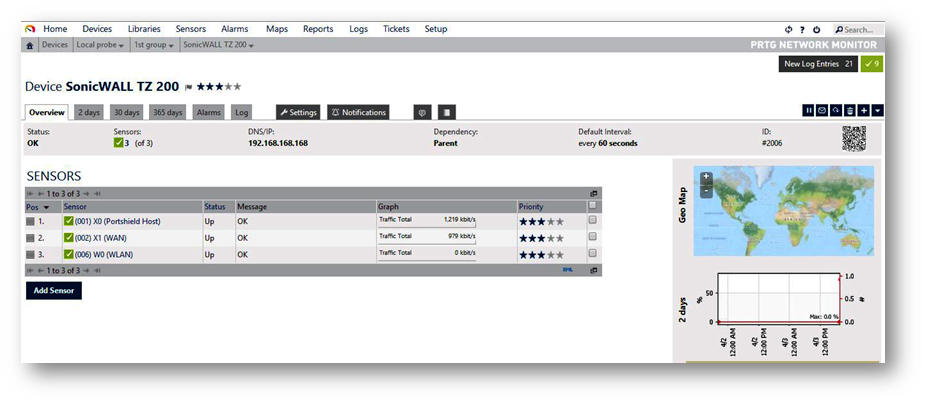
- Now you can see the sensor information for all the interface with the traffic rate.
How to Test
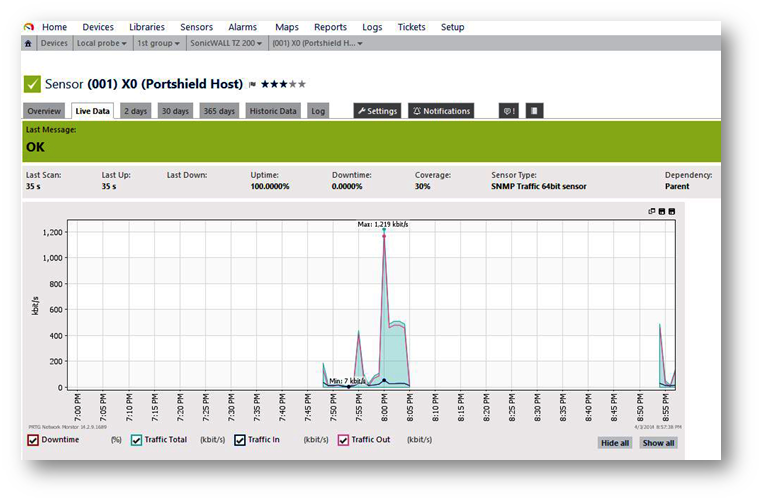
- In order to test the SNMP traffic. Select any one interface to see its traffic rate with graph. Click on X0 interface to see the information as below.
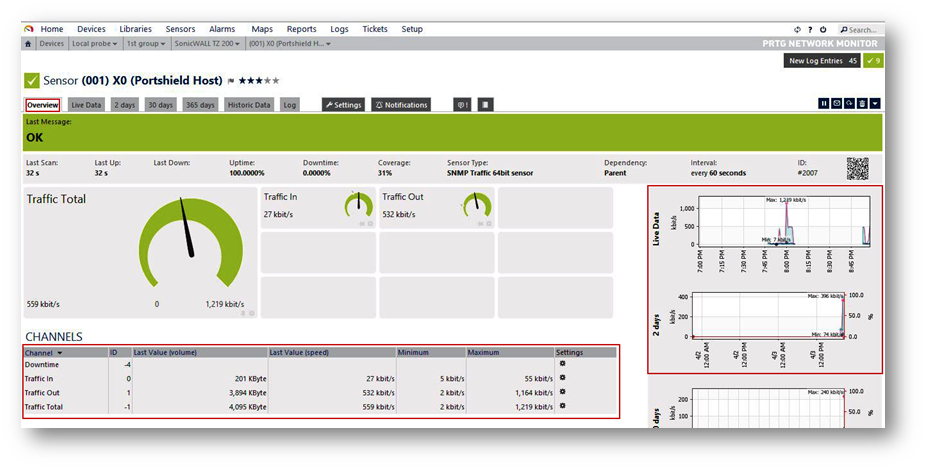
- The Live data can be shown in the graph format as below for the X0 interface.