Configuring Schedule on SonicPoint/SonicWave when using Virtual Access Points
Description
Assigning schedules for users to access wireless network using specific Virtual Access Point.
This article gives step by step configuration that allows administrators to enforce time-based internet access.
Scenario:
- Users / Wireless clients should not be able to see the VAP SSID during Off Work hours.
- During After Work Hours and Lunch Time, the SSID will be suppressed and users will not be able to see the SSID for connection.
Steps to Follow
- Configure Schedule.
- Configure a Wireless VAP.
- Add the VAP to the VAP Group.
- Apply VAP groups.
Resolution for SonicOS 7.X
This release includes significant user interface changes and many new features that are different from the SonicOS 6.5 and earlier firmware. The below resolution is for customers using SonicOS 7.X firmware.
Step 1. Schedule Configuration
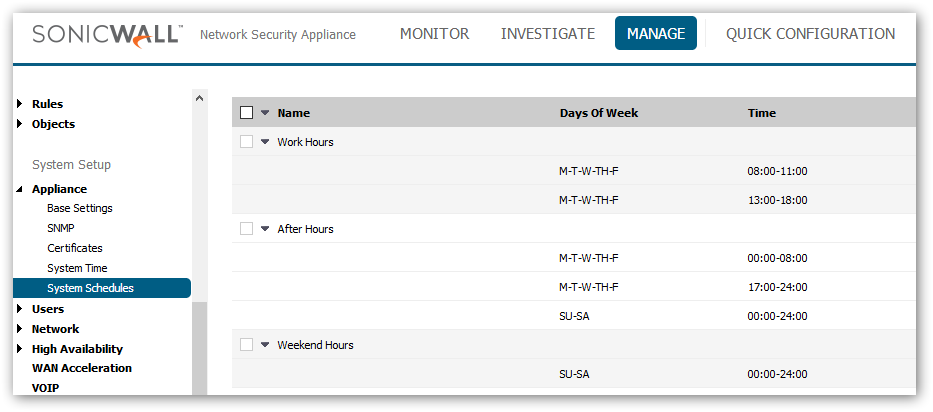
SonicWall has a number of pre-configured schedules which are for various time periods and can be used for various purposes, if suitable. For this scenario the pre-configured Schedule, Work Hours, which will suit our purpose as it is between 8:00 AM and 5:00 PM from Monday to Friday, but not suit for the lunch time schedule, you need to create a new one.
- Login to the SonicWall management interface navigate to the Object | Match Objects | Schedules page.

- Click on the Add button, set Schedule Name as Work Time, set Schedule type as Recurring, select the boxes under Mon, Tue, Wed, Thu, Fri under Recurring.
- Set Start Time as 08:00 and Stop Time as 13:00. Click on the button Add to add this time under Schedule List.
- Set another Start Time as 13:00 and Stop Time as 17:00. Click on the button Add to add this time under Schedule List.
- Click on Save.
Step 2. Wireless VAP configuration
- Navigate to Device | Access Points | Virtual Access Point.
- In the Virtual Access Points section, a VAP has already been configured. Click the Edit button. To add a new VAP click on Add.
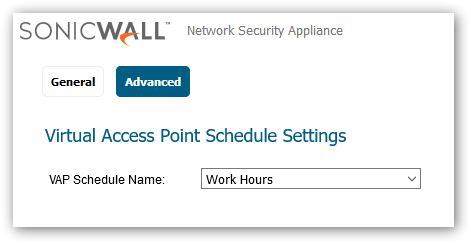
- Navigate to the Advanced tab, select VAP schedule name as ‘Work Hours’.

- Click OK
Step 3. Wireless VAP Groups configuration
- Navigate to Device | Access Points | Virtual Access Points. Click Add in Virtual Access Point Groups section.
- Select the VAP-Corporate from the list and name the group. Click OK.
Step 4. Apply VAP Groups
- Navigate to Device | Access Points | Settings.
- Select the appropriate provisioning profile that will apply to the SonicWall access points.
- In General tab, select the new VAP group under the Virtual Access Point Settings. Click OK.
Resolution for SonicOS 6.5
This release includes significant user interface changes and many new features that are different from the SonicOS 6.2 and earlier firmware. The below resolution is for customers using SonicOS 6.5 firmware.
Step 1. Schedule Configuration
SonicWall has a number of pre-configured schedules which are for various time periods and can be used for various purposes, if suitable. For this scenario the pre-configured Schedule, Work Hours, which will suit our purpose as it is between 8:00 AM and 5:00 PM from Monday to Friday, but not suit for the lunch time schedule, you need to create a new one.
- Login to the SonicWall management interface navigate to the Manage | Appliance | System Schedules page.

- Click on the Add button, set Schedule Name as Work Time, set Schedule type as Recurring, select the boxes under Mon, Tue, Wed, Thu, Fri under Recurring.
- Set Start Time as 08:00 and Stop Time as 13:00. Click on the button Add to add this time under Schedule List.
- Set another Start Time as 13:00 and Stop Time as 17:00. Click on the button Add to add this time under Schedule List.
- Click on OK to save.
Step 2. Wireless VAP configuration
- Navigate to Manage | Access Points | Virtual Access Point.
- In the Virtual Access Points section, a VAP has already been configured. Click the Edit button. To add a new VAP click on Add.
- Navigate to the Advanced tab, select VAP schedule name as ‘Work Hours’.

- Click OK
Step 3. Wireless VAP Groups configuration
- Navigate to Manage | Access Points | Virtual Access Points. Click Add in Virtual Access Point Groups section.
- Select the VAP-Corporate from the list and name the group. Click OK.
Step 4. Apply VAP Groups
- Navigate to Manage | Access Points | Base Settings.
- Select the appropriate provisioning profile that will apply to the SonicWall access points.
- In General tab, select the new VAP group under the Virtual Access Point Settings. Click OK.
Resolution for SonicOS 6.2 and Below
The below resolution is for customers using SonicOS 6.2 and earlier firmware. For firewalls that are generation 6 and newer we suggest to upgrade to the latest general release of SonicOS 6.5 firmware.
Step 1. Schedule Configuration
SonicWall has a number of pre-configured Schedules which are for various time periods and can be used for various purposes, if suitable. For this scenario the pre-configured Schedule, Work Hours, which will suit our purpose as it is between 8:00 AM and 5:00 PM from Monday to Friday, but not suit for the lunch time schedule, you need to create a new one.
- Login to the SonicWall management interface navigate to the System | Schedules page.

- Click on the Add button, set Schedule Name as Work Time, set Schedule type as Recurring, select the boxes under Mon, Tue, Wed, Thu, Fri under Recurring.
- Set Start Time as 08:00 and Stop Time as 13:00. Click on the button Add to add this time under Schedule List.
- Set another Start Time as 13:00 and Stop Time as 17:00. Click on the button Add to add this time under Schedule List.
- Click on OK to save.
Step 2. Wireless VAP configuration
- Navigate to SonicPoint | Virtual Access Point or Wireless | Virtual Access Point
- In Virtual Access Points section, a VAP has already been configured. Click the Edit button.
- Navigate to Advanced tab, select VAP schedule name as ‘Work Time’
- Click OK
Step 3. Wireless VAP Groups configuration
- Navigate to SonicPoint | Virtual Access Point or Wireless | Virtual Access Point. Click the button Add in Virtual Access Point Groups section.
- Select the VAP-Corporate from the list and name the group and click OK
Step 4. Apply VAP Groups
- For Internal wireless
- For SonicPoints
- Navigate to SonicPoint | SonicPoints
- In SonicPoints section, select the SonicPoint on which Group is required to be applied to
- In General tab, select the group at Virtual Access Point Settings. Click OK
Test the Configuration:
In order to test the above scenario, during after work hours, try to scan for wireless network and the wireless client should not see the SSID configured for Work Time schedule.