Wireless: SonicPoint Layer 3 Management configuration over an IPSEC site to site VPN tunnel
Description
Scenario: discovering and managing SonicPoints at the remote site over an IPSEC site to site vpn tunnel which acts as default route for all traffic from the remote site. The Central site (internet gateway) provides DHCP services to the Sonicpoints and the clients at the remote site.
Please Note: The settings shown in this technote is just an example, you must substitute the settings as per your setup.
Resolution
Deployment Steps:
Part 1: Configuration on the SonicWall UTM appliance(s)
Step 1: Create WLAN Tunnel Interface
Step 2: Create DHCP scopes on the central firewall with CAPWAP option (for ip-assignment to the Sonicpoints and clients at the remote site)
Step 3: Configure a site to site vpn policy on both the central and remote firewalls for routing all the internet traffic from remote site via the central site
Step 4: Configure the DHCP over VPN settings on both the central and remote firewalls to enable leasing of IPs from the central gateway
Part2: Configuration on the SonicPoint
Step 1: Downloading the SonicOS 5.9 compatible firmware for SonicPoint
Step 2: Accessing the SonicPoint Management Interface in Standalone Mode
Step 3: Uploading the SonicOS 5.9 compatible firmware for SonicPoint
Detailed configuration steps:
Part 1: Configuration on the SonicWall UTM appliance
- Login to the SonicWall Management Interface and go to Network | Interfaces page
- Select WLAN tunnel interface in the Add Interface drop down menu and configure as per your setup
Tunnel ID: 0 (zero)
Tunnel Source Interface: X0 / LAN
Mode / IP Assignment: Static
IP Address: 172.32.10.1
Subnet Mask: 255.255.255.0

Step 2 : Creating DHCP scopes on the central firewall with DHCP option 138 (CAPWAP)
- Go to Network | DHCP Server page, ensure that the "Enable DHCPv4 Server" option is checked/enabled.
- Click on the Advanced button
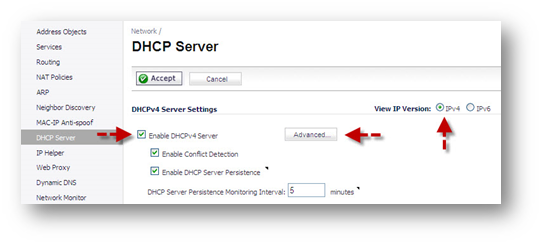
- In the Option Objects tab, click on Add Options button; enter the details as per your setup.
Option Number: Select "138 (CAPWAP AC IPv4 Address List)
Option Type: IP Address (will be greyed out)
Option Value: Enter "10.10.10.1" ---> [ This is the IP of the interface to which the WT0 interface is bound to (X0 interface ip) ]
Click OK when Done

In this scenario the central gateway is the DHCP server for the remote network where the Sonicpoint and the wireless clients would be connecting to.
The central firewall provides DHCP leases to both the physical subnet (interface where SP is connected to--for initial provisioning of the Sonicpoint) and the Virtual subnet (for the IP assignment to Sonicpoints and the wireless clients -- within the GRE tunnel)
Hence there are two DHCP scopes required on the Central firewall
Scope 1 : A range of IPs from the 30.30.30.0/24 subnet with no interface bound to it ----> [This is the scope to which the DHCP option 138 would be bound to for initial provision ]
Scope 2 : A range of IPs from the WTO (tunnel interface) subnet (172.32.10.0/24) -----> [Generally this scope is auto created when the WTO interface is configured]
Note :
If scope 1 is not defined on the central gateway , then alternatively the SP at the remote site must be configured with manual IP assignment for the local communication to work and also the AC IP (10.10.10.1) must be specified manually by directly logging into the SP )
d. On the DHCP Server page, click on the Add Dynamic button to Create a DHCP Scope for the SonicPoint , binding with the new DHCP AC option to the scope.
Range End: 30.30.30.200
Default Gateway: 30.30.30.1
Subnet Mask: 255.255.255.0

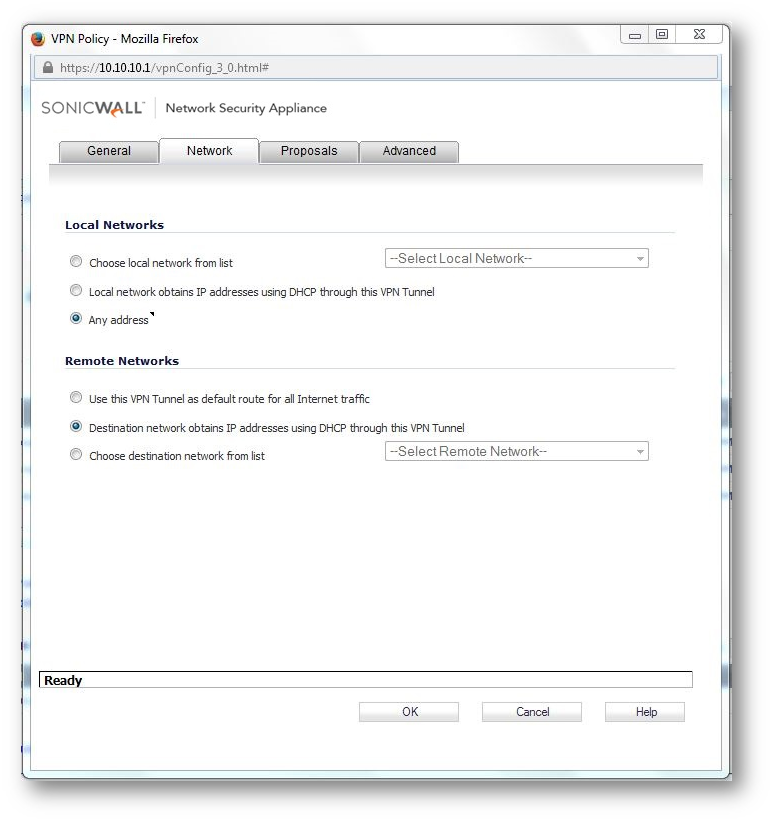
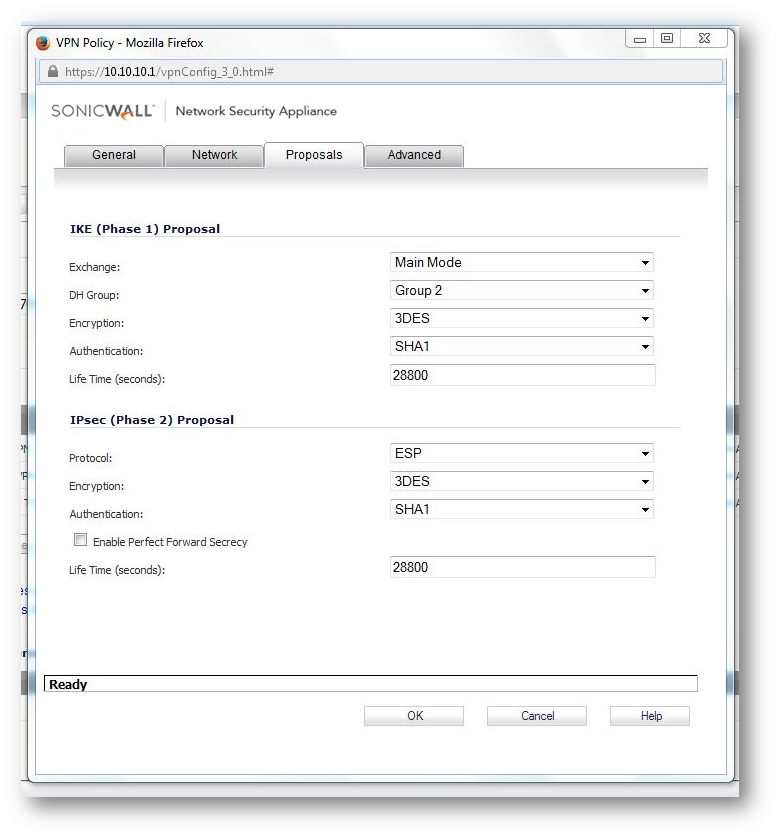
Step 3: Configure a Site-to-Site VPN policy on both the central and remote firewalls for routing all the internet traffic from remote site via the central site
Central Gateway configuration (Site which provides internet access for the Sonicpoint subnet at the remote site)
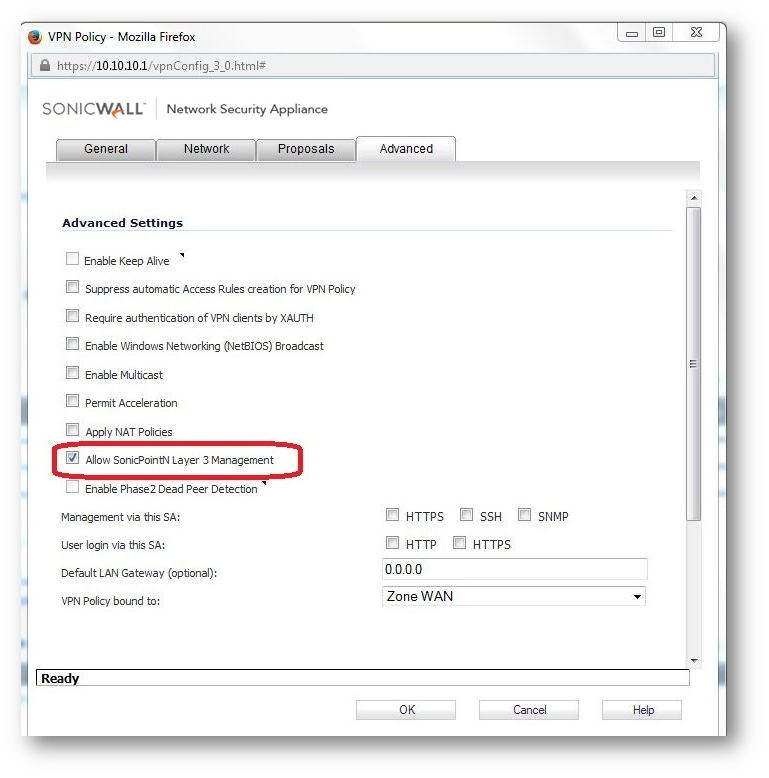
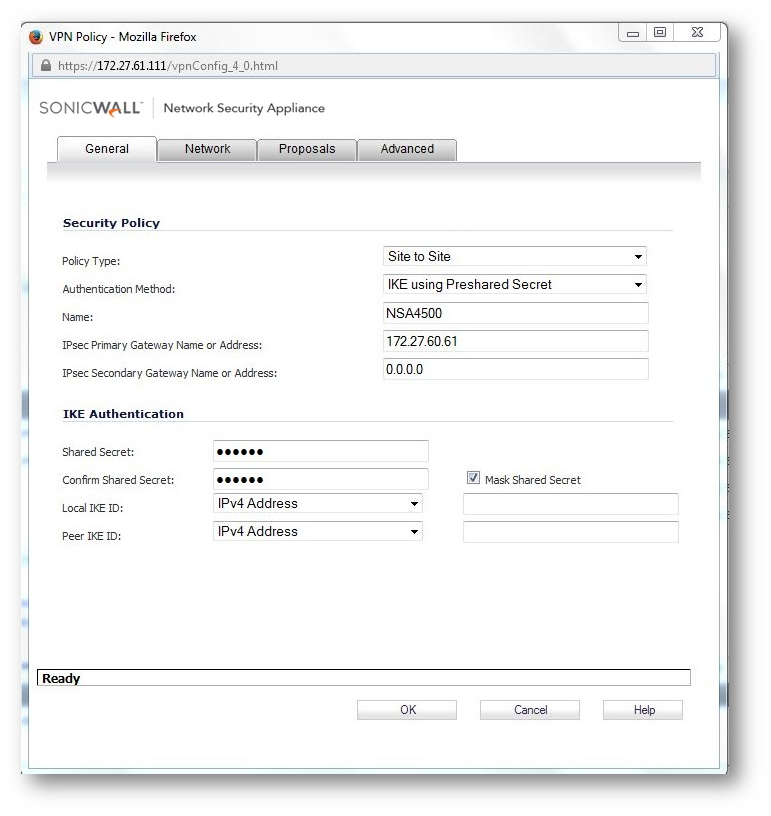
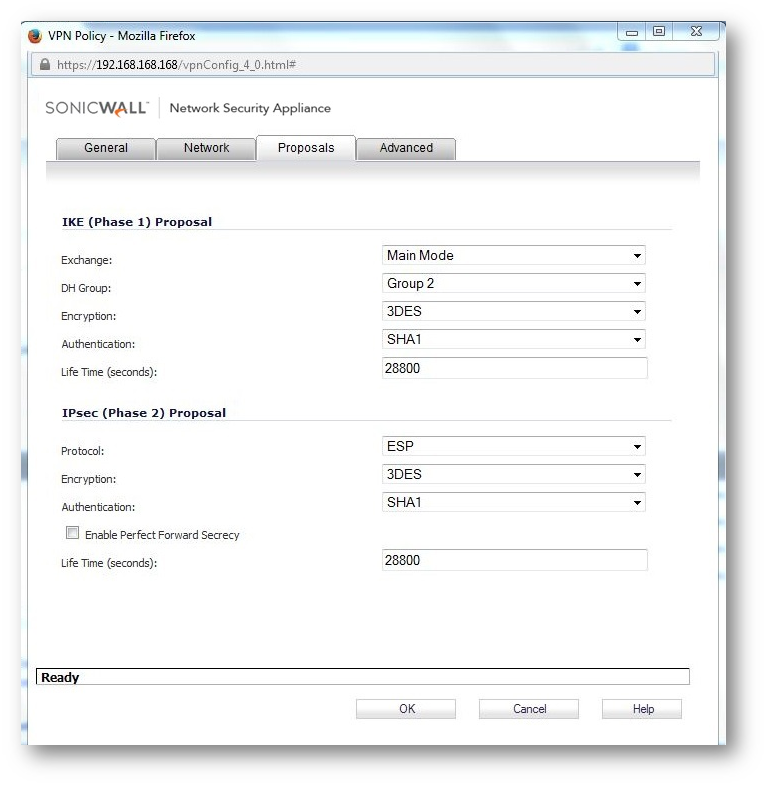
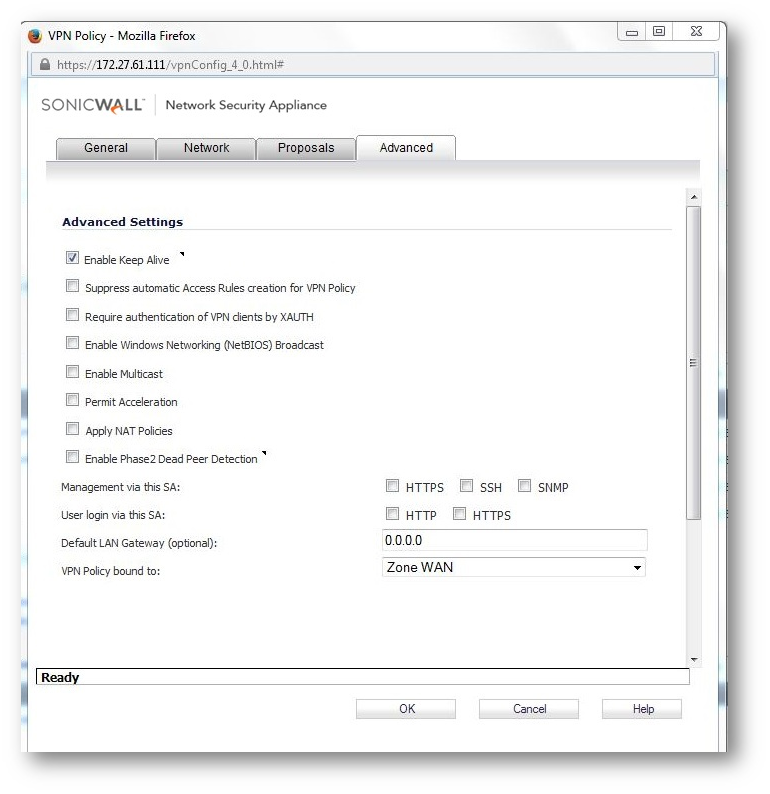
a. Configure The VPN policy on the Central Gateway (as below)

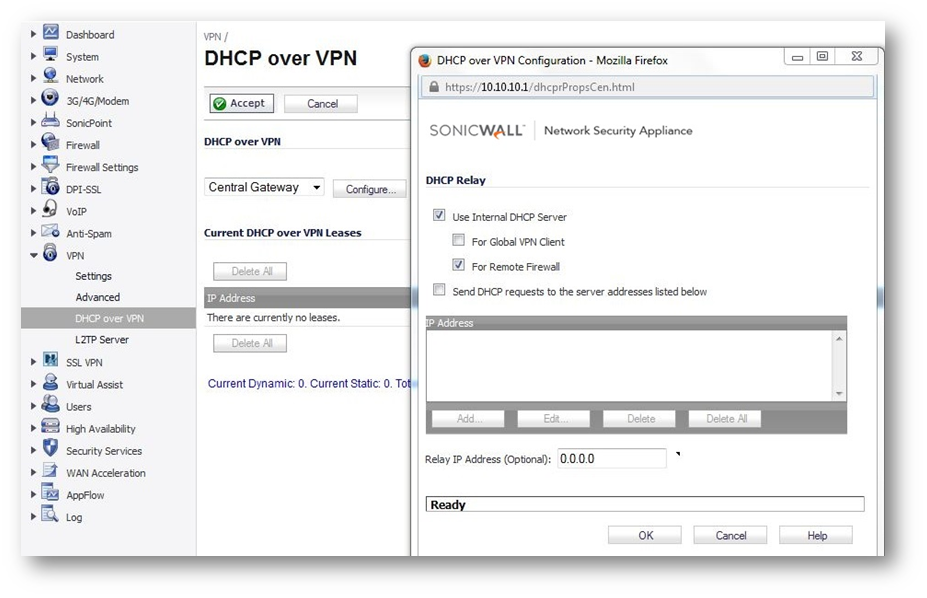
b.Configure DHCP over VPN options on the Central Gateway
� 
c. Configure a NAT policy to NAT the VPN DHCP Client's ips to the WAN interface ip (X1 ip)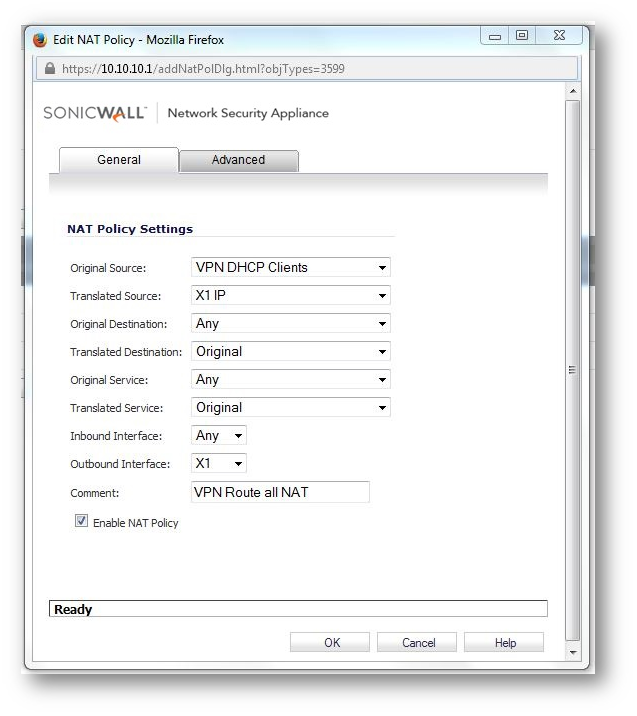
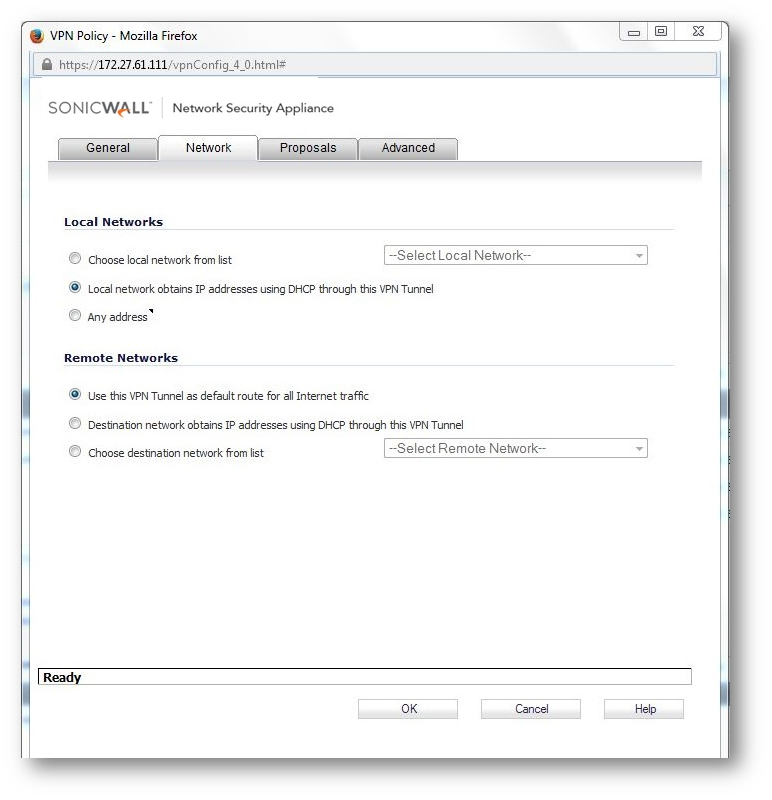
Remote Gateway Configuration (Site where the Sonicpoints and the wireless clients are located)
a.Configure the VPN policy on the Remote Gateway
b.Configure the Interface (X2) to which the Sonicpoint would be connected to , with a static ip from the subnet that is defined� in Step 2(d)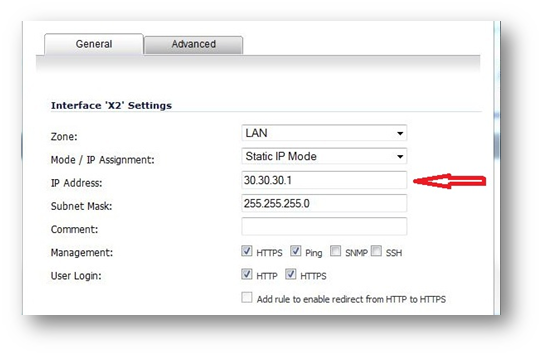
c. Configure DHCP over VPN options on the Remote Gateway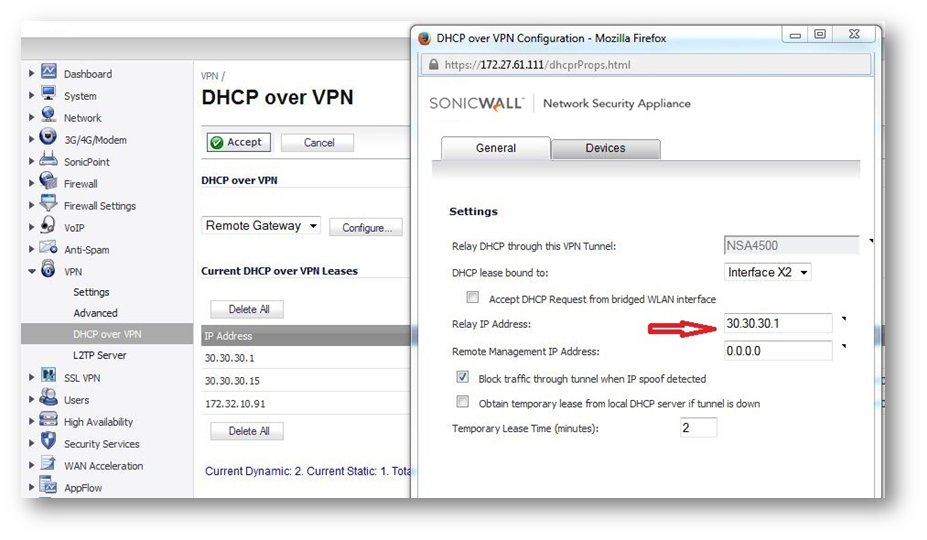
Part 2: Configuration on the SonicPoints
Step 1: Downloading the SonicOS 5.9 compatible firmware for SonicPoint
Method 1: Connecting the SonicPoint to SonicWall UTM appliance running SonicOS 5.9 and above
When the SonicPoints are connected to a SonicWall UTM appliance s WLAN interface/Zone running SonicOS 5.9 and above, they will be automatically updated with the latest firmware.
Method 2: Manually updating the SonicPoint firmware
a. Download the TSR from a SonicWall UTM appliance running 5.9 or above
b. Open the TSR in a Text reader/editor and find the SonicPoint download URL
c. Copy-Paste the Download URL in a Web Browser and download the appropriate SonicPoint Image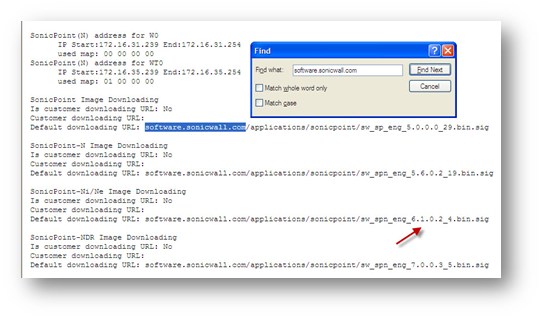
Step 2: Accessing the SonicPoint Management Interface in Standalone Mode:
- The default management interface of the SonicPoint is 192.168.1.20
- If you are connecting to the LAN port on the SonicPoint directly from a PC or through only the PoE injector, you need to configure the Local Area Connection on the PC to be in the same subnet as the SonicPoint.
- IP address: 192.168.1.100.
- Netmask: 255.255.255.0.
- Connect directly to the LAN port of the SonicPoint with a crossover cable or regular cat. 5 Ethernet cable.
- Connect to the LAN port of the SonicPoint through the PoE injector with a regular cat. 5 Ethernet cable.
- Start your Web browser and direct it to the default management IP address for the SonicPoint, 192.168.1.20
Troubleshooting Tip:If you are unable to access the SonicPoint, you may press the Reset Button to access it in SafeMode and then follow the above steps again: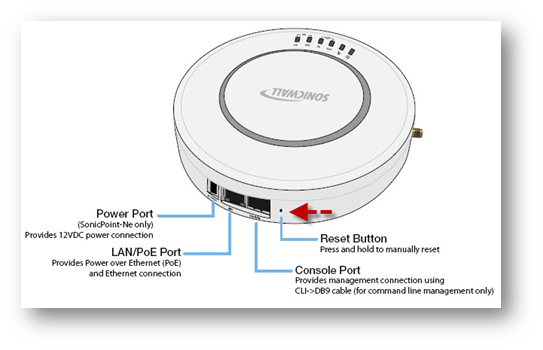
Step 3: Uploading the SonicOS 5.9 compatible firmware for SonicPoint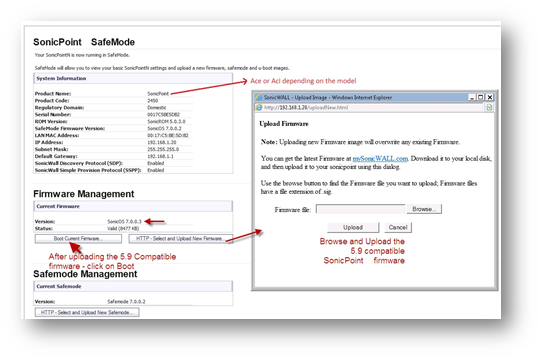
Please Note: During the reboot the SonicPoint will initiate the DHCP Process (DORA) and the Remote Gateway should perform DHCP Relay to Central Gateway for SonicPoint to successfully get the DHCP IP with DHCP Option 138. Then SonicPoint will initiate CAPWAP and GRE/DTLS process to IP received via DHCP option 138 to complete the SonicPoint provisioning.
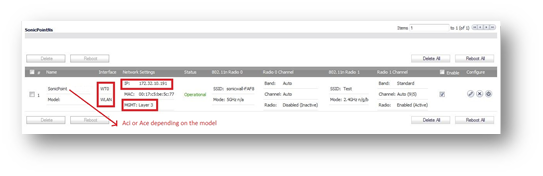
How to Test
Go to SonicPoint | Status page, you must see the remote SonicPoint with label MGMT: Layer 3.