Route traffic to certain website(s) through site to site VPN without Route All Traffic VPN set
Description
Route traffic to certain website(s) through site to site VPN without Route All Traffic VPN setup.
Resolution for SonicOS 7.X
This release includes significant user interface changes and many new features that are different from the SonicOS 6.5 and earlier firmware. The below resolution is for customers using SonicOS 7.X firmware.
Feature/Application:
In existing site to site vpn tunnel setup between Head Office and Remote Office, there would be requirement that traffic to certain website from remote office might need to be routed through head office Internet connection through the existing site to site vpn tunnel. However the requirement would not be to configure the site to site vpn tunnel in Route All Traffic through the vpn tunnel.
We can achieve the setup in few configuration modifications in existing vpn policy in the head office and remote office firewall.
Procedure:
Considering an existing site to site vpn tunnel is created and functional, following are the steps for additional configuration/modification that needs to be done to achieve the above setup.
In this knowledge article we will use google.com website ip address which is randomly taken. So in this example, we will route traffic from Remote Office for google.com website through Head Office firewall ISP.
Configuration in Remote Office Firewall:
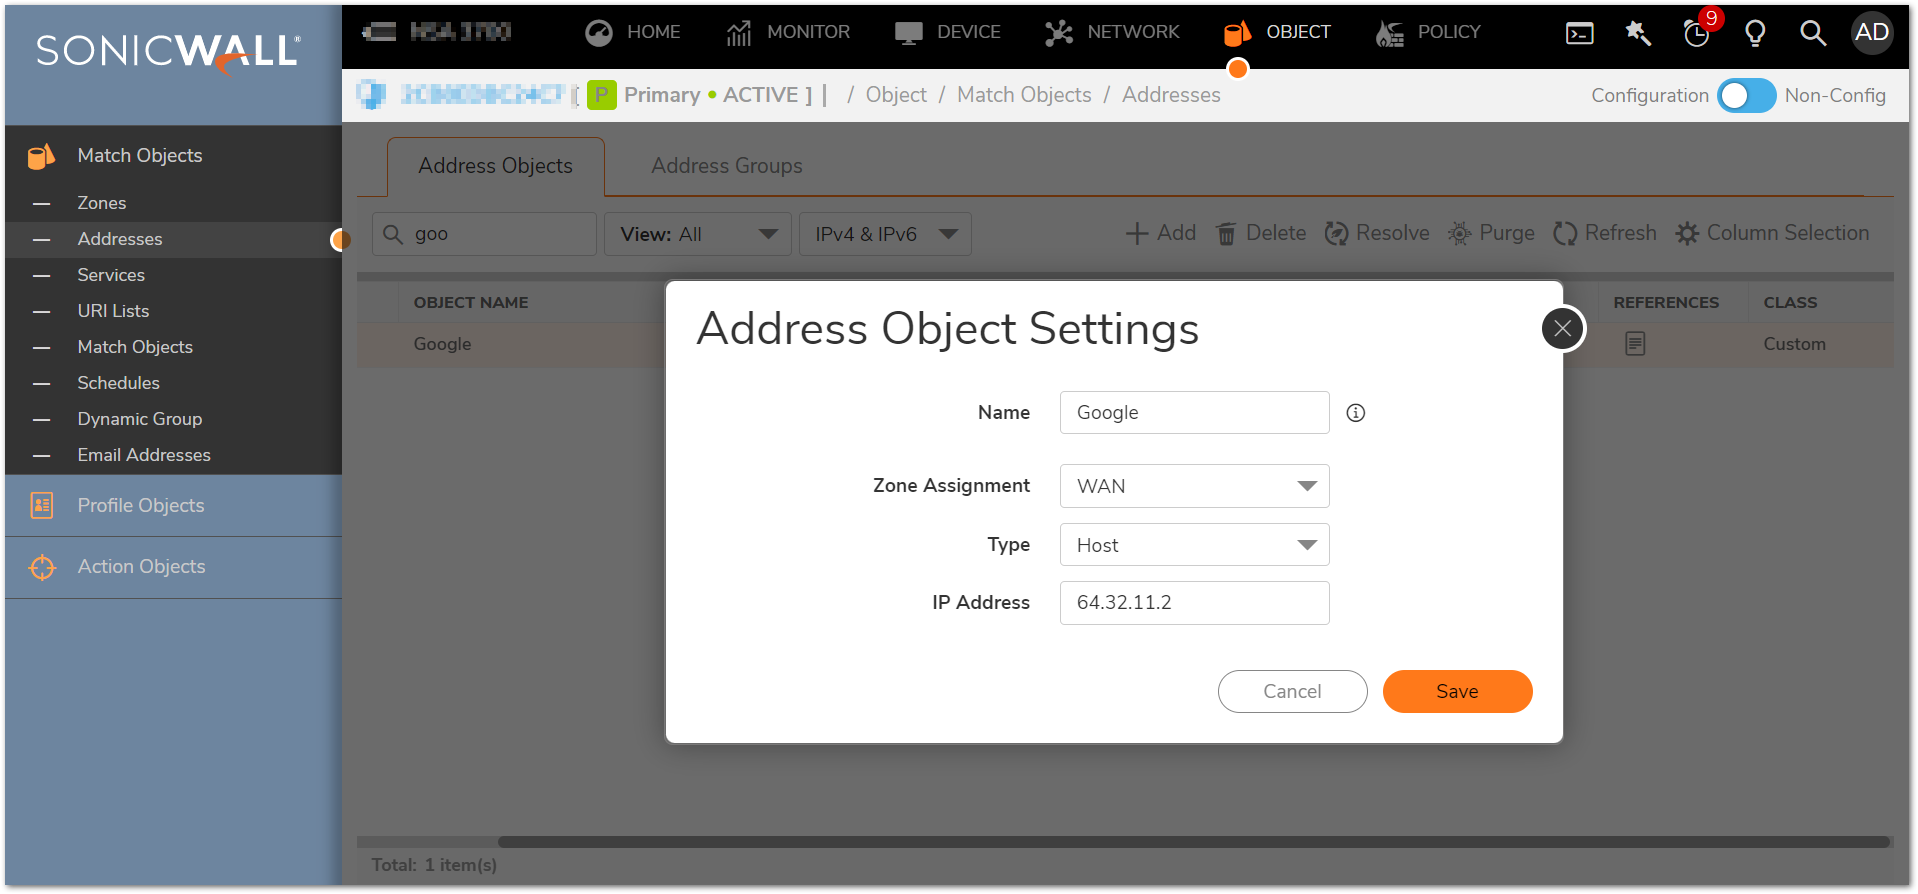
Step 1:Go to Object in the top navigation menu
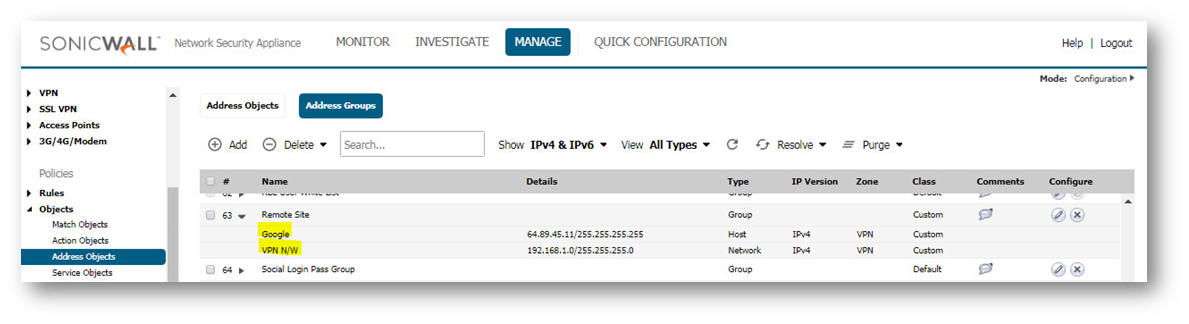
Select Objects | Address Objects and add
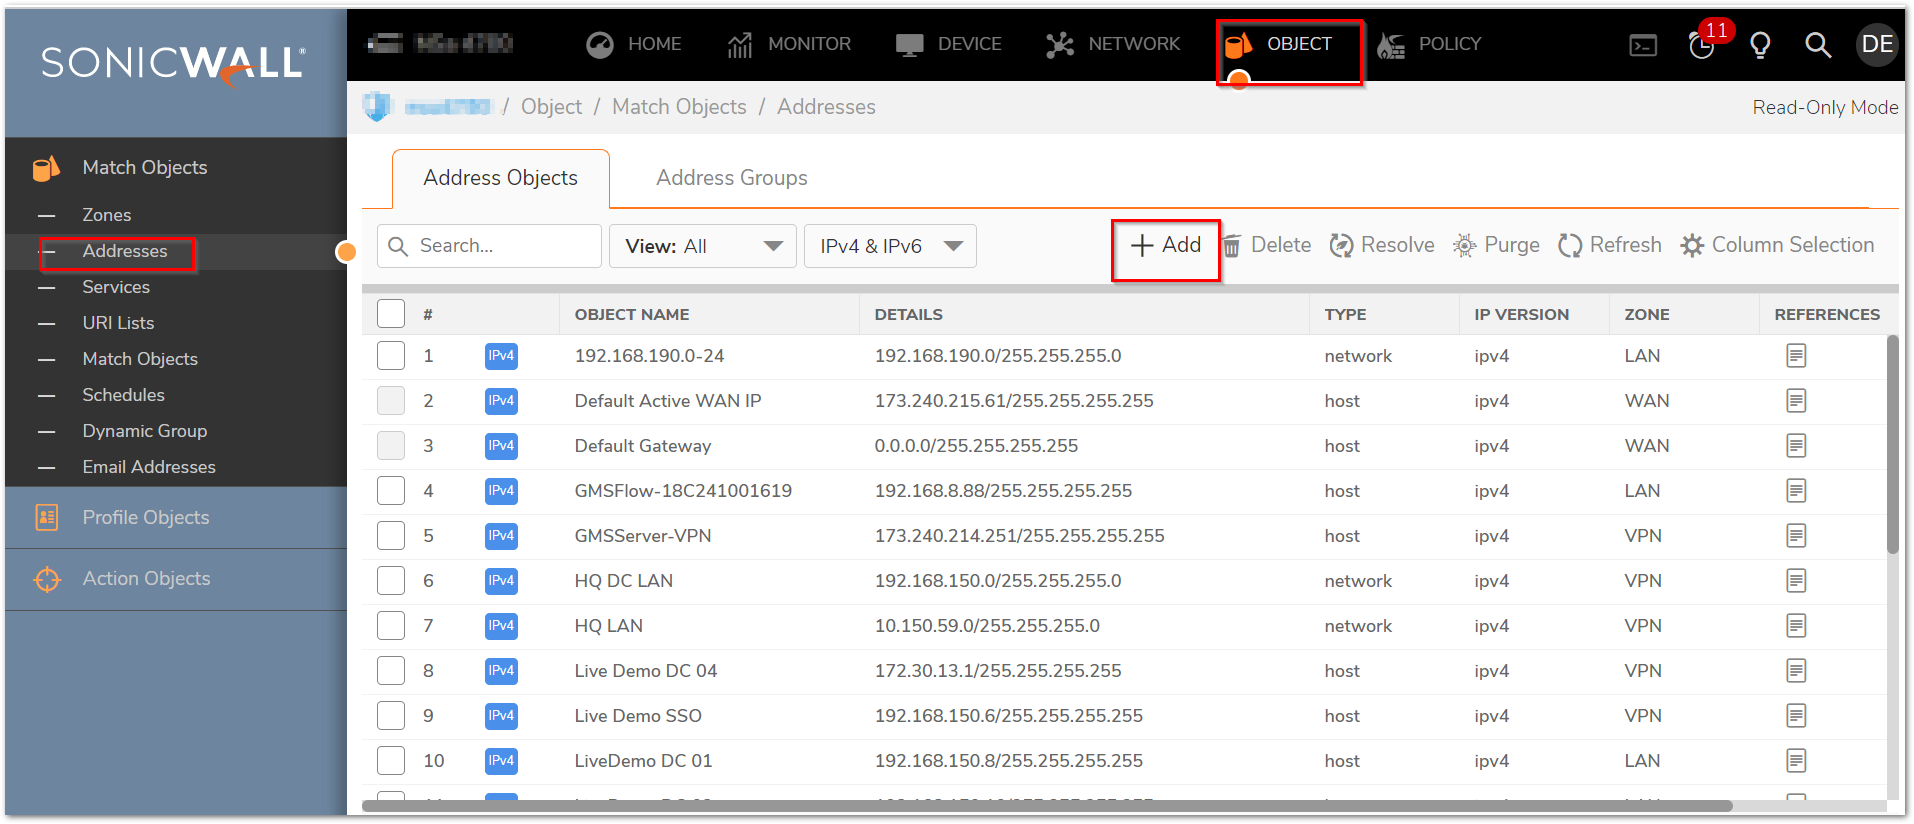
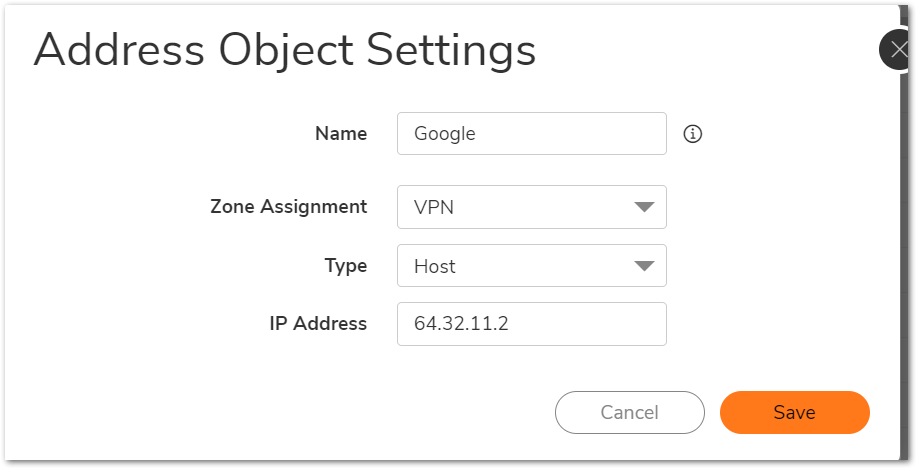
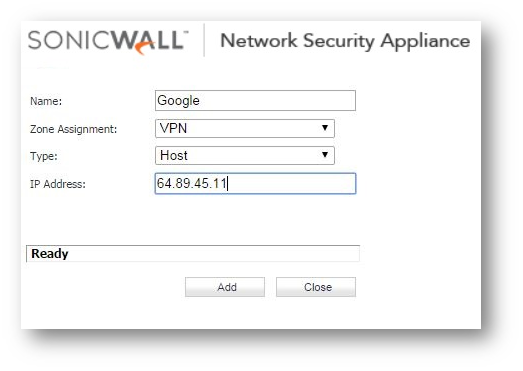
Create an address object for the website public ip as shown in the screenshot below. The address object will need to be in zone VPN.
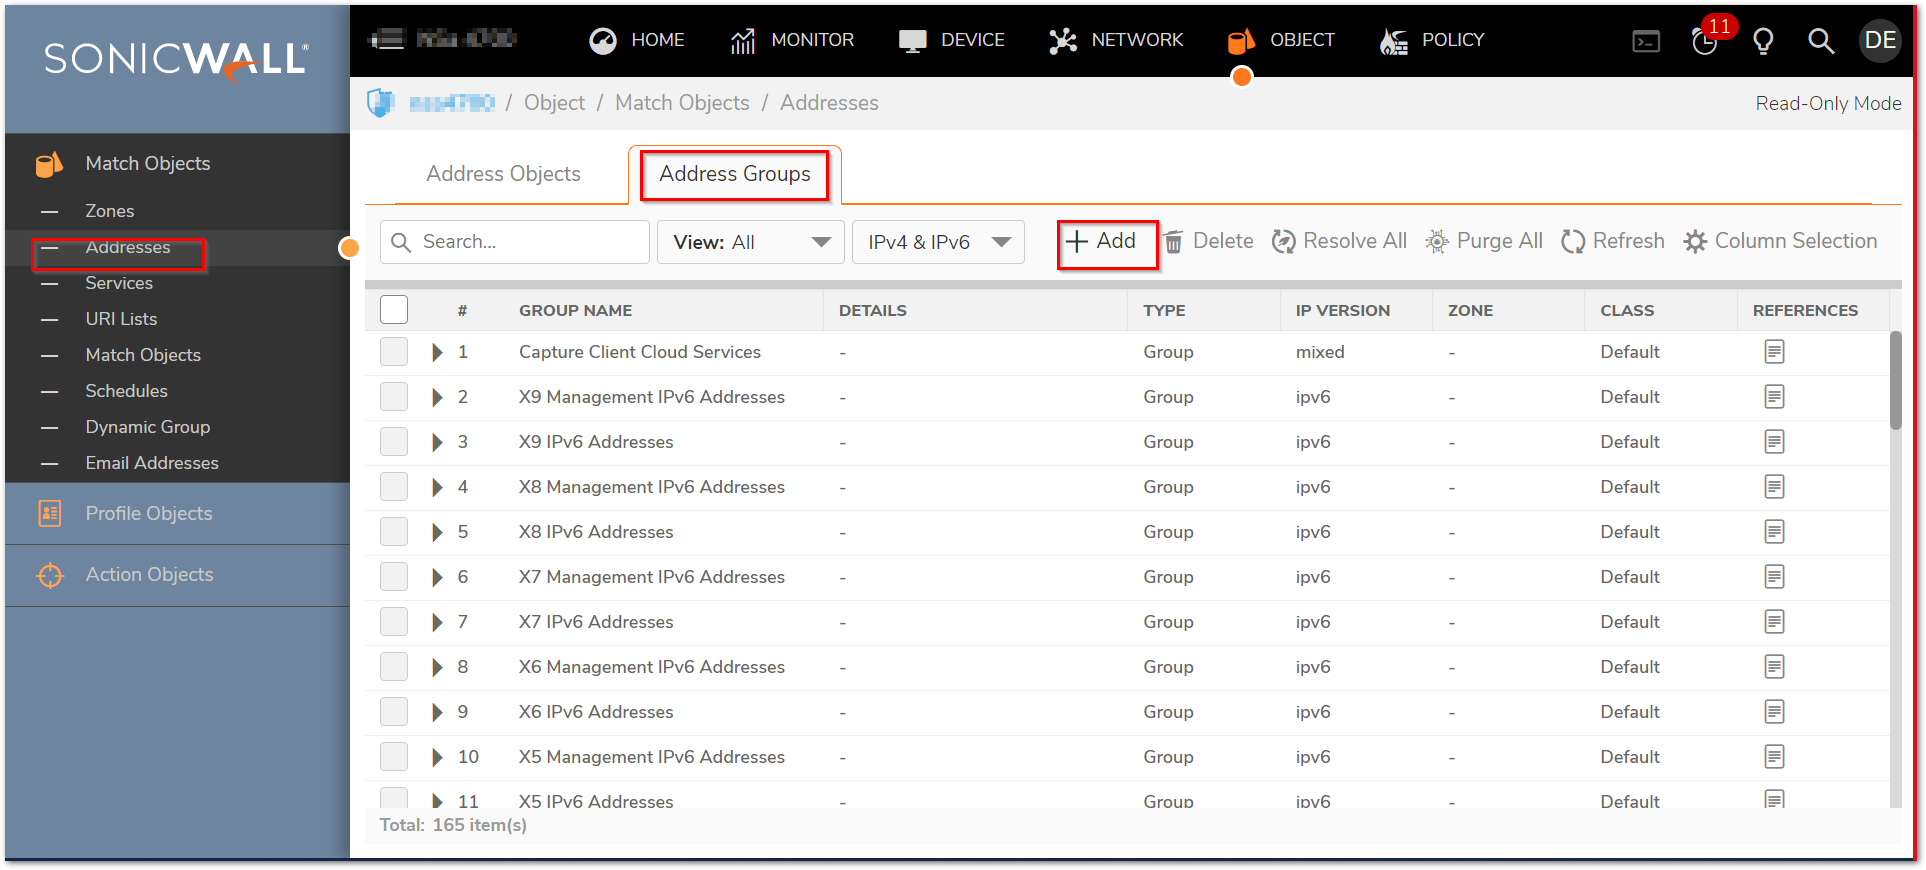
Step 2:
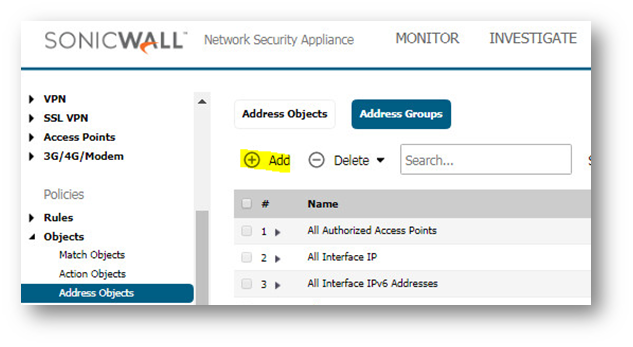
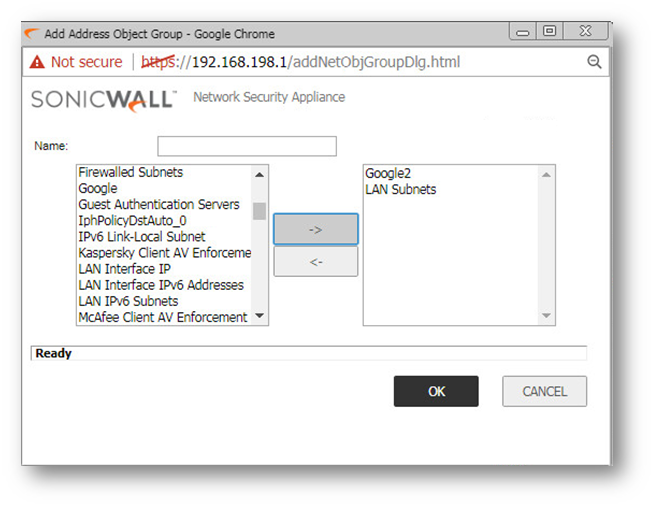
Create a new address Group. Go to Object>>Addresses>>Address group


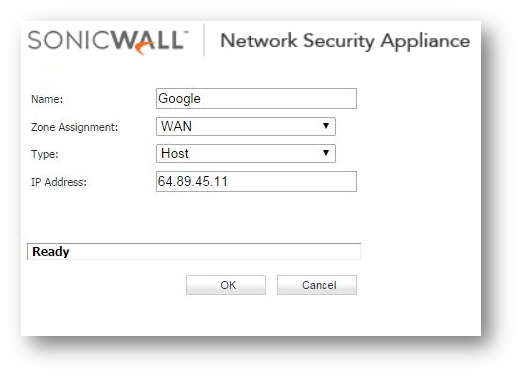
Step 1: Create an address object for the website(s)' public ip address as shown in the screenshot below. The address object will need to be in zone WAN.
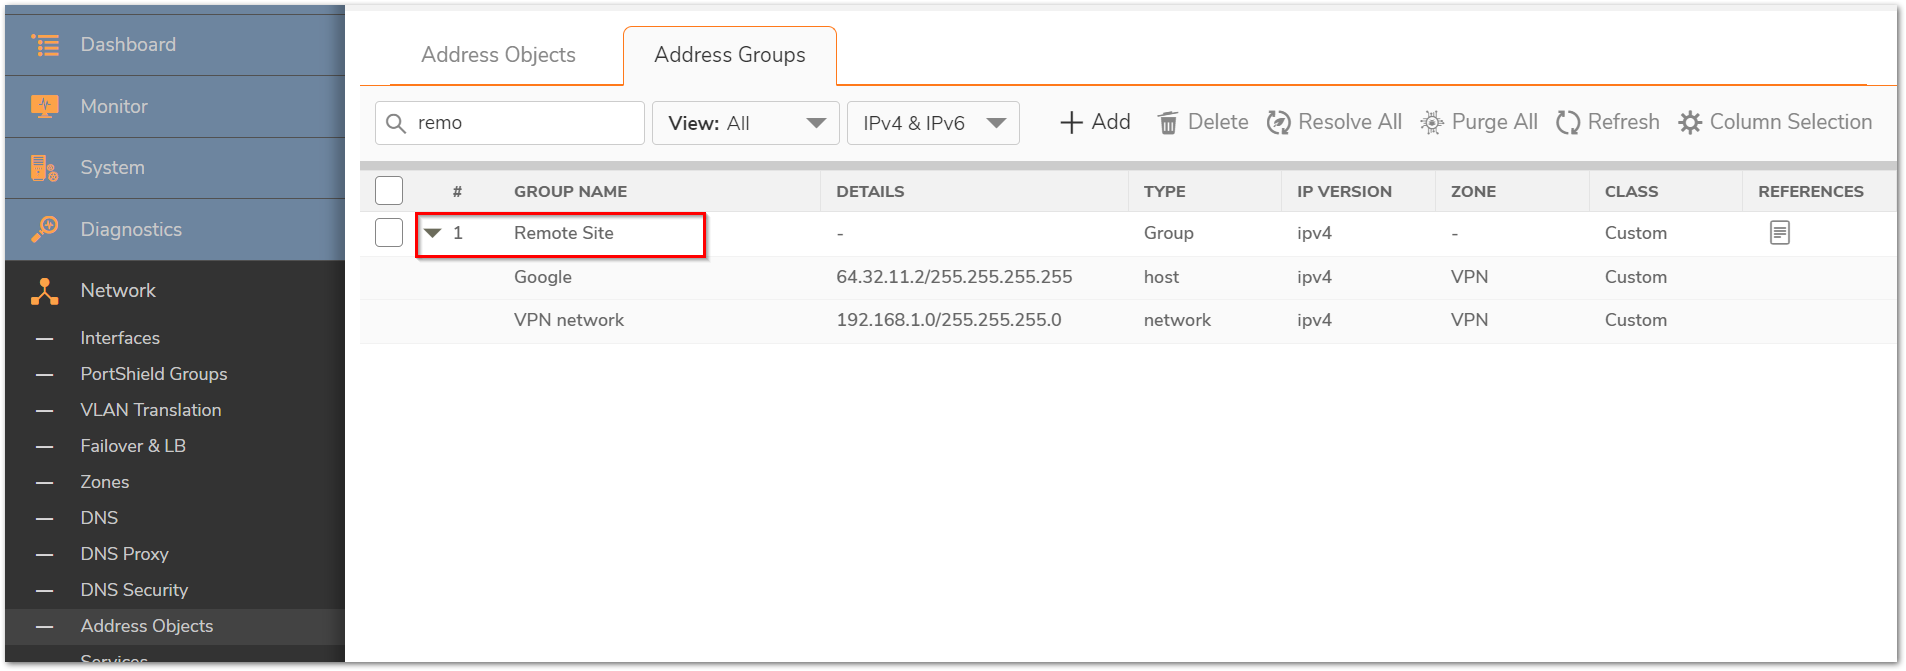
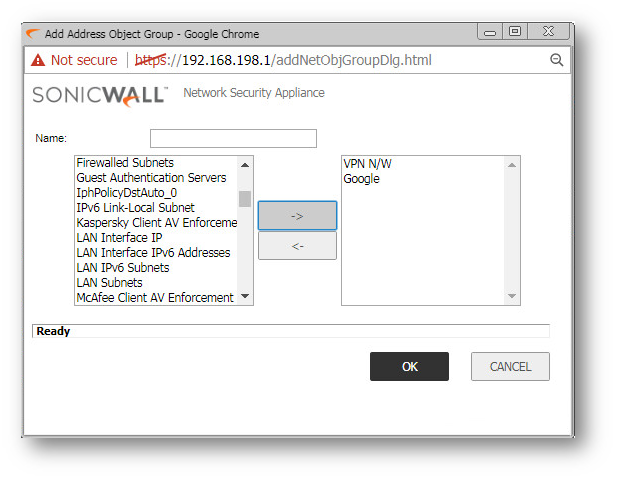
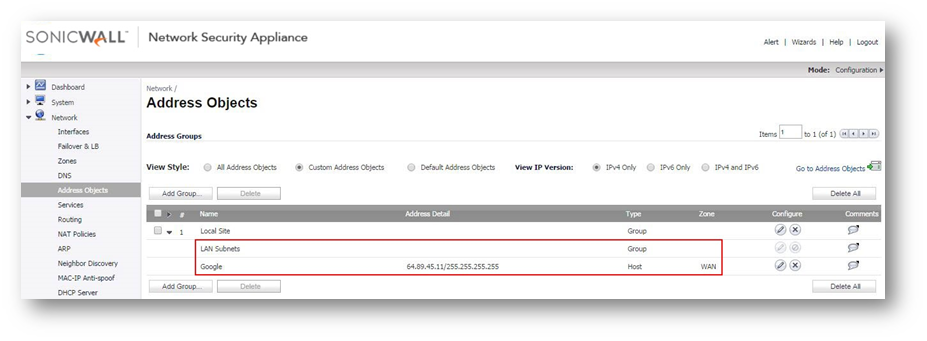
Step 2: Create a new Address Group, include the address object we created in step 1 and also add the existing address object for the Remote Office network(s). So this address group will consist remote network and the website(s) ip address.

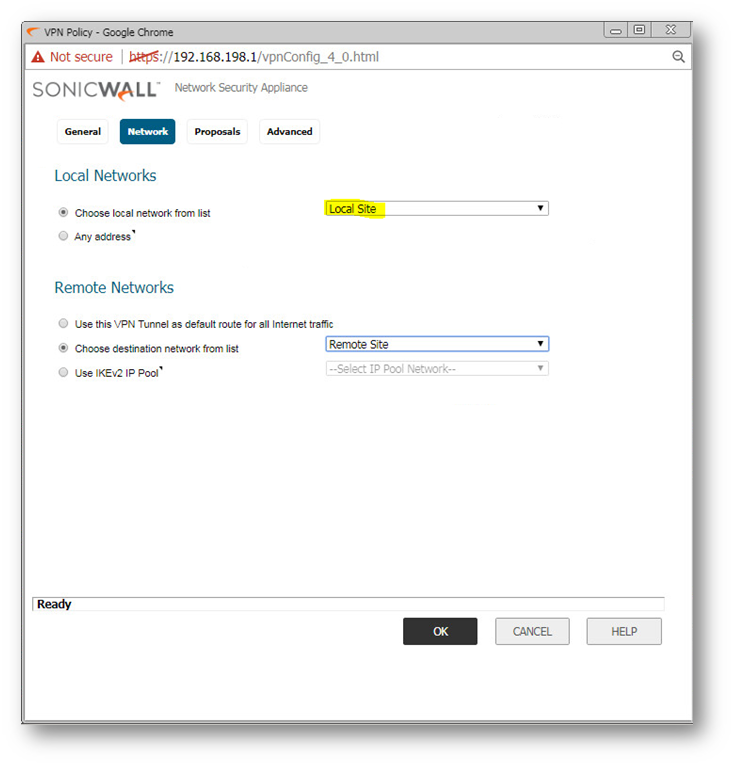
Step 3: In the existing vpn policy to the Remote Office, in the Network tab, for the Local Network, select the Address Group created in Step 2.

Step 4.: Configure NAT policy in the Head Office firewall to translate traffic coming from the Remote office network to WAN IP going to the website(s)
Go to Policy>Rules and Policies>NAT rules and add a new NAT policy as shown below:

Once the above setup is done, from the Remote Office site visit the website added in the vpn configuration. If running packet capture in Remote Office firewall and Head Office firewall, you will notice the traffic getting routed through the Head Office firewall to the website ip address.
Resolution for SonicOS 6.5
This release includes significant user interface changes and many new features that are different from the SonicOS 6.2 and earlier firmware. The below resolution is for customers using SonicOS 6.5 firmware.
Feature/Application:
In existing site to site vpn tunnel setup between Head Office and Remote Office, there would be requirement that traffic to certain website from remote office might need to be routed through head office Internet connection through the existing site to site vpn tunnel. However the requirement would not be to configure the site to site vpn tunnel in Route All Traffic through the vpn tunnel.
We can achieve the setup in few configuration modifications in existing vpn policy in the head office and remote office firewall.
Procedure:
Considering an existing site to site vpn tunnel is created and functional, following are the steps for additional configuration/modification that needs to be done to achieve the above setup.
In this knowledge article we will use google.com website ip address which is randomly taken. So in this example, we will route traffic from Remote Office for google.com website through Head Office firewall ISP.
Configuration in Remote Office Firewall:
Step 1: Go to Manage in the top navigation menu
Select Objects | Address Objects and add

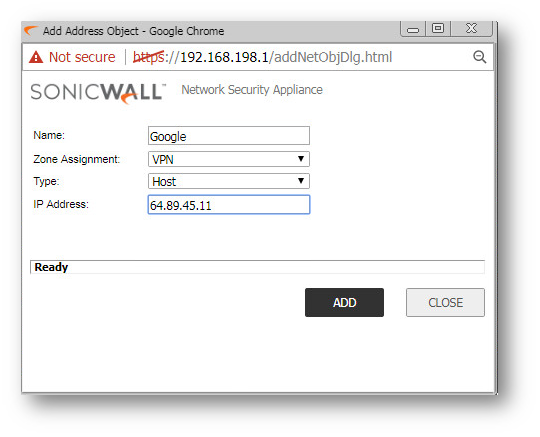
Create an address object for the website public ip as shown in the screenshot below. The address object will need to be in zone VPN.
Step 2: Create a new Address Group. Go to Manage > Objects > address objects > address group and Add
Step 3: Include the address object we created in step 1 and also add the existing address object for the Head Office network(s). So this address group will consist remote network and the website(s) ip address.
Step 3: In the existing vpn policy to the Head Office, in the Network tab, for the Remote Network, select the Address Group created in Step 2.
Go to Manage > VPN > Base settings, edit the VPN in question on the pencil option
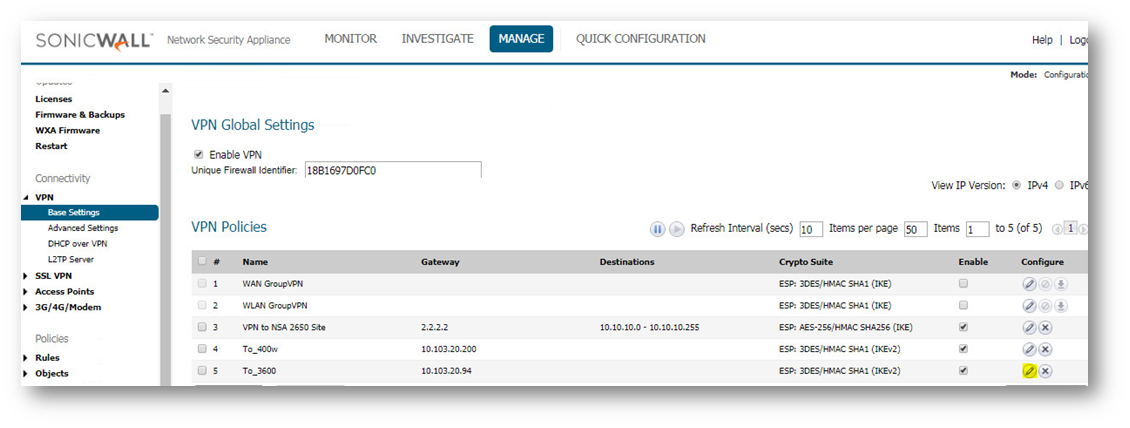
Select Network Tab and on the Remote Network select the Address Group created in Step 2 as shown below:

Configuration in Head Office Firewall:
Step 1: Create an address object for the website(s)' public ip address as shown in the screenshot below. The address object will need to be in zone WAN.

Step 2: Create a new Address Group, include the address object we created in step 1 and also add the existing address object for the Remote Office network(s). So this address group will consist remote network and the website(s) ip address.

Step 3: In the existing vpn policy to the Remote Office, in the Network tab, for the Local Network, select the Address Group created in Step 2.
Step 4.: Configure NAT policy in the Head Office firewall to translate traffic coming from the Remote office network to WAN IP going to the website(s).

Once the above setup is done, from the Remote Office site visit the website added in the vpn configuration. If running packet capture in Remote Office firewall and Head Office firewall, you will notice the traffic getting routed through the Head Office firewall to the website ip address.
Resolution for SonicOS 6.2 and Below
The below resolution is for customers using SonicOS 6.2 and earlier firmware. For firewalls that are generation 6 and newer we suggest to upgrade to the latest general release of SonicOS 6.5 firmware.
Feature/Application:
In existing site to site vpn tunnel setup between Head Office and Remote Office, there would be requirement that traffic to certain website from remote office might need to be routed through head office Internet connection through the existing site to site vpn tunnel. However the requirement would not be to configure the site to site vpn tunnel in Route All Traffic through the vpn tunnel.
We can achieve the setup in few configuration modifications in existing vpn policy in the head office and remote office firewall.
Procedure:
Considering an existing site to site vpn tunnel is created and functional, following are the steps for additional configuration/modification that needs to be done to achieve the above setup.
In this knowledge article we will use google.com website ip address which is randomly taken. So in this example, we will route traffic from Remote Office for google.com website through Head Office firewall ISP.
Configuration in Remote Office Firewall:
Step 1: Create an address object for the website public ip as shown in the screenshot below. The address object will need to be in zone VPN.
Step 2: Create a new Address Group, include the address object we created in step 1 and also add the existing address object for the Head Office network(s). So this address group will consist remote network and the website(s) ip address.

Step 3: In the existing vpn policy to the Head Office, in the Network tab, for the Remote Network, select the Address Group created in Step 2.
Configuration in Head Office Firewall:
Step 1: Create an address object for the website(s)' public ip address as shown in the screenshot below. The address object will need to be in zone WAN.
Step 2: Create a new Address Group, include the address object we created in step 1 and also add the existing address object for the Remote Office network(s). So this address group will consist remote network and the website(s) ip address.
Step 3: In the existing vpn policy to the Remote Office, in the Network tab, for the Local Network, select the Address Group created in Step 2.
Step 4.: Configure NAT policy in the Head Office firewall to translate traffic coming from the Remote office network to WAN IP going to the website(s).

Once the above setup is done, from the Remote Office site visit the website added in the vpn configuration. If running packet capture in Remote Office firewall and Head Office firewall, you will notice the traffic getting routed through the Head Office firewall to the website ip address.
