-
Products
-
SonicPlatform
SonicPlatform is the cybersecurity platform purpose-built for MSPs, making managing complex security environments among multiple tenants easy and streamlined.
Discover More
-
-
Solutions
-
Federal
Protect Federal Agencies and Networks with scalable, purpose-built cybersecurity solutions
Learn MoreFederalProtect Federal Agencies and Networks with scalable, purpose-built cybersecurity solutions
Learn More - Industries
- Use Cases
-
-
Partners
-
Partner Portal
Access to deal registration, MDF, sales and marketing tools, training and more
Learn MorePartner PortalAccess to deal registration, MDF, sales and marketing tools, training and more
Learn More - SonicWall Partners
- Partner Resources
-
-
Support
-
Support Portal
Find answers to your questions by searching across our knowledge base, community, technical documentation and video tutorials
Learn MoreSupport PortalFind answers to your questions by searching across our knowledge base, community, technical documentation and video tutorials
Learn More - Support
- Resources
- Capture Labs
-
- Company
- Contact Us
How to export the RCF/configuration file from SonicWall and import it into Global VPN Client


Description
Resolution
Resolution for SonicOS 7.X
This release includes significant user interface changes and many new features that are different from the SonicOS 6.5 and earlier firmware. The below resolution is for customers using SonicOS 7.X firmware.
- Login to the SonicWall Management Interface
- Navigate to Network | IPsec VPN | Rules and settings.
- Configure the WANGroupVPN on Sonicwall.
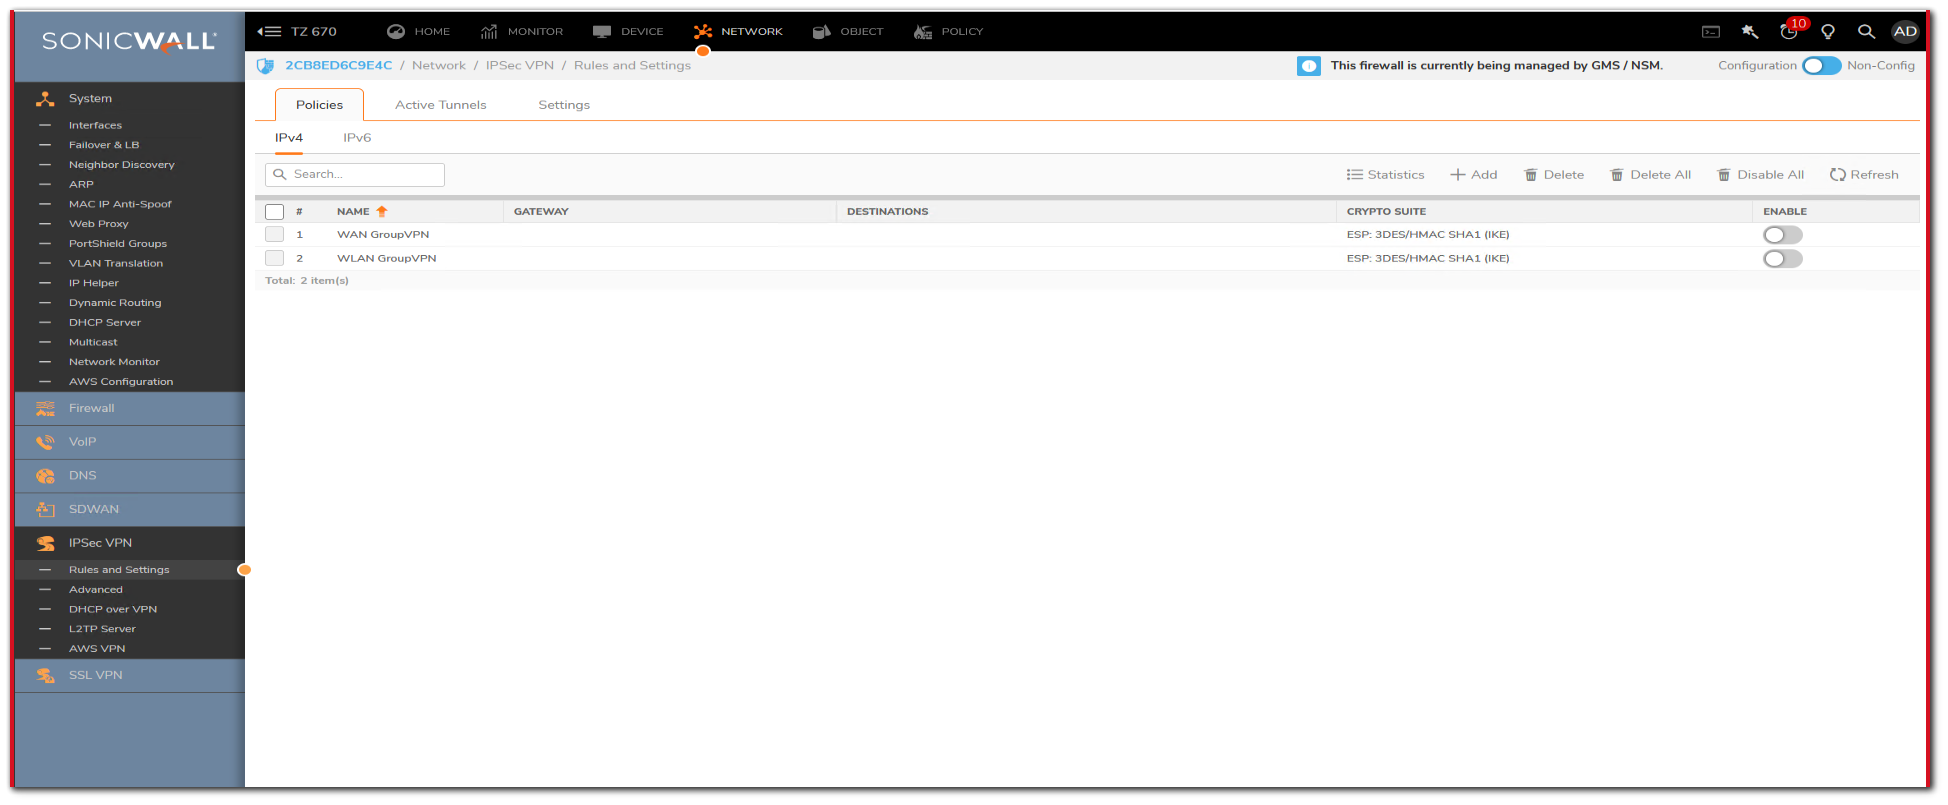
- Click on download from WAN group VPN to export the file.
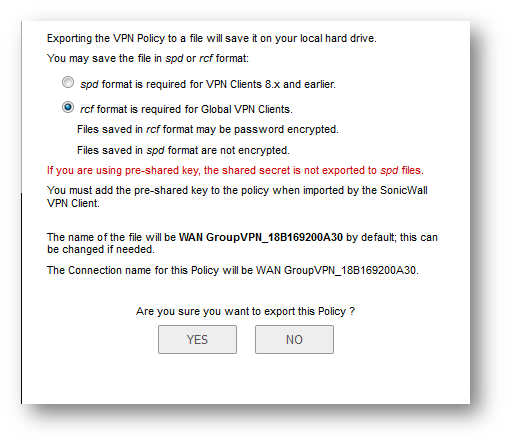
- When a new window pops up to save the file, select rcfformat.
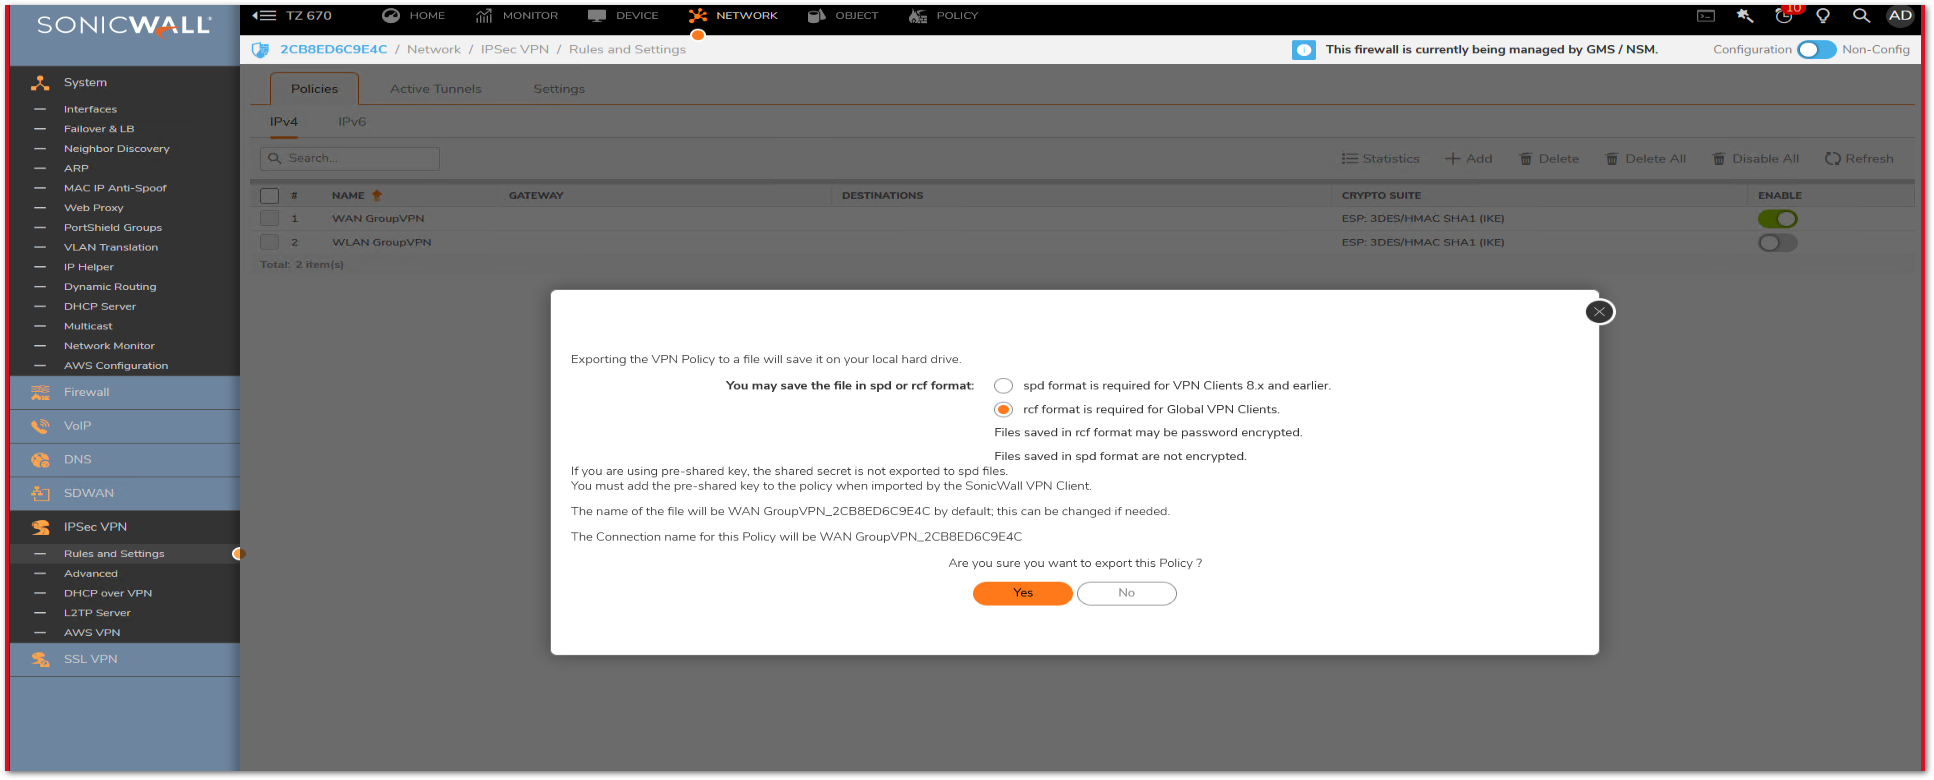
- Specify the VPN access list for the users, in the below example, we have used LAN subnets.
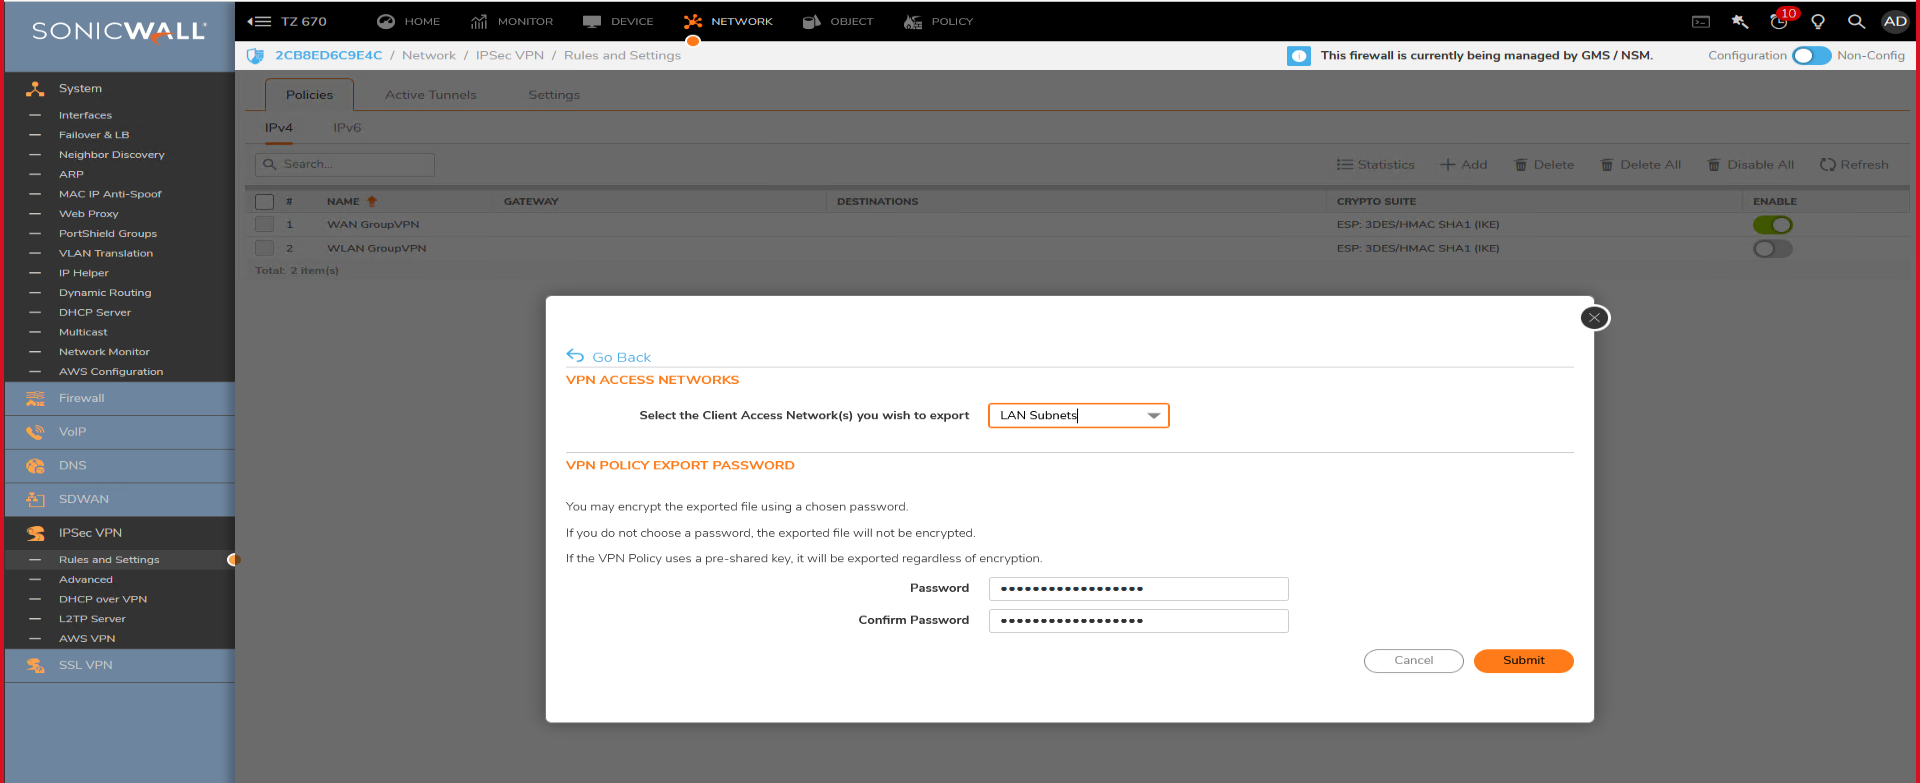
- Mention any custom password and click submit, then the file will be downloaded which can be imported on to the GVC client.
Resolution for SonicOS 6.5
This release includes significant user interface changes and many new features that are different from the SonicOS 6.2 and earlier firmware. The below resolution is for customers using SonicOS 6.5 firmware.
Step 1: Configure the WANGroupVPN on Sonicwall.
Step 2: Exporting the configuration file from Sonicwall.
- Login to the SonicWall Management Interface
- Click Manage in the top navigation menu
- Navigate to Connectivity | VPN | Base Settings page.
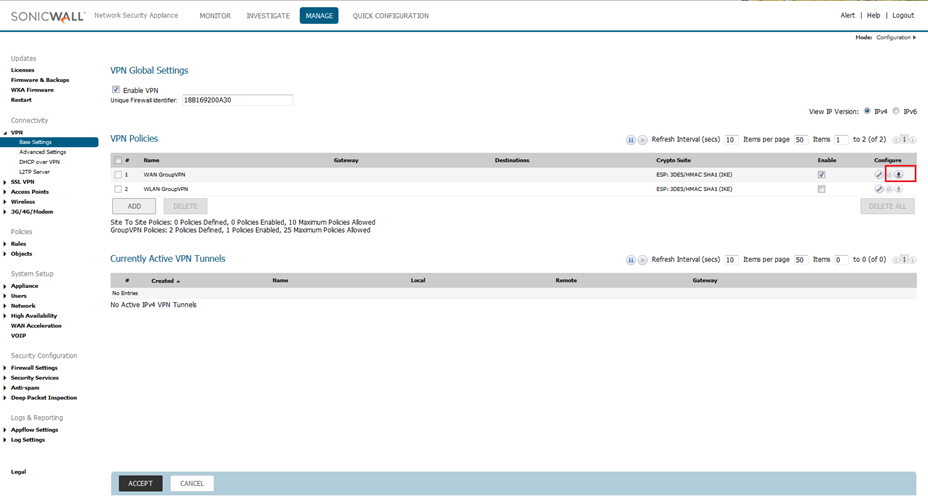
- When a new window pops up to save the file, select rcfformat.
- Specify the VPN access list for the users, in the below example, we have used LAN subnets.
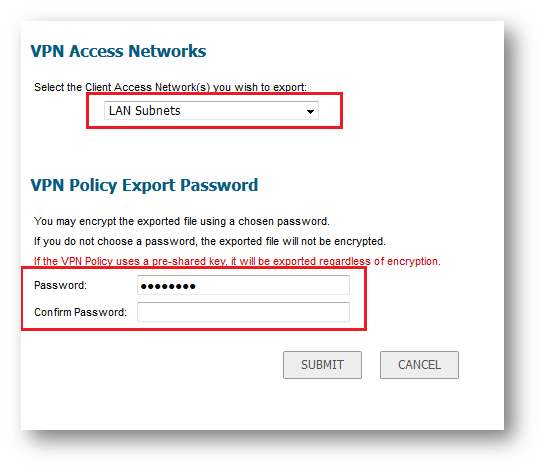
- You also can provide a password, which will be asked for while importing the setting, it's optional. In this example, we have specified the password to protect/encrypt the configuration file.
- The file will be save with .rcf extension.
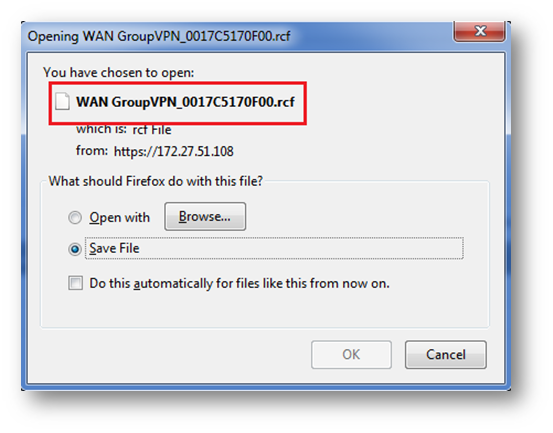
Step 3: Import the WANGroupVPN configuration file in the Global VPN Client.
- Install the latest GVC software on the remote user's computer.
- Launch the Global VPN Client software.
- Click on File | Import and browse to the configuration file with .rcf format.
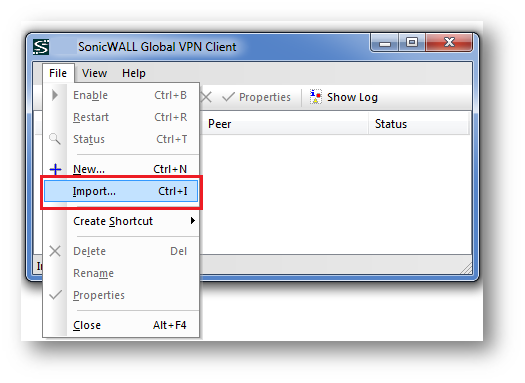
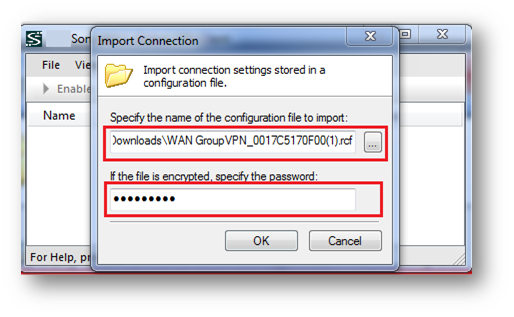
- Enter the password if specified prior to downloading the configuration file.
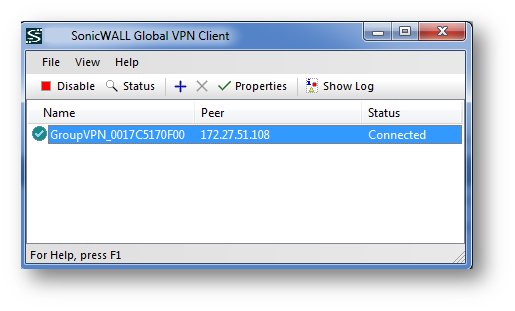
- Once the settings file is imported, you would see a new connection in the Global VPN Client.

Step 4: Connect to the Sonicwall with GVC.
- Right click on the newly created connection and click Enable.

- Enter the username and password for the connection.
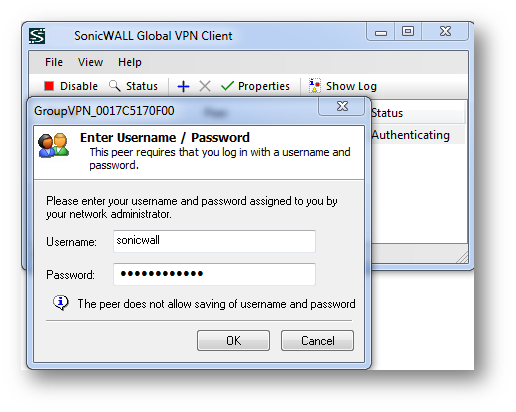
- After entering the username and password the adapter will try to acquire an IP address and then change to connected status.
Resolution for SonicOS 6.2 and Below
The below resolution is for customers using SonicOS 6.2 and earlier firmware. For firewalls that are generation 6 and newer we suggest to upgrade to the latest general release of SonicOS 6.5 firmware.
Step 1: Configure the WANGroupVPN on Sonicwall.
Step 2: Exporting the configuration file from Sonicwall.
- Login to the SonicWall Management Interface and go to the VPN | Settings page.
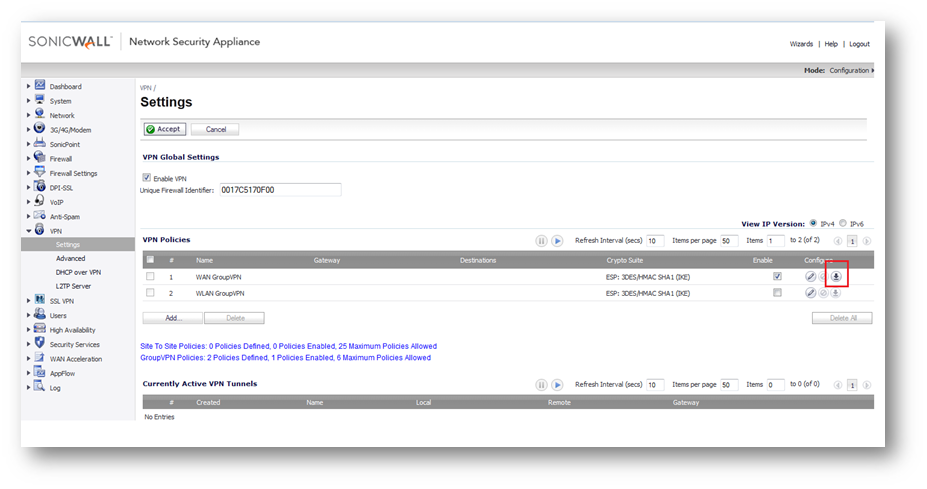
- When a new window pops up to save the file, select rcfformat.

- Specify the VPN access list for the users, in the below example, we have used LAN subnets.
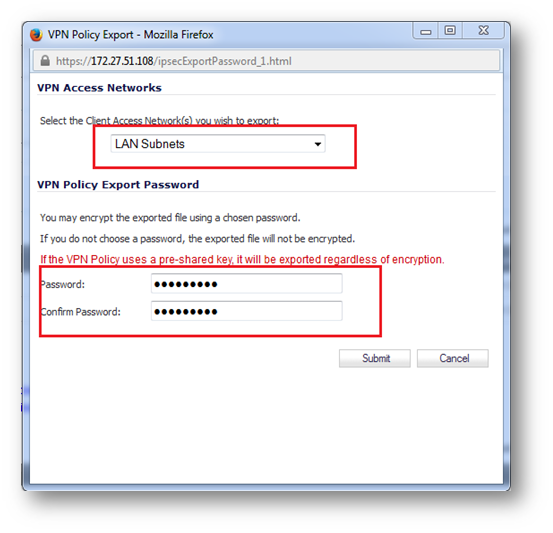
- You also can provide a password, which will be asked for while importing the setting, it's optional. In this example, we have specified the password to protect/encrypt the configuration file.
- The file will be save with .rcf extension.

Step 3: Import the WANGroupVPN configuration file in the Global VPN Client.
- Install the latest GVC software on the remote user's computer.
- Launch the Global VPN Client software.
- Click on File | Import and browse to the configuration file with .rcf format.


- Enter the password if specified prior to downloading the configuration file.
- Once the settings file is imported, you would see a new connection in the Global VPN Client.

Step 4: Connect to the Sonicwall with GVC.
- Right click on the newly created connection and click Enable.

- Enter the username and password for the connection.

- After entering the username and password the adapter will try to acquire an IP address and then change to connected status.

Related Articles
- Error:"Invalid API Argument" when modifying the access rules
- Cysurance Partner FAQ
- Configure probe monitoring for WAN Failover and Loadbalancing - SonicWall UTM
Categories
- Firewalls > SonicWall NSA Series
- Firewalls > SonicWall SuperMassive 9000 Series
- Firewalls > SonicWall SuperMassive E10000 Series
- Firewalls > TZ Series


 YES
YES NO
NO