-
Products
-
SonicPlatform
SonicPlatform is the cybersecurity platform purpose-built for MSPs, making managing complex security environments among multiple tenants easy and streamlined.
Discover More
-
-
Solutions
-
Federal
Protect Federal Agencies and Networks with scalable, purpose-built cybersecurity solutions
Learn MoreFederalProtect Federal Agencies and Networks with scalable, purpose-built cybersecurity solutions
Learn More - Industries
- Use Cases
-
-
Partners
-
Partner Portal
Access to deal registration, MDF, sales and marketing tools, training and more
Learn MorePartner PortalAccess to deal registration, MDF, sales and marketing tools, training and more
Learn More - SonicWall Partners
- Partner Resources
-
-
Support
-
Support Portal
Find answers to your questions by searching across our knowledge base, community, technical documentation and video tutorials
Learn MoreSupport PortalFind answers to your questions by searching across our knowledge base, community, technical documentation and video tutorials
Learn More - Support
- Resources
- Capture Labs
-
- Company
- Contact Us
How to deploy NSv v7.1.1 SonicWall firewall on Azure.


Description


At the time of creating this KB, the latest version was 7.1.2-7019
Created one firewall based on SonicOSX - Policy mode.
Resolution
Resolution for SonicOS 7.X
This release includes significant user interface changes and many new features that are different from the SonicOS 6.5 and earlier firmware. The below resolution is for customers using SonicOS 7.X firmware.
The below resolution is for customers using SonicOSX 7.1 firmware.
0. Register the new firewall on MySonicwall. Note down firewall serial number and auth code.
1. Log in to your Azure Account: In your browser navigate to https://portal.azure.com and log into your Microsoft Azure Account.
2. Use ARM template below and Deploy to Azure
https://github.com/sonicwall-nsv/sonicwall-nsv-azure-templates?tab=readme-ov-file
 FEW TIPS:
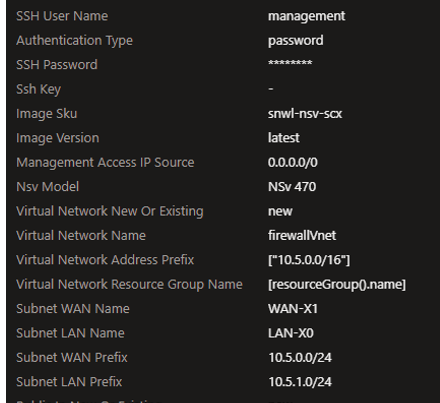
- Use unique storage account name - avoid capital letter or special characters.
- Note down the ssh password - you might need it in the future.
- If you do not know the public source ip that you will use to start the connection, you can set 0.0.0.0/0 as management access ip source - We strongly recommend editing the Network Security Group later with a specific public ip.
- Keep Image SKU ''snwl-nsv-sck'' and Image version as ''latest'' to get NSv 7.1.2
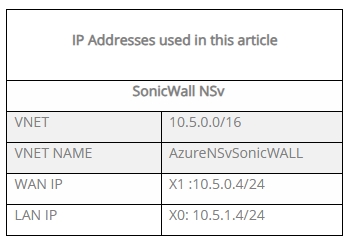
- Edit WAN and LAN subnet ip's according to your preference.

 You can get different firmware version editing Image SKU and Image version snwl-nsv-scx and latest 7.1.2, snwl-nsv-byol and latest 7.0.1, snwl-nsv-byol-654 and latest 6.5.1
3. Edit the ''Network Security Group'' for the firewall in Azure with your source public ip (with high priority) to allow the access.

4. Access the firewall using the public ip WAN-X1.
5. Use the default user and password "admin/password" and change the password.
6. To Manually configure Sonicwall - use the second "click here" link presented on the page after changing the password.
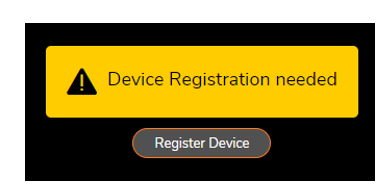
7. Register the device from firewall.

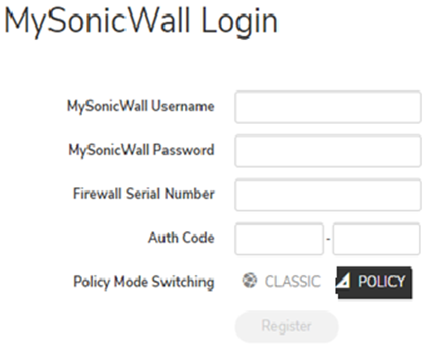
8. Use the MySonicwall user and password from the same MySonicwall account where you registered the device previously.
9. Enter the firewall serial number and auth code obtained from MySonicwall.
10. When presented with the choice of Classic mode (SonicOS) or Policy mode (SonicOSX) Select "Policy" mode

For more information about SonicOS or SonicOSX please read the below link:
11. The Firewall will restart after successful registration.

Related Articles
- Error:"Invalid API Argument" when modifying the access rules
- Cysurance Partner FAQ
- Configure probe monitoring for WAN Failover and Loadbalancing - SonicWall UTM


 YES
YES NO
NO