-
Products
-
SonicPlatform
SonicPlatform is the cybersecurity platform purpose-built for MSPs, making managing complex security environments among multiple tenants easy and streamlined.
Discover More
-
-
Solutions
-
Federal
Protect Federal Agencies and Networks with scalable, purpose-built cybersecurity solutions
Learn MoreFederalProtect Federal Agencies and Networks with scalable, purpose-built cybersecurity solutions
Learn More - Industries
- Use Cases
-
-
Partners
-
Partner Portal
Access to deal registration, MDF, sales and marketing tools, training and more
Learn MorePartner PortalAccess to deal registration, MDF, sales and marketing tools, training and more
Learn More - SonicWall Partners
- Partner Resources
-
-
Support
-
Support Portal
Find answers to your questions by searching across our knowledge base, community, technical documentation and video tutorials
Learn MoreSupport PortalFind answers to your questions by searching across our knowledge base, community, technical documentation and video tutorials
Learn More - Support
- Resources
- Capture Labs
-
- Company
- Contact Us
How to Increase Disk Storage on Analytics VM?


Description
This article describes the procedure to increase Disk Storage on your analytics VM.
Please consider the below points:
- The steps below assume that you have an Analytics VM, which already have an additional storage disk attached to it and you want to increase capacity of additional disk.
- New installation of Analytics 2.5-2520 or above version is required to increase additional storage disk size.
Resolution
Procedure:
At high level user must perform following procedure to increase additional storage disk size
Step 1: Deployment of Analytics virtual machine
Step 2: Attach storage disks to Analytics virtual machine
Step 3: Copy data from existing storage disk to new storage disk.
Step 4: Add firewalls in new Analytics virtual machine.
Detailed Procedure:
Follow below steps to expand additional storage disk size of existing Analytics virtual machine, say VM-A by deploying new Analytics virtual machine, say VM-B.
We are explaining this procedure considering Analytics is deployed on VMWare and please follow equivalent platform specific workflow if your Analytics VM is deployed on another platform.
Step 1: Deployment of Analytics virtual machine
Create new Analytics virtual machine (VM-B) running version 2.5-2520 or above by following Analytics installation guide of desire platform. We do not have to add any additional storage disk to Analytics at this point.
Step 2: Attach storage disks to Analytics virtual machine
Attach additional storage disk of existing Analytics virtual machine, VM-A to VM-B.
- Remove additional storage association from old virtual machine, VM-A by editing virtual machine settings.

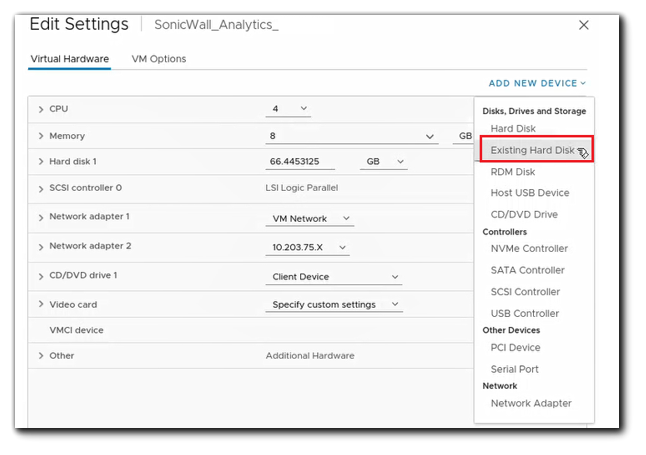
After this we do not have to perform any configuration on old Analytics VM-A. - Attach storage removed in last step with new Analytics virtual machine, VM-B by editing virtual machine settings
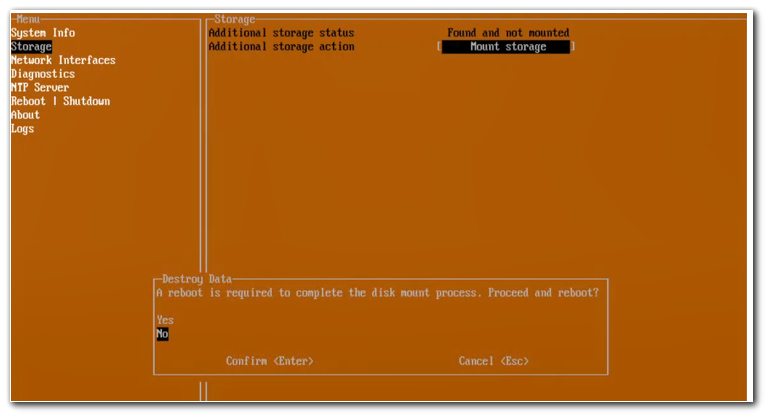
- Power on new Analytics virtual machine VM-B, launch management console and move to ‘Storage’ menu item to mount disk that we added in previous step.
You will be prompted to enter a key. Enter a keypass of your choice and hit enter. VM will reboot to complete disk mount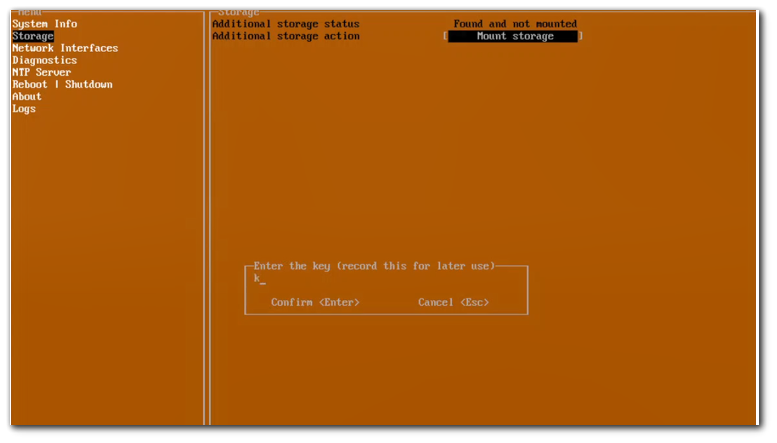
 NOTE: Save this key as you will need it for performing any actions on the disk. If you lose the key, you lose your data.
After rebooting Additional storage action status will be disk is Ready for use
Now attach new virtual disk to Analytics VM-B. If you want to increase additional storage disk size from previous installation of Analytics VM-A, please configure desired higher capacity disk. - Boot Analytic VM-B in safe mode, in management console go to Reboot | Shutdown and in Boot Analytics into safemode sub menu chose Enable

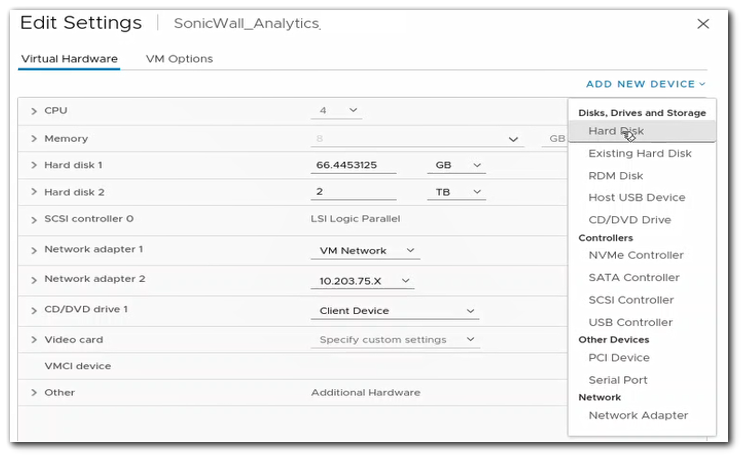
- Add new additional disk of desired capacity to Analytics VM-B, by editing virtual machine configuration.
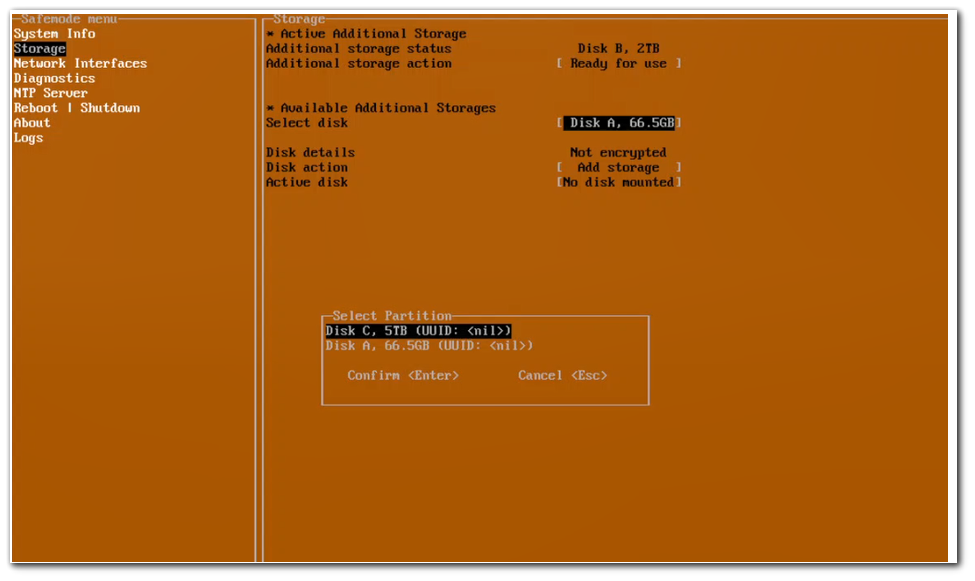
- Now, in Management Console, storage menu, choose disk added in previous step in ‘Available Additional Storages’. In below figure new disk is displayed as Disk C.
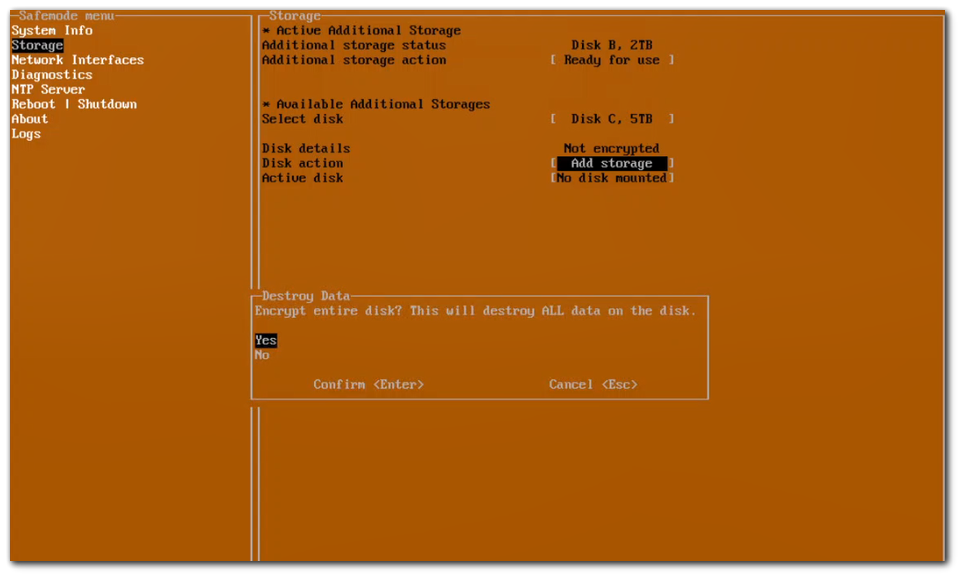
- In disk action, chose ‘Add storage’ and confirm deletion of data from newly added virtual Hard Disk and provide desired key. System will now start to encrypt and mount new virtual hard disk
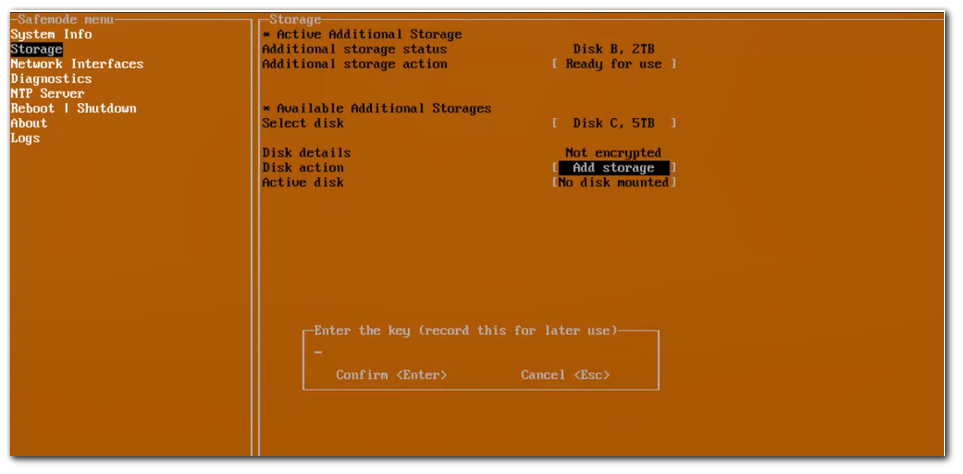
You will be prompted to enter a key. Enter a keypass of your choice and hit enter. VM will reboot to complete disk mount
Once the disk is mounted, you will see a menu option Active Disk will show the Enable button.
Step 3: Copy data from existing storage disk to new storage disk.
Now you can either choose to Backup data to Disk C and then use it as live disk or use the Disk C without old data.
- If you want to backup data, Choose the Backup Data option. You will see a confirmation dialog after approving that, you will be prompted to enter the key for the disk
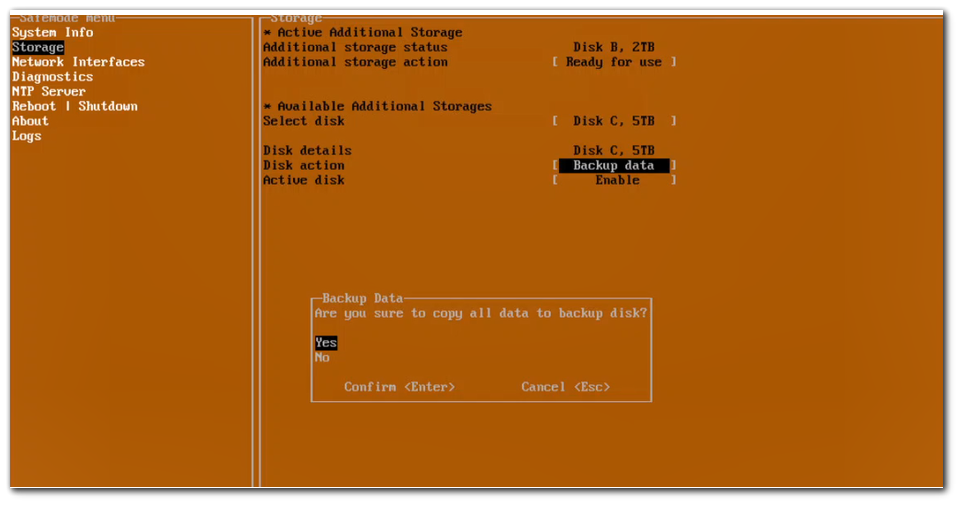
After entering the key hit Enter. You will see a dialog with progress of data copied. You can close the dialog by pressing Escape-key once you see a completion message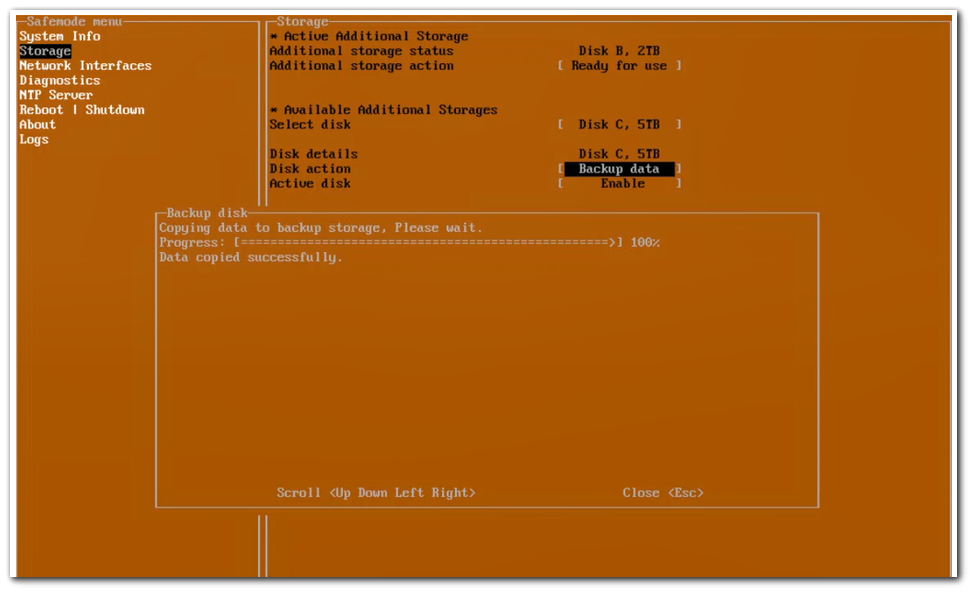
- To use the disk as live disk, select the Active Disk menu option. You will see a confirmation dialog stating that this operation will restart the VM.
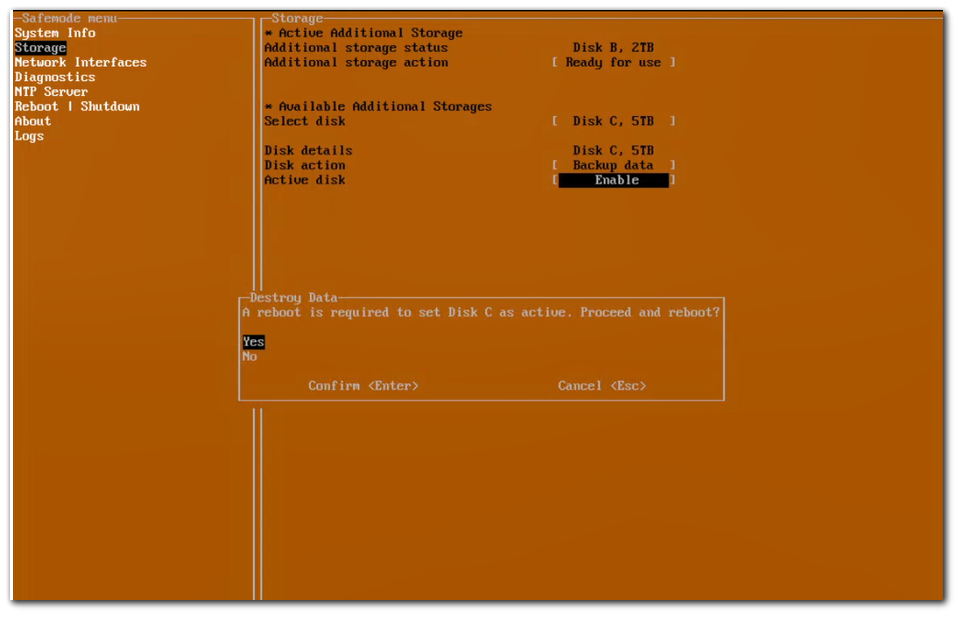
Once you approve, you will be promoted for entering the key. This operation will set Disk C as your default live disk and will restart the VM into normal mode. The VM now onward will use Disk C as Extra disk for Analytics.
Step 4: Add firewalls in new Analytics virtual machine.
Log into Analytics VM-B and add firewall using same ‘Firewall Name’ as in old Analytics VM-A. Check existing analytics data is available for all firewalls.
Related Articles
- How to create and export On-Demand report from CSC / CGMS
- SonicWall NSM – AppFlow ports
- NSM - Firewall System Events and Filters


 YES
YES NO
NO