How to import the SonicWall DPI-SSL CA certificate into the Windows Certificate store?
Description
Before Client DPI-SSL is enabled, the SonicWall Client DPI-SSL CA certificate must be trusted by web applications like browsers. In Windows, this is done by importing the certificate into the Windows Certificate Store, because most browsers and other applications use the Windows Certificate store.
Resolution for SonicOS 7.X
This release includes significant user interface changes and many new features that are different from the SonicOS 6.5 and earlier firmware. The below resolution is for customers using SonicOS 7.X firmware.
Download the SonicWall Client DPI-SSL CA certificate from the Client DPI-SSL page.
- Login to the firewall.
- Navigate to POLICY | DPI-SSL | Client SSL.

- Click Certificate tab.

- Click the drop down menu and select the certificate that will be used for DPI-SSL and then click download.

Open Microsoft Management Console by typing MMC in Run.
- Click on File and select Add/Remove Snap-in.
- Click on Certificates and click Add.
- Select Local Machine store.
- Select Computer Account and click Next.
- Click Finish.
- Click OK.
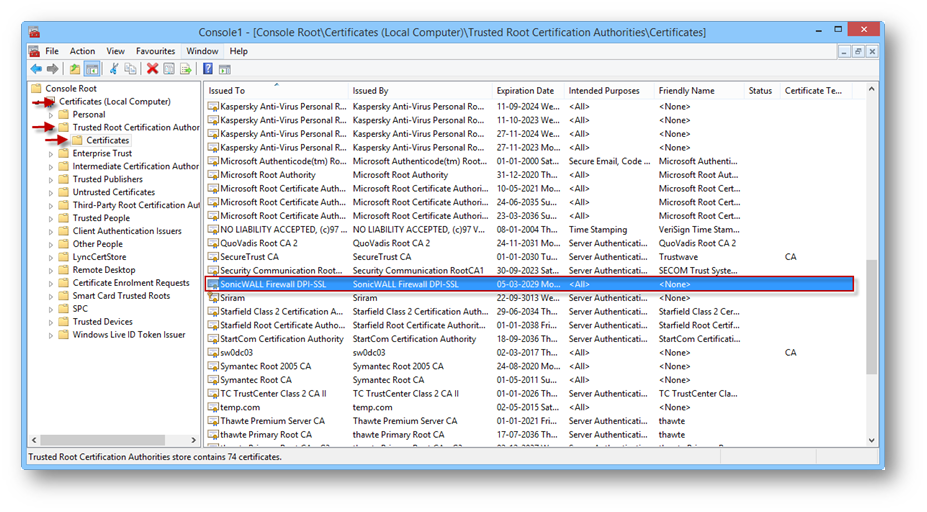
- Right-click on Trusted Root CA Certificates folder.
- Click on All Tasks and click on Import.
- Click Next and browse to the location where the SonicWall DPI-SSL certificate is saved.
- Select the certificate and click Open.
- Click on Next and then Finish.
- Close the console.
Resolution for SonicOS 6.5
This release includes significant user interface changes and many new features that are different from the SonicOS 6.2 and earlier firmware. The below resolution is for customers using SonicOS 6.5 firmware.
Download the SonicWall Client DPI-SSL CA certificate from the Client DPI-SSL page.
- Login to the firewall.
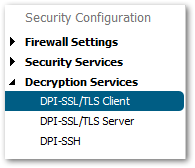
- Navigate to MANAGE | Decryption Services | DPI-SSL/TLS Client.
- Click Certificate tab.

- Click the drop down menu and select the certificate that will be used for DPI-SSL and then click download.

Open Microsoft Management Console by typing MMC in Run.
- Click on File and select Add/Remove Snap-in.
- Click on Certificates and click Add.
- Select Local Machine store.
- Select Computer Account and click Next.
- Click Finish.
- Click OK.
- Right-click on Trusted Root CA Certificates folder.
- Click on All Tasks and click on Import.
- Click Next and browse to the location where the SonicWall DPI-SSL certificate is saved.
- Select the certificate and click Open.
- Click on Next and then Finish.
- Close the console.

