


-
Products
-
SonicPlatform
SonicPlatform is the cybersecurity platform purpose-built for MSPs, making managing complex security environments among multiple tenants easy and streamlined.
Discover More
-
-
Solutions
-
Federal
Protect Federal Agencies and Networks with scalable, purpose-built cybersecurity solutions
Learn MoreFederalProtect Federal Agencies and Networks with scalable, purpose-built cybersecurity solutions
Learn More - Industries
- Use Cases
-
-
Partners
-
Partner Portal
Access to deal registration, MDF, sales and marketing tools, training and more
Learn MorePartner PortalAccess to deal registration, MDF, sales and marketing tools, training and more
Learn More - SonicWall Partners
- Partner Resources
-
-
Support
-
Support Portal
Find answers to your questions by searching across our knowledge base, community, technical documentation and video tutorials
Learn MoreSupport PortalFind answers to your questions by searching across our knowledge base, community, technical documentation and video tutorials
Learn More - Support
- Resources
- Capture Labs
-
- Company
- Contact Us
SonicWall TZ300 Wireless (TZ300W) out of box
 06/22/2023
  46 People found this article helpful
 515,178 Views

Description
SonicWall TZ300 Wireless (TZ300W) Out of Box Video
The SonicWall TZ300 Wireless package includes the following:
- SonicWall TZ300 Wireless Appliance
- 3 Antennas
- One Ethernet Cable
- One Power Adapter
- One Power Cord
- Quick Start Guide
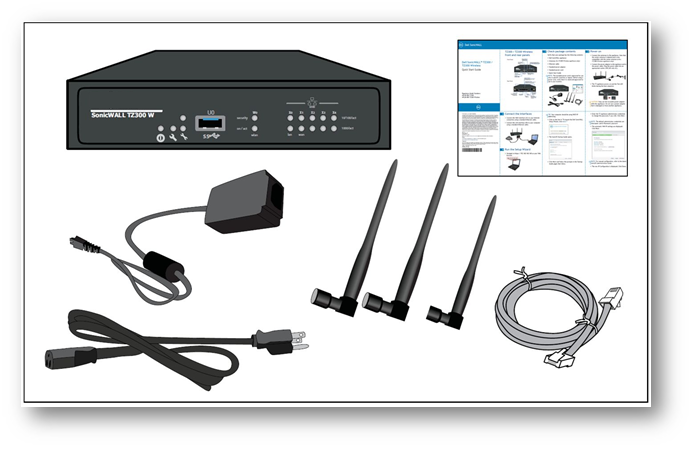
 NOTE: The included power cord is approved for use only in specific countries and regions.Before using a power cord, verify that it is rated and approved for use in your location.
Resolution
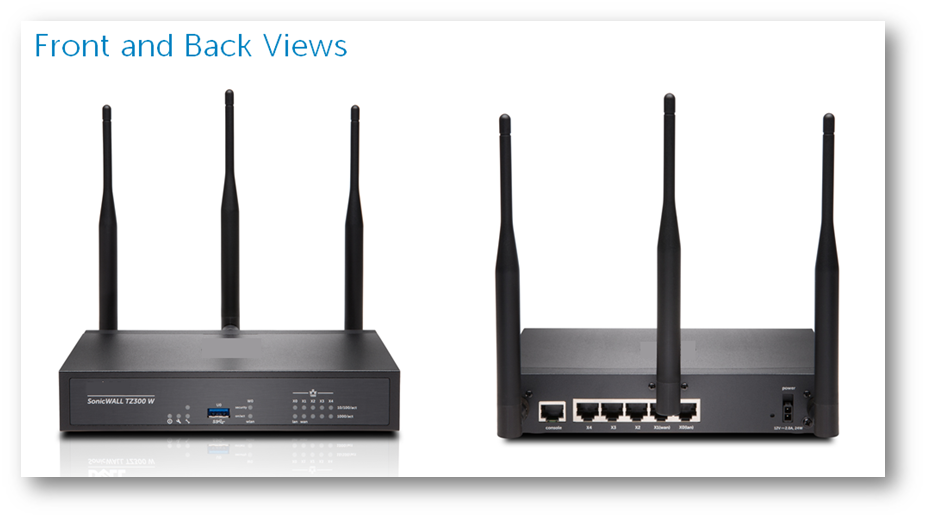
Front and Back Views of the SonicWall TZ300W
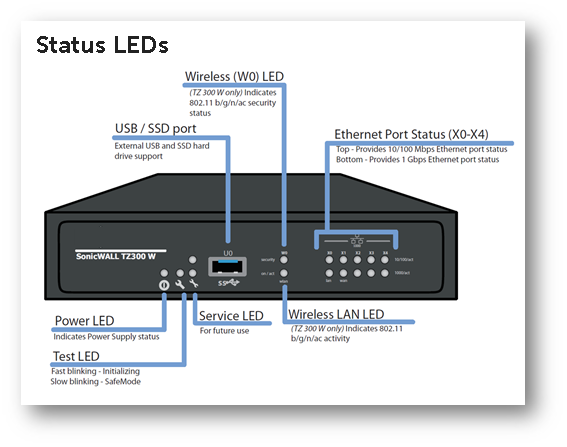
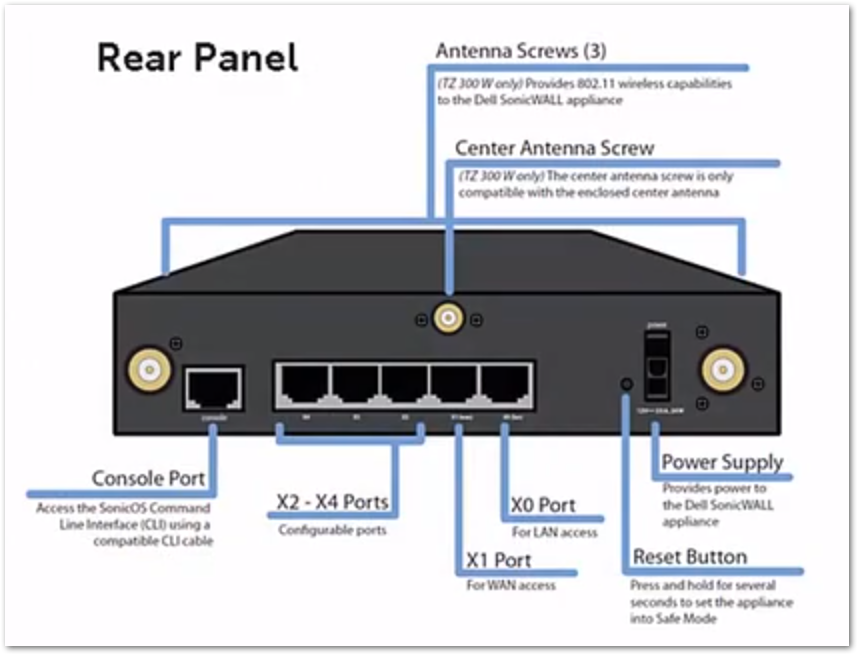
SonicWall TZ300W Port Descriptions
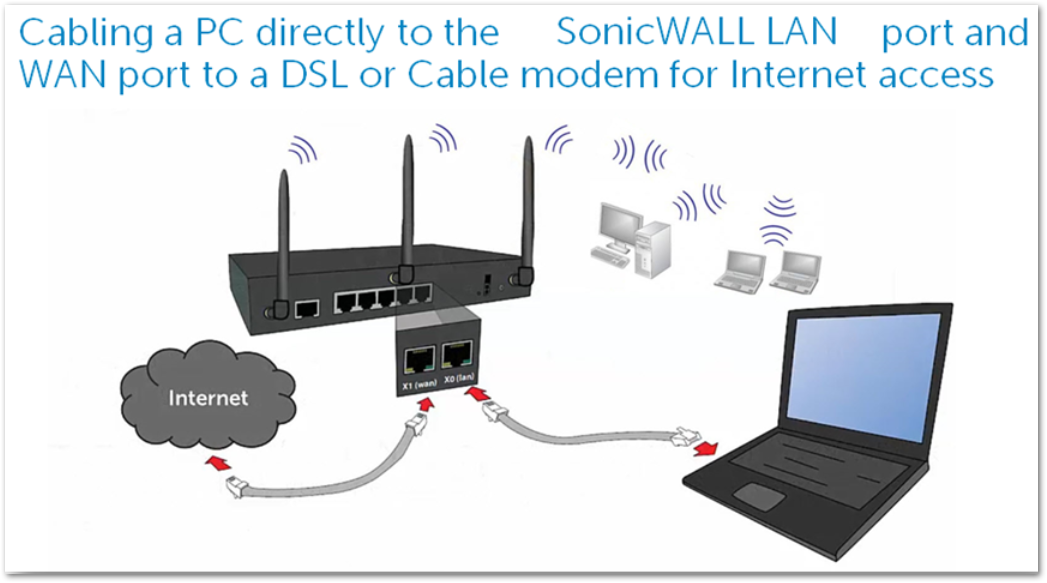
Cabling the SonicWall TZ300W as a Network Gateway
- Locate the SonicWall ports X0 and X1, port X0 is also label as LAN and port X1 is also label as WAN.
- Connect your Internet access device such as a DSL or Cable modem to SonicWall WAN (X1 port).
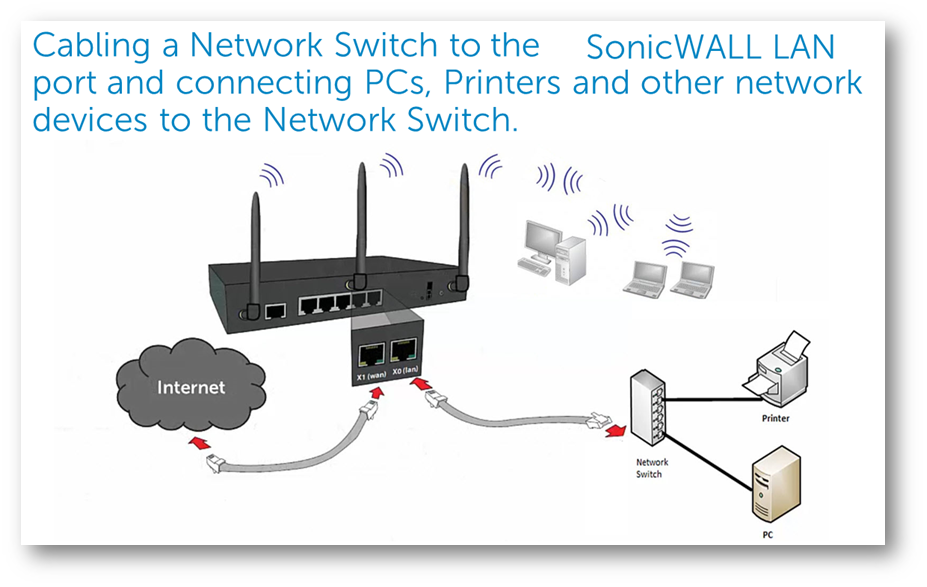
- Connect SonicWall LAN (X0 port) to your laptop or PC or to a Network Switch that to which your network devices such as PCs, game consoles, Smart TVs, etc are connected.
- Other ports such as X2, X3 can be assign to other networks. NOTE: Wireless Clients connects through WLAN after setup, See below Wireless access Setup.
Cabling Topologies
- Option 1
- Option 2
Power on SonicWall TZ300W
- Plug the power cable into an appropriate power outlet (110 - 240 volts).
- Appliance powers on and the orange LED blinks during the boot sequence. This process may take up to 2 minutes.

Accessing SonicWall Admin User Interface
- Connect a PC to the SonicWall LAN (X0) interface or a network switch connected to the LAN interface. You will automatically receive an IP address from the SonicWall appliance.
- Open https://192.168.168.168 in the browser to access SonicWall Login Page.
SonicWall TZ300W First time setup
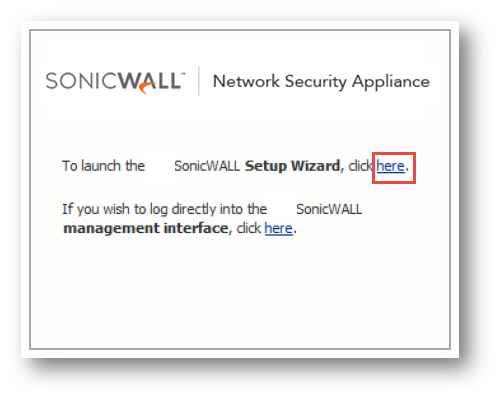
- During first time access to user Interface, you will be offered a choice to use Setup Wizard or go directly to the SonicWall management Interface.
- At the Setup Wizard Launch Page : Click the Setup Wizard link here.
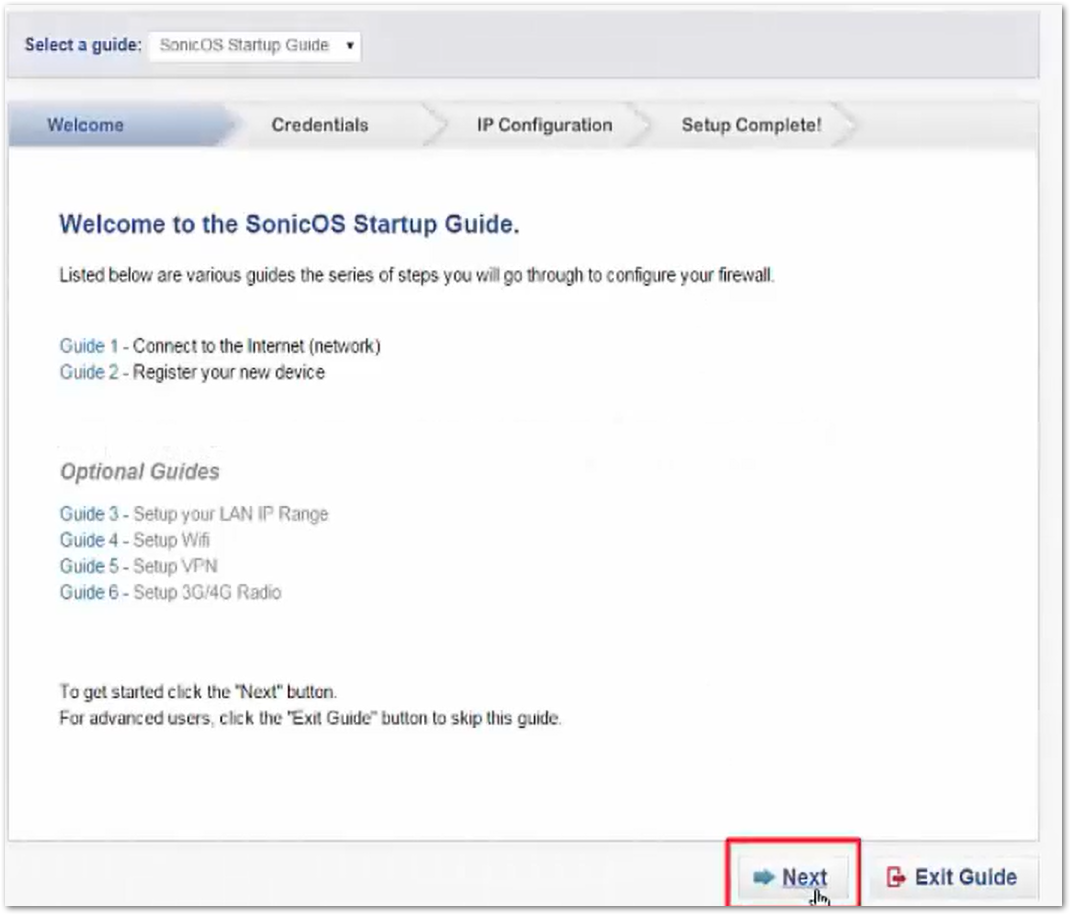
- At the Setup Wizard Welcome Page, click Next.
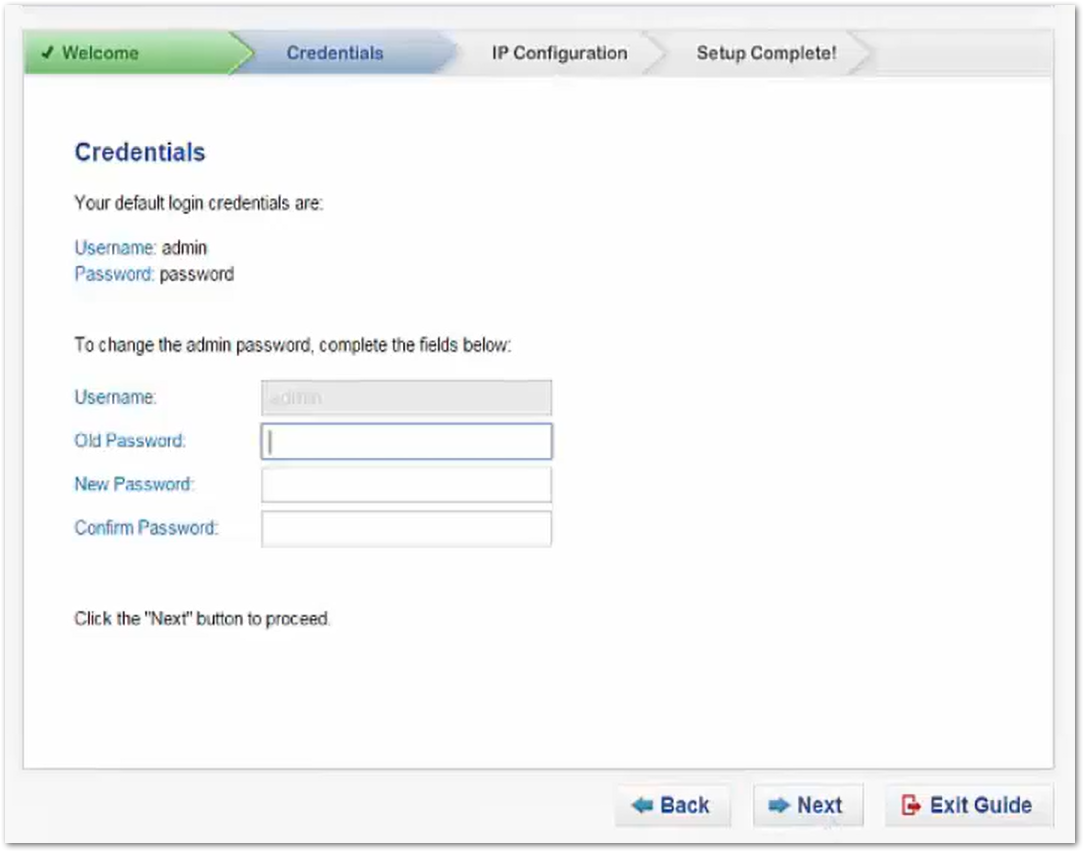
Default Credentials
- Username: admin
- Password: password NOTE: Update the password for the admin user. This is recommended to keep the admin user secure.
- Click Next.
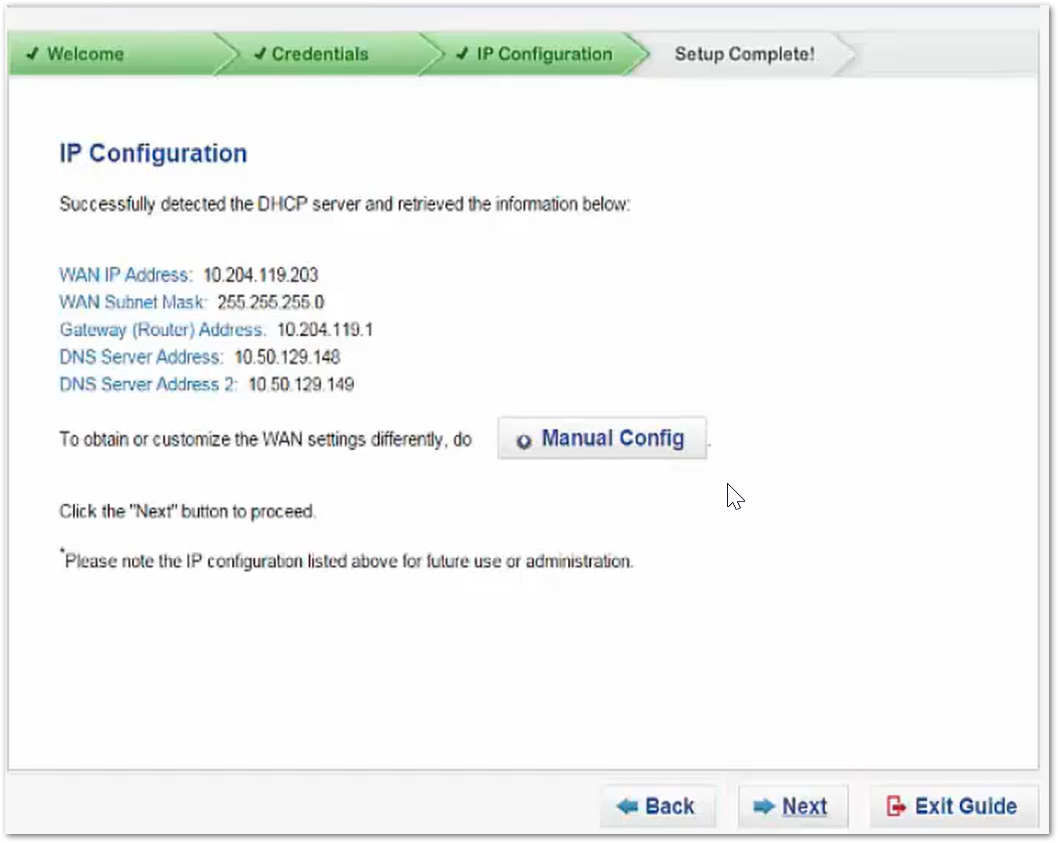
IP Configuration page
- The WAN Interface will detect for a DHCP server to retrieve its IP configurations.
- If no DHCP server is detected or if you wish to enter static IP parameters then click on the link Manual Config.
- Click Next.
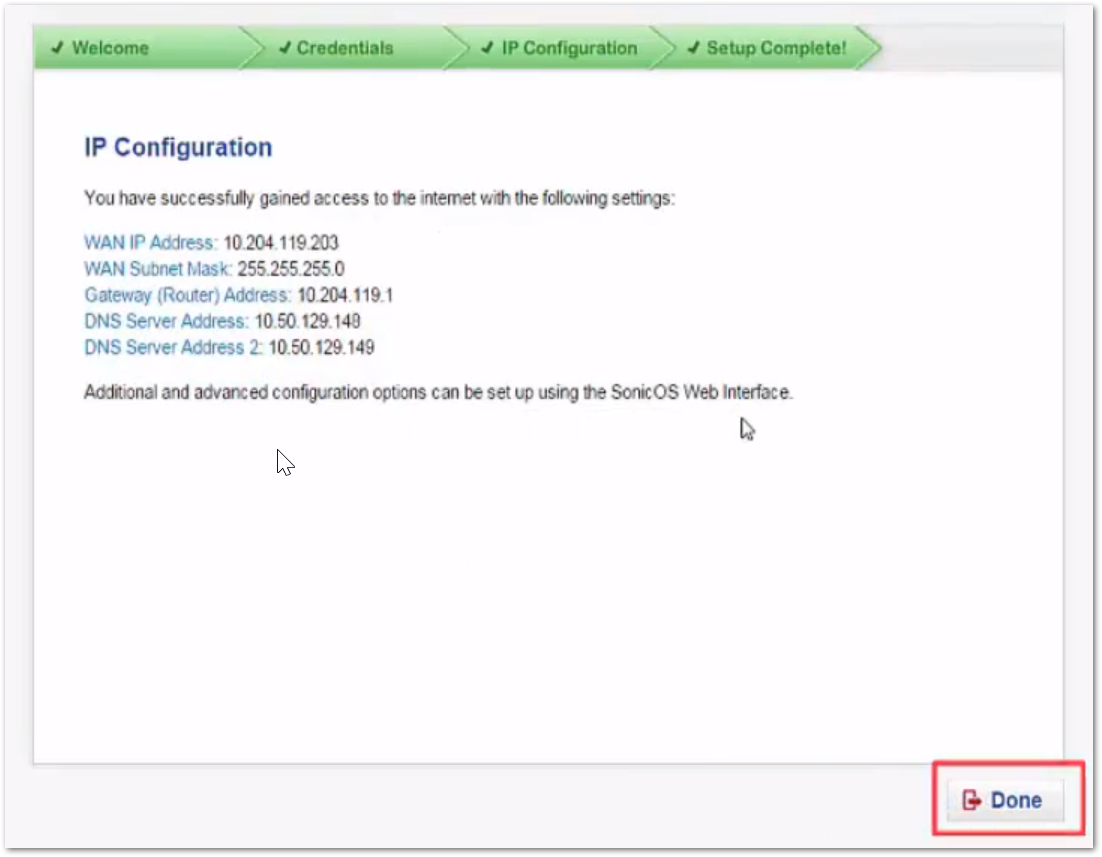
IP Configuration success page
- The IP configuration for the WAN interface is complete and the Setup Wizard is done.
- Click Done.
SonicWall TZ300W Wireless access Setup
- Use Wireless Wizard to deploy wireless access point.
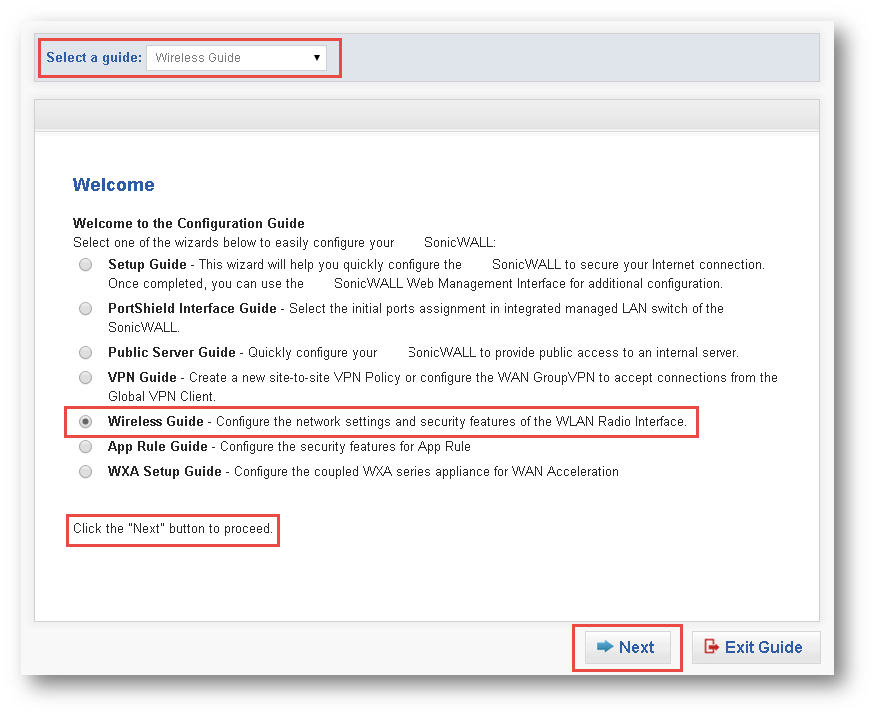
- Click the Wizards link to open the Wizard Menu.
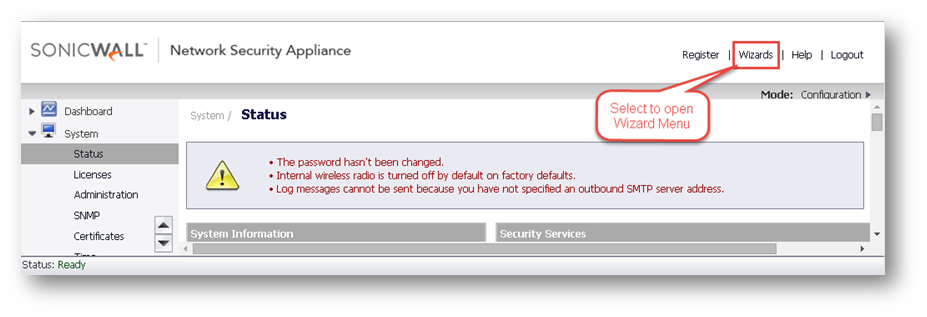
- At the Wizard Menu popup, select Wireless Guide to configure the Wireless network settings and security settings of the WLAN Radio Interface.
- Select a County Code.
- Depending your Regulatory Domain, you may have Country Codes for many countries.
 EXAMPLE: The Regulatory Domain of North America has only one Country Code (US).
- Accept the default network setting for Wireless LAN (WLAN).

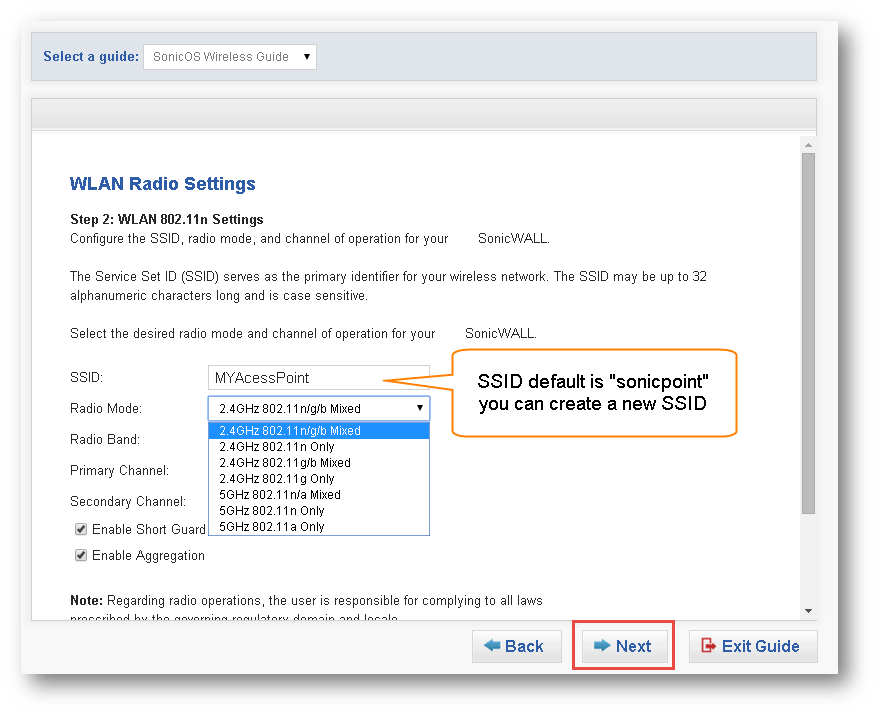
- You may accept the default SSID or create your own SSID.
- Here we have created a new SSID MYAccessPoint.
- For Radio Mode, we will select 2.4GHz 802.11 n/g/b Mixed.
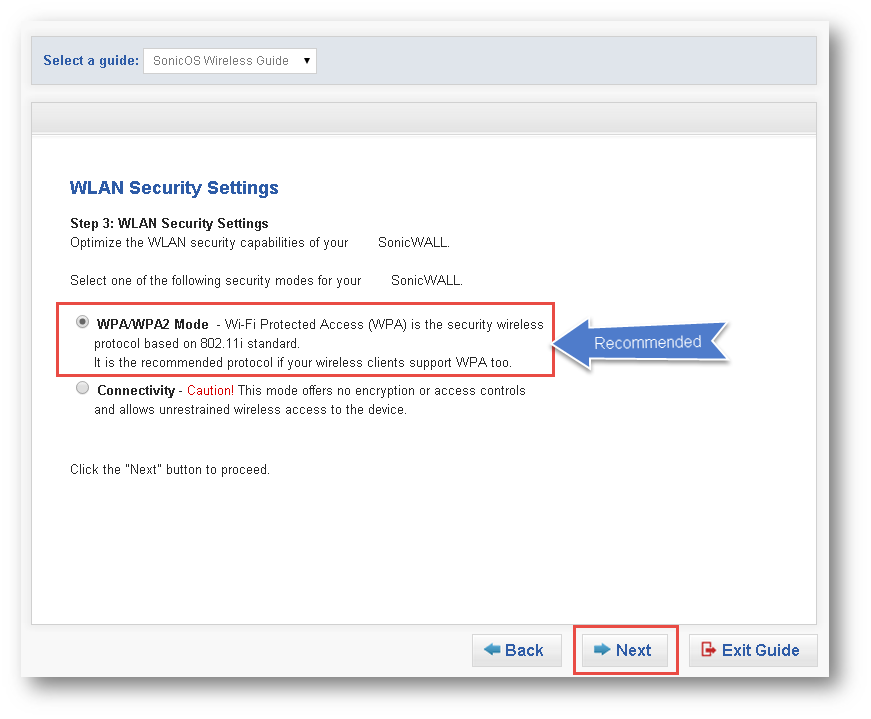
- We will select the WAP2/WPA mode for WLAN security, this mode is recommended.
- Select Connectivity mode only if no security is needed.
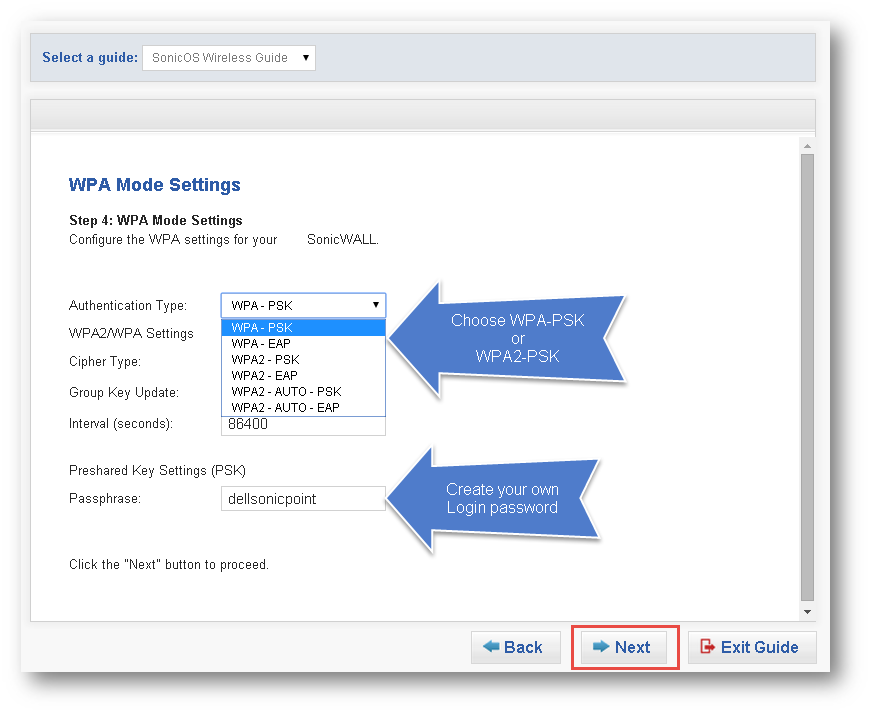
- Choose between WPA-PSK or WPA2-PSK and Preshared Key (PSK) passphrase, (WAP2-PSK) is recommended.
- For this example, the Passphrase is SonicPoint or you may choose your own.
- Creating VAP is optional.
- For this example we will not create a VAP.

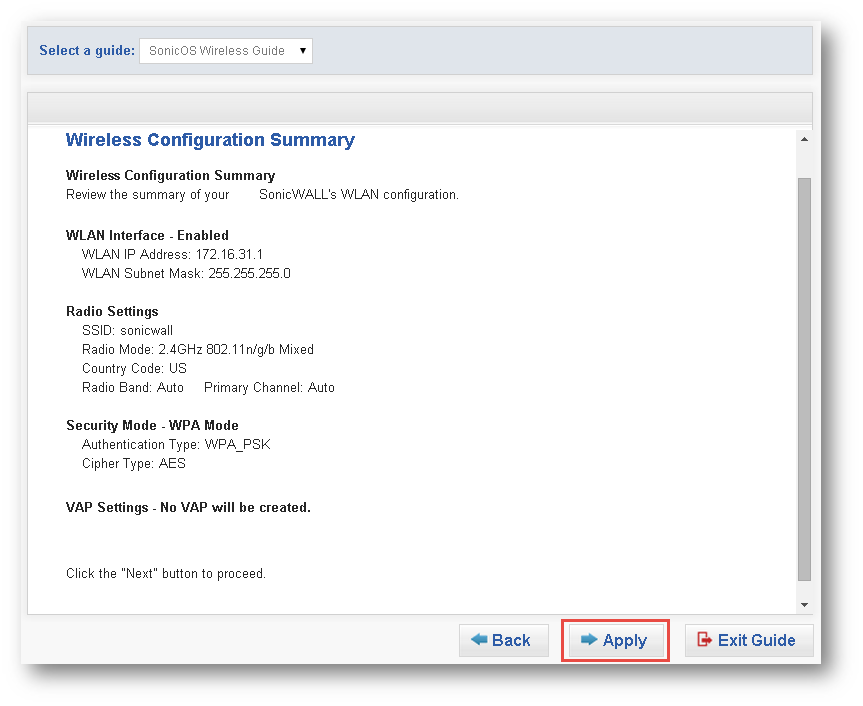
- This your WLAN summary, review your selections and correct as needed.
- Click Apply to accept this WLAN configuration.
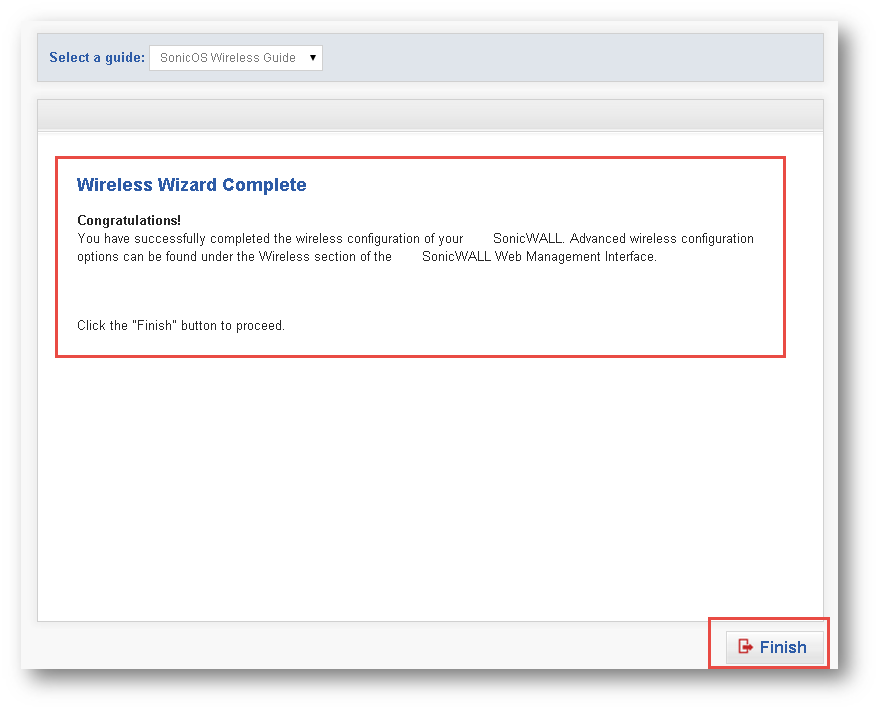
- Your Wireless Wizard is complete.
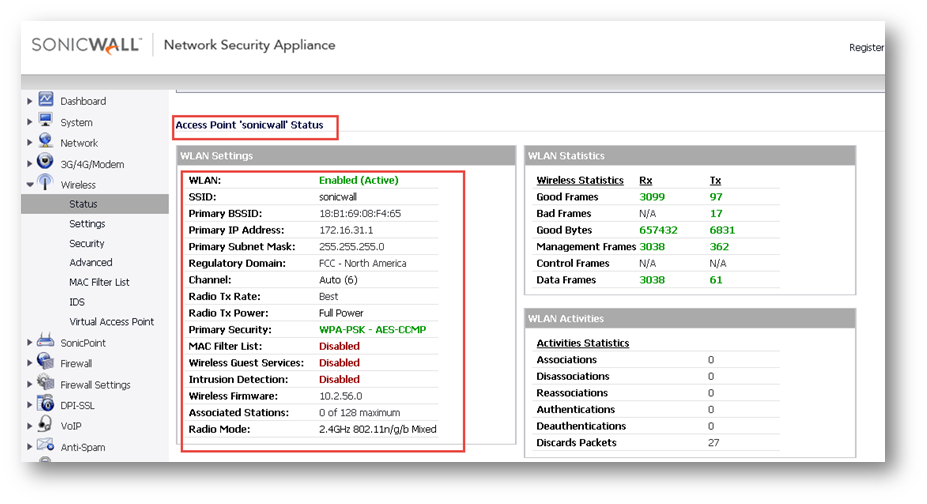
- This is your Wireless LAN status page.
- WLAN is now Enabled (Active).
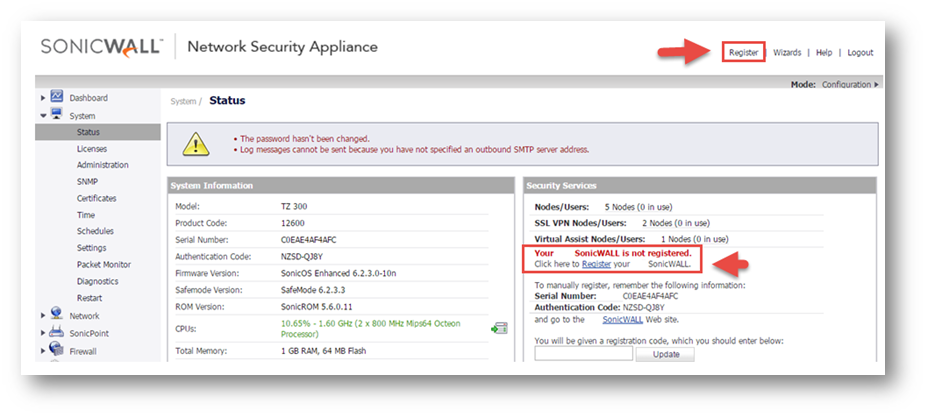
Register your SonicWall
- Click Register.
- To register your SonicWall from the License Management page, enter your MySonicWall username, password and click Submit.
- If you don t have an existing MySonicWall account, create one by clicking on Create MySonicWall account. A Create Account popup will appear, enter the requested information and click the Register button to register.
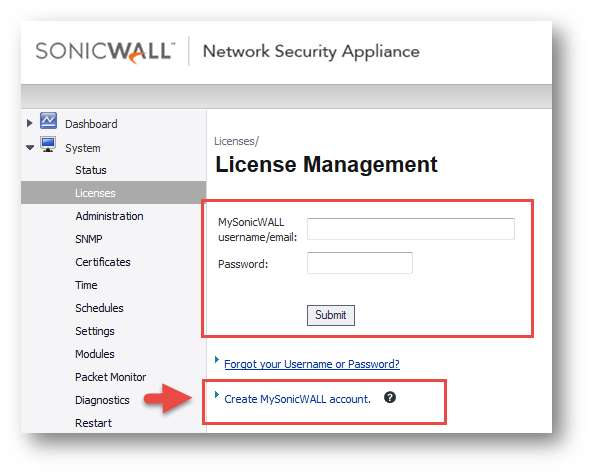
- When the Create Account popup appears, enter the requested information and click the Register button to register.
Related Articles
- Error:"Invalid API Argument" when modifying the access rules
- Cysurance Partner FAQ
- Configure probe monitoring for WAN Failover and Loadbalancing - SonicWall UTM
 YES
YES NO
NO