


-
Products
-
Gen 7 Firewalls
SonicWall's Gen 7 platform-ready firewalls offer performance with stability and superior threat protection — all at an industry-leading TCO.
Read More
-
-
Solutions
-
Federal
Protect Federal Agencies and Networks with scalable, purpose-built cybersecurity solutions
Learn MoreFederalProtect Federal Agencies and Networks with scalable, purpose-built cybersecurity solutions
Learn More - Industries
- Use Cases
-
-
Partners
-
Partner Portal
Access to deal registration, MDF, sales and marketing tools, training and more
Learn MorePartner PortalAccess to deal registration, MDF, sales and marketing tools, training and more
Learn More - SonicWall Partners
- Partner Resources
-
-
Support
-
Support Portal
Find answers to your questions by searching across our knowledge base, community, technical documentation and video tutorials
Learn MoreSupport PortalFind answers to your questions by searching across our knowledge base, community, technical documentation and video tutorials
Learn More - Support
- Resources
- Capture Labs
-
- Company
- Contact Us
Configuration of Guest Services with Traffic Quota in SonicOS (5.9 & above) and (6.2 & above)
 03/26/2020
  26 People found this article helpful
 445,386 Views

Description
Guest accounts are temporary accounts set up for users to log into your network. You can create these accounts manually as needed or generate them in batches. SonicOS includes profiles you can configure in advance to automate configuring guest accounts when you generate them. Guest accounts are typically limited to a predetermined life-span. After their life span, by default, the accounts are removed
Resolution
Guest Services Traffic Quota:
Traffic Quota is a ideal feature for customers that require a management mechanism which allows administrative control over the amount of data that guest users can upload or download.
Two options are available per guest account:
Receive Limit -> Download limit of the user
Transmit Limit -> Upload limit of the User
Disables the control : Unlimited / 0
Input range: 0 ~ 1024 MB
Step 1: Enable Guest Service in LAN / DMZ / WLAN zone
Login to your SonicWall Management page
1) Navigate to Network | Zone page; configure your LAN / DMZ / WLAN zone (to which you would like to apply Guest Services).
2) Go to Guest Services tab, select Enable Guest service check box.
3) Click OK button to accept the change.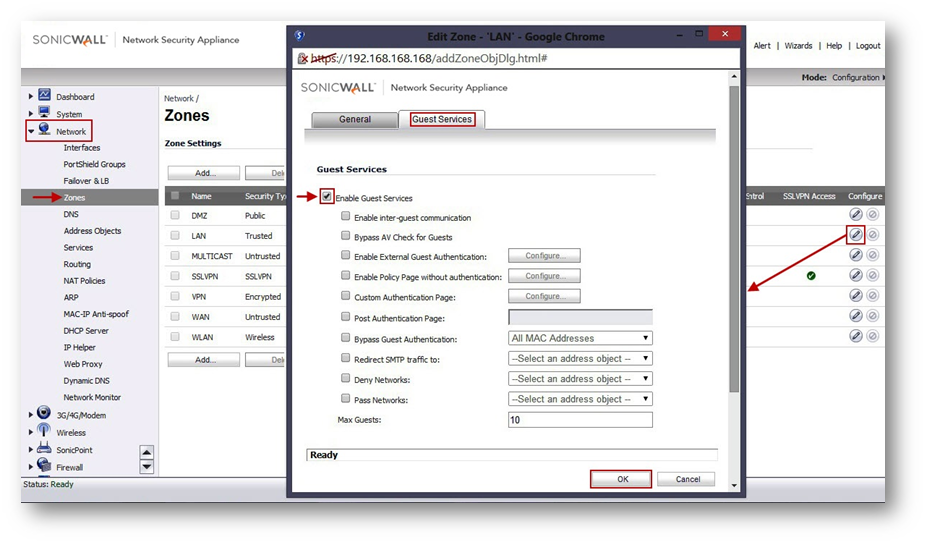 Step 2: Created New Guest Service Profile or Edit Default Guest Profile with Quota
Login to your SonicWall Management page
Navigate to Users | Guest Services, on the right side click Add button under Guest Profiles to create new profile
- Profile Name: New Guest (Type any friendly name which you would like to use).
- You can select Account Lifetime, Session Lifetime & Idle Timeout as per your requirement.
- Receive limit (0 to disable): 50 MB (Type the value (0~1024) which you would like to give for Guest users).
- Transmit limit (0 to disable): 50 MB (Type the value (0~1024) which you would like to give for Guest users).
- Click OK button to create new profile with above information.

A new Guest Profile is created with the custom settings (as per your requirement) under Guest Services as below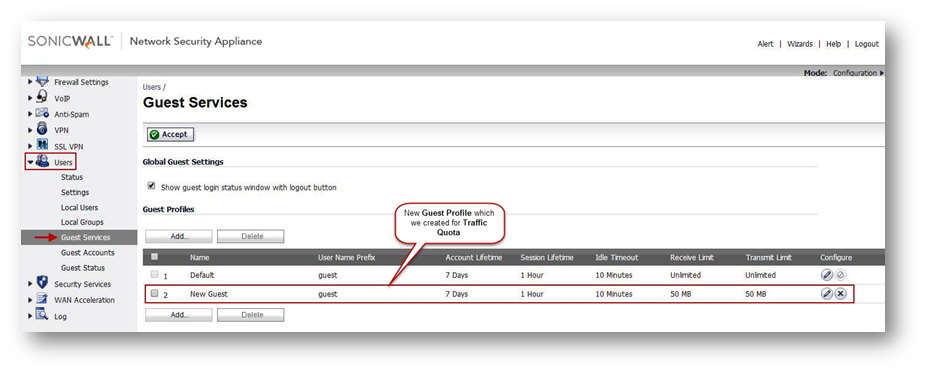 Step 3: Create Guest Accounts with Guest Profile
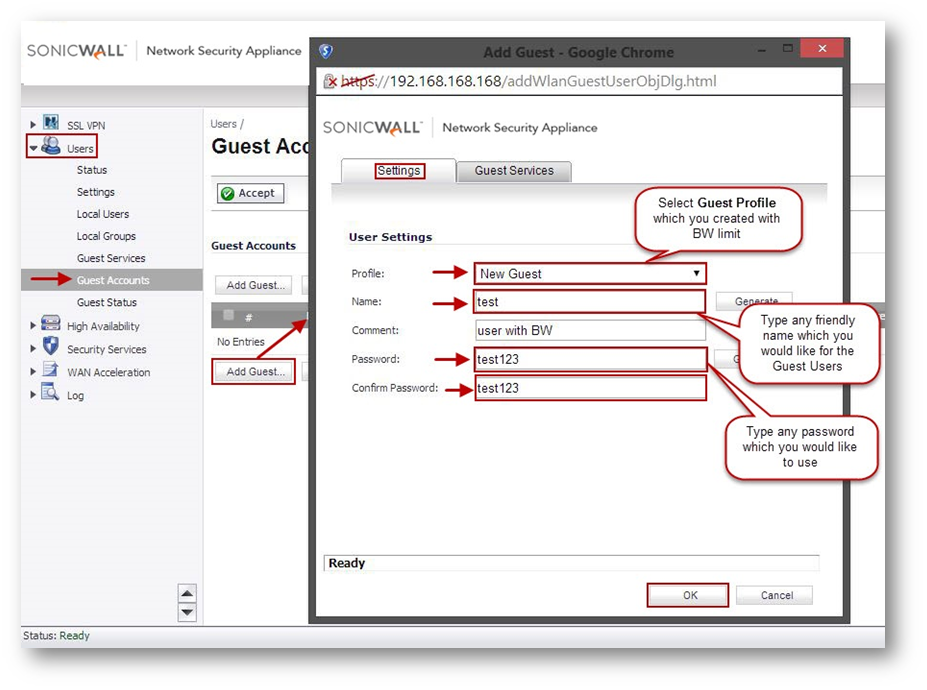
Login to your SonicWall Management page
Navigate to Users | Guest Accounts, on the right side click Add Guest button under Guest Accounts to create new Guest User.
- Profile: New Guest (Select Guest Profile wish you created).
- Name: test (Type any friendly name which you would like to user or you can generate random name by clicking Generate).
- Password: test123 (Type any password which you would like to user or you can generate name by clicking Generate).
- Confirm Password: test123 (Type same password).
- Click OK button to create new Guest Account with above information.
 A new Guest Account is created with the Guest Profile (as per your requirement) under Guest Accounts as below
How to Test:
After configuring Guest service with traffic quota, open web browser in computer behind LAN / DMZ / WLAN zone (to which guest service is applied). Go to any website example: www. Google. com, it will redirect you to the SonicWall User Login page where you need to type the Guest Account information (user name & password) which you created for the users as below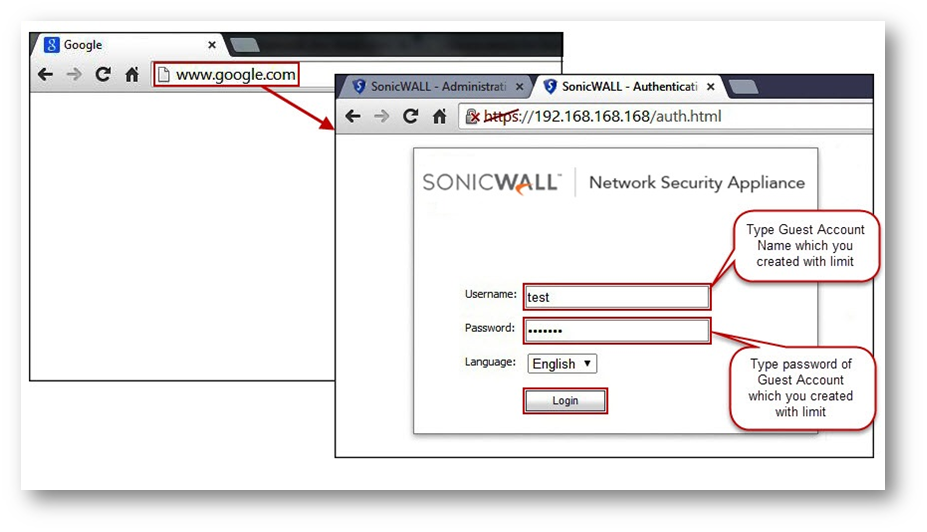 It will redirect you to the webpage with the SonicWall- Guest Login Status Pop-up Window. This Window will show the Login session time information with the Receiving and transmitting limit and also it shows Logout button.
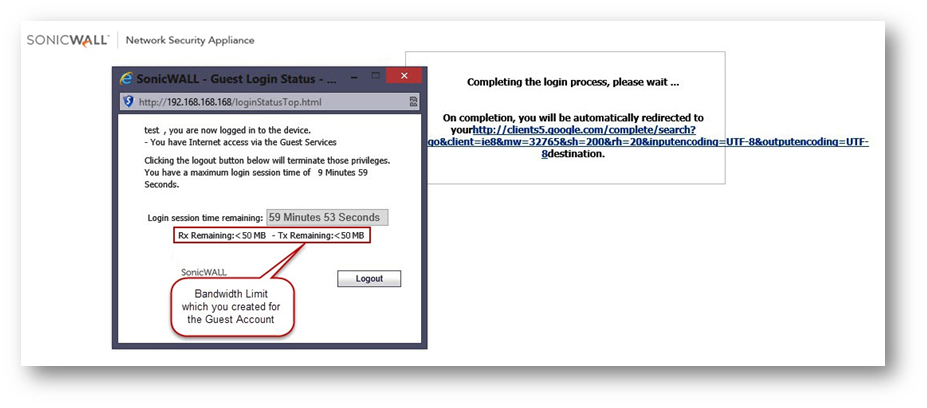 You can minimize the pop-up window and access internet normally. Once the User exceeds the quota limit set in the Guest profile then Guest user will be logged out. They will not be able to access internet and they will be redirected to SonicWall Login page. The Pop-up Window will show as You have been logged out from the SonicWall
 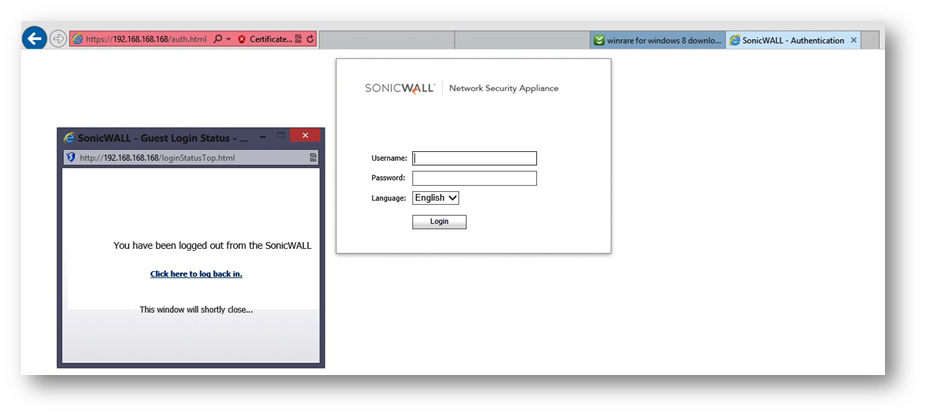 When the User try to login with same Guest Account they will get error as Guest traffic quota has exceeded and user will not be able to access internet with that Account.
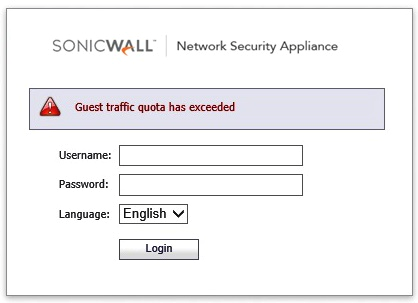 Also in SonicWall Log, it will show the message regarding the Guest quota limit information as below
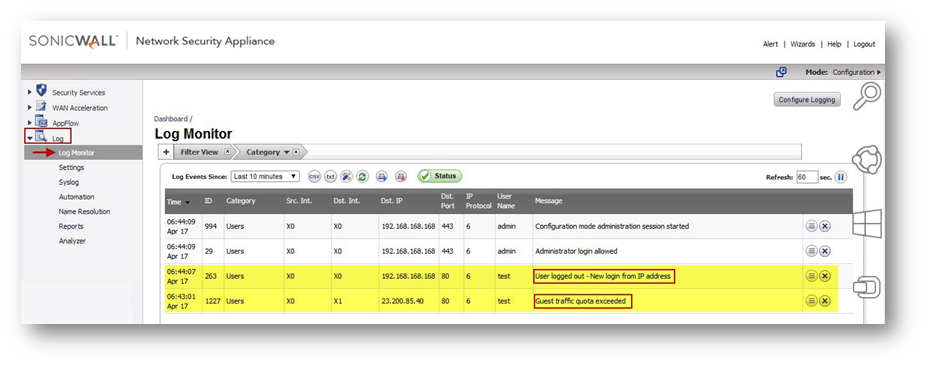 The Guest User will be disabled after exceeding quota as below

Related Articles
- How to Understand and Resolve Settings Corruption
- Best practices for administrator managing SonicWall Firewall Appliances
- How to setup the SonicWave 600 series on WNM
Categories
- Firewalls > TZ Series
- Firewalls > SonicWall SuperMassive E10000 Series
- Firewalls > SonicWall SuperMassive 9000 Series
- Firewalls > SonicWall NSA Series
 YES
YES NO
NO